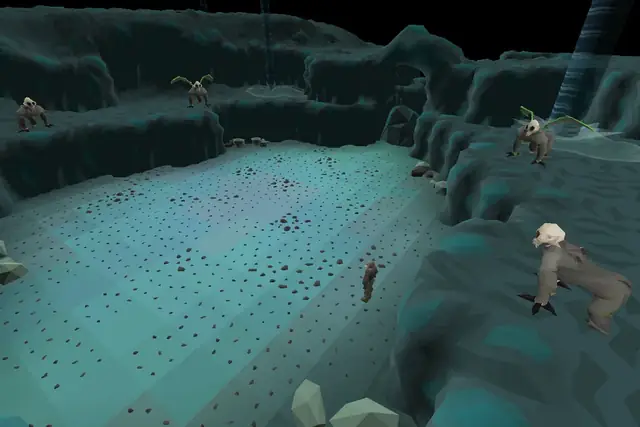
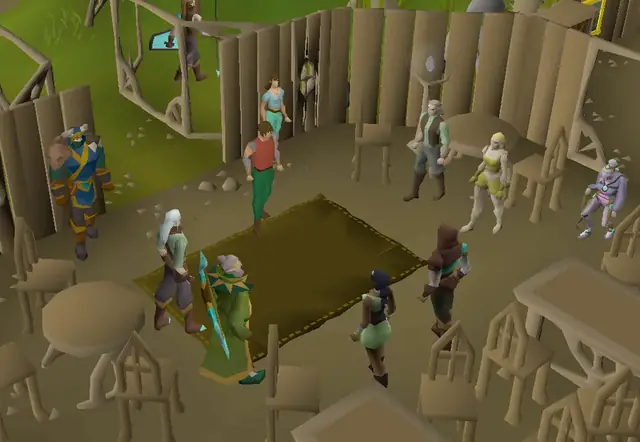
30 years prior to the fateful day a mighty adventurer awakened Elvarg from her slumber, Crandor was a thriving and very much alive island, with a great tradition of mages and adventurers. The history of Crandor is a bold one, enough so that many a Crandorian earned the right to be part of the Champions' Guild! The Crandor we know today is very different from that of the past and there are so many questions that remain unanswered - your chance to uncover the secrets of the past starts with Dragon
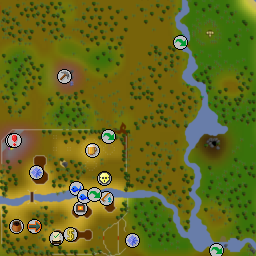
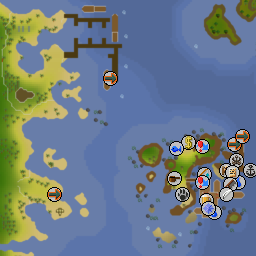
To start the quest, first speak to Alec Kincade outside the Myths' Guild. A quick way there is using the Spirit tree to Feldip Hills. He will let you join the guild if you can discover an ancient secret, and tells you to meet up with Dallas Jones at Karamja Wines, Spirits, and Beers on Musa Point. The fastest way to get to him is use the Karamja teleport on an amulet of glory and walk south. Another quick way is to use the TzHaar Fight Pit minigame teleport. You can also use fairy ring DKP then travel south, over the log then north, then use the shortcut (mith grapple may or may not be required depending on Agility level).
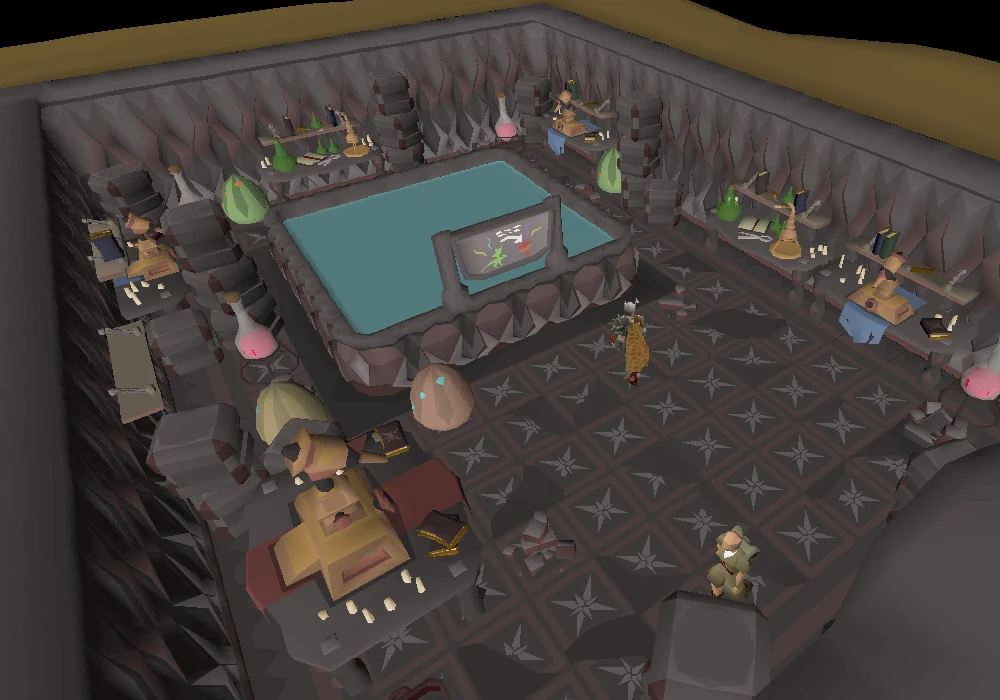
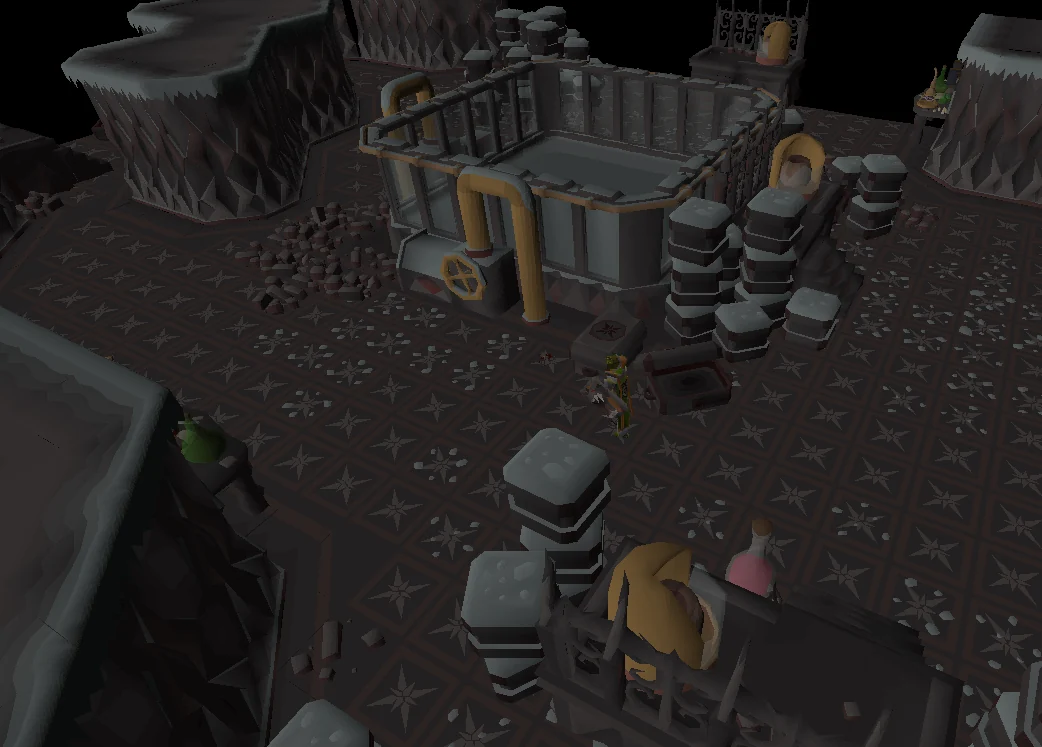
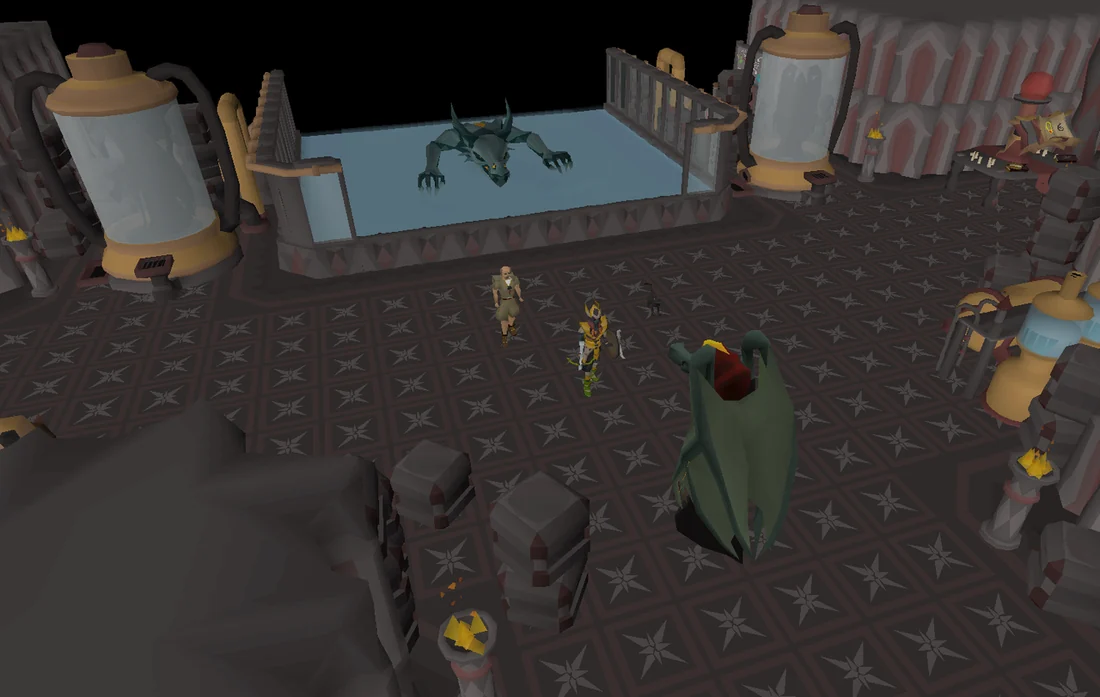
A hidden laboratory found near Elvarg's lair. Image credits →
Speak to Dallas Jones, who will realise you are the Hero of Crandor after learning that you slew Elvarg. He tells you to meet him in her old lair. You can get back to Crandor by travelling through the caves in the volcano on Karamja, the opposite direction as if you were going to Mor Ul Rek. Once inside, you will have to climb over the wall. Speak to Dallas Jones again, and then use a pickaxe on a covered up wall at the north-eastern corner (there is a rock with a bronze pickaxe embedded in it just outside of Elvarg's lair). When the wall crumbles, enter the tunnel to find an ancient laboratory.
Inspect the machinery to the east for some old notes, then attempt to inspect the ancient mural. A Level 100 spawn will burst out from the nearby strange egg and attack you; kill it. Once it is killed, inspect the mural again, which illustrates dragons and fungi with the word "Lithkren". Dallas recalls an old settlement on Fossil Island with similar architecture as the laboratory, with one of the many books he found there mentioning a place called Lithkren. He will ask that you make your way to the House on the Hill to meet him there.
Note:Goutweed is required later on, if you do not already have one it can be obtained by stealing it from the Troll Stronghold kitchen which is cheap and faster, or it can be farmed in a herb patch using gout tuber, requiring 29 Farming and takes 80 minutes, but is not recommended due to their extremely high market value.
The quickest way to reach the House on the Hill is with an enchanted digsite pendant; this requires having travelled to the House at least once. If players have not done so, they must reach the House by climbing the hill to the south-west using the bridge.
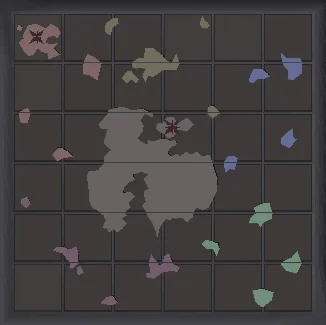
Once inside, climb down the trapdoor and speak to Dallas. He will tell the player that he had read through the ancient books again, and determines that the grid on the floor is a map of the island. He will ask you to find 24 map pieces, which are found near or around the House; don't go past the bridges, as there's nothing there. As you find pieces, you can return them to Dallas to look after, so you don't need enough inventory space to hold them all at once.
There are five scraps in the open chest at the same floor as you.
There are three more scraps in the open chest at the top floor.
There are seven scraps in a hook briar south of the house.
There are five in a mushtree just east of the house, near the strange stone.
There are four in the fungi next to the west staircase, outside.
Once all map parts are given to Dallas, the map now must be completed. The map consists of 24 tiles, five of which will be stuck to the board, signifying that's their final position. The free pieces must be rotated and dragged around the interface in order to make progress. If the puzzle looks correct but does not automatically close, check the rotation of the pieces, specifically the top-left piece.
Once all the map tiles have been correctly positioned, the puzzle will automatically close and appear on the floor, with Dallas determining the north-westernmost island to be Lithkren. Dallas will then ask you to look for Jardric for a boat, since he does not wish to ask the Museum expedition for it, as it requires a lot of paperwork and time to do so. Jardric can be found by the General Store within the Museum Camp.
Speak to Jardric. You will ask on Dallas Jones's behalf for a boat, but he tells you that all the boats around the island are owned by the Varrock Museum, so he suggests that you build one instead. He will tell you that you will need eight oak planks, 10 swamp paste, 12 nails of any kind (note: extra nails are recommended, in case some bend), a saw, and a hammer.
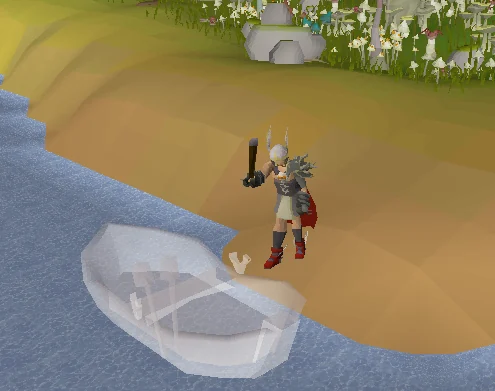
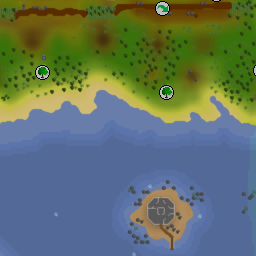
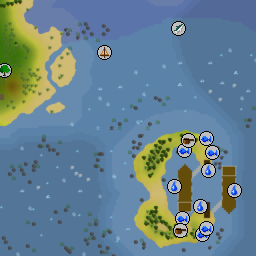
Once these materials have been obtained, players should make their way north-west to the coast just west of the task only Wyvern Cave entrance in the Mushroom Forest and build the rowboat. It is suggested that players unlock the Magic Mushtree for quick-access to the boat for future use. This is located just north-east of the rowboat at the transportation icon . With the enchanted digsite pendant, this is the fastest way to Lithkren.
After the rowboat has been built, players can freely travel to and from the island.
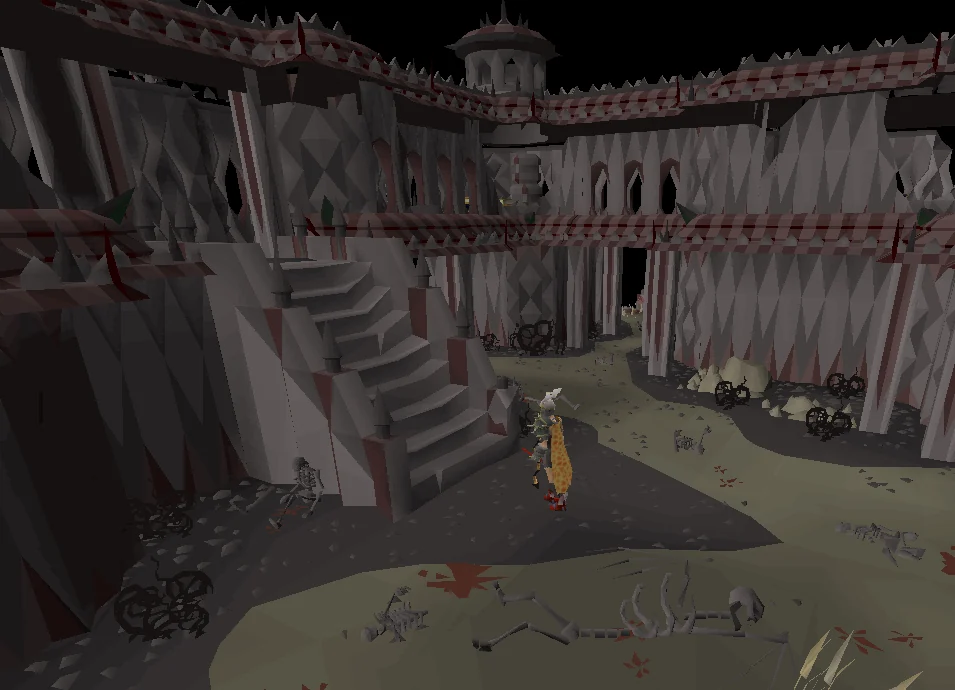
Take the boat to Lithkren. Head north, then go up the stairs on the eastern side of the south-western building. Go down the trapdoor to the south, down the stairs to the north, then follow the path. Meet Dallas at the bottom. He tells you that he found these ancient doors but can't open them.
Search the nearby burnt skeleton along the east wall for Aivas' diary. Read it to discover that a battle took place on Lithkren, led by none other than Robert the Strong, a hero who lived during the Fourth Age, well known for defending humanity against the dragonkin. Speak to Dallas again, telling him that Robert the Strong was reincarnated into Bob the cat. While finding the notion absurd, he asks you to track down Bob while he processes this new information.
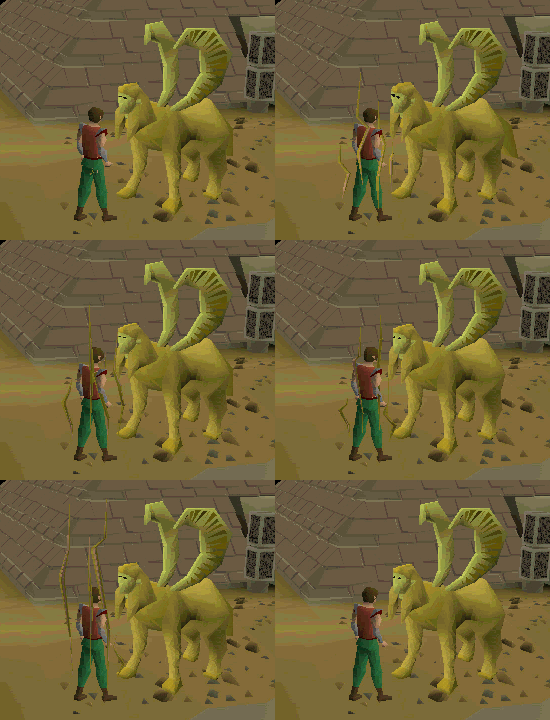
Show animation: The Sphinx grants the player the ability to speak to cats without the catspeak amulet.The Sphinx grants the player the ability to speak to cats without the catspeak amulet. Image credits →
Bob has one of the largest wander radius of all NPCs in the game, spawning outside Unferth's house every time there is a system update, after which he is allowed to roam up to 30,000 tiles in any direction. He is only found in Misthalin, Asgarnia, and the northern part of the Kharidian Desert. He cannot enter the Wilderness, nor pass through the Shantay Pass.
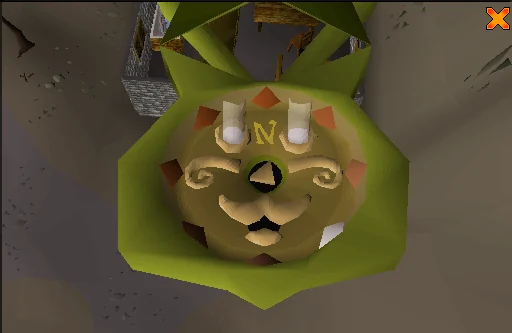
You will need the catspeak amulet(e) to speak to him, and may also use it locate Bob, which works somewhat like a compass - when facing north, click the left or right whiskers to control the interface and point it in the right direction. However, he will often get stuck in a few common locations, and it may be faster to pick one of the following locations and World hop until you find him.
Note the following table is not an exhaustive list of locations.
The interface of the Amulet of catspeak (e). This specific picture shows that Bob is south-east to the player's current location. Image credits →
You tell Bob about you needing his memories as Robert the Strong, which he can't remember. You suggest to talk to the Sphinx again, to which he agrees.
Travel to Sophanem, and speak to the Sphinx. Before asking for her help, the Sphinx will grant you the ability to speak with cats without the amulet of catspeak, as you've proven yourself to be a friend of the felines. Tell the Sphinx of your problems; unfortunately, she can't help you, as she can't enter Bob's mind and choose specific memories of his life. However, you then remember the Oneiromancer, who may be more capable to help you and Bob. Head to Lunar Isle, and make sure you bring your seal of passage if you haven't completed the Fremennik Elite Diaries yet! Note: You can still use the bank booth operated by 'Bird's-Eye' Jack even without a seal of passage.
05
Robert the Strong
Items needed:Seal of passage, tinderbox, goutweed, 1 astral rune, hammer, pestle and mortar, fighting equipment (good ranged defensive armour and food) Note: Ranged attacks are ineffective. 100,000 coins and teleport to Lunar Isle per death (recommended for safety). Items recommended: An emergency teleport.
On death, you can pay at the Item Chest near the brazier 100,000 to retrieve lost items. Any unsafe death will delete all items left inside the deathbank. Any items left on the ground will be lost.
Head to the Oneiromancer, who is near the Astral Altar, and ask her about unlocking Bob's memories. She will tell you that you must make another dream potion. She will give you a dream vial. Fill it with water, and use your goutweed on it. Next, use a hammer on an astral rune, and use the resulting astral rune shards on a pestle and mortar, and use the ground astral rune on the dream vial to finish the dream potion. Once you make the potion, light the ceremonial brazier to the building at the far west and use the dream potion on it.
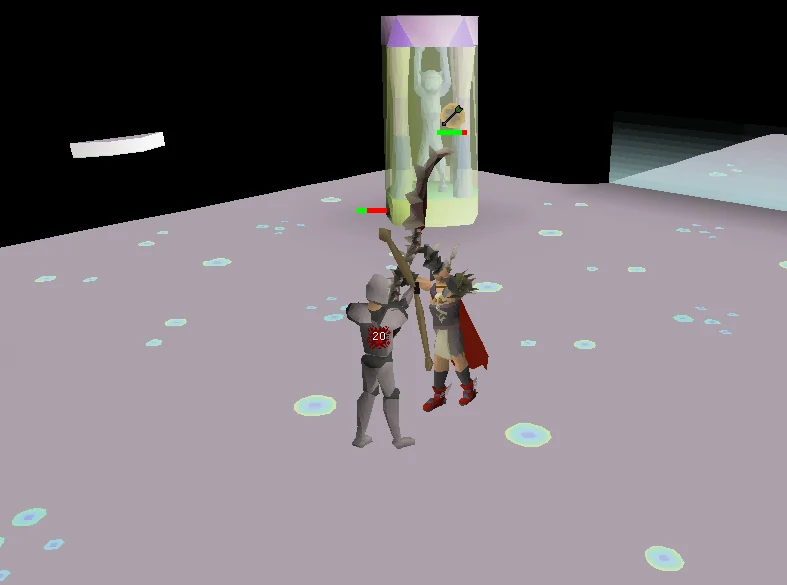
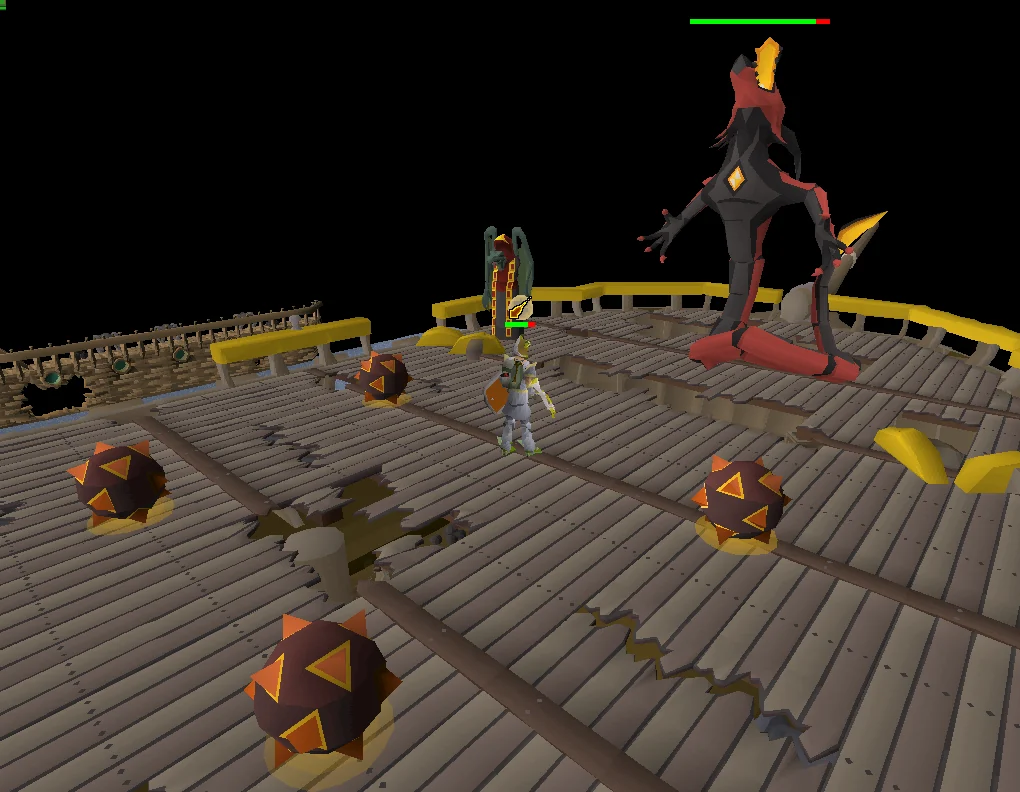
Entering Bob's dream, Not Bob tells you that the guardian needs to be defeated to bring back Bob's memories. You must fight Robert the Strong. He is level 224 and uses Ranged. Prayer can be used during this fight; however, he is able to hit partially through Protection from Missiles prayer; it's highly recommended to bring food as he is quite accurate and his normal attacks can hit in the 20s. Crush attacks work the best, as his crush defence is the lowest. Make sure to maximise your Ranged Defence and crush attack. Using Verac the Defiled's equipment can be a great option due to its crush bonuses alongside having a 25% chance to ignore Robert's defences. For players with lower levels (less than 70 Defence and Attack), granite equipment with a leaf-bladed battleaxe or Sarachnis cudgel can be a good alternative. Alternatively, for those on a budget, the four specs of a dragon mace can also be a surprisingly powerful budget option with the potential to max 40-60s (depending on the player's stats and gear) with the spec and then finishing off the remaining hp with a few more hits.
Robert's special attack occurs after he says See if you can hide from this! and a lightning bolt strikes his bow, which occurs approximately every twenty-five seconds. He fires a purple arrow at the player, which will deal 50+ damage and deactivate any current prayer(s) if it hits. Hide behind any of the four pillars to dodge the attack. Make sure you are completely behind the pillar, and not standing on the sides, as it is possible to get hit by the arrow if not. While running to and hiding behind the pillar, it is recommended to heal and restore Prayer if necessary to save time spent during the fight. If you do not run back out to fight him, Robert will teleport you back to him, telling you to Face me you coward!, though it does not deal damage or have any other effect. Wait until he teleports you to attack, as clicking before will cause your character to path away from Robert before attacking. Repeat until he is defeated. If your Magic level is 94+ you can use vengeance to inflict large amounts of damage back.
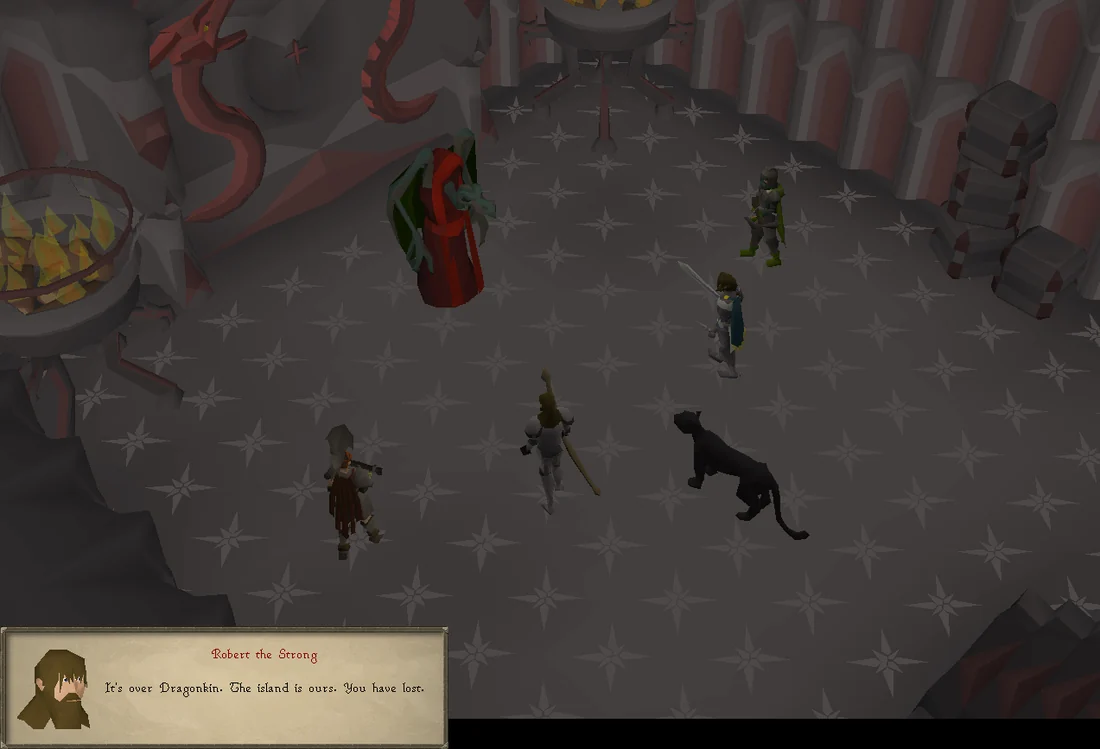
Aivas, Tristan, Odysseus, Robert the Strong, and Camorra confronting a dragonkin on Lithkren. Image credits →
If you and Robert kill each other at the same time, talking to Bob and saying "I'm ready" will take you to the cutscene where Bob remembers everything, he doesn't need to be fought again.
If you leave the dream you do NOT have to remake the dream potion. You can re-enter the dream by talking to Bob. The catspeak amulet (e) is no longer needed.
06
The Dragon key
Bob tells you that he hid several key pieces around the world after the incident.
(Using fairy rings and teleport tablets will reduce some of the time of the trip. One example of quickly getting to the Kharazi Jungle is to use a Brimhaven teleport and taking the cart to Shilo Village)
Note: For Ultimate Ironman, consider acquiring the Vorkath key piece first to save inventory space during the fight. If deathpiling for Vorkath, the order of collecting keys may not matter as much.
Bob tells you that he hid the Karamja key on the south coast of Karamja; the Kharazi Jungle. Head towards the south-eastern area of the shore, where there is a large mossy staircase leading into a cave. This takes you to the Karamjan Temple, a maze with the key piece in the centre.
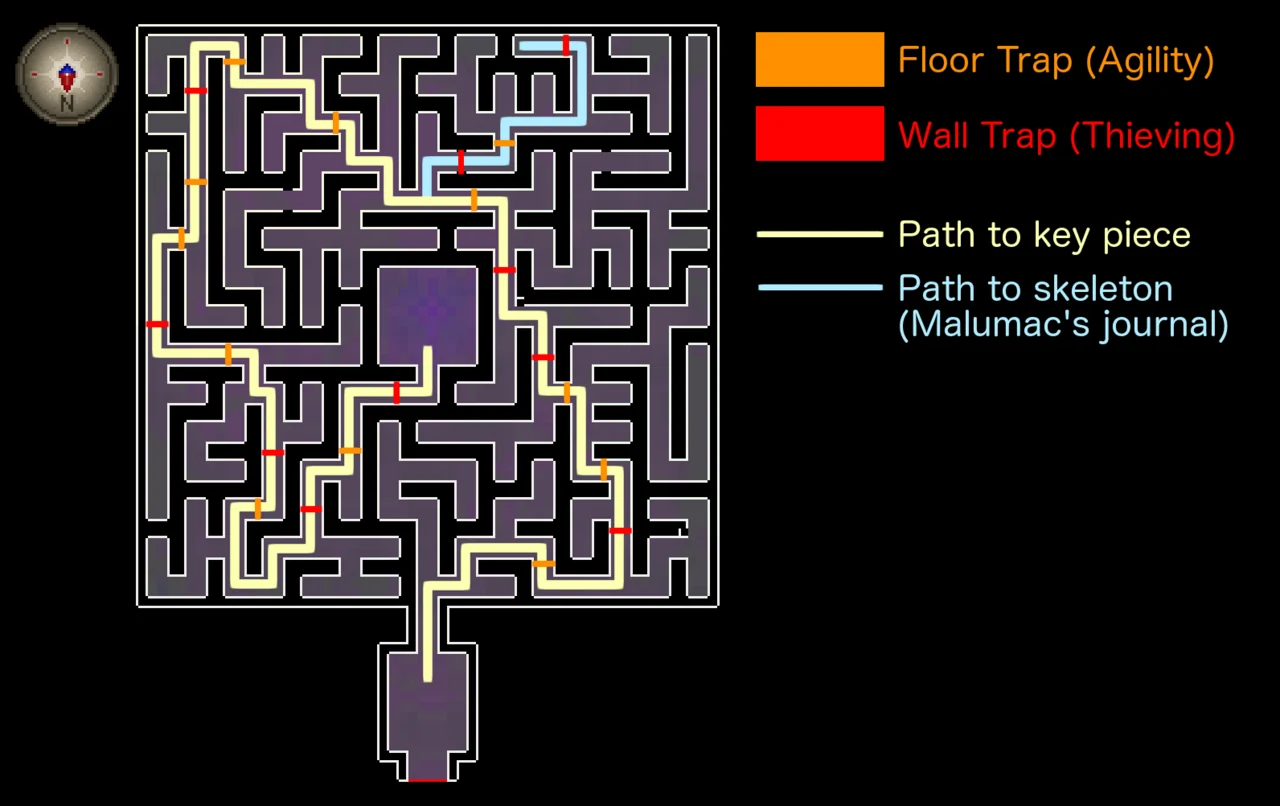
You have to navigate the maze, with traps consisting of spike and man traps. The spikes can be disabled through Thieving, and many traps leapt over with Agility. Note that toggling running off while leaping over the traps seems to improve the chance of success. To make matters worse, there are also multiple level 124 stone guardians wandering the area in a multi-combat environment. Each stone guardian only uses one combat style (indicated by the colour on them), so pray accordingly. It is recommended to disable auto-retaliate.
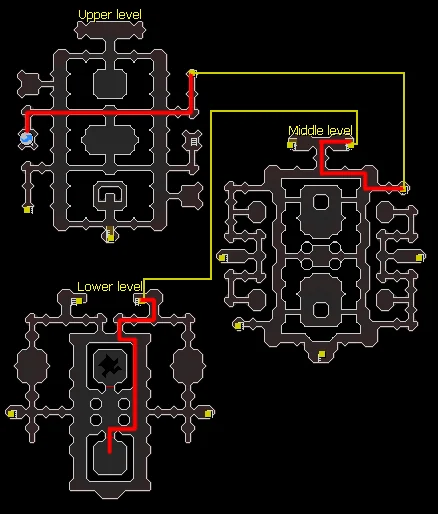
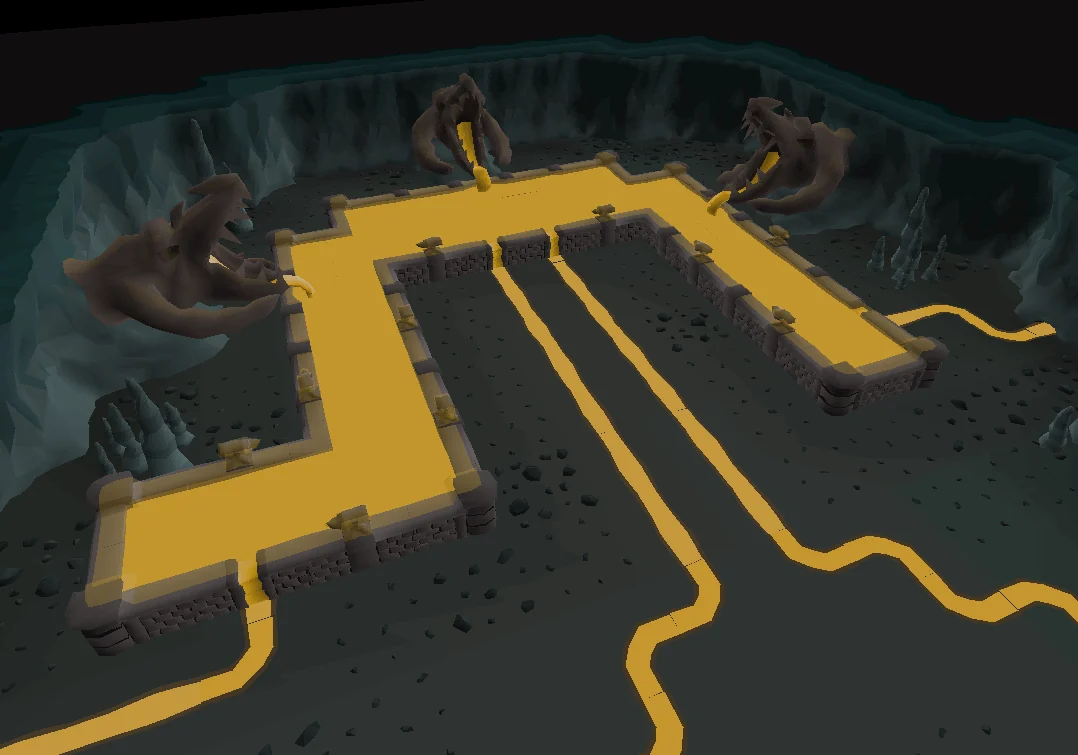
The route to reach the centre of the temple. Image credits →
Follow the route as indicated on the map to the right. The traps will do more damage than the guardians, so be on the lookout for wall traps. Optionally, players may take a detour to the blue route to search a skeleton and obtain Malumac's journal, which provides some insight into the history of the Temple.
Once you reach the centre, grab the dragon key piece from the plinth. The plinth also activates a two-way transport between the entrance and centre.
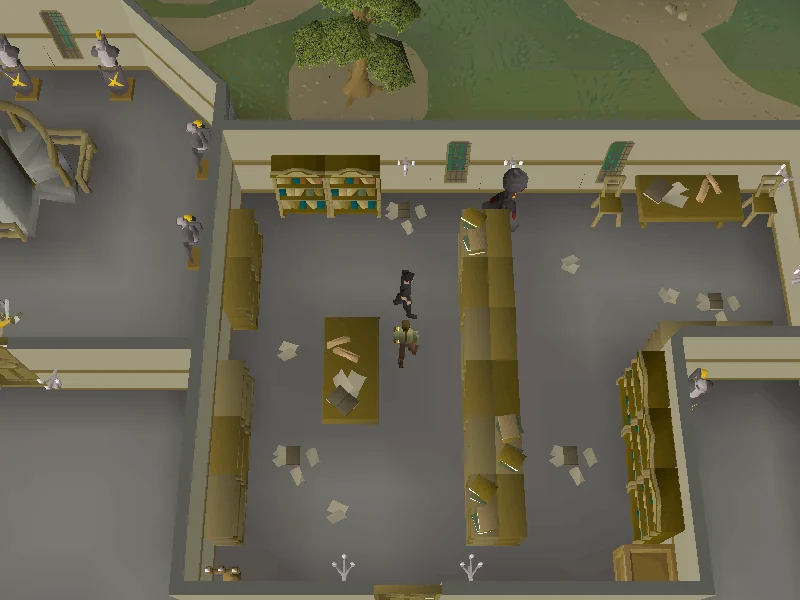
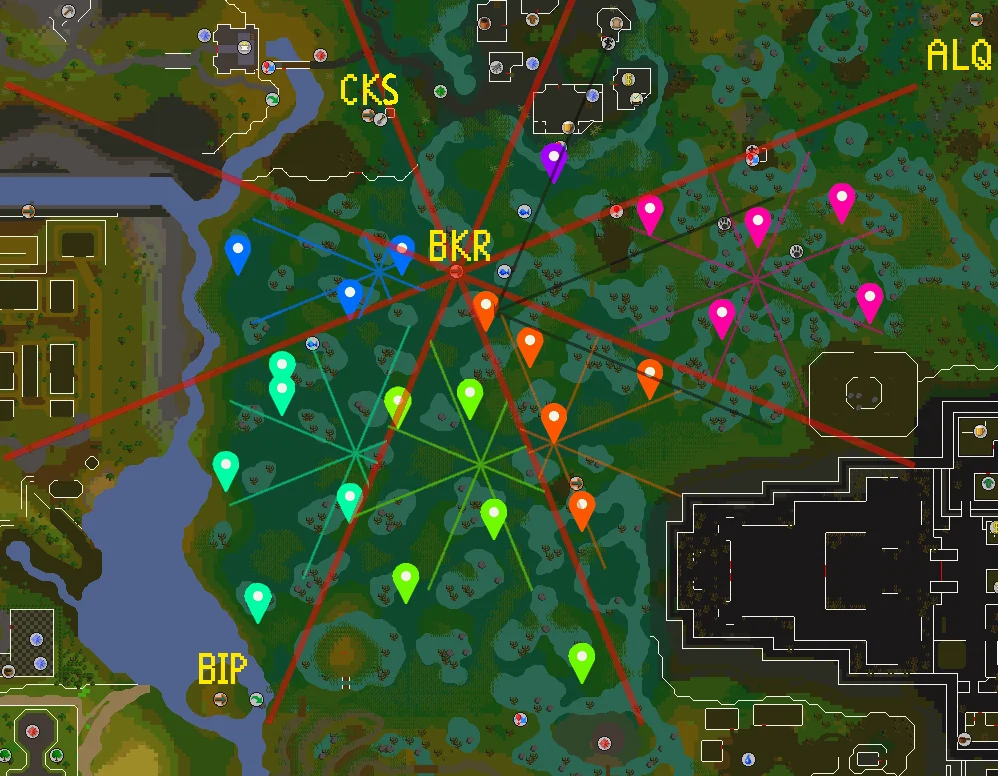
Location of the Census records. Image credits →A map of possible key piece locations, which splits Mort Myre Swamp into 6 sections, starting at the BKR fairy ring, then further subdivides sections past that. Image credits →
Note: The effects of swamp decay and Ghasts are nullified with an active Fire of Dehumidification with 50 Construction and completion of the quest Making Friends with My Arm. You should still bring food because the device will damage you while searching for the key, and food is cheaper than brews.
Bob tells you that Tristan held onto this dragon key piece. Go to the Varrock Palace Library, and speak to Reldo regarding this. He'll tell you of a book containing census records, and that he doesn't remember where it was, but knows that it had a red cover. Look for the bookcase that has a red book on it and search it to find the Varrock census records. Bring it back to Reldo for further inquiry. According to the records, it appears Tristan's descendants may have settled in Port Phasmatys, as that is where most Morytania migrants settle.
Make your way to Port Phasmatys, and make sure you have your ghostspeak amulet equipped. Speak to the ghost villagers, and they'll lead you to Sarah in the house with a range just west of the bank. Alternatively, you may go straight to Sarah as well. Speak to her about the key; she buried it in the swamp to prevent the vampyres from obtaining it, and does not wish for it to be found, as she believes it is safer that way.
The orb acts much like similar items, damaging the player when used in return for telling you where it is. The key piece will be located in 1 of 24 locations within Mort Myre Swamp. Make sure you have some food, taking 12-20 lobsters to last the trip; be wary of ghasts as they may rot your food. While you can't die from the orb's damage directly, the ghasts in the Mort Myre Swamp can sometimes deal 1-3 hitpoints of damage if you have no food or druid pouches in your inventory.
A quick way to find the key piece is to start at the fairy ring code BKR and feel the locator orb, then using the map to narrow down the possible locations:
For example, if you get north-east, it will always be the lone purple spot that you need to cross the bridge to get to.
If you get south-west, south, or south-east, go to the centre of the subdivided area and scan again. For example, if you got west, go to the centre of the blue subdivision and scan there again. If you get west again, you've narrowed it down to a single dig spot.
If you're unable to see the message provided by the orb, try changing your game chat filter from "on" to "filtered".
Once you find the exact location, use your spade to dig it up.
On death, you can pay Torfinn 100,000 to retrieve lost items. Any unsafe death will delete all items left inside the deathbank. Any items left on the ground will be lost.
Note: Vorkath is a boss with multiple mechanics and attack styles. It is highly advised to read the section below in its entirety before taking him on.
Note: Unlike the post-quest boss fight, the quest version of Vorkath will wake up and start attacking immediately after entering his arena. While doing the quest, prepare your equipment and drink your potions before entering.
Bob tells you that he hid another key in an abandoned dragonkin fortress north-west of Rellekka. Talk to Brundt the Chieftain about this fortress, and he tells you that a deadly beast has slain many of his warriors who went there. He'll give you permission to fight the dragon, and that Torfinn will take you there. In order to pass through, you will have to slay Vorkath, an undeadblue dragon. You will want to bring venom immunity items, as both Vorkath and the spiders in the dragonkin laboratory are capable of envenoming the player.
Mechanics
Vorkath's dragonfire attacks deal heavy damage without two layers of dragonfire protection. Certain combinations of protection are more effective than others. Specifically, the dragonfire's max hit is reduced to 20 if using a regular antifire potion (or its extended version) AND Protect from Magic, it is reduced to 10 if using a regular antifire potion AND an anti-dragon shield (or better), it is also reduced to 10 if using a super antifire potion (or its extended version) AND Protect from Magic, and it is reduced to 0 if using a super antifire potion AND an anti-dragon shield. It is recommended to use the strongest antifire protection available.
Vorkath has numerous attacks, but uses a predictable attack pattern. He will use 6 standard attacks in a row (in a random order) followed by one of his two special attacks. He will then use 6 more standard attacks, then the other special attack, and repeat this pattern.
His standard attacks are:
A melee attack that hits up to 32.
A ranged attack which looks like a spiky ball, and hits up to 28.
A magic attack which looks like a blue projectile, and hits up to 30.
Orange dragonfire that deals damage (two layers of dragonfire protection are required).
Green dragonfire that can inflict venom if unprotected.
Pink dragonfire that deactivates prayers (they can be turned back on immediately using quick prayers).
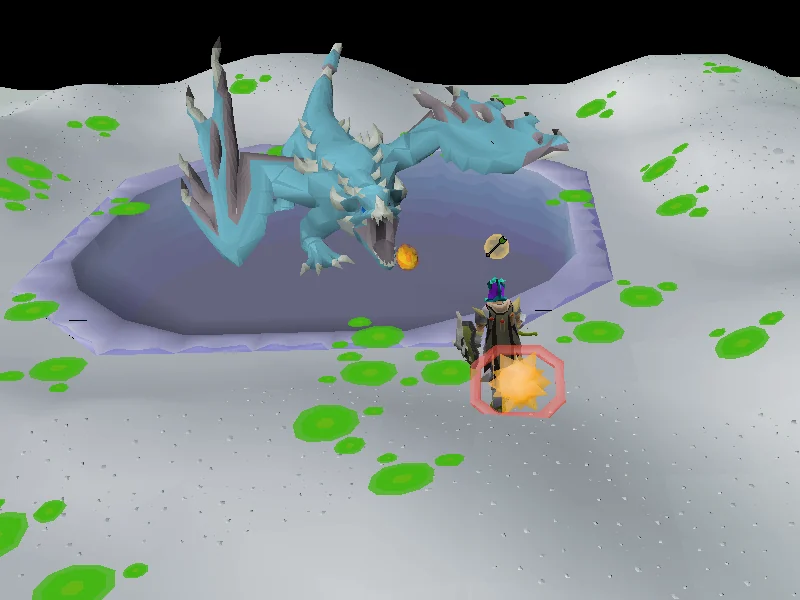
An orange fireball fired onto the player's position that deals extreme damage. This absolutely must be avoided by moving two tiles away. Dragonfire protection has no effect. Always watch out for Vorkath spitting a fireball in an arc upwards into the air, and move immediately. Standing only one tile away when it hits will result in half damage, but this can still hit 60+.
His special attacks are:
Vorkath will spit acid everywhere, which will fall on random tiles in the arena; do not stand on these tiles as they deal damage and heal Vorkath. Turning off run is strongly recommended to navigate the poison spots. After this attack, Vorkath will rapidly barrage the player with fire attacks. The player must thenwalk (not run) throughout the rest of the attack to avoid the fire barrage. Be careful to avoid the poison spread out by his earlier attack, and always keep moving during the dragonfire barrage, or you will incur heavy damage rapidly. One trick to avoid the fire barrage is to find a clear straight path avoiding the poison splashes, then continue walking back and forth in that path until the barrage ends. Players can use the time spent walking during this attack to heal and drink potions (and optionally turn off prayer to save points).
Vorkath will shoot a freezing projectile at the player, freezing them in place, and then shoot another projectile somewhere else in the arena, where a Zombified Spawn will appear. Quickly use Crumble Undead on the spawn to kill it or else it will explode near you and deal 30+ damage.
Longer-lasting potions such as anti-venom+ and extended super antifire will allow you to spend less time keeping up protection and more time focusing on the fight. They are well worth the cost, if possible.
Order of importance
Mechanic
Order of importance
Notes
Special attacks
Highest
See above
Orange fireball
Highest
As soon as you see him launch the aerial dragonfire attack, you MUST move out of the way, or face an extremely high chance of getting hit for your full hp. There will be several ticks after the attack that you can use to drink any potions needed or heal up.
Dragonfire
Very High
If using a two-handed weapon such as the toxic blowpipe, it is imperative that magic is prayed against at all times. If not, ranged prayers may be used. Set quick-prayers to protect from magic, and keep an eye out for the purple dragonfire attack. As soon as you see it, be prepared to turn your prayers back on via the quick-prayer interface.
Hitpoints
High
Keep an eye on your hitpoints, and do not let them drop below 32 at any point in time. If walking during the poison attack section, it's possible to let them drop further, as the main objective is now to avoid the magic attacks by walking away. If several squares ahead are open, you can use the walking time before your next click to heal up then. You will not be attacked by any of his other attacks at this time.
Venom
Medium
Drink an anti-venom potion as needed.
Melee attacks
Lowest
Stand a tile or more away from Vorkath to avoid melee damage altogether.
Poison attack
Special
When the poison attack comes on, you will only be attacked by his rapid fire attacks, which can only be mitigated by walking. For this reason, it no longer becomes necessary to pray magic or have any other protection. If you can get the timing, this is a good time to re-pot and eat back to full hp.
Zombified Spawn
Special
When you see a white dragonfire attack, you will be frozen, and a Zombified Spawn will appear several tiles away. As soon as you see the fire attack, click on your spellbook, select Crumble Undead, and look to see where Vorkath shoots the Spawn (marked by a visible projectile). As soon as the Spawn appears, cast Crumble Undead on it. You will have a few ticks after this to eat, so use this time to drink potions or heal if necessary.
Vorkath has 460 hitpoints and is weak to stab and ranged. Dragonbane weapons are ideal, but are expensive and Vorkath can be defeated without them. If using melee, an Abyssal dagger or better is recommended, along with using Protect from Magic.
During the fight, the highest priority is to watch out for and dodge the fireball attacks, and the two special attacks. Learning the attack patterns will help the player stay alive long enough to kill Vorkath.
Once he is defeated, move past him to the north-west to find a Dragonkin laboratory. Small level 35 spiders are here that can inflict venom, so make sure to bring an anti-venom potion. Inside the laboratory, you can inspect various ancient machinery, equipment, and incubators scattered throughout the room to find old notes which detail the progress of experiments done within the lab. A total of 6 exist. To progress, pull a lever in the south-west with at least 15% run. Once that lever is pulled, a door will unlock and a timer will start. Run to the previously locked room in the east and search the stone chest for a dragon key piece and an ancient key. Make sure to grab both of these before leaving! If you forget one of these items, you will need to return; fortunately, you do not need to fight Vorkath again.
Bob tells you that Camorra hid her dragon key piece in a land far west. Note: Players can directly visit Amelia in her house south of the archery shop in Shayzien. The next two paragraphs are optional should the player wish to read additional dialogue.
Make your way to Port Piscarilius and speak to Veos (or Cabin Boy Herbert if A Kingdom Divided has been started), asking him about Camorra. One fast way to reach him is to use Kharedst's memoirs/Book of the Dead to teleport to Piscarilius and running south to the piers. He will recommend that you go to the Library Historical Archive, where you may be likely to find your answer. You can also teleport a short run south-east from the Grand Library using the memoirs.
Head to the Arceuus Library and have Archeio teleport you to the Library Historical Archive. There, speak to Imerominia about Camorra. As Shayzien and Hosidius were founded during the Dragonkin Conflicts, she will direct you to two historians specialising in the history of those two cities: Amelia of Shayzien and Jonathan of Hosidius.
The correct historian to visit is Amelia, so make your way to her house south of the archery shop in Shayzien. Players can use the Xeric's Lookout teleport on Xeric's talisman for the quickest route, running a short distance north-west. Alternatively, Kharedst's memoirs/Book of the Dead teleports the player a fair distance north-west of Amelia's house. If neither of these options are available, fairy ring code DJR may be used with a long run south-east.
While you are at it, grab a light source and a tinderbox (if needed to light your light source) from the bank if you haven't already. Speak to her, and she will tell you to go to the Shayzien Crypts, whose entrance is found in the south-western part of the Graveyard of Heroes.
There are three levels in the crypt, and you will need to make your way to the bottom level. Activate Protect from Magic, as there are multiple high-levelled zombies and skeletons (level 132) in a multi-combat environment. The zombies and skeletons use Ranged, Magic or Melee, so run past them as fast as you can until you reach the crypt. From the upper level, take the ladder in the north-east corner down to the middle level. Then, make your way to the far east ladder to get to the bottom level. Once you reach the bottom level, head to the centre, and enter the southern doors.
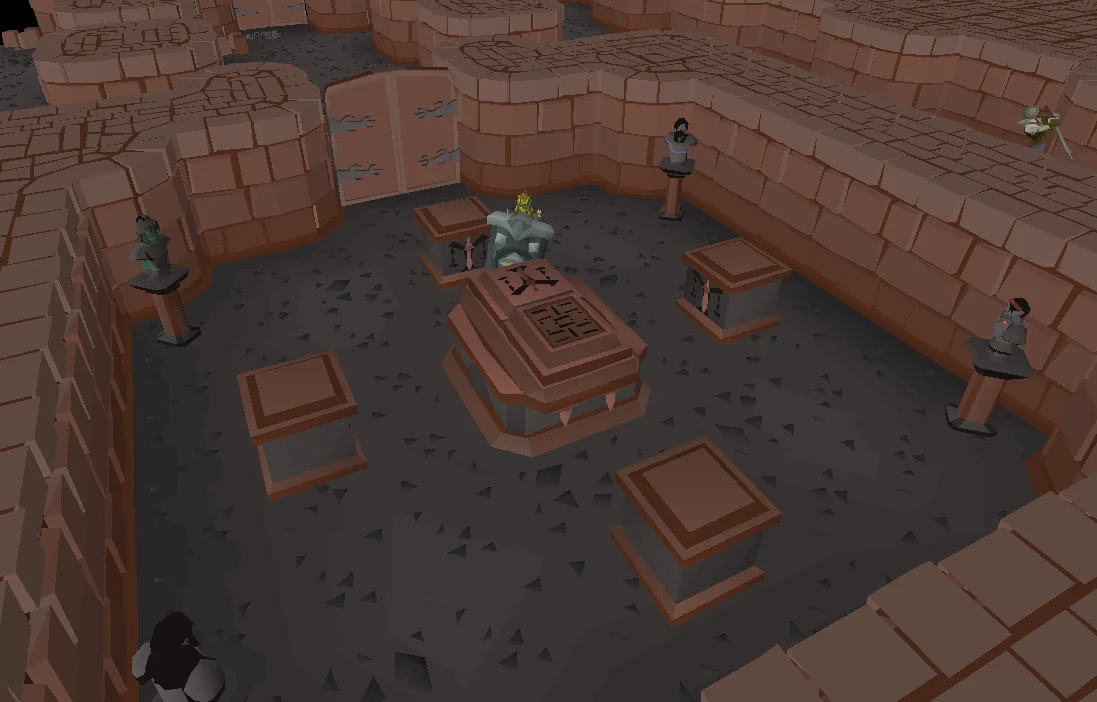
A player in Camorra's tomb in the Shayzien Crypts. Image credits →
Inspect Camorra's tomb and solve a riddle. Grab the four busts of Robert, Camorra, Tristan, and Aivas from the corners and place them accordingly on the plinths, based on what the puzzle states.
The puzzle can be solved in a few steps (fill in with table):
"The one from [Location] sat at the north of the table": Place this statue north.
"... opposite the one with [Weapon]": Place this statue south.
"The one with [Weapon] asked the .....": Place this statue west.
Show animation: A player lighting the dragon forge.A player lighting the dragon forge. Image credits →
Travel to the Ancient Cavern through the whirlpool south of Barbarian Assault. You may optionally talk to Dallas and Bob on Lithkren for context first. It is essential that you have completed the first Firemaking part of the Barbarian Trainingminiquest, and then obtained instruction from Otto on how to create Pyre ships to gain access to the Ancient Cavern, or you will end up failing to gain entry and will thus be washed up at the shore to the south.
Once on the floor with the brutal green dragons, follow the east wall until you reach stairs leading to the mithril dragons. Once up the stairs, travel west to a door on the northern wall (southern-facing) of the central rock formation and open the mithril door with the ancient key. Go inside. Use Fire Wave or Fire Surge on the three dragon head structures. Go back out and travel east and down the stairs. Run to the south-west corner where the barbarians are and go up the stairs. Continue to the end and forge the four pieces together by using one of the several anvils (small decorative anvils on the wall).
Enter through the ancient doors and continue down the hallway. Talk to Dallas or Bob, a cutscene will then play. You, Bob and Dallas will find a live dragon, before a Dragonkin approaches. The Dragonkin, Zorgoth, reveals its name as Galvek, the Dragonkin word for "Fate". Zorgoth notices that Robert has changed forms, and reveals that the attempt on his life by Robert had failed. He somehow recognises the player, but not Dallas, who will then ask Zorgoth about Elvarg, and why she attacked Crandor.
Zorgoth, a dragonkin, appears before you, Bob, and Dallas. Image credits →
Zorgoth reveals that as their numbers were dwindling, the dragonkin required a new weapon to turn the tide against the humans. Elvarg was the first of these dragons intended to destroy humanity, but remarks that it was a failure, and continued experimenting on various other creatures in various laboratories, including the one on Lithkren, where they began working on the ultimate weapon: a dragon that can control the minds of other dragons. However, Robert had launched an assault on the island, forcing him to seal the laboratory, with himself in it, in hopes that his kind will reopen the ancient doors to resume their work. However, due to Robert's actions, this never happened.
Zorgoth will state that being sealed in here has given him hundreds of years to perfect his creation, the dragonkin's salvation. Dallas will interrupt, asking why he intends to annihilate humanity. Zorgoth answers by saying that they were defending themselves from the humans, while Robert argues that they were the ones being attacked. Zorgoth continues, saying that only a handful of dragonkin who gave in to the curse of the Stone attacked the humans, but they were not willing to distinguish the aggressive dragonkin from the peaceful ones, and neither will he, stating humanity is a disease. He calls Galvek out of the incubation chamber, and Galvek launches fireballs at the group, killing Dallas. You grab Bob and narrowly avoid them.
Outside, Jardric will investigate and find Zorgoth and Galvek. He fires a shot at Galvek, before being knocked away by Zorgoth. Galvek smashes through the roof and flies off with Zorgoth, who is preparing to organise the dragons for the assault on humanity.
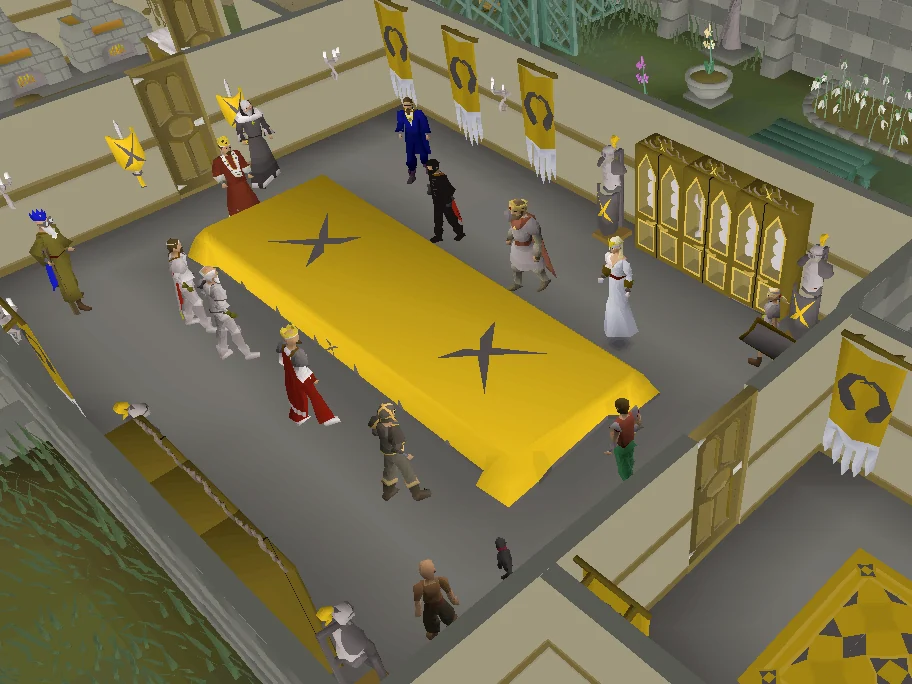
The kingdoms of Gielinor meet to discuss the dragonkin threat. Image credits →
Once all three have made their way to Varrock, head back to the castle and speak to Roald, who has organised a meeting in the dining room, and have agreed to launch an assault on Ungael, where the dragons are gathering. Regardless of what you say of the plan, Bob will ask to speak with you outside.
Bob will tell you that dragonkin are immune to most weapons, and that the assault will not cease until Zorgoth himself is dealt with. Since Zorgoth mentioned that Galvek has the ability to influence the minds of other dragons, Bob deduces that killing Galvek will cause Zorgoth's dragon army to dissolve, which would end the assault.
The combined fleet will make its way towards the Dragonkin Fortress on Ungael to stop Zorgoth. Zorgoth will send his own powerful dragon army to counter the advance. Checkpoints are listed as parts and waves. The fight with Galvek himself needs to be completed without any checkpoints.
On death, you can pay Torfinn 100,000 to retrieve lost items. Any unsafe death will delete all items left inside the deathbank. Any items left on the ground will be lost.
Completing each part acts as a "checkpoint", so you are free to teleport out after completing a part if you are low on supplies and will not have to restart from the beginning. Moonclan teleport tablets may be a useful emergency teleport option and method of resupplying using the bank booth with 'Birds-Eye' Jack then interacting with any adjacent banker without a Seal of passage to be teleported to north Rellekka, which is in very close proximity to Torfinn in order to quickly rejoin the fleet, or retrieve lost items.
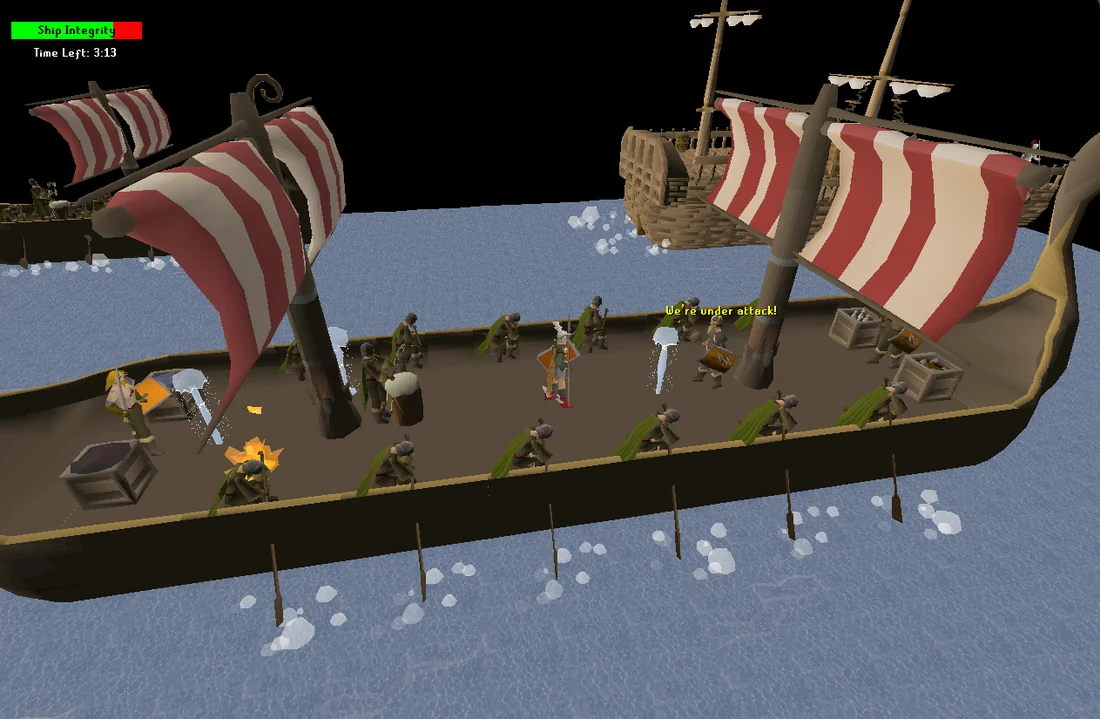
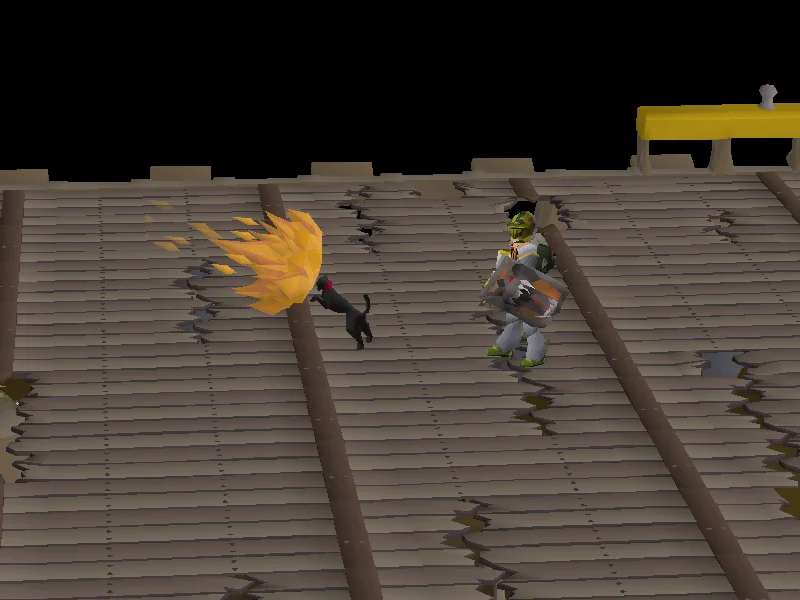
Defending Brundt's ship from the dragon's assault. Image credits →
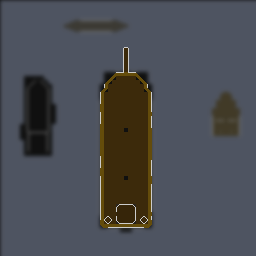
Speak to Torfinn in Rellekka who is on the dock north of the market. You will be placed on Brundt's ship, and will need to repel a dragon assault for four minutes. The dragons will launch dragonfire towards the ship, either causing leaks, damaging the masts, wounding the rowers, or causing fires. There are several crates containing items to repair the ship and maintaining its integrity. If the ship's integrity falls to 0%, you will need to start over.
When you are nearing the end of the 4 minutes you will notice that the frequency of damage to the ship will increase significantly and it will be impossible to have the ship cleared of all damage. The best tactic here is to always repair damage / heal the warrior closest to you.
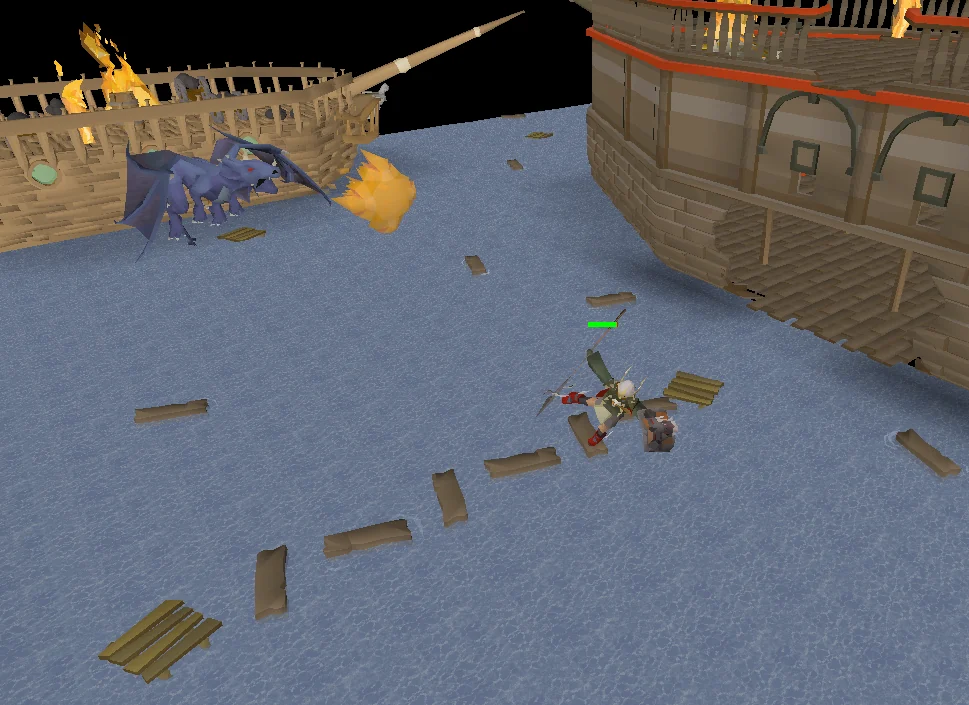
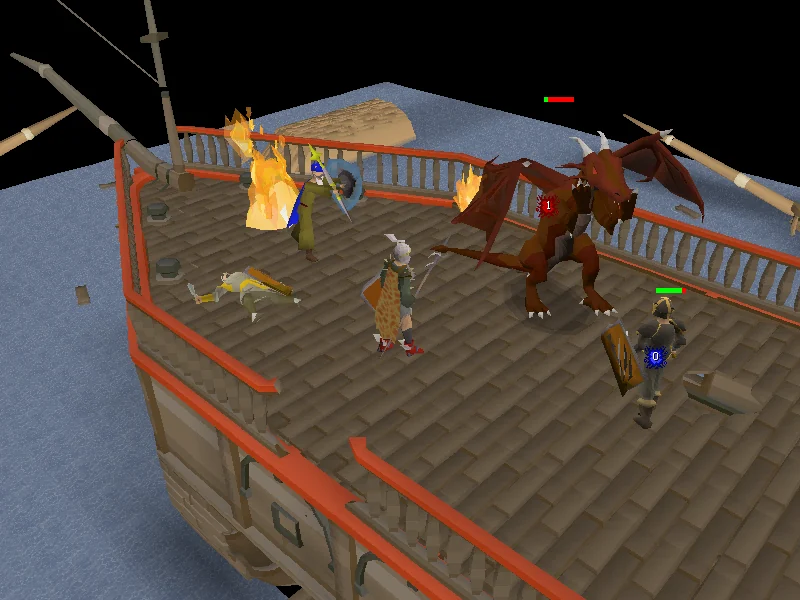
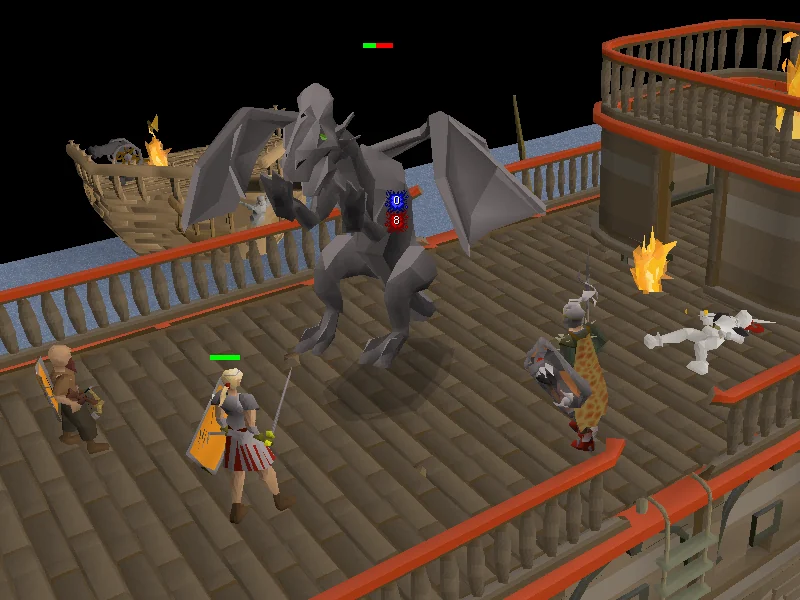
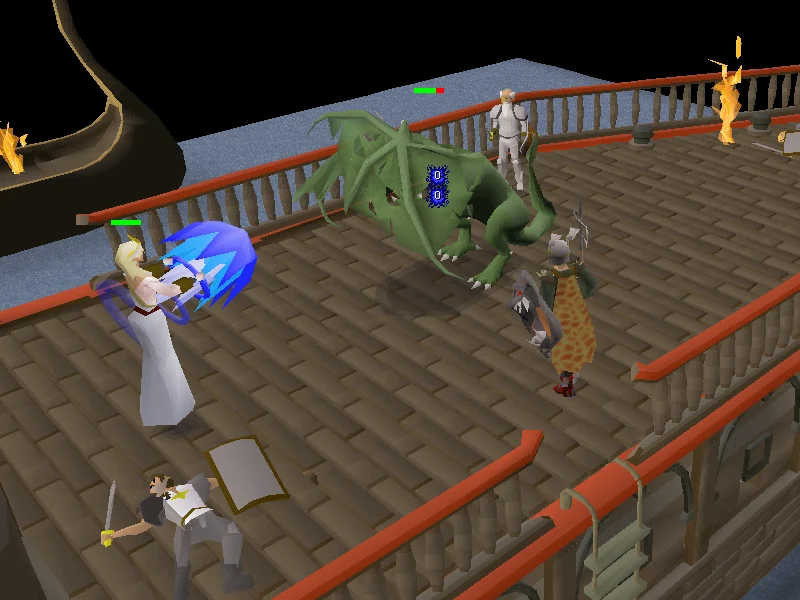
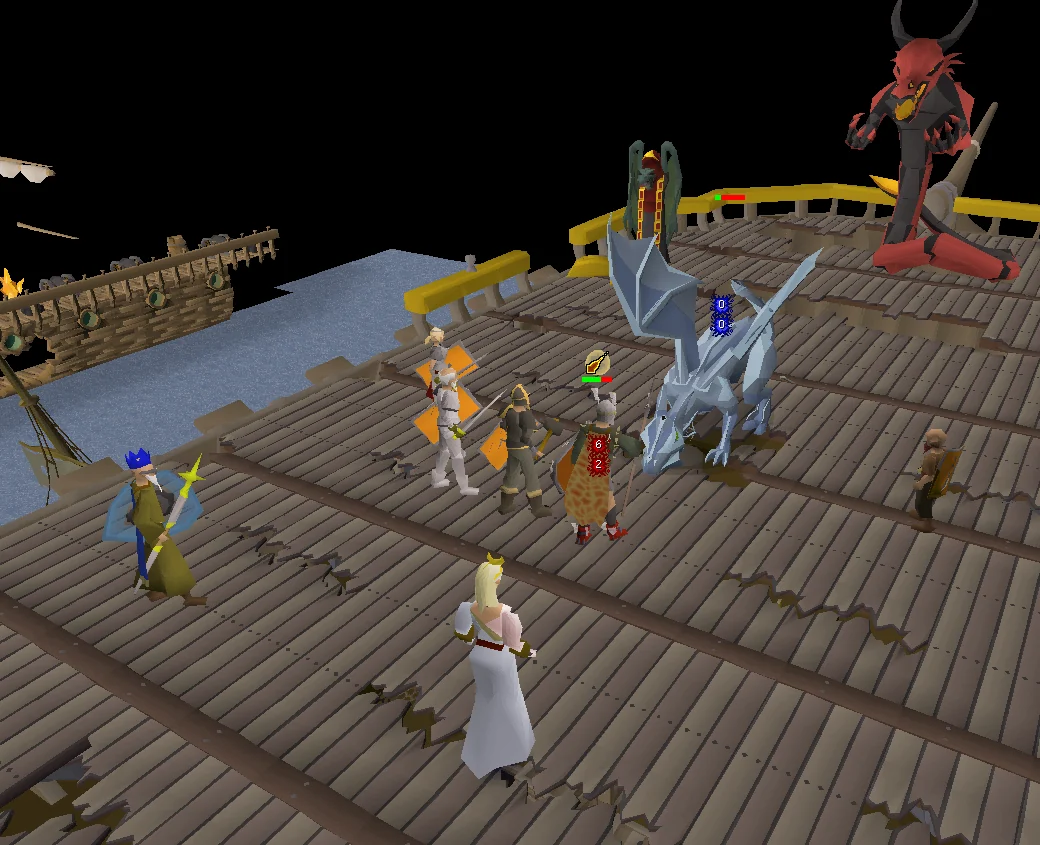
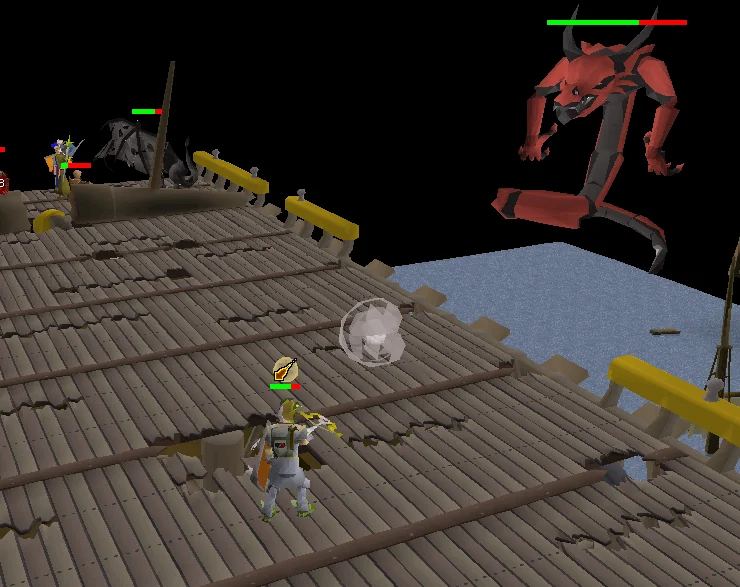
What remains of the army advances onward, while the rest take their time to catch up. Before navigating through the shipwrecks, make sure you have full dragonfire protection, as there are several dragons, which will launch dragonfire at you throughout the area. You will want to bring a lot of food, as you can fail some of the obstacles and take damage. There are several fancier ships, which act as "milestones". Several of the leaders will be fighting a lone dragon; you will need to kill it/wait for it to be killed to proceed. If you are running short on food, going afk during these fights to heal up is recommended. The first "fancy" ship has a red dragon, the second has an iron dragon, and the last has a brutal green dragon.
The Dragons
The following table will run down each dragon that you will face if you choose to be a hero and do so. You have the option to attack until you become the target. Then you can hide behind the npcs and let them finish. The table assumes you are ranging, using Protect from Melee or Magic, and standing out of melee distance. Thralls cannot be summoned on the ships to aid in the fights.
The Wise Old Man and Brundt the Chieftain fight against a red dragon. Image credits →Achietties and Jardric fight against an iron dragon. Image credits →The Oneiromancer and Sir Tiffy Cashien fight against a brutal green dragon. Image credits →
Part III
Help the Varrock guard fight several dragons on Varrock's grand ship. This consists of two green dragons and two blue dragons. The dragons fight the guards and kill them unlike in the previous fights, but will shift their aggression towards you when you get near.
The Dragons
The following table will run down each dragon that you will face, in order from top to bottom. The table assumes you are ranging and either using Protect from Melee or standing out of melee distance.
Items Recommended: Ranged or Magic Combat equipment, prayer potions, food (however, the entirety of wave 1 does not necessitate food if using prayer).
Bob jumps in the way of Galvek's attack, sacrificing himself to save you. Image credits →
Once these four dragons are killed, Zorgoth and Galvek board the ship. Galvek launches dragonfire, which kills four Varrock guards. He then launches dragonfire at you. However, Bob jumps in front of you, sacrificing himself to save your life.
Warning: During the following waves, Galvek will periodically launch fireballs that can kill you instantly. These are very easy to miss incoming. These work similarly to Vorkath's fireballs, with Galvek shooting a fireball into the air and the fireball landing on the player's position a few ticks later. They can deal up to 115 damage on direct hit and 57 if the player is within one tile; dragonfire protection has no effect. Keep Galvek on the screen at all times to look out for the fire ball spitting animation, or listen for the sound cue (a long rumbling noise), as you must move two tiles away quickly to avoid instant death. Note that turning off music (in Options) and zooming out to maximum distance (using the mouse wheel) may help here.
There are two waves of dragons to deal with in this part, each containing three dragons fought one at a time. There is a checkpoint after the first and second wave, so if you teleport out or die in wave 2 you will not have to complete wave 1 again.
At the start of Wave 2, the player's allies will appear and assist you in battling the dragons, and will do a fair amount of damage. It may be helpful to leave to change gear and restock after wave 1. If so, you should teleport out, because the debris you can use to escape has a confirmation that may be difficult to click on during combat.
The Dragons
The heroes aid you in a fight against a rune dragon. Image credits →
The following table will run down each dragon that you will face, one by one.
^ Using Ranged with enchanted diamond bolts is a viable alternative if you only have access to low-level gear or spells.
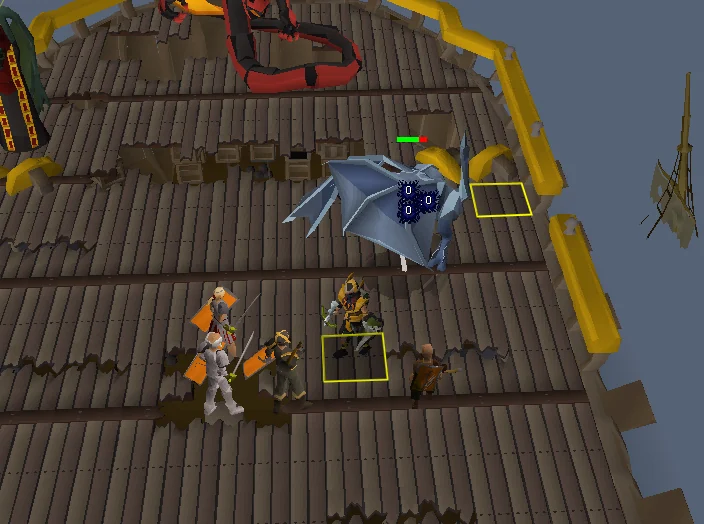
The safe spot for fighting the Rune and Adamant dragon during the fight. Highlighted tiles can be used to avoid fireballs, without being attacked by the dragon. Image credits →
In wave 2, the adamant dragon's poison attack and rune dragon's electricity attack can both be avoided by moving out of the way; however, it may be hard to do this alongside dodging Galvek's fireballs (which should take priority). For this reason, using antipoison and insulated boots is recommended as a backup.
One strategy to make wave 2 much easier is to stand underneath the adamant and rune dragons, as they will back into a corner and be unable to move or attack the player, allowing the allies to deal most of the damage. When Galvek prepares a fireball, run to the other side of the dragon. Since both are 5x5 in size, there is ample room to ensure not being hit by the fireball. Doing this will negate all damage taken. There will then be time to eat and use potions. Alternatively, since the dragons are so large it is possible to avoid the fireball by moving two tiles while staying under the dragon, preventing all damage.
Galvek will finally confront you for a fight. The dragon has 1,200 Hitpoints and four phases. Two brutal black dragons will then drop down, but the leaders will hold them off for you so you can deal with Galvek. There are no checkpoints during this fight.
Dragonfire
In addition to using all three forms of combat, Galvek uses high-damage dragonfire, and purple dragonfire that deactivates prayer. The following table calculates how much protection is necessary for these two attacks.
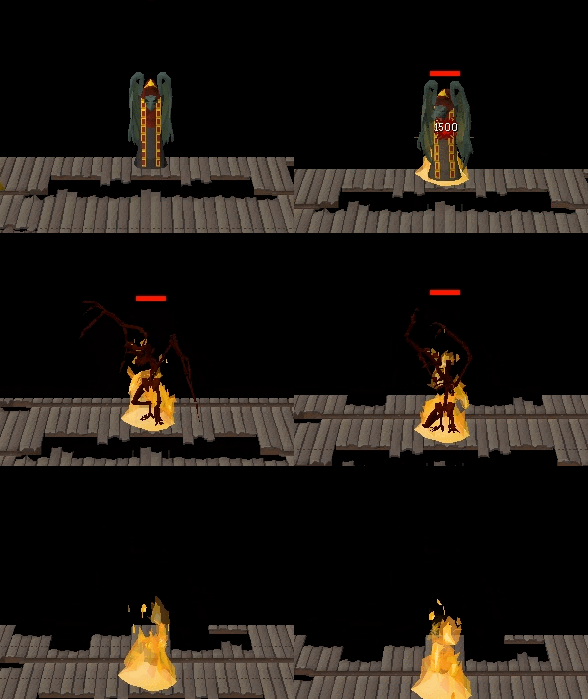
Phase 1 (1200-900 HP): Galvek can place fire traps in set positions, which if touched, will deal up to your max health in damage in a 3x3 area. They automatically explode after a set amount of time or if Galvek is forced into the next phase. Players should remain on a line running north-to-south in front of Galvek, between the east and west fire traps. Pray Magic during this phase. Galvek can also teleport the player in front of him.
Phase 2 (900-600 HP): Galvek will harness the power of air on the west side, and begins to use Ranged attacks. He can launch a hurricane that will drain stats, especially run energy. Pray Ranged from this phase on. Drinking a dose of stamina potion during or after this wave is recommended to restore run.
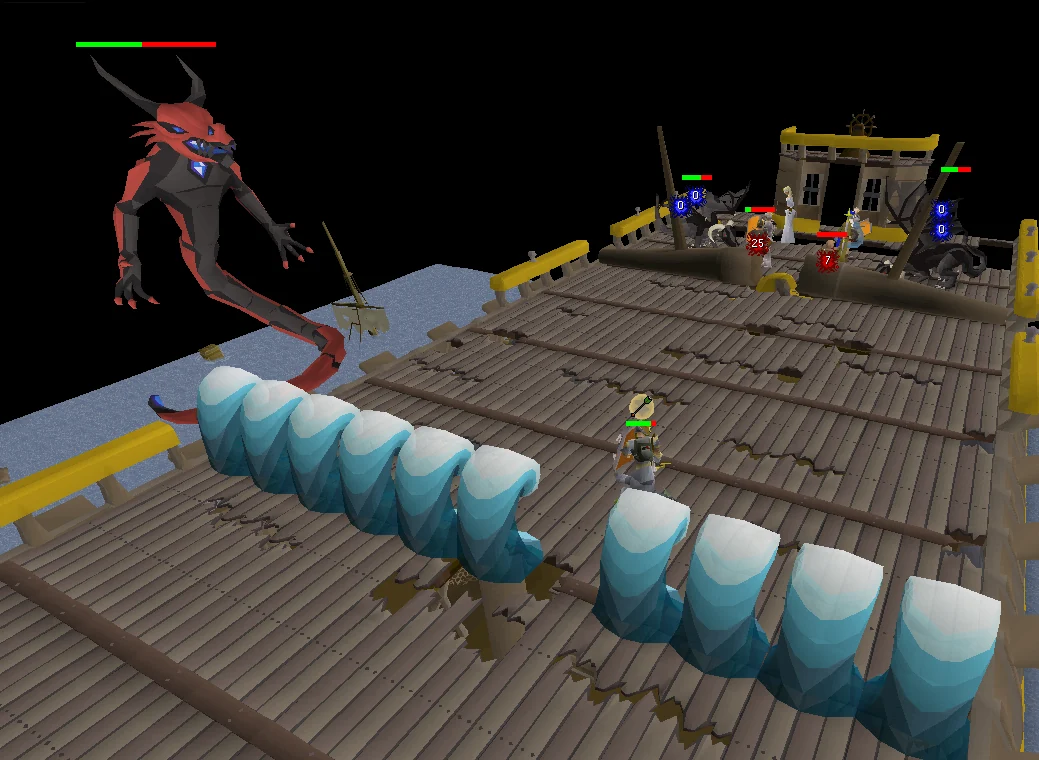
Phase 3 (600-300 HP): Galvek will harness the power of water on the east side. He can launch a tsunami, which will sweep across the ship from north to south or south to north, and must be avoided by standing in the one-tile gap as the wave passes. The tsunami can deal 70-120 damage if you are hit. After launching the tsunami, he will follow up with the launched fireball attack, which must be avoided alongside dodging the wave. Warning: Turn Auto Retaliate off, otherwise there's a chance you'll walk into a tsunami when he attacks you.
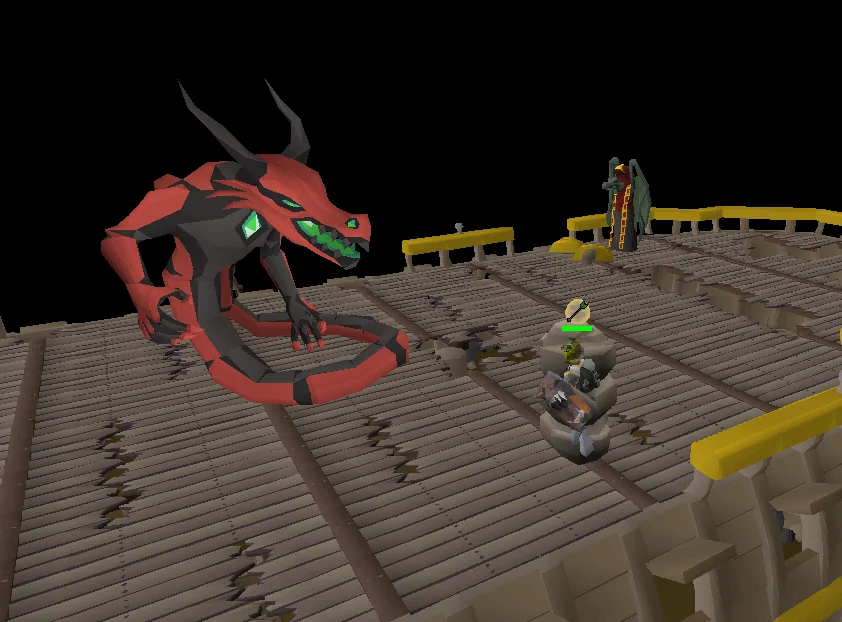
Phase 4 (300-0 HP): Galvek will harness the power of earth, landing on the middle of the ship. He will launch earth projectiles that look like slow-moving rock balls at the player which entomb the player in stone if they are hit. These must be avoided by moving one tile away, otherwise the player may be unable to dodge the next fireball. If you are hit, it is possible to survive if a fireball is not fired. However, if it is fired while you are stuck it is best to immediately teleport out.
For this fight, it's highly recommended to use Ranged, as while he is weakest against stabbing attacks, he is just as weak against Ranged. His high health pool means that Ruby bolts (e) can deal up to 100 damage, which significantly speeds up the battle. Once he is below 150 health, players should switch to Diamond bolts (e).
This fight can take multiple tries at a low level because of the randomness of the Ruby bolts (e) that do the majority of the damage. It's highly likely that in the player's first few tries, they may need to teleport out in the event of food shortage. Using Super restores alongside Saradomin brews in a 1:3 ratio will prolong the fight and give players a better chance of defeating him.
If the player is having trouble with Ranged, it is possible to defeat Galvek entirely with melee, provided the player has high melee stats (90+ in Attack and Strength and high Defence). Players with 90+ Attack and high Stab bonuses will consistently hit Galvek, reducing his health rather quickly, and at a much more consistent rate than utilising Ruby bolts (e). Another advantage to a melee attempt is that Galvek's own melee attack is far less accurate than any of his other standard attacks, provided the player has a high Defence level. Players should equip a Dragon hunter lance or Zamorakian hasta and Dragonfire shield and have Protect From Magic and Piety active for the entirety of the fight, and should equip tank armour. Reducing Galvek's defence with a Bandos godsword or Dragon Warhammer early in the fight helps as well.
If both the player and Galvek die at the same time, he doesn't need to be fought again. When you go to the fleet, the cutscene of Galvek dying will play.
11
End of the Battle
Once Galvek reaches zero health, he spirals out, falling to the ground. With his last, dying (dragon)breath, which shoots backwards, Zorgoth is completely incinerated. With Galvek slain and the Dragonkin menace defeated, the battle has been won.
You will be brought back to Burthorpe, where you, Unferth, and Neite will mourn Bob's death. Make your way back to Alec and inform him of your achievements; he will be impressed and initiate you as a member of the Myths' Guild.
The story kin-tinues
If you have completed While Guthix Sleeps before completing Dragon Slayer II, an extra cutscene will play before the quest is completed.
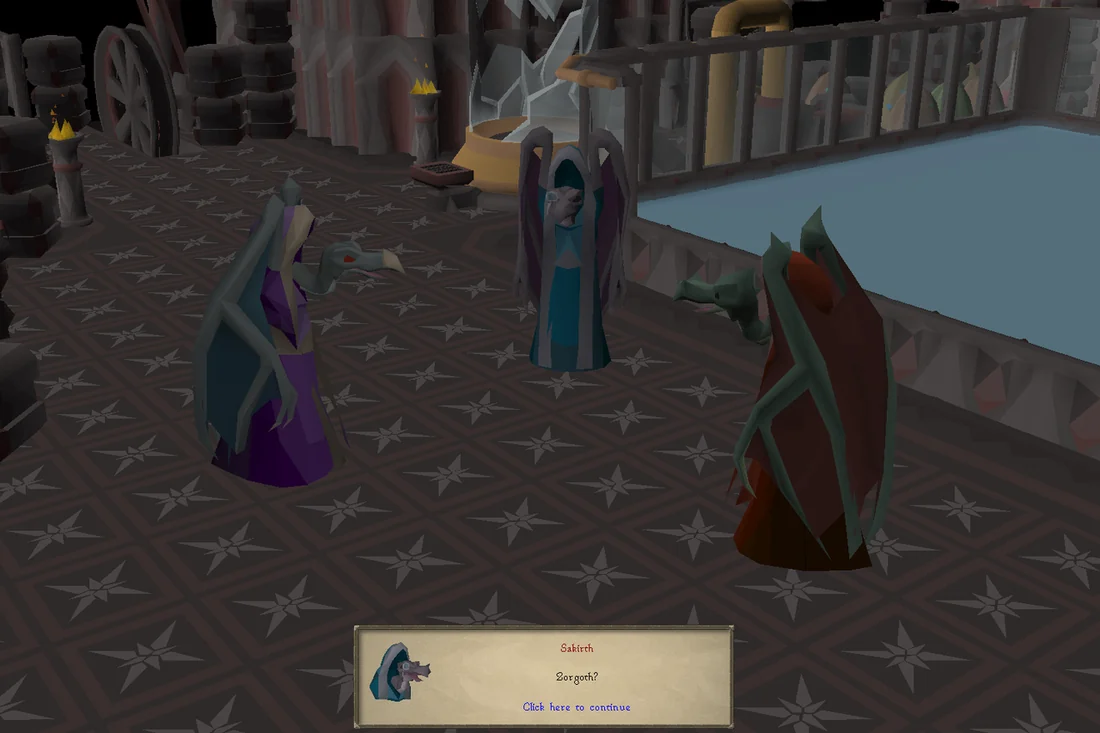
Meanwhile, back in the Lithkren Vault, three Dragonkin — Strisath, Sithaph, and Sakirth — will break free from their stasis chambers, noting that Zorgoth is dead and someone has used the Stone, and agree to bring terror to the mortals who wish to claim its power.
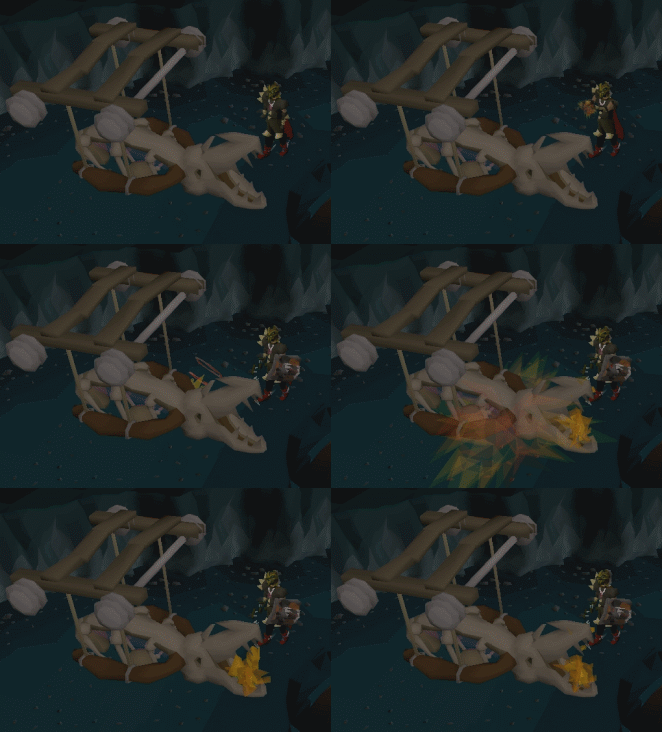
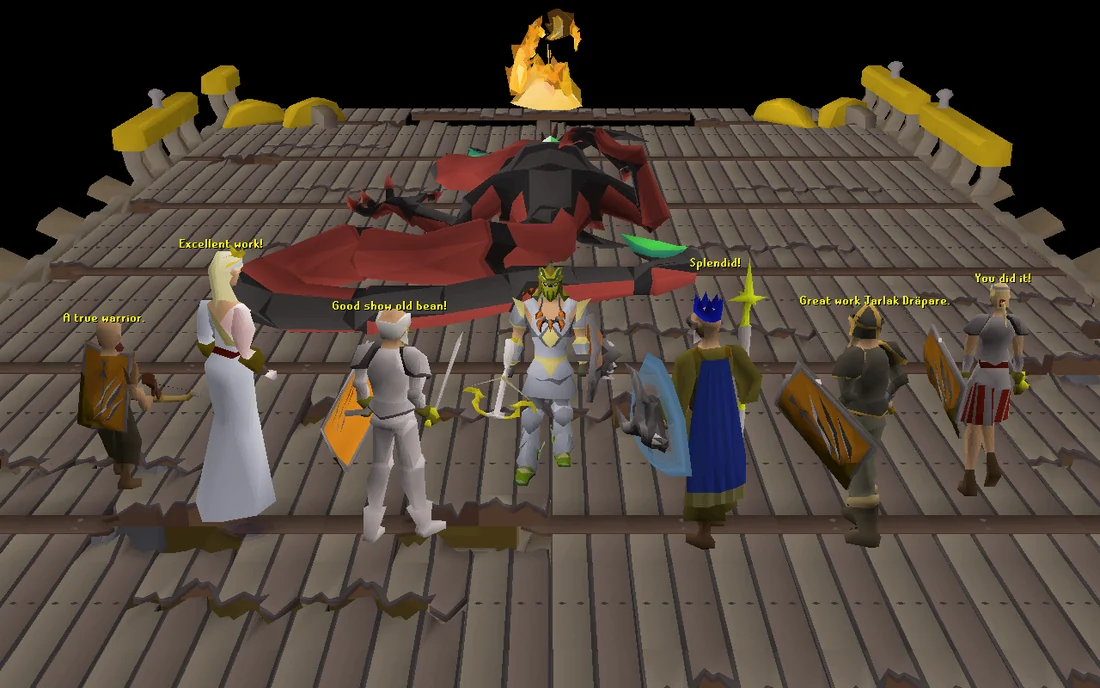
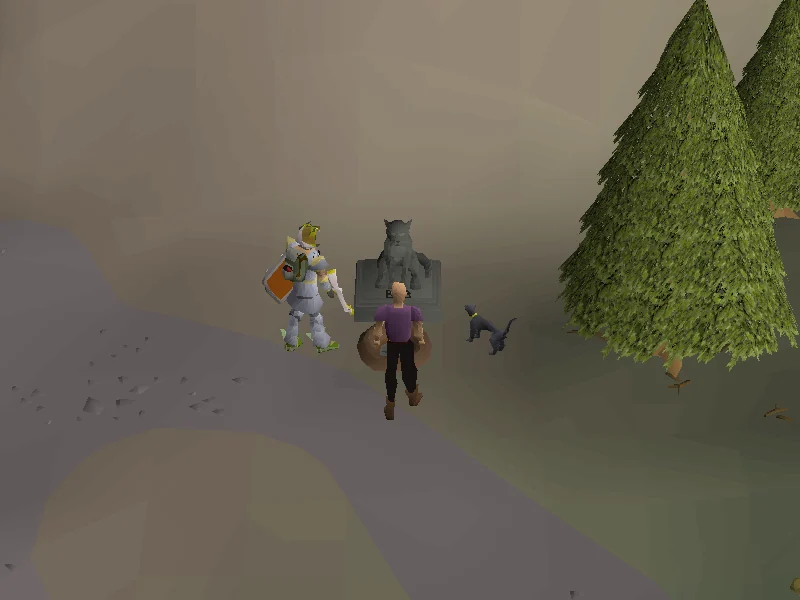
Show animation: Zorgoth incinerated by his own creation.Zorgoth incinerated by his own creation. Image credits →Being congratulated after defeating Galvek. Image credits →The player, Neite, and Unferth at Bob's grave. Image credits →The dragonkin awaken in the Lithkren Vault. Image credits →
Congratulations, quest complete!
Quick checklist 147 instructions
Use this when you already know the route. The full walkthrough above includes explanations and diagrams.
Starting off
Talk to Alec Kincade outside the Myths' Guild (spirit tree to Feldip Hills) to start the quest.
Say: How can I gain access to the Guild? → Yes.
Talk to Dallas Jones at the Karamja pub at Musa Point. The fastest way there is amulet of glory to karamja, alternativley to take the boat from Port Sarim.
Say: Yes I know it well.
Go to Elvarg's Lair under Crandor and talk to Dallas Jones (shortcut via the volcano on Karamja).
Right-click use your pickaxe on the Northern wall in the room you defeated Elvarg, then enter the tunnel. (Marked on minimap red wall line)
Investigate the Ancient Mural to the north. A level 100 spawn will attack you. Kill it.
Investigate the mural again.
Talk to Dallas Jones.
The House on the Hill
Head to Fossil Island in the basement of the House on the Hill and talk to Dallas Jones.
Say: Ask about the island.
Find the missing 24 map pieces and use them on the map in the middle of the room. Note: You can hand your pieces to Dallas to save inventory space - Hand in 8 map pieces within the house before heading outside to save time.
Search the open chest north of the map for 5 pieces.
Go upstairs, search the open stone chest on the north wall for 3 pieces.
Go outside, search the Fungi just north of the staircase for 4 pieces.
Search the Hook briar south of the house for 7 pieces.
Run to the east, search the mushtree for 5 pieces.
Talk to Dallas Jones and solve the map puzzle.
Say: Let's talk about the investigation. → Let's do it!
Pieces can be clicked to rotate them, and also dragged to swap them.
Talk to Dallas Jones again.
Talk to Jardric at the museum camp.
To Lithkren!
Bring 8 oak planks, 10 swamp paste, 12 nails (more may be needed as you may bend them), a hammer, and a saw to the west side of the island (on the coast just south-west of the "Mushroom Meadow" Magic Mushtree) and build a rowboat.
Talk to Dallas Jones and board the boat.
Say: I'm ready.
Head north-west from the boat to the ruined courtyard, and climb up the western stairs.
Climb down the trapdoor to the south, down the staircase to the north, and north down another staircase.
Talk to Dallas Jones.
Search the skeleton to the east and read Aivas' diary.
Talk to Dallas Jones again.
Bob the Cat
Find Bob the Cat with your Catspeak amulet (e) and talk to him. You may choose to world hop at the Catherby archery shop to find him quickly.
Talk to the Sphinx in Sophanem.
Say: Ask the Sphinx for help with Bob's memories.
The sphinx will enchant you. You can now talk to cats without the catspeak amulet!
Robert the Strong
Bring your seal of passage and make sure you have 1 free inventory space! Note: You can still use the bank run by 'Bird's-Eye' Jack without the seal; however, it is needed to speak to the Oneiromancer.
Head to Lunar Isle and talk to the Oneiromancer.
Say: Bob's memories. → .Yes.
Crush the astral rune with a hammer, then grind the astral rune shards with a pestle and mortar.
Make a dream potion by filling the dream vial with water (sink west of bank in town) and adding your goutweed and ground astral rune.
Gear up for a fight, light the Ceremonial Brazier (located in the largest building on the island), and use your Dream potion on the flame.
You may leave to prepare by using the giant history book at the entrance, then rejoin the fight at any time by talking to Bob again.
Talk to Bob and Not Bob, then exit out of the dream to gear up if you are not fully prepared. This also allows you to clear out the tinderbox and fill up with combat supplies.
Re-enter the dream by talking to Bob outside the brazier, and then head through the barrier and kill Robert the Strong.
He can't be fought with ranged or magic, bring melee gear and a crush weapon.
He can hit heavy damage through Protect from Missiles but it reduces damage taken. Using chivalry or piety is recommended to speed up the fight, as the most challenging part about this fight is lasting long enough through the damage taken.
When he shouts See if you can hide from this!, run behind one of the pillars to avoid his special attack. If it hits you, it can deal up to 60 damage and will knock off your prayers.
Super combat potion, an inventory full of food and a prayer potion are highly recommended. Do not underestimate this fight!
Note: If you leave the dream, you do NOT have to remake the dream potion! Talk to Bob to re-enter the dream.
The dragon key
Talk to Bob again.
You now need to collect the four parts of the key to open the door on Lithkren.
Karamja key piece
Head to the south-eastern coast of the Kharazi Jungle and down the staircase into the maze. Turn off Auto Retaliate.
Navigate to the centre of the maze and take the key piece.
Avoid spikes and traps with thieving and agility.
Use protection prayers to protect from the golems' attacks.
Red: Melee
Green: Ranged
Blue: Magic
Once you have taken the Dragon key piece, the plinth can be used to transport you out.
Morytania key piece
Talk to Reldo in the Varrock Castle library.
Say: Ask about Tristan.
Search the second bookcase from the north on the west side of the central row (see this image).
Talk to Reldo again.
Say: Ask about Tristan.
Go to Port Phasmatys and speak to Sarah, west of the bank.
Bring a dragonstone, 2 molten glass, a glassblowing pipe, and a chisel to Ava in Draynor Manor.
Say: I need your help with a key piece.
Use your glassblowing pipe on your dragonstone and use the inert locator orb on Ava to get a locator orb.
Head to Mort Myre Swamp and use the locator to find the buried key piece. Bring food as the locator hurts you every time you use it.
The location is random inside the swamp. Each time you use the locator it will tell you which direction to go.
Start at BKR and feel your locator device.
If you get north-east, it will always be the lone purple spot that you need to cross the bridge to get to.
If you get south-west, south, or south-east, go to the centre of the subdivided area and scan again. For example, if you got west, go to the centre of the blue subdivision and scan there again. If you get west again, you've narrowed it down to a single dig spot.
Dig up the dragon key piece.
Ungael key piece
Ask Brundt the Chieftain in Rellekka about the dragonkin fortress.
Say: Ask about the dragonkin fortress. or → Ask about the dragonkin fortress. if you don't own a seal of passage or → Ask about the dragonkin fortress. if you haven't started the Fremennik Exiles quest, whichever refers to the fortress.
Prepare for a fight with Vorkath. See Vorkath/Strategies for recommended setups.
Super antifires and Anti-venom+ potions are highly recommended.
Set your quick prayers to protect from Magic and your best ranged attack prayer to allow easy re-enabling prayers.
Elite Void Knight equipment together with a crossbow and ruby/diamond bolts is recommended.
Turn off run to make evading the fire barrage special attack easier. Use Ctrl+click on tiles to run to that tile whenever necessary.
Talk to Torfinn on the dock to the north to go to Ungael.
Say: Yes please.
Kill Vorkath.
Before the fight, put on Protect from Magic and drink your Anti-venom+, Super antifire, and Ranging potions.
Make sure to re-pot during the fight, Super antifire and anti-venom has a short duration (both 3 minutes).
Vorkath has several different regular attacks, including a melee attack. The two important ones are:
Orange fireball shot into the air - Move at least two squares away from your current location.
Pink fireball shot at you - Your prayers will be knocked off, turn them back on (using quick prayers).
After every six regular attacks, Vorkath will use one of his special attacks:
He will spit acid all over the crater and start firing fireballs very rapidly at your current location. Find a straight line clear of acid spots and walk back and forth along it to avoid the fireballs. See the Vorkath strategy page for advanced tactics.
He will hit you with Dragonfire barrage, freezing you in an ice block. He will then summon a Zombified spawn that slowly walks to you, if it reaches you it will deal 30 damage. Kill it before it gets you, using Crumble Undead will guarantee a one-hit kill. You will stay frozen and Vorkath will stop attacking you until you kill the spawn or it reaches you. A possible strategy is to bring a slayer staff and setting the auto-cast to Crumble Undead, to reduce the need to click as accurately right away.
After you kill him, climb over the ice chunks in the north of the crater (if required you can teleport out to restock for a dungeon part, Vorkath will remain dead).
Walk along the path to the north-west of the island and enter the cave.
There are venomous spiders inside, don't forget your Anti-venom+.
Pull the lever in the south-west section, then run to the room on the east wall before the timer runs out (you must have at least 15% run energy).
Search the stone chest for a dragon key piece and an ancient key.
Kourend key piece
Enter the crypt whose entrance is found in the southern part of the Graveyard of Heroes. Follow the dirt path south to a small building.
Caution: The crypt is full of powerful aggressive skeletons and zombies that attack with all three combat styles.
Head to the bottom of the crypt and inspect the tomb to find the puzzle.
The solution to the puzzle is different for everyone. Refer to the table below to solve this puzzle.
"The one from [Location] sat at the north of the table": Place this statue north.
"Opposite the one with [Weapon]": Place this statue south.
"The one with [Weapon] asked the .....": Place this statue west.
Place the final statue east.
Search the tomb to get the Dragon key piece.
Reforging the key
Go to the Ancient Cavern (use a games necklace to teleport to Barbarian Outpost and run south to the whirlpool).
Descend the stairs and run south to another set of stairs which lead to the mithril dragon area.
Run west and open the mithril door in the middle of the area (with the three mithril dragons clumped together). You need the ancient key to open this door.
Cast Fire Wave or Fire Surge on the three dragon heads.
Leave the room and go east down the staircase, and then go to the south-western area of the caverns, and climb up the rough hewn steps there.
Use one of the anvils here to forge the dragon key.
Return to Fossil Island and use the Rowboat to Lithkren (west of Mushroom Meadow Mushtree). Return to the area where Dallas Jones is.
Use the Dragon key on the ancient doors.
Enter the doors and head up north and speak to Dallas to start a cutscene.
After the cutscene, make sure to finish the dialogue with Jardric and Bob.
A World United
Travel to Varrock and speak with King Roald about the dragon threat.
Say: Talk about the dragon threat.
Speak with the following rulers "about the dragon threat" in any order:
Sir Amik Varze in Falador
Say: Talk about the dragon threat.
King Lathas (King Thoros after Song of the Elves) in East Ardougne
Say: Talk about the dragon threat.
Brundt the Chieftain in Rellekka
Say: Talk about the dragon threat. or → Talk about the dragon threat. if you completed The Fremennik Exiles, whichever refers to the threat.
Return to Varrock and enter the dining room north of the throne room.
Say: It's a good plan.
Make sure to talk to Bob after exiting the dining room.
The Assault
Return to Rellekka and take the boat back to Ungael by speaking to Torfinn.
Hold off the assault on your ship for 4 minutes.
Click leaks to fill them.
Click fires to douse them.
Click injured Fremennik warriors to heal them.
Click damaged masts to repair them.
There is a checkpoint after defending the ship from the assault.
Put on your dragonfire protection.
Make your way towards Varrock's grand ship, fighting a red dragon, iron dragon, and brutal green dragon on the way.
Kill the two green and two blue dragons battling the Varrockian soldiers.
There is a checkpoint after killing these four dragons. If necessary, teleport out and prepare for the next wave.
Kill the black, steel then brutal red dragons that arrive on the ship one at a time.
When Galvek does a casting animation, run away from your current location.
There is a checkpoint after killing the brutal red dragon. If necessary, teleport out to prepare for the next three dragons.
Kill the mithril, adamant then rune dragons that arrive on the ship one at a time.
When Galvek does a casting animation, run away from your current location.
These three dragons have a melee, ranged, magic, and dragonfire attack.
The adamant dragon also has two special attacks:
A ranged attack with the Blood Forfeit effect (hits through Protect from Missiles).
A poison attack that splashes and lands on nearby squares dealing lots of damage.
It is recommended to use Antidote++ or other poison immunity to minimise this damage.
The rune dragon also has two special attacks:
A ranged attack with the Life Leech effect (hits through Protect from Missiles).
An electric attack that hits nearby squares and arcs around the player, dealing rapid damage.
It is recommended to wear Insulated boots to minimise this damage.
There is a checkpoint after killing the rune dragon. Teleport out and stock up for the final battle.
The Final Battle
Kill Galvek - he has four phases that have 300 hitpoints each.
Keep avoiding his ground-targeted fireballs.
Turn your prayers back on after his pink dragonfire knocks them off.
Setting your quick prayers to Protect from Magic and Eagle Eye/Rigour is beneficial to counter this attack.
Use Protect from Magic in phase 1, use Protect from Missiles in phases 2, 3 and 4.
Phase 1: Drops eight fire traps- don't get near them or you will be hit for all your health. Stay along the north side of the ship, one square directly south of Galvek, and run two squares south from your location to avoid the fireball, and return to your original position once the attack has failed to hit you.
Phase 2: Launches transparent projectile which drains stats, especially run energy.
Phase 3: Summons waves from either the north or south end, avoid them by standing in the gap. Turn off auto retaliate to not get pulled away from the gap.
Phase 4: Launches earth projectiles. Avoid these or you will be bound, and probably die.
Ending
Return to Alec Kincade outside the Myths' Guild.
Say: Let's talk about my quest.
Congratulations, quest complete!
QUEST COMPLETE
Rewards
80,000 Smithing experience
60,000 Mining experience
50,000 Agility experience
50,000 Thieving experience
Ability to speak to cats without the Catspeak amulet
Access to the Myths' Guild
Access to the pettable dog
Ability to make super antifire potions by speaking to Primula
4x 25,000 experience in Magic, Ranged, Strength, Attack, Defence, or Hitpoints by speaking to Ellen
Access to Fountain of Uhld where dragonstone jewellery (excluding the ring of wealth) can be recharged
Access to the Pool of Dreams where players can choose to fight Galvek again or rewatch cutscenes from the quest
Access to the Wrath Altar
Access to the shop to buy the mythical cape
Access to adamant and rune dragons in the Lithkren Vault
Access to a stronger version of Vorkath on Ungael
Ability to reforge the dragon platebody and kiteshield
Ability to have a rune dragon as a Treasure Room guardian (requiring 99 Construction and 25,000,000 coins)
Ability to create an Ava's assembler by bringing Vorkath's head, 75 Mithril arrows, and 4,999 coins (or Ava's accumulator) to Ava in Draynor Manor
Ability to craft Ferocious gloves from Hydra leather in the Lithkren Vault (requires a hammer)
Ability to construct Mythical cape (mounted) in your POH
Ability to go back through the ancient doors on Lithkren and use your Digsite pendant on the Strange Machine north of the dragons. This will allow you to teleport there.
 5
5