5
5Requirements
- 25 Ranged [boostable]
- Completion of the following quests:
QUEST 42 · MEMBERS
There are rumours of a secret passageway that can be used to get to the other side of the mountains west of Ardougne. Now it's just a matter of finding it.
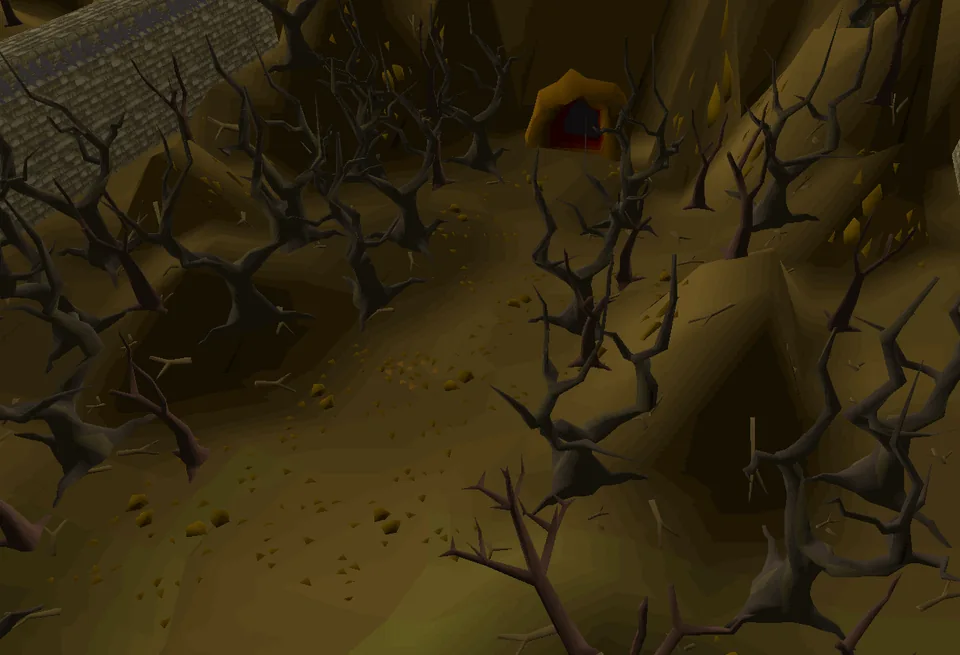
Talk to King Lathas on the first floor of Ardougne Castle.
STEP BY STEP
Follow the chapters below. Click any screenshot or diagram to view it at full size.
This quest relies heavily on your Agility skill, often making you complete a number of obstacles in succession. In most cases, failing any of the obstacles in an area will send you back to the beginning of the area, which can be quite frustrating, especially if your Agility is low. Many of the obstacles are harder to traverse if the player has a high equipment load. As the risk of all enemies besides the final encounter may be mitigated via safe-spotting or Protect from Melee, players should strike a balance between equipping Weight-reducing clothing and protective armour.
Many of the traps in the dungeon damage you based on your current health. This means that by keeping your health relatively low, you will have to use less food through the dungeon than you would if you were to eat to full Hitpoints each time you get damaged.
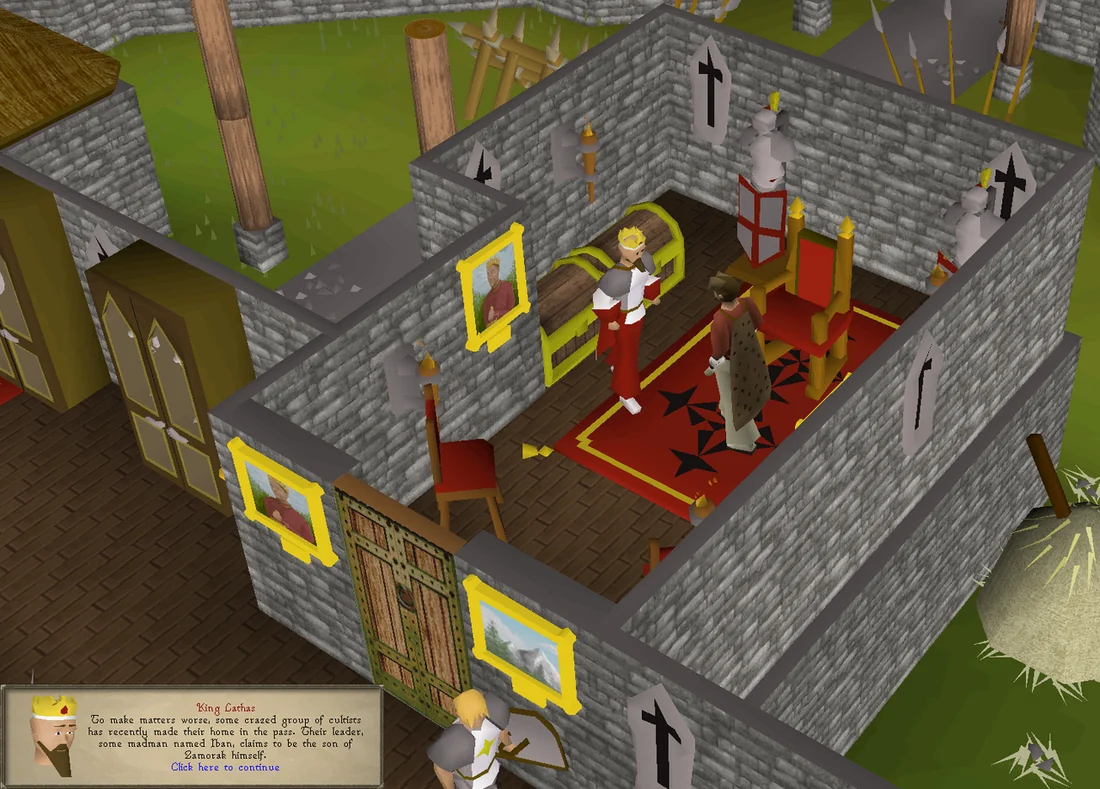
To begin, talk to King Lathas on the 1st floor (UK) floor of Ardougne Castle. He'll remind you about the Underground Pass and that it is the only way to reach the western lands in order to stop his corrupted brother King Tyras. Unfortunately, the evil Iban, who claims to be the son of Zamorak, and his cultists have moved in. He'll ask you to check in with his head tracker Koftik who is waiting for you just outside the entrance to the Underground Pass. Your mission is to find a way to the other side of the dangerous pass and report back.
This time, you'll be allowed to go right through the front gates to West Ardougne, so head through and walk all the way west through the city until you find the cave entrance with Koftik standing outside. Talk to him, and he'll explain more about the Pass. It is unlike other caves, being possessed of a corrupting darkness that breaks the will of men. He tells of the proud adventurer Randas, who apparently heard the voice of Zamorak himself inside the cave, telling him how to achieve his greatest goals. Nobody has heard of him since. Koftik instructs you to meet him next to the bridge further inside.
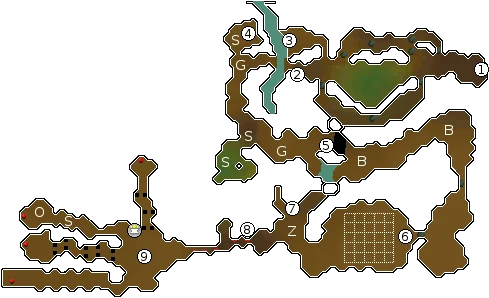
When you walk inside (#1), you'll see three paths branching off in different directions. (Warning: Do not take the middle path; the swamp will drag you down and send you tumbling down a hillside forcing you to crawl back up.) Instead, take the northern most path. Climb over a series of rocks around the swamp and get to where Koftik is standing next to a fire (#2). There is a stone tablet near the beginning. It contains an eerie text that you may read if you wish. Several more tablets will be encountered later on, written to celebrate Iban and his supposed heritage.
Talk to him, and he'll tell you it looks like there have been others in the cave already. If you want, Koftik also shows you an excerpt of the diary of Randas that he found lying around. He'll give you an oily cloth from the remains of a camp and tell you he found charred arrows as well. If you later need another one, you can search the nearby pile of abandoned equipment to get more. Use the oily cloth on an arrow, and then use the result on the fire to get a fire arrow. You can stack several of these before lighting them in case you miss.
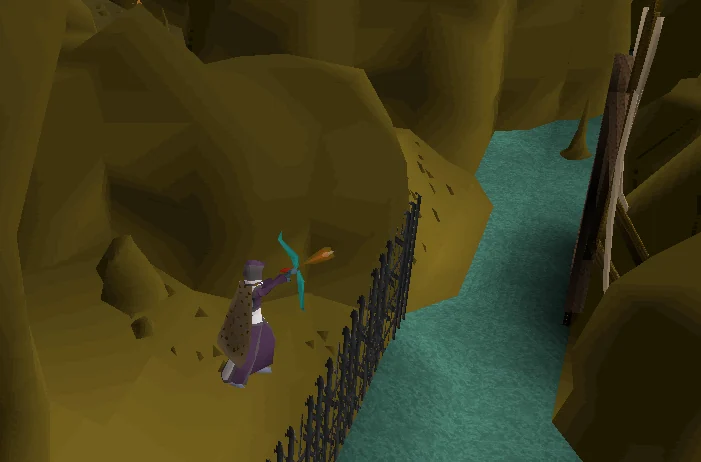
Go north to get to the small area (#3). Look across the subterranean river, and you can see where the guide rope holds up the bridge. Fire your lit arrow at the rope. If you succeed, the bridge will drop, and you'll automatically walk across the bridge. If you get the message "I can't reach that!", then move closer and adjust your position along it.
Do not pull the lever right after the bridge (it will send you back to the beginning).
Before you continue, take the plank north of the lever (#4).
|
|
Walk south from where you picked up the plank. Do not walk into the swampy area filled with blessed spiders and instead head back east (#5). You will come up on a pit and a small water crossing with a rope swing. Use your rope on the rock hanging from the ceiling above the dark pit to swing across.
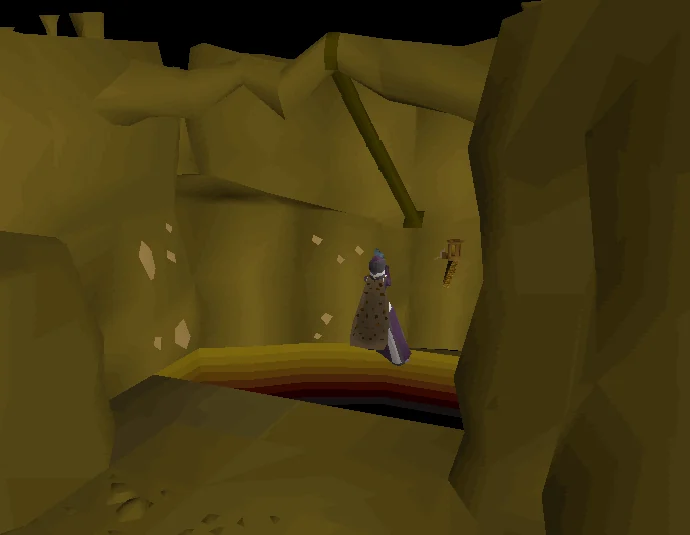
If you fail and fall, you will fall into a rocky pit and lose your rope. Follow the path on your mini-map climbing over rocks when needed to get to the muddy rock pile. You'll be placed at the very beginning of Underground Pass. You will need another rope to attempt the obstacle again. You can purchase ropes at the general store in Ardougne.
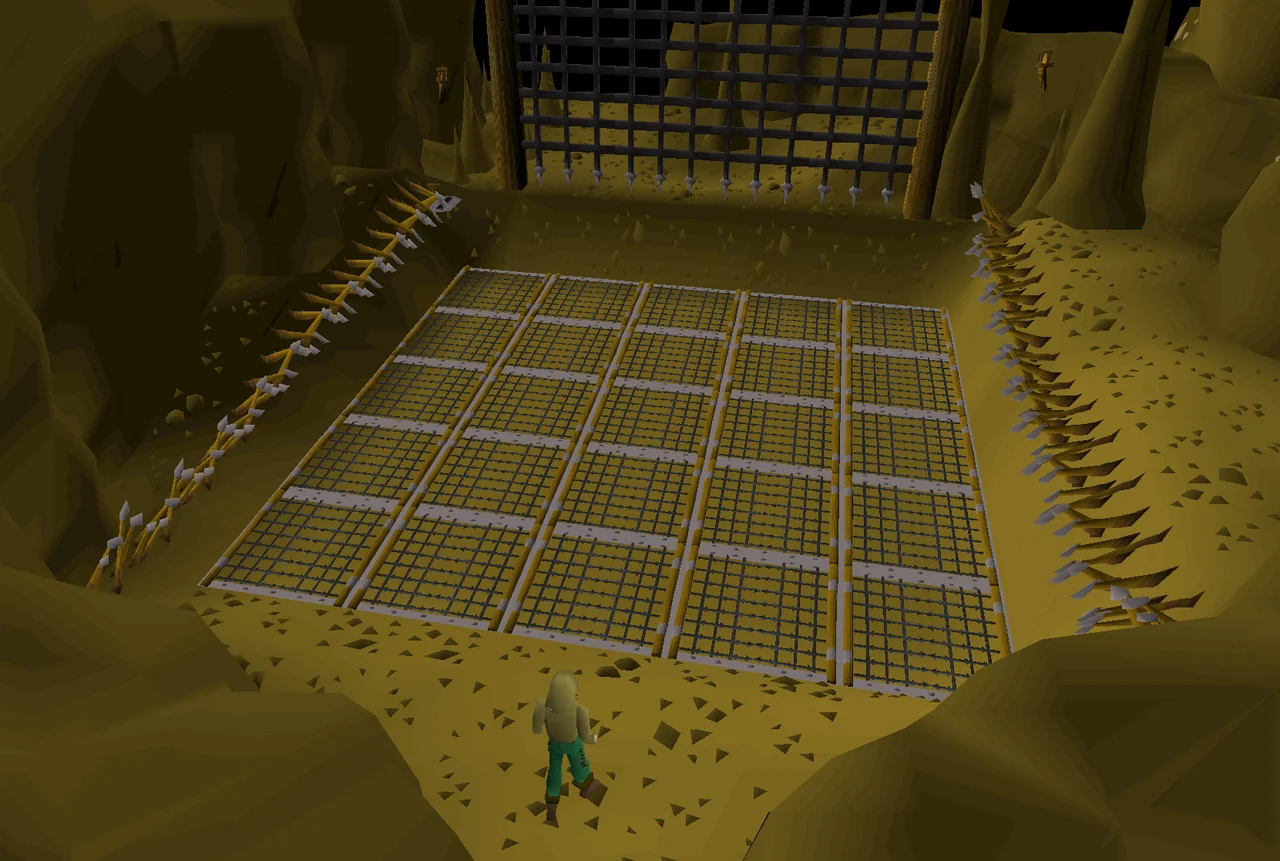
Continue down the path going east and then south. Eventually, you'll see Koftik standing in front of a grid (#6). He is being affected by the voices you have been hearing in your chat, talking about the paths of righteous men and their being beset by the iniquities of the selfish and the tyrannies of the evil. He says you have to pick your own path next.
Many of the tiles will drop you into a pit dealing 15 damage to your health. You'll need to use trial and error finding a safe path across. Once you've found a safe way across, remember it; you'll need it for Regicide. Pull the lever once you are across to lift the gate. The path is different for everyone. Not all grid paths are possible, you will never need to:
The grid puzzle always does 15 damage upon falling into a pit. Keep this in mind while trying new squares. Should you die from falling, your items will stay in the pit. To retrieve what you lost then, you must intentionally step on a square that will drop you into the pit. Once you get across the grid, there is an altar in the next important room, so you can use Rapid Heal to save some food.
Remember or write down the path you used to get across. You have to come back through here *twice* during Regicide later; the correct path is permanent and unique to each player. (Your browser will remember the path saved in the grid below as long as you don't clear your browser cache).
It can be useful to keep track of the route you have to take using the following grid:
When crossed, pull the lever on south to open the gate.
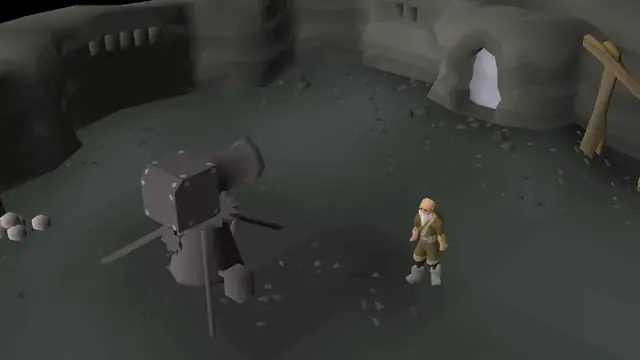
To the north there is a furnace (#7). For the moment it can be ignored, but remember where it is. If you forgot to pick up the plank by the Blessed Spiders earlier there is another one that spawns just north-east of this furnace.
Warning: If you use the obstacle pipe, it will cause you to go back to the rope swing with no return.
Head west, to a narrow corridor (#8). Approach it carefully, as there are five traps (odd markings) in the wall. (There's two on the north side followed by three on the south side.) There are two ways of passing the traps.
Warning: Do not stand on the tile in front of an armed trap for a prolonged period. It will repeatedly hit very fast and could be fatal.
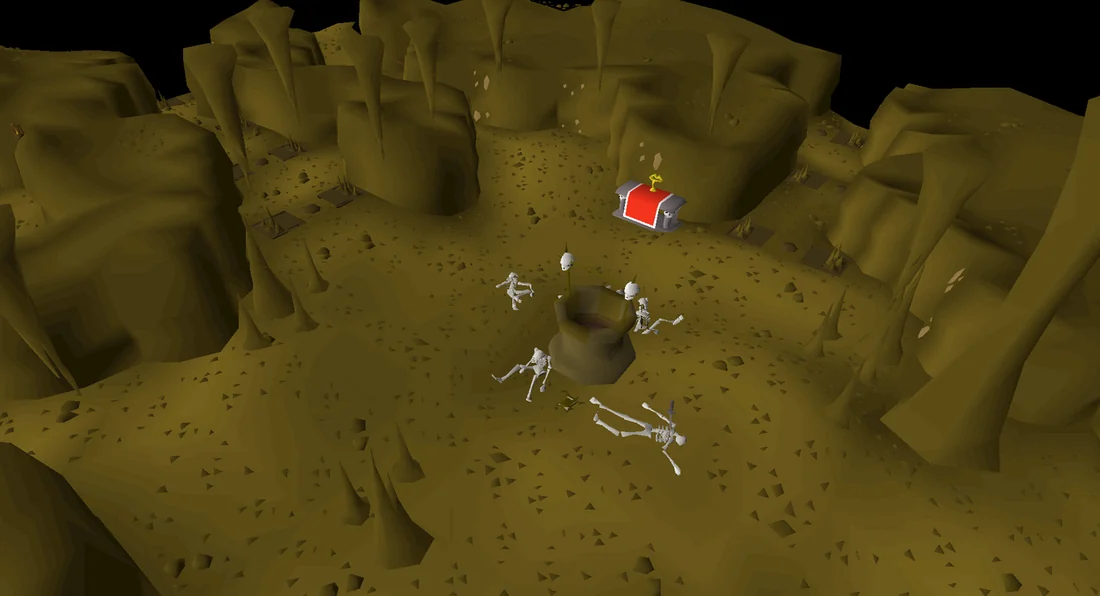
Whichever method you choose, you will eventually arrive to an area with an altar (#9) (note: this is a good opportunity to activate the Rapid Heal prayer and leave it on until the orbs of light have been destroyed - this will save on food which may be required later on) and a large, rather sinister-looking well in the centre. At this point you will be unable to climb down the well as a magical force prevents you from doing so whilst there is still light. Read the old journal lying by the well; it was written by Randas and describes how he had orbs of light blessed by Saradomin to keep the darkness at bay. You must destroy these orbs to proceed. To complete this profane task, there are four different paths branching off from this room:
Now that you have all four of the orbs, back track a little bit. Go back to where the furnace was (#7) (remembering to be careful of the traps in the wall). Use each of the orbs on the furnace to destroy them.
Make sure to top off your prayer if needed and head down the well (#9) descending another level. If you need food, search the crates to the west to receive two salmon and two meat pies.
There is some food in the crates right when you arrive down the well (#1).
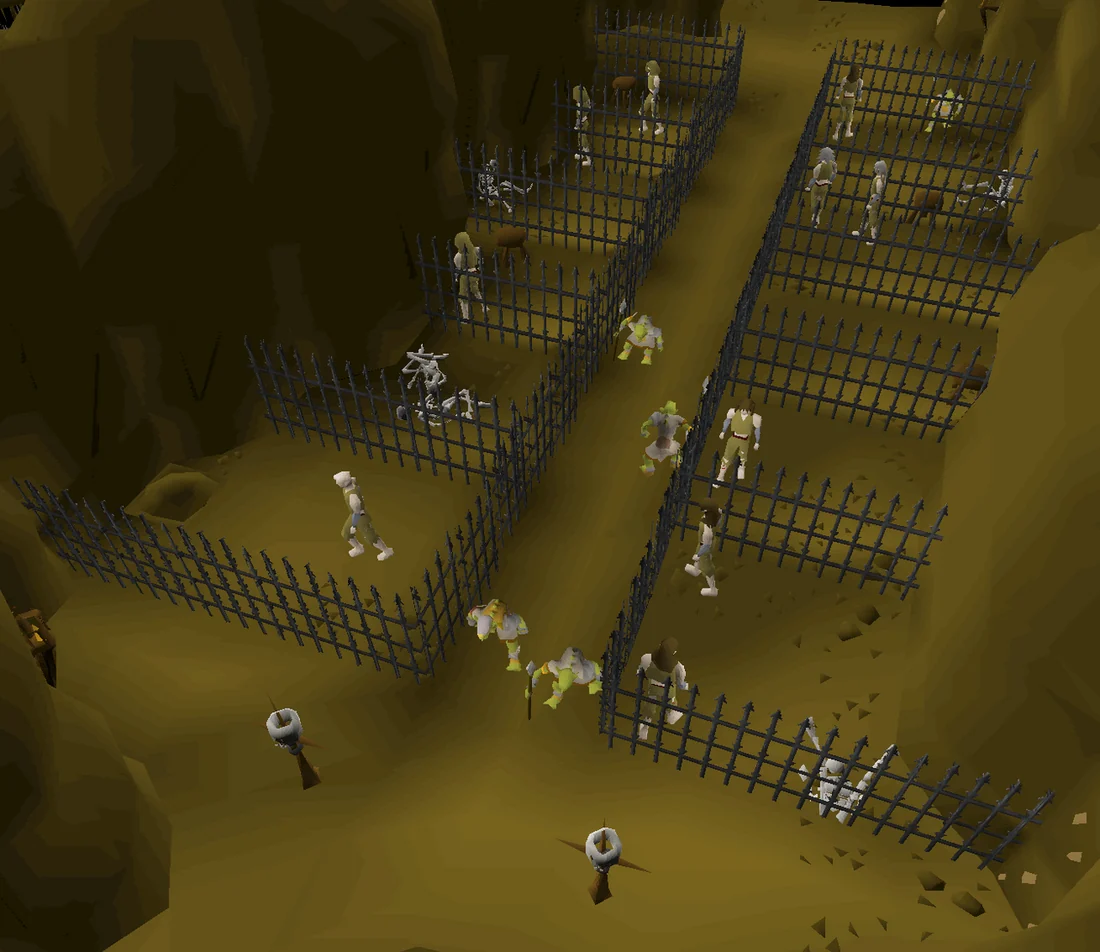
Head west through the cave, and you'll find yourself in an area with a few cages containing slaves guarded by goblins. You may enter the cells by picking their locks to talk to the slaves if you want ; their dialogue varies from pure gibberish to a friendly offer to cook you into soup. Pick the lock on the first one on the left (south-east). You'll notice that there's a rather odd-looking patch of ground at the back of it. Use your spade on this to dig through, and you'll find a hidden tunnel that will take you through to the other side (#2). Do not drop your spade in case you fail the narrow ledge.
Edge across the narrow ledge (#3), and you'll be near a maze of raised beams (#4). However, you can skip this step with 50 Thieving as seen in the next paragraph. To get through it, you'll need to hop over a number of obstacles. If you fail, you need to climb back up one of the ramps nearby, often setting you back a few steps.
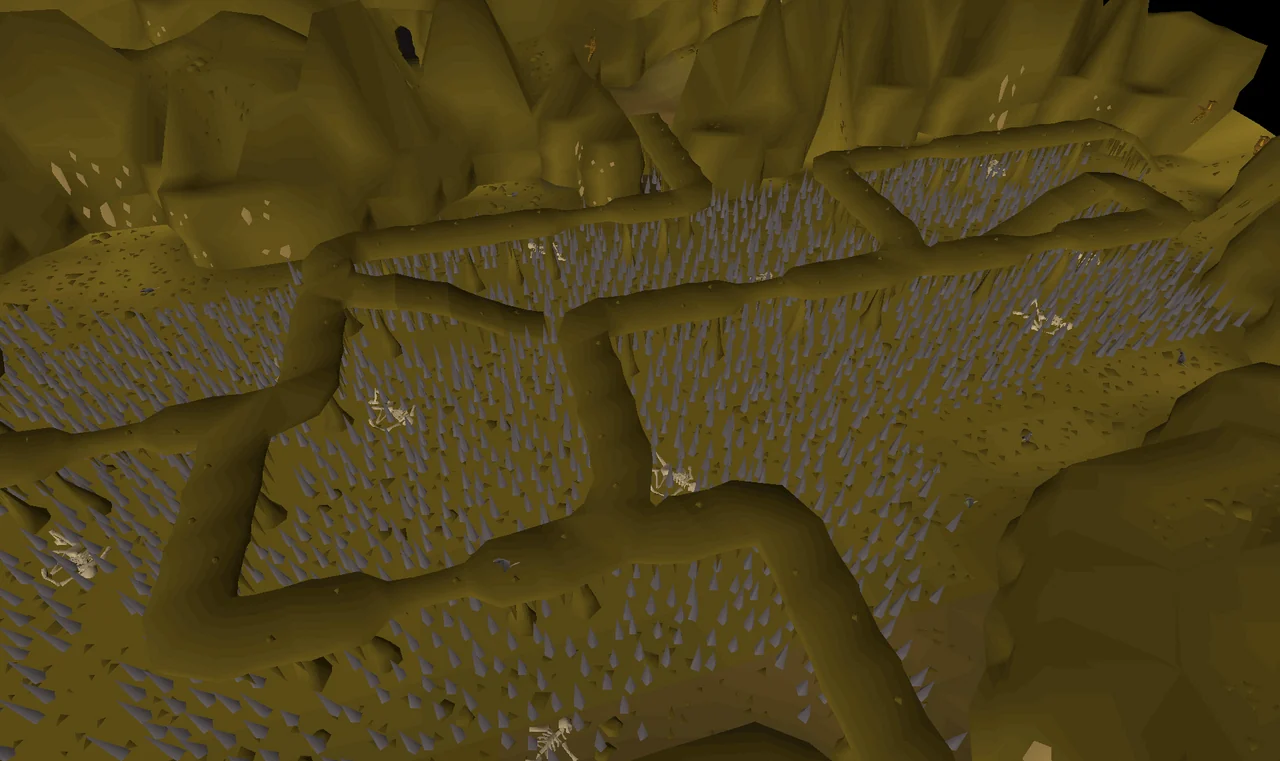
To get through the maze:
If you have 50 Thieving, go a little bit further south past the maze to a gate that you can pick the lock of (#5). It completely bypasses the whole maze. Once through, head south to meet Koftik. He has clearly been corrupted by the voices to the point of insanity, although he claims the contrary himself. Squeeze through the pipe entrance to get into the next area (#6).
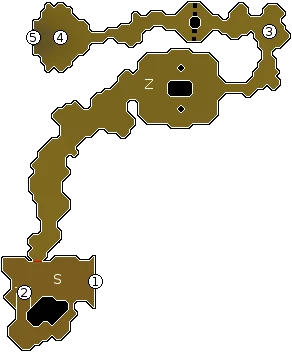
In the next room, you'll find a group of skeletons and a unicorn in a cage (#2).
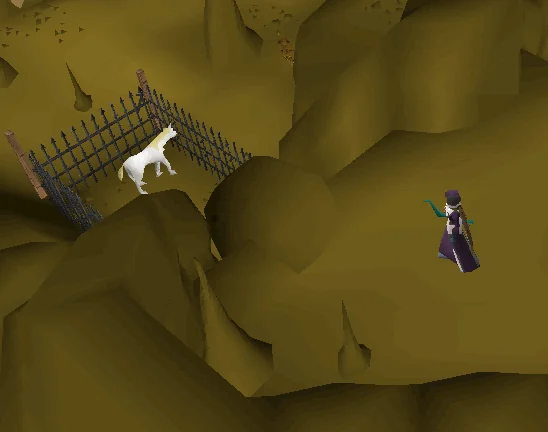
You'll need its horn, but you can't get into the cage to get it. If you search the cage, you'll find a loose piece of railing. Note: If you already have a piece of railing in your bank, you're unable to obtain a new one. Take this, and head (south) up the path above where the cage is you'll find a large boulder. (Before moving the boulder, make sure that you have no items on the ground. As after the boulder is moved they will be gone!) Use the loose railing to pry it loose, and crush the unicorn. Now, you can go back down and retrieve the unicorn horn by searching the smashed cage. Proceed through the tunnel entrance and head north.
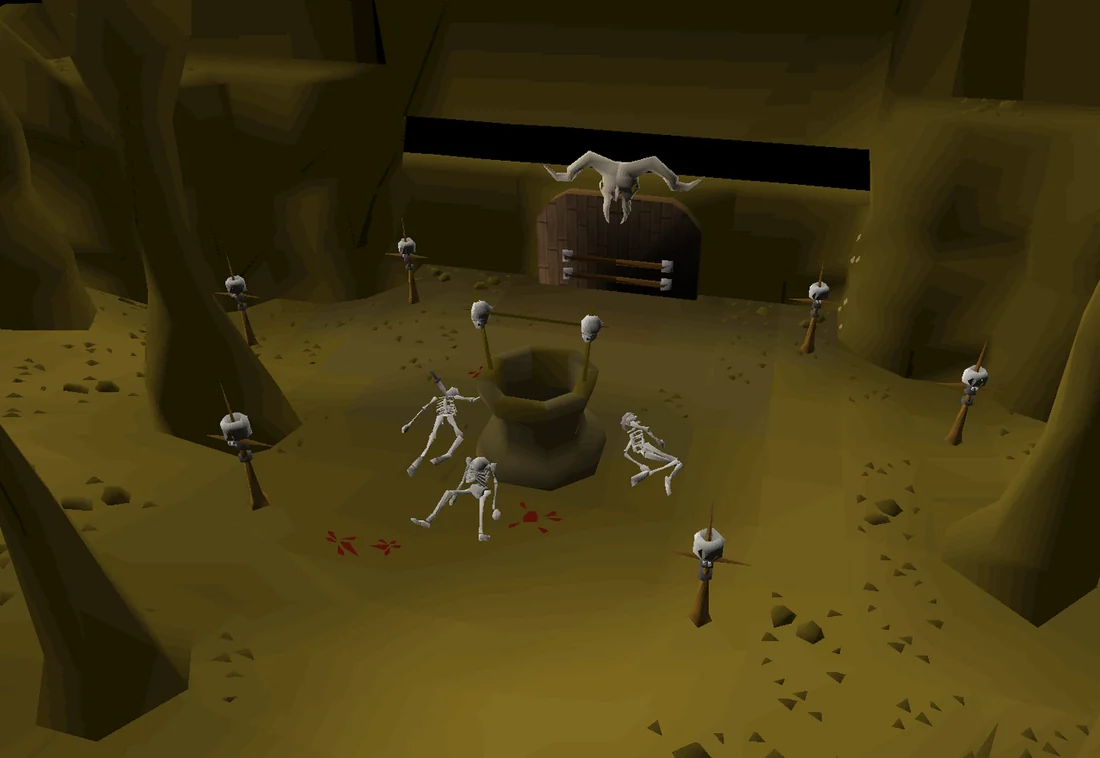
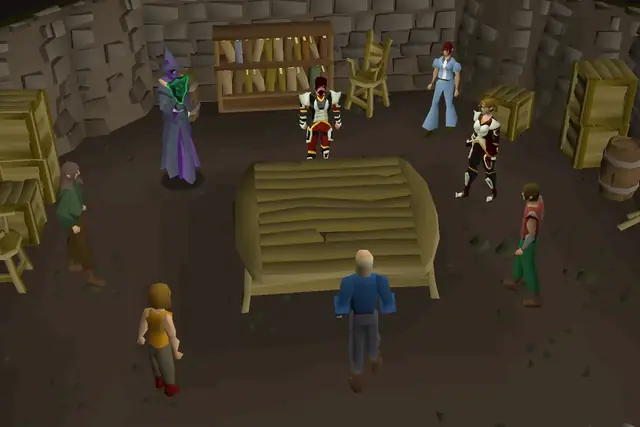
Heading north through the cave, you'll come to a small group of Paladins named Sir Carl, Sir Jerro, and Sir Harry, who have made a sort of camp (#3), having been tasked by Lathas with the same mission but unable to open the locked Doors of Iban. Upon speaking with any of them, they will offer you some nourishment in the form of two loaves of bread, two meat pies, a bowl of stew, a prayer potion (2) and an attack potion (2). Afterwards, they suggest that you leave and let them finish the task.
Unluckily for the paladins, you need the paladin's badges that they carry and the only way to get them is to slaughter them. They're all level 62 and attack with melee. It is possible to safespot the paladins by attacking them and running west where they will not follow you.
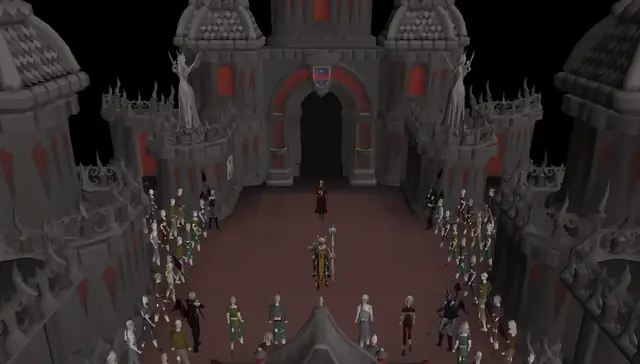
Head west keeping your eyes out for the traps there. Again, you can foil them by placing the plank on them. Keep going west to where there's another well (#4). Its inscription says that the doors of Iban will not open as long as there is a beating, good heart present and the well demands the offering of such a creature's remains and three crests of the blessed. Use the unicorn horn and the three badges on the well to open the large doors (#5) conform its inscription. Once you have all three badges (red, blue, and green), deposit them into the well along with the horn. The doors of Iban will open.
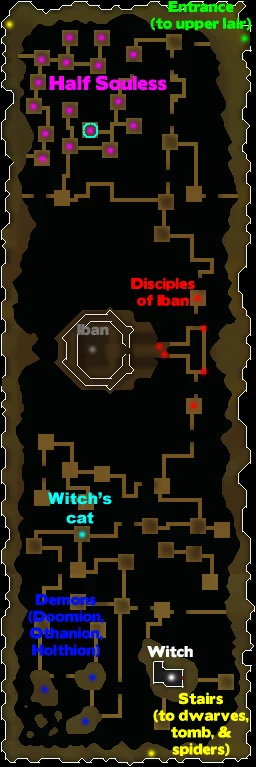
Now, you're in the largest area of the Underground Pass. Around all edges of the area is a rock ledge to walk on. The middle is a large, open area with a maze of walkways, most of which are broken. If you try to jump across them, sometimes, you will fall and end up taking big damage when you hit the ground below, as well as being in a large area filled with Soulless. Keep in mind that this area has been known to take well over an hour to clear, so be persistent.
The doors lead to a massive cave and Koftik will appear again, declaring the place his home and Iban to be his friend. He mentions some 'foolish dwarves' that have taken up residence to the south and resist Iban. He tells you to slay them in his lord's name like you did the paladins.
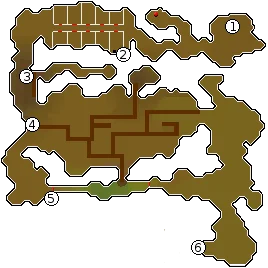
For now, ignore the walkways, though do take note of the locations where you can get onto them. Walk down along the east wall and then west until you find a cave into which you can descend. Descend down into the cave. (Map of bottom level is found in next section.)
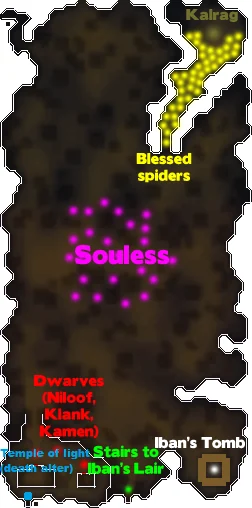
There are three dwarves named Niloof, Klank, and Kamen in a small fenced area with two buildings just to the west. Niloof will be surprised to see a human and explain their group consists of miners unaware of the evil of Iban. The son of Zamorak has corrupted the only exit into the western lands, the Well of Voyage, instead using it to dispose of his victims. You suggest to kill Iban, to which Niloof replies to seek out Iban's only confidante and guide, Kardia, the witch who lives on the platforms above. He then gives you two more pies and a pizza.
Klank explains the dwarves are the only ones not corrupted by Iban's voice. All humans have become soulless slaves of his, or possibly of Zamorak's himself. Those who resist are locked in cages until they are broken. He gives you a pair of sturdy gauntlets (called Klank's gauntlets) to protect against the soulless' vicious bite.
Finally, Kamen is a little fried and asks you if you want some of his brew which 'will blow your head off' and advises to keep it away from naked flames. If you decline, he will offer to sell you some bread, stew, and a meat pie for 75 coins; if you accept, your Agility level will temporarily decrease by 4; he will then still offer the food for 75 coins.
There's a tinderbox spawn in the smaller eastern building, if you didn't bring one.
Go back through the cave staircase used to enter the area, south-east of the dwarves. Go north-east until you reach the first walkway that can be used. Walk along it, jump the gap, and take the first turn south to find Kardia's house (the witch).
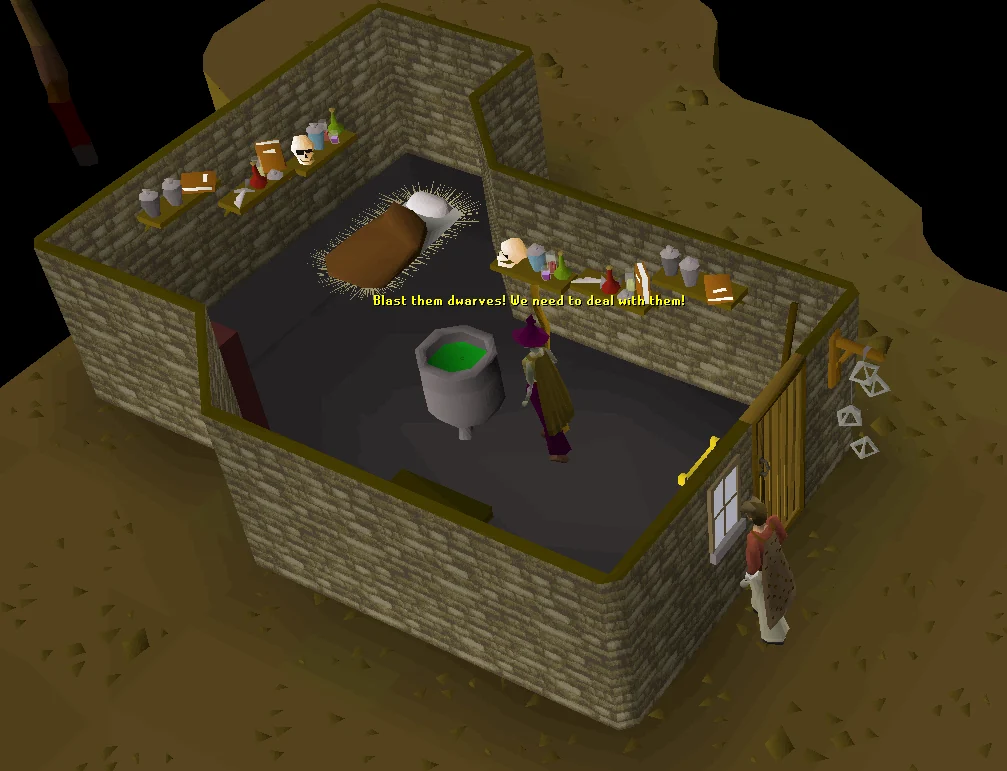
Attempt to open the door, or search the window, and you'll hear her talking to herself about her missing cat. Head north, take the western path, hop across the gap and then take the north branch of the path. Follow it until you find the cat. It will be a yellow dot on your minimap. Grab it and go back to the witch's house again (if you drop the cat, you'll have to wait for a moment before you can grab it back).
Knock on the door. You'll automatically hide behind the corner while the witch gets her cat. While she's distracted, open the door and sneak into her house to search the chest. You'll get a stat restore potion, a super attack potion, the History of Iban, and a Doll of Iban.
The book is not needed to progress the quest, and can be dropped. It contains the backstory of how Kardia used the doll to resurrect the Black Knight Iban, slain by the White Knights in the Dawn Ascent.
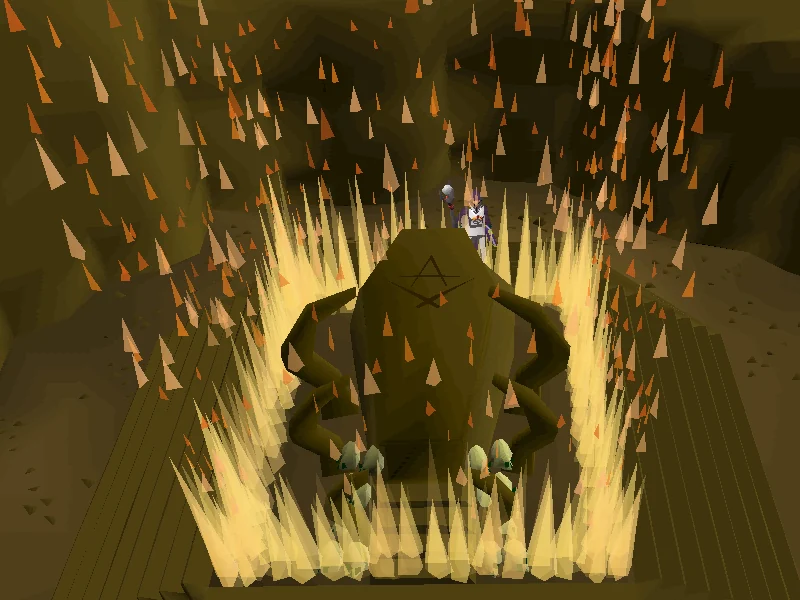
Either fall or head back south to the cave to get back downstairs. Iban's tomb is in the south-eastern corner but cannot be opened. If you try to do so, a yellow claw will hit you for 10 damage. A nearby stone tablet says that only by burning the tomb will the corpse become available.
| “ | Only as flesh becomes ash, and wood becomes dust, |
” |
Enter the larger building in the dwarven camp and pick up the bucket in the corner. Also speak to Niloof about the doll and the witch; he will confirm that you need to reverse Kardia's ritual and then throw the doll into the Well of the Damned. Next, go into the smaller building and pick up the tinderbox. Use the bucket on the barrel inside of the smaller house to get some of the dwarf brew that Kamen was offering you earlier.
Take this and head back to Iban's tomb. Dump the bucket of alcohol on top of the tomb (only needs to be done once) and light it up with your tinderbox either by using it on the tomb or via the search option. After you're done watching it burn, a pile of Iban's ashes will appear in your inventory (or drop on the ground). The ashes will automatically be used on the doll (unless the doll had been dropped, in which case you must do it manually).
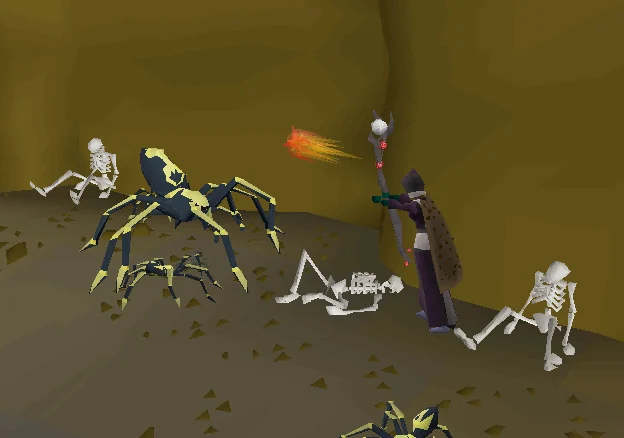
Head straight north from the tomb and keep going until you reach a corridor full of blessed spiders (these have a max hit of 4). Run to the end of the corridor until you find a giant level 89 spider named Kalrag. Kalrag can hit somewhat hard (a max hit of 9), but is fairly inaccurate if you are wearing melee armour. The biggest challenge of this fight is often the swarm of spiders which can keep you from attacking Kalrag. If you're below 79 combat, it can be fairly difficult to finally get her alone to begin attacking, which is why it's advisable to run to the back of the corridor and start attacking her before the others get to you. Kalrag can be safespotted by luring her to the far north of the room, then running to the spot between the two skeletons (shown to the right). Kalrag can also be safespotted on the northern wall, one tile east of the skeleton, by trapping her on the eastern part of the northern wall that juts out.
When you defeat her, you'll automatically soak up the blood with your doll. The spiders nearby will attack you and can pile up on you despite not being a multi-combat area. They will interrupt the fight with Kalrag if they are attacking you. Once you kill Kalrag, you will be stunned for about two seconds (and can be attacked by all spiders at once) so heal up before dealing the finishing blow. Using Protect from Melee is advisable. While stunned, you will automatically smear Iban's blood onto the doll.
Low levels might have a problem with Kalrag as the blessed spiders will keep attacking, preventing the player from attacking her. This can be avoided by running alongside Kalrag, killing blessed spiders in the hope that Kalrag will be the next to aggro on you. You can also try trapping Kalrag in the north-western corner of the cave, to make sure she's next to you after you kill a spider. Kalrag can be killed without it hitting you if you aggro it with a ranged attack and run past the stalagmites on the west side of the corridor, as its movement range ends a tile before those stalagmites it will back up until you have to move forward to keep attacking. Repeat until dead.
Once you have killed Kalrag, exit the corridor.
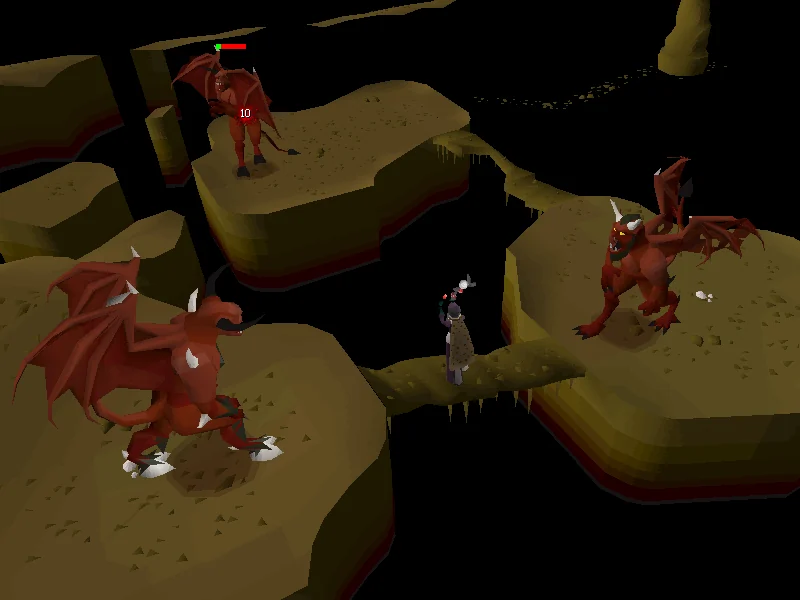
To get Iban's shadow, you need to kill three level 91 demons named Doomion, Othainian, and Holthion. Head north and then west from the witch's house, and take the first left (south) all the way down until you reach where the demons are.
Kill each one any way you like and pick up the Amulet of Doomion, Amulet of Othanian[sic], and Amulet of Holthion that they drop respectively. If you are a low level or are using Ranged or Magic, there are safespots for killing the demons by standing on the narrow pathways: Othainian on the pathway to the north and the other two demons on the pathway between them. You can also kill Othainian & Holthion from the walkway on the edge of the map. If you did not bring telegrab runes, it is strongly recommended to cross the bridge to Othainian's island before killing it, so that you do not have to kill it again if you fail the obstacle.
Note: After obtaining the demon's respective amulet, that same demon will no longer be aggressive towards you nor is it attackable. However, using manual magic cast still allows you to attack the demon without it being able to retaliate—possibly an oversight from Jagex.
Once you have all three of them, head just north of where Doomion was to the chest. Opening it will remove the amulets from your inventory and give you Iban's shadow. It will automatically be used on the doll.
In the northern part of the upper area there will be several cages with half-soulless in them, one of whom has the remains of the dove. Head northwards along the western cave wall ledge, and jump across the first broken bridge on the right. From here, go north at the junction, then east at the next junction, then north, and finally west to a cage on a dead-end platform (shown circled on the map above). Equip Klank's gauntlets if you haven't already and search the cage for Iban's dove. Sometimes there is no popup telling you that you found it, so keep an eye on your chatbox. The half-soulless will exclaim 'Kuluf Ali Monopiate'.
Note: The remains will automatically be smeared onto the doll when searching the correct cage.
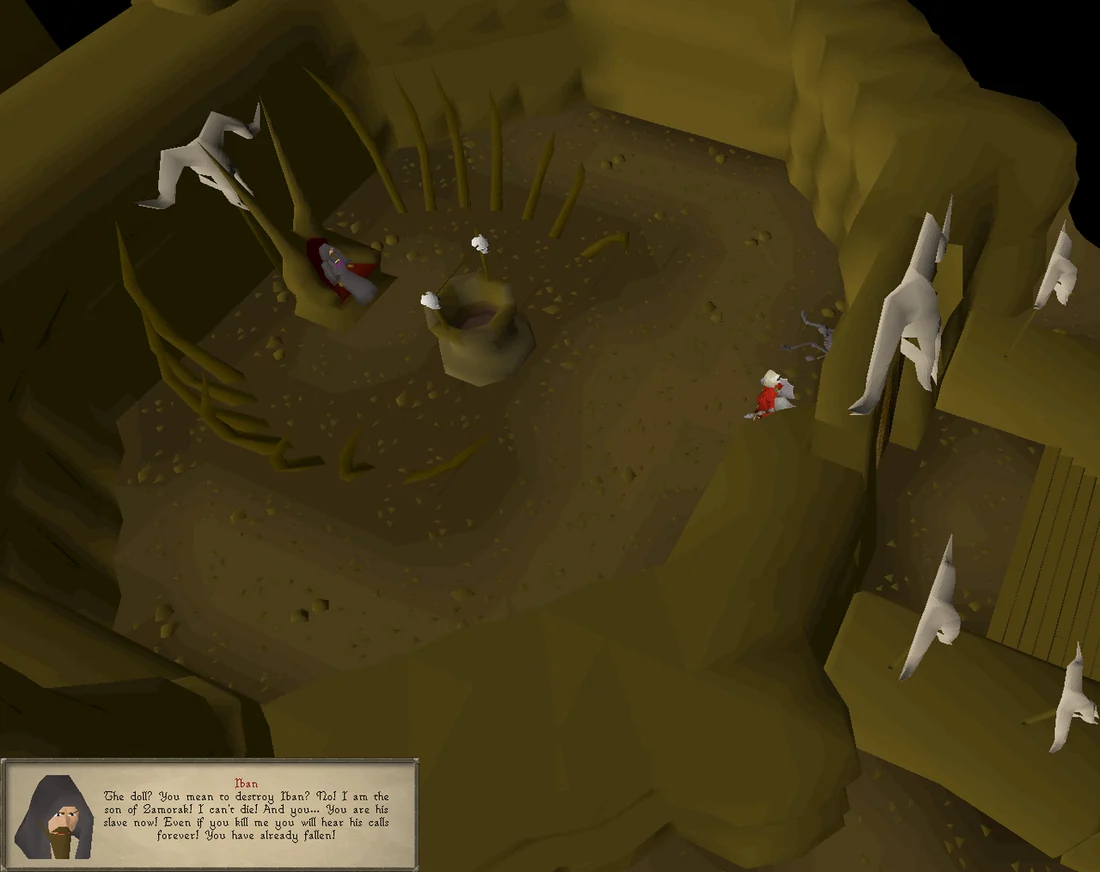
Now, to finally destroy Iban and bring an end to this quest. You'll need to jump your way to Iban's temple in the centre of the area (If you are having trouble with the jumps due to low agility levels, starting from the west side near the half souless has the least amount of jumps, albeit a lot longer). Once you're there, kill a disciple of Iban and take his Zamorak monk robes. (Collecting a few of the robe bottoms is highly lucrative!)
(Should you die attempting to dispose of the doll, you will have to run through the entirety of the dungeon again, so be sure to bring the items required with you.)
Enter the temple wearing both upper and lower Zamorak robes. Iban will recognise the doll and declare he cannot die, as well as that you are Zamorak's slave regardless. He then begins to attack you, represented by red spikes that will haphazardly appear near the entrance for several ticks. These spikes rapidly deal around 5 to 8 damage each and can't be blocked with prayers. They also stun you and teleport you back to the entrance, so make sure you run in with plenty of health. Running directly to the well should be fairly easy with one or two food items.
A method to never get hit by Iban's spell is to enter the temple, immediately exit and then walk back inside, which should roughly coincide with the end of his first round of attacks. Then quickly run to the well in the centre of the room and use the doll before he launches his next volley.
Use the doll on the Well of the Damned in the centre of the room. You may have to do this a few times, as his attacks may interrupt you. When you do manage to get the doll into the well, Iban will be taken by darkness and destroyed utterly. The temple will begin to collapse and you drop into a cavern below. You also receive Iban's staff, which the man had dropped.
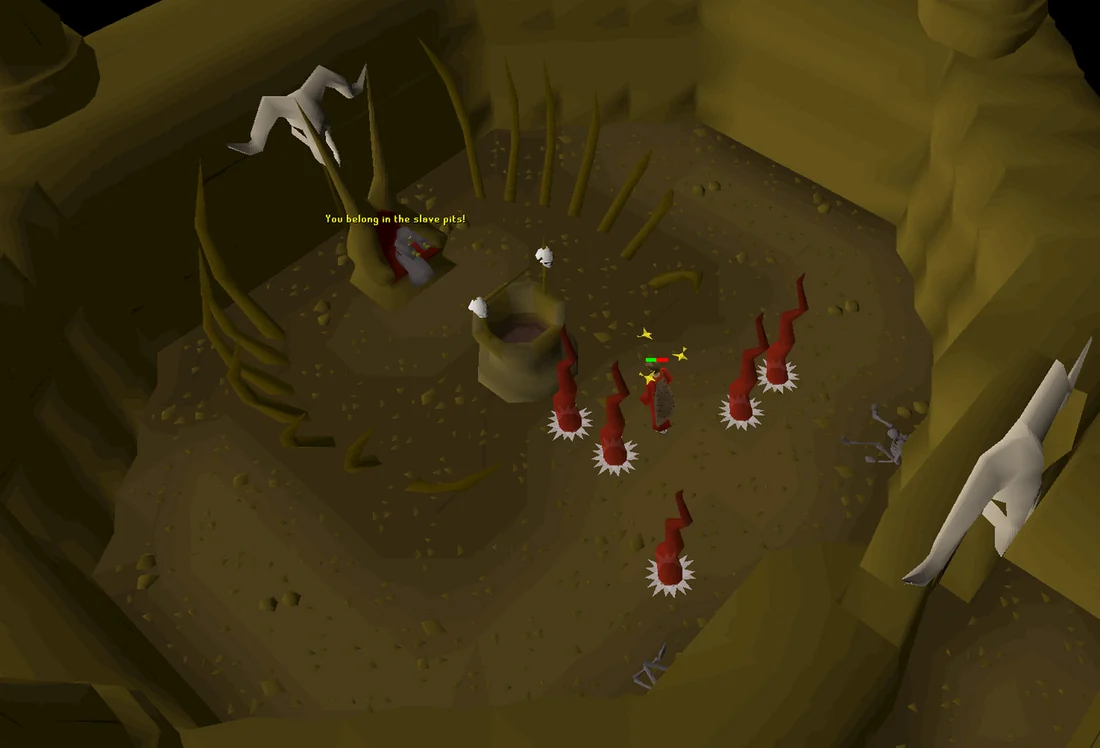
Note: You can use the doll on the well while in dialogue. It's possible to reach the well before being attacked, taking 0 damage.
Make your way through this cave to meet Koftik, who will be sane again and suffer from memory loss with Iban's voice suddenly gone. You inform him that you have slain Iban and vaguely remember some of your actions such as crushing the unicorn and killing the paladins, unsure whether it really happened. He will lead you back to the entrance of the Pass.
Leave the cavern and return to Ardougne to tell King Lathas of your success to finish the quest. He will thank you for your service and enquire whether the passage to the west is now clear. Upon being told that the temple was destroyed, he says he will send his mages to clear the well so that you can stop his brother Tyras, who he reminds you joined forces with the Dark Lord on his expedition after being corrupted by the Chalice of Eternity.
Note: For souvenir collectors, all quest items will be removed upon completing the quest. In order to keep the desired quest item(s), it/they should be dropped before speaking to King Lathas to complete the quest.
Congratulations, quest complete!
Use this when you already know the route. The full walkthrough above includes explanations and diagrams.
Talk to King Lathas on the first floor of Ardougne Castle.
Say: I am. What's our plan? → Yes.
Talk to Koftik in the westernmost part of West Ardougne next to the cave.
Say: I'll take my chances.
Bring the rest of your supplies now, as after this section there is no turning back unless you want to restart the entire dungeon.
Enter the cave and run south at the first junction.
Talk to Koftik for a cloth. Use it on an arrow, then use your tinderbox on it or use the arrow on the fire on the ground.
Go north to the gated area.
Warning: If you dropped any items pick them up before you shoot the rope because you cannot pick them up afterwards, unless you pull the lever to go back across the bridge. If dropped close to the bridge they can be telegrabbed
Equip your bow and fire arrow (be sure to light the arrow with your tinderbox), then shoot the guide rope attached to the bridge.
Once across the bridge, take the plank in the north room (if you did not bring one).
Continue through the cave until you reach a section with water and a pit. Ignore the water, use a rope on the rock above the pit. If you fail, you will lose your rope.
Continue through the cave until you reach a large grid.
Walk across the grid and use trial and error to find your path. You will fall through some of the tiles. Some paths are not possible, see the full guide for solving this optimally.
Warning: Keep your Hitpoints above 15 when crossing the grid.
Pull the lever next to the gate.
You can now pray Rapid Heal for the duration of this step (there is an altar up ahead). Run west past the zombie camp, there will be five sets of odd markings along the walls of the corridor (You must attempt to disable the wall traps or walk past them).
Grab the plank by the furnace if you did not grab one earlier.
You will reach an altar, take the north path using the plank on the flat rocks.
Take the orb and walk back to the altar.
Take the north-west path with the ogres and blessed spiders. Take the orb.
Take the centre-most west path, traversing the flat rocks using the plank. Take the orb.
Take the final path, do not pick up the orb, but search the rock beneath instead and disarm the trap to get the orb.
Return to the zombie camp to the east.
Use the 4 orbs on the furnace.
Return to the altar, turn off Rapid Heal/pray at altar and climb down the well.
Optional: Search the two stacked crates in the room you landed in to find 2 salmon and 2 meat pies.
Go west and picklock the south-east slave cage gate.
Use your spade on the loose mud at (2).
Go west and cross the ledge at (3).
Note: You may fall down off the ledge and have to go back to the slave cage again at (2).
If you have 50 thieving, take the short cut at (5) - avoid the bubbles!
If you lack 50 thieving, cross the stone bridge maze to get to the other side. (4)
Squeeze-through the pipe at (6).
Search the unicorn cage.
Walk through the path south of the cage and use the piece of railing on the boulder above the unicorn.
Search the cage again to get the Unicorn horn. You can drop the piece of railing.
Pass-through the tunnel and follow the cave until you reach the 3 knights.
Optional: Talk to any of the knights (Sir Jerro, Sir Carl, or Sir Harry) to receive 2 meat pie, 2 bread, a stew, a Attack potion(2), and a Prayer potion(2).
Kill them and take their badges.
You can safespot them by standing in the hallway to the south.
Continue forward, using your plank on either flat rock, until you see a well.
Use the badges and unicorn horn on the well.
Open the door.
Run south as far as you can (see map), and descend into the cave (yellow dot on map).
Talk to Niloof the dwarf, you will also receive 2 meat pies and a meat pizza.
Note: You can also talk to Kamen and either accept his beer (reduces Agility level and causes damage) or decline and purchase the food for 75 coins. If you accept his beer, you take 5 damage and your Agility level is reduced by 3 each time you do. You need 4 free inventory slots in the next section.
Talk to Klank the dwarf.
Say: (Make sure to have one inventory slot available to receive his gauntlets.)
Go upstairs and search the Witch's window from outside her house (Cross the broken bridge north-east of the house. Use the map pictured to find her).
Pick up the Witch's cat (use the map).
Use the cat on the Witch's door and then open the door.
Open the chest in her house for a few items (do not skip chat option on chest).
Note: You will need 4 inventory spaces.
Kill the three demons west of the Witch and take their amulets.
Open the chest north of the middle demon.
Return to the Dwarf encampment on the lower level. Use a bucket on the brew barrel in the eastern house.
Note: There is a bucket in the corner of the larger house to the west if you did not bring one.
Note: If you did not bring a tinderbox, grab one from the eastern house for the next step.
Run to the south-east corner of the lower level and use the dwarf brew and the tinderbox on the tomb.
Run north to the spider pit, kill Kalrag the spider and run out of its pit.
Head north-west and ascend through the cave entrance to reach the half souless area.
Wear Klank's gauntlets and search the cage circled on the map for Iban's dove. (It is applied to the doll automatically and will not go into the inventory).
Head south from where you obtain Iban's dove until you reach the broken bridge you used to get over, from there head east and then south to the Disciples of Iban.
Kill a disciple of Iban in the middle of the maze and pick up his robes.
Equip the robes. (Following updates prior to the release of the Song of the Elves quest, you only need to equip the robes to enter the doors)
Do not drop anything that you are not willing to lose as using the doll on the well will teleport you to the entrance of the tunnels.
Enter Iban's temple, (Following updates prior to the release of the Song of the Elves quest Iban now has a chat dialogue) use this time to click one tile north of the well so that you can avoid any potential damage, right click use on the doll on the well, do not click investigate.
Warning: Iban can deal a lot of damage quickly so be prepared.
Iban's spikes deal around 8 damage each and cannot be blocked with prayers. Running directly to the well should be fairly easy with one or two food items.
Use the Doll of Iban on the well in the centre of the room. You may have to do this a few times, as his attacks may interrupt you. When you do manage to get the doll into the well, Iban will be destroyed and the temple will begin to collapse.
Speak to Koftik to be transported back through the pass.
Head back to Ardougne Castle and speak with King Lathas.
Congratulations, quest complete!
QUEST COMPLETE
OSRS WIKI CONTRIBUTORS
Walkthrough text and preparation lists are adapted from Old School RuneScape Wiki contributors under CC BY-NC-SA 3.0. Game imagery © Jagex Ltd; individual image credits are available from their captions. This page is fan-made and not affiliated with Jagex.
KEEP QUESTING
Game icons © Jagex Ltd, via the OSRS Wiki. Interface icons by Lucide.