QUEST 74 · MEMBERS
Between a Rock...
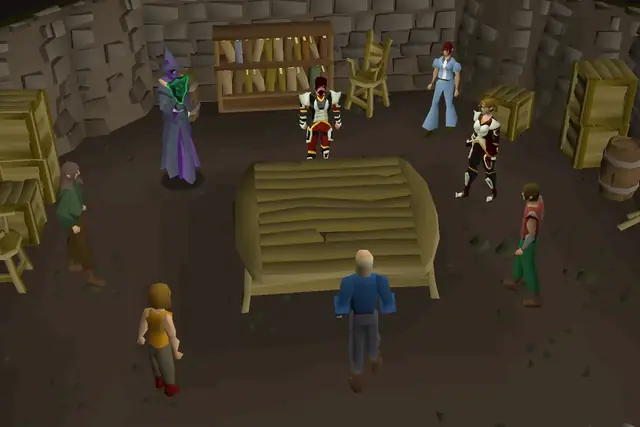
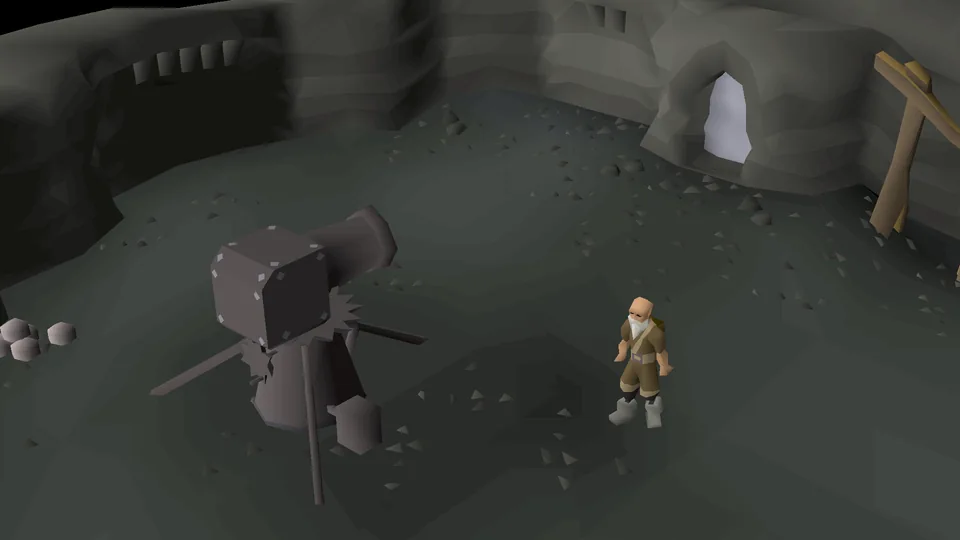
Hidden away from the fearsome trolls and the roaming Fremennik, the dwarves delve deep beneath the mountains in search for the ore they need to support their home of Keldagrim. One dwarf in particular, however, has for years been trying to crack open a rock that seems to be impervious to any material that he's tried on it. Convinced that solving the riddle of the rock will lead him to unimaginable wealth, he has spent the later part of his life on just this lump of stone. Help him out, but take
- Difficulty
- Experienced
- Length
- Medium
- Quest points
- 2
- Released
- 21 March 2005
 2
2Jump to a chapter
Before you start
Where to start
Talk to Dondakan the Dwarf at the Keldagrim south-west mine.


Items required
- A pickaxe
- 4 gold bars (You will need an extra bar and telegrab if you want to keep a golden cannonball for after the quest)
- A hammer
- An ammo mould (can be bought for 5 coins during the quest) or a double ammo mould
- ~830 coins (for cart and ferry)
Recommended
- 50 Combat level
- Combat gear
- A Falador teleport
- A Combat bracelet (to teleport to the Monastery)
- A Camelot Teleport
- Ring of Charos(a)
- A lunar or dramen staff
- An amulet of glory for a teleport to Edgeville for the furnace
- Stamina Potion to reduce travel time
Enemies to defeat
- Scorpion(s) (level 14)
- Arzinian Being of Bordanzan (level 75-125)
STEP BY STEP
Walkthrough
Follow the chapters below. Click any screenshot or diagram to view it at full size.
Before you begin
 1
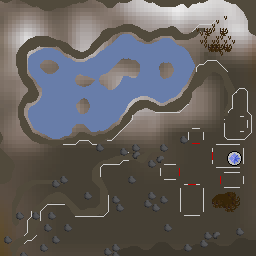
1- 1 Location
Don's rock
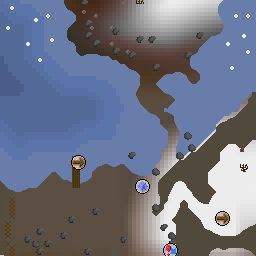
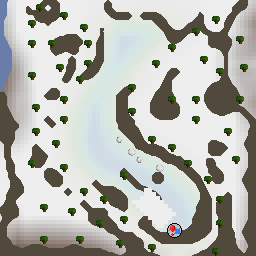
Start the quest by going to the Keldagrim mines north-east to Rellekka. You can get there in several different ways:
- Fairy ring code DKS, which can be found north-east of Rellekka.
- You can use the enchanted lyre for easy access, or, if your house is in Rellekka, you can also teleport there.
- Take the minecart from the Grand Exchange. If doing so, go north-west from the carts to the Dwarven Boatman and take the boat (free) to reach the ferryman at the entrance.
Once you've entered the cave, there will be a crack between two dwarf statues directly across from you, which you should enter. From there, talk to the Dwarven Ferryman (not the boatman) for a ride across the river, which will cost 2 coins or be free if you have a Ring of Charos(a) equipped.
Go east and around the rock wall and then go west until you reach and cross the bridge that leads to Dondakan's Rock and his Dwarf Multicannon.
Speak to Dondakan. Ask "Why are you firing a cannon at a wall?" to begin the quest, then speak to him again and ask "So why were you trying to get through the rock again?".
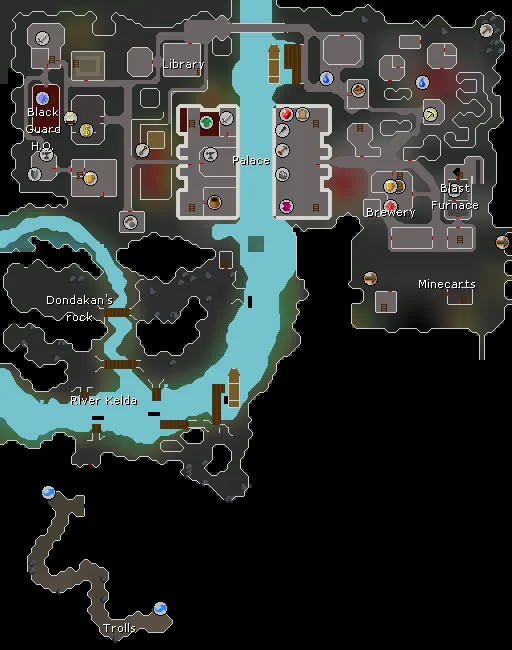
Dondakan will then ask you to get further information about the rock and tell you to talk to the Librarian. Return to the other side of the river, paying 2 coins again or crossing for free with the ring. This time, speak with the Boatman to be taken to Keldagrim. If you have not started The Giant Dwarf, you will be presented with a small cutscene introducing the area. You will then be taken by guards, giving you the option to start The Giant Dwarf.
You can talk to the Librarian on the Western side of Keldagrim, but it won't do much other than specifying who to speak with. Instead, go into the western part of the Trading Consortium. Look for the area with an anvil on the minimap in the palace and speak with the engineer inside of the room it's located in. This is located within the large building not the anvil which is further west.
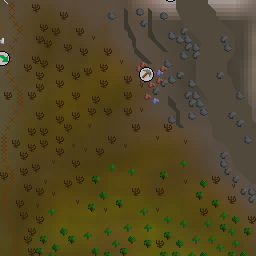
You will be told to speak with Rolad located in the eastern building at the Dwarven Mine entrance camp next to Ice Mountain. To get there, either teleport to Falador or the Monastery and walk the distance, use Ancient Magicks to teleport to Lassar, teleport to the Barbarian Village with a skull sceptre, or take the mine carts located in the south-eastern portion of Keldagrim for 150 coins (75 coins if you have the Ring of Charos(a)). If you took the carts, head south, east, then north and exit the mine.
Rolad is inside the eastern house at the camp. He will ask you to find the pages from a book giving you information about the rock.
- Note: Make sure to fully complete the dialogue otherwise the pages won't appear.
Between the pages
Items needed: A pickaxe, 1 gold bar (an extra 1 if you want your own golden cannonball), and 3 inventory slots, ammo mould.
Items recommended: A weapon and food to kill a level 14 Scorpion, and a teleport to a furnace (see below for some).
Items recommended: A weapon and food to kill a level 14 Scorpion, and a teleport to a furnace (see below for some).
All three pages can be obtained in the Dwarven Mine in any order. Note that the pages may require multiple attempts to be obtained:
- The first page can be found by killing scorpions in the south-eastern area of the mines. (It may take a few kills) (Try switching worlds if killing a scorpion doesn't give you page 1)
- Tip: Squeeze through the narrow crevice (level 42 Agility) to complete a medium Falador diary task when returning to Rolad from the SE area of the mine.
- The second page can be found by searching the mine carts along the tracks.
- The third page can be found by mining clay, copper, tin, or iron rocks inside the mine.
Return to Rolad when you have found all three pages, and he will give you the Dwarven lore.
Rolad will ask you to give back the book because he wants to study it. You can answer "Of course" or "Of course. (lie)" Choose to lie and read the book, and keep it for later. If you need an ammo mould, purchase it from Nulodion in the western house next door to Rolad.
Head back to Dondakan using one of the methods first used to reach him and speak with him until you get a short cutscene where he kicks the rock to no avail. He then tells you that he wants a material that is stronger than runite and granite. This is where your gold bars come in handy. Show him your gold bar by using it on him.
- Note: You can also show him a gold ore instead. If you have forgotten to bring one, there is a gold vein in the cave south of Dondakan's.
Go to any furnace with a gold bar and your cannonball ammo mould, and make a golden cannonball by using the gold bar on the furnace. Some furnaces include:
- Falador's furnace is just a few steps away using Falador Teleport.
- Edgeville's furnace can quickly be reached using an amulet of glory or using the Minigame Teleport to Soul Wars and exiting the yellow portal.
- Completion of Lost City lets you use the furnace at Zanaris, and partial completion of Fairytale II lets you take the fairy ring DKR to Edgeville.
- If you have completed The Fremennik Trials, Rellekka's furnace is the fastest on foot; but teleporting is much quicker.
- You can also walk back to the mine carts in SE Keldagrim, take Cart 3 to the Grand Exchange, then use the shortcut from the Grand Exchange to Edgeville (21 Agility).
Tip: If you want a trophy golden cannonball in your bank, make one and drop it, make another, then telegrab the one on the floor. Trying to pick one up normally won't work if you have another on you.
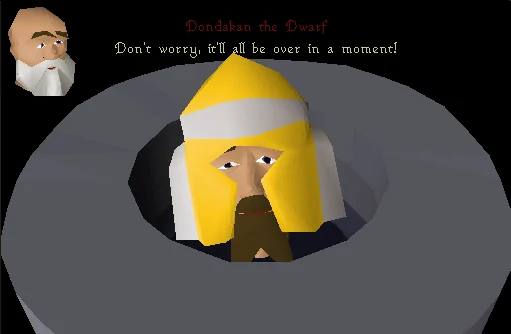
When you are finished, return to Dondakan and give him the golden cannonball by using it on him. When he fires it, the cannonball will disappear through the wall. He will then ask to fire you through the wall, but he needs the schematics in order to change the cannon to be able to fire a human. You will also need to make yourself a gold helmet (requires 50 Smithing) if you don't want your head to explode when you hit the wall.
- Tip: Smithing a golden helmet in the Resource Area is a medium Wilderness Diary task.
Breakthrough design
Items needed: 3 gold bars (an extra 3 if you want your own golden helmet) and a hammer.
Items recommended: Teleport to Camelot or Games necklace or 100 coins.
Items recommended: Teleport to Camelot or Games necklace or 100 coins.
| Making Sense of Dwarven Schematics | |
| The jingle that plays upon solving the schematic. | |
There are a set of four (4) schematics:
- The first schematic is given to you by Dondakan.
- The second one is given by the engineer you spoke to earlier back in Keldagrim, by the anvil in the western palace bottom floor.
- Before moving on, you can make your golden helmet by the anvil. The helmet is extremely heavy, so it's a good idea to put it in the bank. Tip: If you want to have more than one golden helmet after the quest, make one and drop it, make another, then telegrab the one on the floor. This helmet is useful for slaying gryphons and the Shellbane gryphon boss, as they have a special attack that is blocked by having a high equipped weight.
- Read to the last page of the Dwarven lore book, and you will find another schematic page.
- Enter the White Wolf Tunnel; it can be reached easily by using Camelot Teleport and walking down the stairs to the east, or teleporting to Burthorpe Games Room (Minigame Teleport / games necklace) and walking down the stairs to the south of Burthorpe. Go to the small bar area, and speak with Khorvak. He will ask for a dwarven stout. You can take one off the table and give it to him by using it on him, or refuse and enjoy a funny piece of dialogue about RuneScape and alcoholics. Either way, you will receive the final schematic.
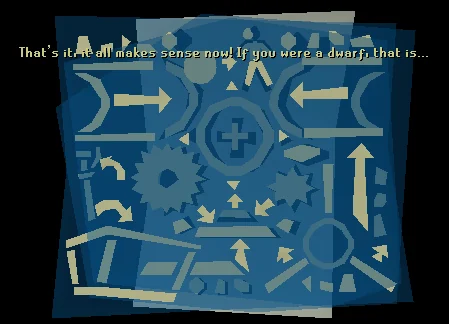
Once you have all schematics, click 'assemble' on the one Dondakan gave you. You will be shown all schematics, but they will not make any sense. What you must do here is move the schematics one by one so that they fit with the original schematic. Select and show one at a time, rotate and move them to fit. It may be easiest to use the human stick figure legs, torso, and head to position each of the pieces correctly. This part should be quite simple. Be aware that even if you move the pieces in the correct relative position, you might need to select them all and move them together to the correct position on the screen. Once you put them all in place, the screen will show: "That's it! It all makes sense now! If you were a dwarf, that is...".
| Ready to Fire! | |
| The jingle that plays upon the player is ready to be fired out of Dondakan's cannon.. | |
Riddle of the Rock
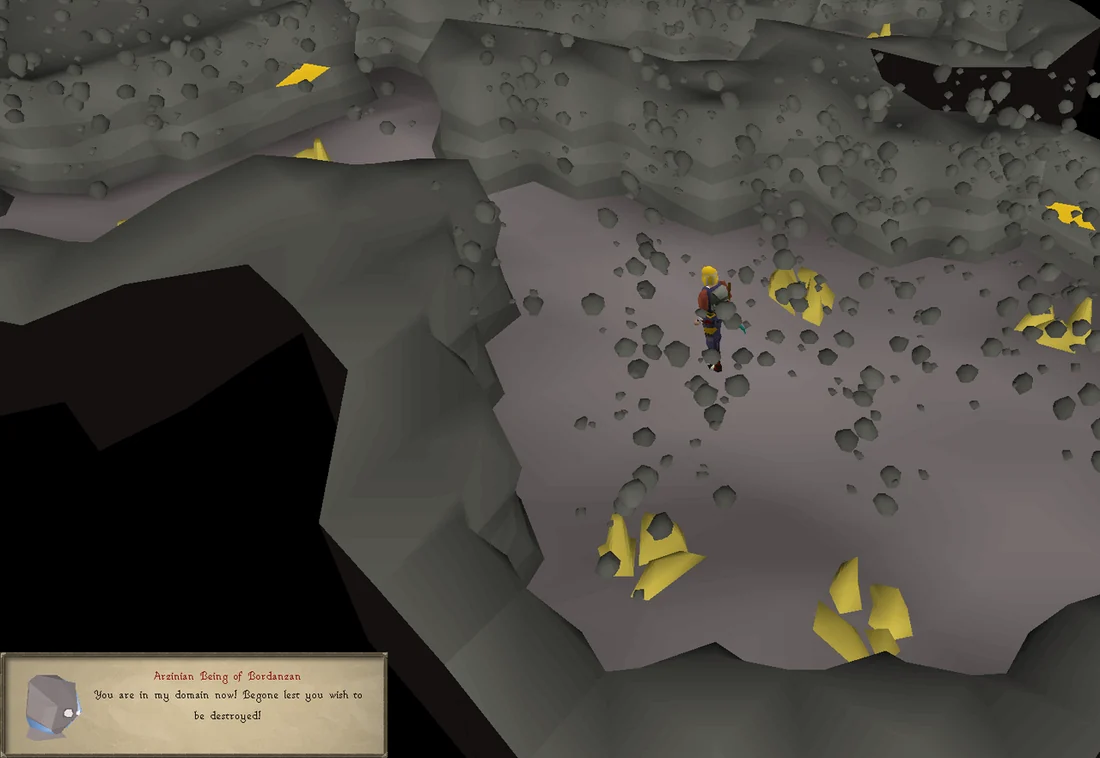
Items needed: A weapon, armour and food to defeat a level 75-125 enemy; golden helmet (equipped), a pickaxe, and 2 coins or Ring of Charos(a) for ferry.
Items recommended: 15 free spaces in your inventory.
Items recommended: 15 free spaces in your inventory.
Once the schematic is assembled, return to Dondakan.
To fight the Arzinian Being of Bordanzan, you will need to mine at least six 6 gold ore. Otherwise, it will keep regenerating its hitpoints. Mining 15 pieces of gold is highly recommended as this will lower the combat level of the boss from 125 to 75. The gold must remain in your inventory. You only have eight 8 minutes to mine the gold AND defeat the avatar; if you take off your gold helmet, you will be teleported back to Dondakan.
Note: Mining a gold rock here will grant you the achievement for the Medium Fremennik Diary. You will not need to revisit the mine after the quest. Equip the golden helmet; make sure you have a pickaxe because any gold ore/ingots in your inventory will disappear. Go back to Dondakan with the schematics and the items needed to kill the level 75-125 enemy. Once you are ready, ask Dondakan to shoot you into the rock.
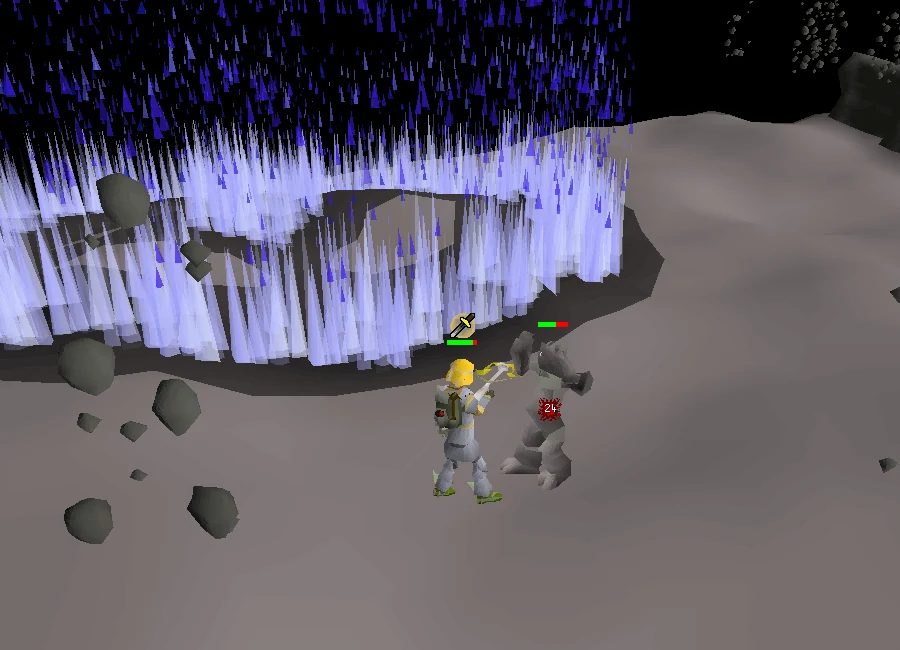
When you feel you have enough gold ore, go to the centre of the area, where you will find a set of flames. Go through the first set of flames and talk to the second set. While talking to the flames, the Arzinian Avatar will attack.
The avatar will appear in one of three forms for the duration of the fight. The form chosen is usually based on your highest combat stat, though there is additionally a small chance to instead pick another form. The form that appears will determine the attack style of the boss:
- Arzinian Avatar of Magic if your highest combat stat is Strength or Attack.
- Arzinian Avatar of Ranging if your highest combat stat is Magic.
- Arzinian Avatar of Strength if your highest combat stat is Ranged.
Choose combat equipment and prayers accordingly. See Arzinian Avatar for more details.
You can use Prayer for an easy fight; the spirit shouldn't take too long to kill. If you are close to dying, you can take your gold helmet off, which will teleport you outside of the rock, next to Dondakan.
Tip: If you die then collect the helmet from the ground and enter the cave again. You will have to start over. Remember food.
When you have defeated the spirit, you will be teleported back out of the rock. Speak to Dondakan to finish the quest.
Note: If your inventory was full when defeating the boss the helmet will be dropped on the ground.
Congratulations, quest complete!
Tip: If you plan on obtaining the Music cape, re-enter the mine to unlock the song In Between.
Quick checklist 32 instructions
Use this when you already know the route. The full walkthrough above includes explanations and diagrams.
The rock
Find the Dwarven Ferryman. Either enter the tunnel and subsequent cave just south of the Polar Hunter area (fairy ring DKS) OR go to northern part of Keldagrim and use the Travel option on the Dwarven Boatman.
Talk to the Dwarven Ferryman (not the Dwarven Boatman) and use the Ring of Charos(a)
Say: (Charm) I don't have any money on me. or use the Travel option to go across the river.
Run north and east across the bridge and west past the second wooden bridge to talk to Dondakan.
Say: Why are you firing a cannon at a wall? → So why were you trying to get through the rock again? → Sounds interesting!
Go to western Keldagrim and talk to the Dwarven Engineer in the Trading Consortium's palace smithing shop.
Note: The Dwarven Boatman (near the Dwarven Ferryman) will take you quickly to northern Keldagrim and back.
Finding the pages
Go to the Ice Mountain entrance of the Dwarven Mine and talk to Rolad in the east house (chat will disengage once then re-engage).
(Optional) Purchase the ammo mould from Nulodion here
Go down the trapdoor to the Dwarven Mine. Complete the following in any order until you receive the respective pages:
Kill Scorpions for book page 1.
Search the mine carts for book page 2.
Mine any rocks except Adamantite or Coal for book page 3.
Talk to Rolad.
Say: Of course. (lie) (chat will again disengage then re-engage)
Read Dwarven lore in its entirety and keep it for later.
The golden cannonball
Go back to the Keldagrim mines and talk to Dondakan.
Use a gold bar on him.
Go to any furnace and use a gold bar on the furnace to make a golden cannon ball. Edgeville is recommended for easy fairy ring or Keldagrim minecart access.
Use the golden cannon ball on Dondakan to receive a Schematic.
Say: Yes, I'm sure this will crack open the rock. → So you want to... fire me into the rock? → I can't argue with that, shoot me in!
The gold helmet and schematics
Read the Dwarven lore book to receive the base schematics.
Say: Yes
Go back to the Dwarf Engineer at the Western Trade Consortium to get the Schematics.
Use your gold bar on the nearby anvil to make a gold helmet.
(Optional) Smith the gold helmet in the wilderness Resource Area to complete a Wilderness Diary Medium Achievement.
Completing the schematics
Go to the pub in the White Wolf Mountain passage and speak to Khorvak.
Say: No, I've had enough of buying drinks for people!
Assemble the schematics per below to get the completed Schematic:
Final battle
Equip your Gold helmet and pickaxe and prepare to kill a level 75-125 Arzinian Avatar.
Talk to Dondakan with the schematics.
Say: You may fire when ready!
Mine 6 OR 15 Gold ore (keep them in your inventory. If you aren't going to get 15, just get 6 as there is no benefit before 15). Getting 15 reduces the boss's level from 125 to 75, so this is recommended for lower-level players.
Go to the centre of the area.
Go through the first set of flames.
Talk to the second set of flames.
Kill the Arzinian Avatar. It will be either Arzinian Avatar of Magic (if your highest combat stat is a melee stat), Arzinian Avatar of Ranging (if your highest combat stat is Magic), or Arzinian Avatar of Strength (if your highest combat stat is Ranged). Choose combat equipment and prayers accordingly. See Arzinian Avatar for more details.
Finishing up
Talk to Dondakan.
Congratulations, quest complete!
QUEST COMPLETE
Rewards
- 5,000 Defence experience
- 5,000 Mining experience
- 5,000 Smithing experience
- A rune pickaxe
- A gold helmet
- Access to the Arzinian Mine full of gold rocks and gold veins. A nearby dwarf at the river will bank the player's gold ore for a charge of 20% of the ores, rounded up (10% with the Ring of Charos(a)).
- The ability to teleport to Dondakan's rock using a ring of wealth
OSRS WIKI CONTRIBUTORS
Sources & credits
Walkthrough text and preparation lists are adapted from Old School RuneScape Wiki contributors under CC BY-NC-SA 3.0. Game imagery © Jagex Ltd; individual image credits are available from their captions. This page is fan-made and not affiliated with Jagex.
- Between a Rock... →full guide · revision 15315213
- Between a Rock.../Quick guide →quick guide · revision 15315351
KEEP QUESTING