| Tin rocks | |||||||||||||||||||
|---|---|---|---|---|---|---|---|---|---|---|---|---|---|---|---|---|---|---|---|
 | |||||||||||||||||||
| Released | 4 January 2001 (Update) | ||||||||||||||||||
| Members | No | ||||||||||||||||||
| Quest | No | ||||||||||||||||||
| Location | Varies | ||||||||||||||||||
| Map icon |  | ||||||||||||||||||
| Options | Mine | ||||||||||||||||||
| Examine | A rocky outcrop. | ||||||||||||||||||
| Advanced data | |||||||||||||||||||
| Object ID | 11361 | ||||||||||||||||||
| Link | MOID | ||||||||||||||||||
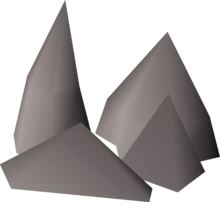
Tin rocks contains tin ore mined upon with a pickaxe. It can be mined with any level Mining. Mining 14 tin ore and 14 copper ore (wielding the pickaxe as a weapon to free the 28th inventory space) and smelting them to bronze bars is a slow but effective way to raise Mining and Smithing.
For members, players can power level the Mining skill with tin ore in the Port Khazard mine and amass ore. This is because of two fast respawning tin rocks that are very close to a bank deposit box. These two tin rocks are the closest mining rocks to a fast bank source, which surpasses the West Falador mine and level 5 Agility shortcut.
On the other hand, free players can best gather their ores at either East Varrock mine or West Varrock mine and banking at the respective banks. For example, if using West Varrock Mine, one would bank at Varrock west bank.
The rocks on Tutorial Island have slightly more pronounced shadows than the standard variants, and do not grant experience past level 3 Mining.
Locations
| Location | Members | Spawns | Map |
|---|---|---|---|
| Abandoned Mine - level 1 |  | 5 | Show map |
| Abandoned Mine - level 2 | | 8 | Show map |
| Abandoned Mine - level 3 | | 10 | Show map |
| Al Kharid mine |  | 1 | Show map |
| Barbarian Village mine | | 5 | Show map |
| Battlefield mine | | 1 | Show map |
| Camdozaal Mines | | 3 | Show map |
| Deepfin Point | | 3 | Show map |
| Desert Mining Camp (surface) | | 4 | Show map |
| Desert Mining Camp (underground) | | 4 | Show map |
| Dwarven Mine | | 10 | Show map |
| East Fremennik Isles mine | | 3 | Show map |
| East Lumbridge Swamp mine | | 5 | Show map |
| Edgeville Dungeon mine | | 2 | Show map |
| Fight Arena mine | | 7 | Show map |
| Hosidius mine | | 4 | Show map |
| Isle of Souls mine | | 3 | Show map |
| Jatizso mine | | 11 | Show map |
| Keldagrim south-west mine | | 5 | Show map |
| Northern Conch mine | | 2 | Show map |
| Pandemonium Cave | | 3 | Show map |
| Piscarilius mine | | 6 | Show map |
| Piscatoris mine | | 2 | Show map |
| Port Khazard mine | | 2 | Show map |
| Ralos' Rise mine | | 4 | Show map |
| Rimmington mine | | 2 | Show map |
| Ruins of Unkah mine | | 1 | Show map |
| South-east Varrock mine | | 6 | Show map |
| South-west Varrock mine | | 8 | Show map |
| Tutorial Island mine | | 18 | Show map |
| West Falador mine | | 6 | Show map |
Mining info

Rocks deplete and produce one tin ore on every successful mining attempt, though more ore can be gained using special equipment.
| Item | Quantity | Rarity | Price | High Alch | |
|---|---|---|---|---|---|
 | Tin ore | 1 | Always | 19 | 1 |
The probability to succeed on a given mining attempt scales with Mining level according to the figure below.
{"type":"scatter","options":{"tooltips":{"intersect":false,"format":"skillingSuccess"},"datasetsPerGroup":3,"aspectRatio":1.35,"title":{"display":true,"font":{"size":18},"text":"Tin rocks mining chance","position":"top"},"scales":{"y":{"ticks":{"stepSize":0.1,"format":"percent"},"scaleLabel":{"display":true,"labelString":"Success rate"}},"x":{"ticks":{"stepSize":1},"scaleLabel":{"display":true,"labelString":"Level"}}},"maintainAspectRatio":false,"fill":false},"minWidth":"300px","resizable":true,"width":"min(540px, 100vw - 32px)","isChartObj":true,"height":"400px","isFinished":true,"minHeight":"300px","data":{"datasets":[{"fill":false,"borderCapStyle":"round","label":"Tin rocks ","showLine":true,"data":[{"y":0.39453125,"x":1}],"pointStyleImg":"Tin ore.png","hoverBackgroundColor":"rgba(151,198,222,0.5)","backgroundColor":"rgba(166,206,227,0.3)","borderDash":[5,5],"borderColor":"rgba(166,206,227,1)","hoverBorderColor":"rgba(151,198,222,1)","pointRadius":0,"clip":5,"baseColor":"#89807f"},{"pointRadius":0,"label":"Tin rocks ","showLine":true,"data":[{"y":0.39453125,"x":1},{"y":0.40625,"x":2},{"y":0.4140625,"x":3},{"y":0.42578125,"x":4},{"y":0.43359375,"x":5},{"y":0.4453125,"x":6},{"y":0.453125,"x":7},{"y":0.46484375,"x":8},{"y":0.47265625,"x":9},{"y":0.484375,"x":10},{"y":0.49609375,"x":11},{"y":0.50390625,"x":12},{"y":0.515625,"x":13},{"y":0.5234375,"x":14},{"y":0.53515625,"x":15},{"y":0.54296875,"x":16},{"y":0.5546875,"x":17},{"y":0.5625,"x":18},{"y":0.57421875,"x":19},{"y":0.58203125,"x":20},{"y":0.59375,"x":21},{"y":0.60546875,"x":22},{"y":0.61328125,"x":23},{"y":0.625,"x":24},{"y":0.6328125,"x":25},{"y":0.64453125,"x":26},{"y":0.65234375,"x":27},{"y":0.6640625,"x":28},{"y":0.671875,"x":29},{"y":0.68359375,"x":30},{"y":0.6953125,"x":31},{"y":0.703125,"x":32},{"y":0.71484375,"x":33},{"y":0.72265625,"x":34},{"y":0.734375,"x":35},{"y":0.7421875,"x":36},{"y":0.75390625,"x":37},{"y":0.76171875,"x":38},{"y":0.7734375,"x":39},{"y":0.78125,"x":40},{"y":0.79296875,"x":41},{"y":0.8046875,"x":42},{"y":0.8125,"x":43},{"y":0.82421875,"x":44},{"y":0.83203125,"x":45},{"y":0.84375,"x":46},{"y":0.8515625,"x":47},{"y":0.86328125,"x":48},{"y":0.87109375,"x":49},{"y":0.8828125,"x":50},{"y":0.89453125,"x":51},{"y":0.90234375,"x":52},{"y":0.9140625,"x":53},{"y":0.921875,"x":54},{"y":0.93359375,"x":55},{"y":0.94140625,"x":56},{"y":0.953125,"x":57},{"y":0.9609375,"x":58},{"y":0.97265625,"x":59},{"y":0.984375,"x":60},{"y":0.9921875,"x":61},{"y":1,"x":62}],"fill":false,"hoverBackgroundColor":"rgba(29,114,171,0.5)","backgroundColor":"rgba(31,120,180,0.3)","borderDash":[],"borderColor":"rgba(31,120,180,1)","hoverBorderColor":"rgba(29,114,171,1)","borderCapStyle":"round","clip":5,"baseColor":"#89807f"},{"borderCapStyle":"round","hoverBorderColor":"rgba(169,219,124,1)","showLine":true,"data":[{"y":1,"x":62}],"fill":false,"hoverBackgroundColor":"rgba(169,219,124,0.5)","borderDash":[],"borderColor":"rgba(178,223,138,1)","backgroundColor":"rgba(178,223,138,0.3)","pointRadius":5,"clip":5,"baseColor":"#89807f"}]}}Pre-roll
The mining gem drop table has a 1/256 chance to roll on every mining attempt;[1] if the player is wearing a charged amulet of glory, amulet of glory (t), or amulet of eternal glory, the probability increases to 1/64.2.[2][3] If the table successfully rolls, the player may receive an uncut gem or nothing, and in either case can not receive an ore.[4] This neither depletes the rock nor grants Mining experience. The rates shown are for every mining attempt.
| Item | Quantity | Rarity | Price | High Alch | |
|---|---|---|---|---|---|
 | Nothing | N/A | 70/32,768; 70/8,216[d 1] | N/A | N/A |
 | Uncut sapphire | 1 | 32/32,768; 32/8,216[d 1] | 206 | 15 |
 | Uncut emerald | 1 | 16/32,768; 16/8,216[d 1] | 416 | 30 |
 | Uncut ruby | 1 | 8/32,768; 8/8,216[d 1] | 1,011 | 60 |
 | Uncut diamond | 1 | 2/32,768; 2/8,216[d 1] | 2,455 | 120 |
Tertiary
The following items can drop together with the main resource. The rates shown are for a successful mining attempt.
| Item | Quantity | Rarity | Price | High Alch | |
|---|---|---|---|---|---|
 | Clue geode (beginner) | 1 | 1/1,027–1/521[d 1] | Not sold | N/A |
 | Loop half of key (moon key) | 1 | 1/4,944[d 2] | Not sold | N/A |
 | Clue geode (easy) | 1 | 1/8,737–1/4,212[d 1] | Not sold | N/A |
 | Clue geode (medium) | 1 | 1/10,279–1/4,956[d 1] | Not sold | N/A |
 | Clue geode (hard) | 1 | 1/16,961–1/8,178[d 1] | Not sold | N/A |
 | Clue geode (elite) | 1 | 1/51,397–1/24,782[d 1] | Not sold | N/A |
 | Rock golem | 1 | 1/741,575–1/739,125[d 3] | Not sold | N/A |
Equipment
 Varrock armour 1, 2, 3, and and 4 give a 10% chance to receive an extra ore.
 Mining gloves allow one additional ore to be mined before the rocks deplete.
 Superior mining gloves allow two additional ores to be mined before the rocks deplete.
 Expert mining gloves allow three additional ores to be mined before the rocks deplete.
 Celestial rings and signets provide an invisible +4 boost to Mining level, regardless of charges. When charged with stardust, they also give a 10% chance to receive an extra ore.
 Prospector kit boosts Mining experience by 2.5%.
 Amulet of glory increases the chance of obtaining gems when charged.
 Mining capes give a 5% chance to receive an extra ore.
- Varrock armour, celestial rings, and Mining capes roll independently; multiple bonus resources can be given.
Changes
| Date | Changes |
|---|---|
| 20 March 2024 (Update) |
Map icon changed from |
| 15 March 2023 (Update | poll) |
|
| 7 December 2022 (Update | poll) |
The random tick delay after mining tin has been removed. |
| 21 January 2016 (Update | poll) |
The object was graphically updated |

See also
- Tin ore vein
References
- ^ Jagex. Mod Ash's Twitter account. 11 February 2020. Archived from the original on 27 November 2020. Mod Ash: "It adds a gem roll before each ore roll, and if you receive a gem you don't get the ore roll."
- ^ Jagex. Mod Ash's Twitter account. 22 May 2019. Archived from the original on 1 August 2022. Mod Ash: "All charged amulets of glory, including the eternal one, have the same benefit for getting gems."
- ^ Jagex. Mod Ash's Twitter account. 7 February 2017. Archived from the original on 18 June 2019. Mod Ash: "[the actual increase when wearing the Amulet of Glory while mining is] 1/86 rather than 1/256 for a gem."
- ^ Jagex. Mod Ash's Twitter account. 6 July 2020. Archived from the original on 27 November 2020. Mod Ash: "Yes, [the mining gem table has] got [...] chance of giving no gem."