3
3Requirements
- Completion of the following quests:
- 10 Crafting [not boostable]
- 56 Agility [boostable] [not required to start]
- The ability to defeat a level 110 Tyras guard (can be safespotted)
QUEST 59 · MEMBERS
Continuing the Plague City series, the Regicide Quest takes you beyond the 'Well of Voyage' to a new realm. King Lathas will employ you once again, this time for the grim task of disposing of his brother. Upon travelling to the realm you will find yourself surrounded by new and strange plants, animals and even a new race. Once there, you will see that everything is not as serene as it first appears.
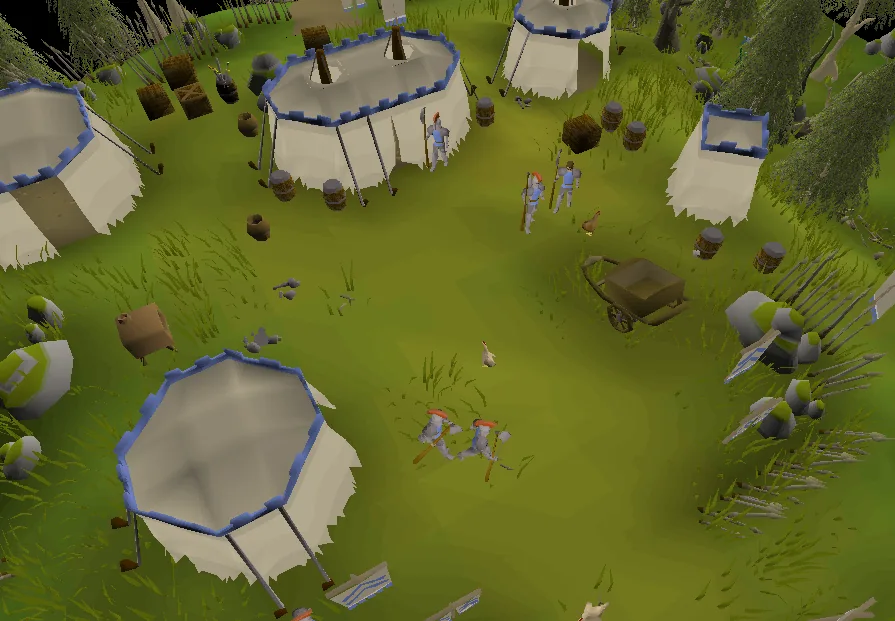
Talk to King Lathas on the first floor of Ardougne Castle.
STEP BY STEP
Follow the chapters below. Click any screenshot or diagram to view it at full size.
You may be approached by the King's Messenger, but this is not required. Talk to King Lathas. He will tell you to go through the Underground Pass again to the western darklands. Once there, you are to meet some scouts of his. You must speak to King Lathas and be informed of your new mission before going through the Underground Pass; otherwise, you will be unable to pass the dense forest on the other side of it. The quest log will indicate the quest is started by showing a description of what must be done rather than the requirements.
See the separate guide for how to get through the pass. If you have just enough agility potions to complete the required elf traps, do not waste them here as it takes another voyage through the pass to get back to the elf lands.
Once you are at Iban's temple (where you encounter him during Underground Pass), go in and talk to Koftik if you require food. Simply climb down the Well of Voyage and go out of the cave.
Welcome to Tirannwn! Go into the forest just a little bit and wait for an elf named Idris to spawn and start a dialogue with you. This may take a little while. If he spawns but does not talk to you, hop worlds and try again. He will question why you are here, but he is slain by Essyllt and Morvran before he has the chance to finish. They will tell you to talk to Lord Iorwerth, who can be found at the camp in the north-west corner of the forest.
Before proceeding with the quest, here is a detailed map of Tirannwn:
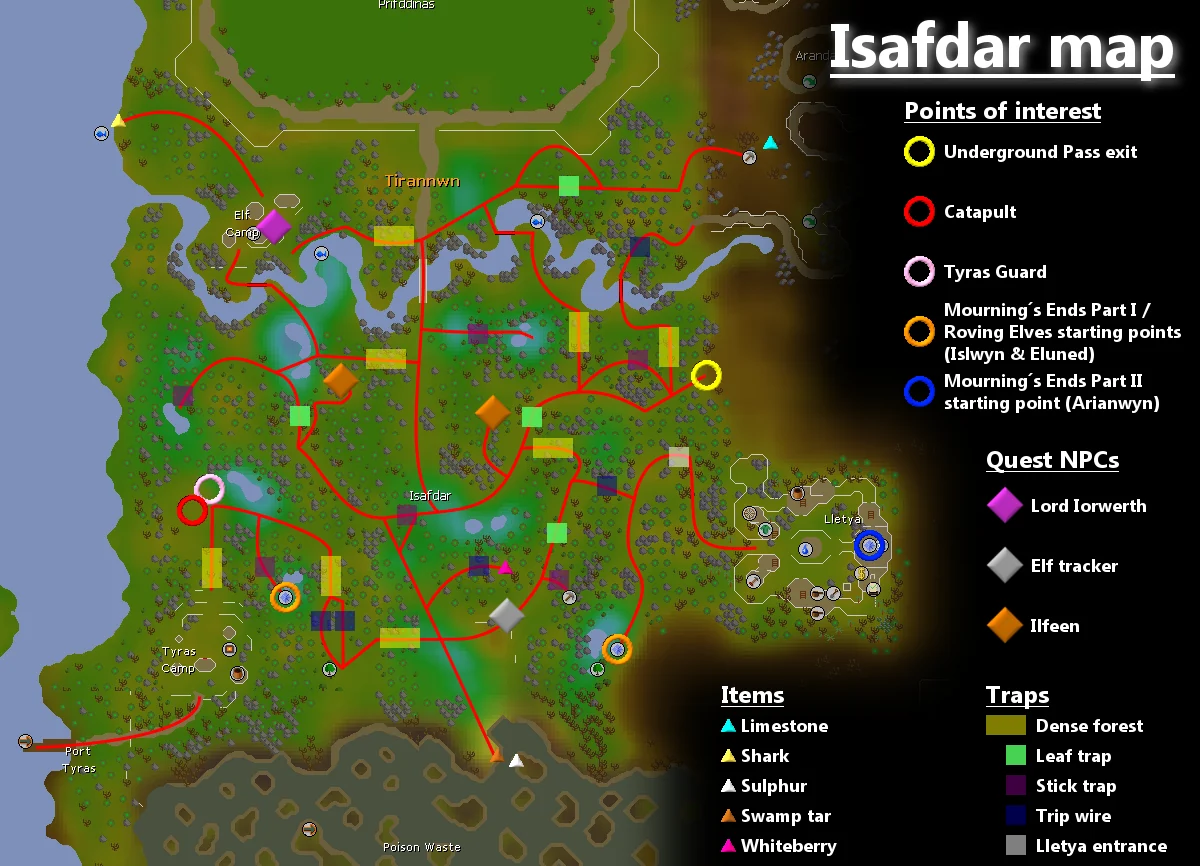
As you navigate the forest, you will encounter four different obstacles:
Make your way to the Elf Camp in the north-west corner. See the map above for reference. Along the way you can kill and cook rabbits for food if needed.
At the camp, speak with Lord Iorwerth. He will tell you to talk to his tracker after you tell him that King Lathas sent you.
Go back down the path you took to reach the camp, but go south when you reach the stick trap.
The Elf Tracker is at a small camp just north of the Poison Waste. He will not believe what you say since you are a human, so return to Lord Iorwerth to get a crystal pendant. Note that if you wish to keep the pendant as a souvenir, it must be drop tricked every time you talk to Lord Iorwerth from now on, as well as when completing the quest by talking to King Lathas - otherwise it will be removed from your inventory or bank. Talk to the tracker again with the pendant in your possession. He will tell you to find the Tyras Camp.
Click "Follow" on the footprints leading into the dense forest to the west. You will receive a message telling you that you are unable to follow the footprints. Return to the tracker and tell him. You will now be able to climb through dense forest if you have 56 Agility.
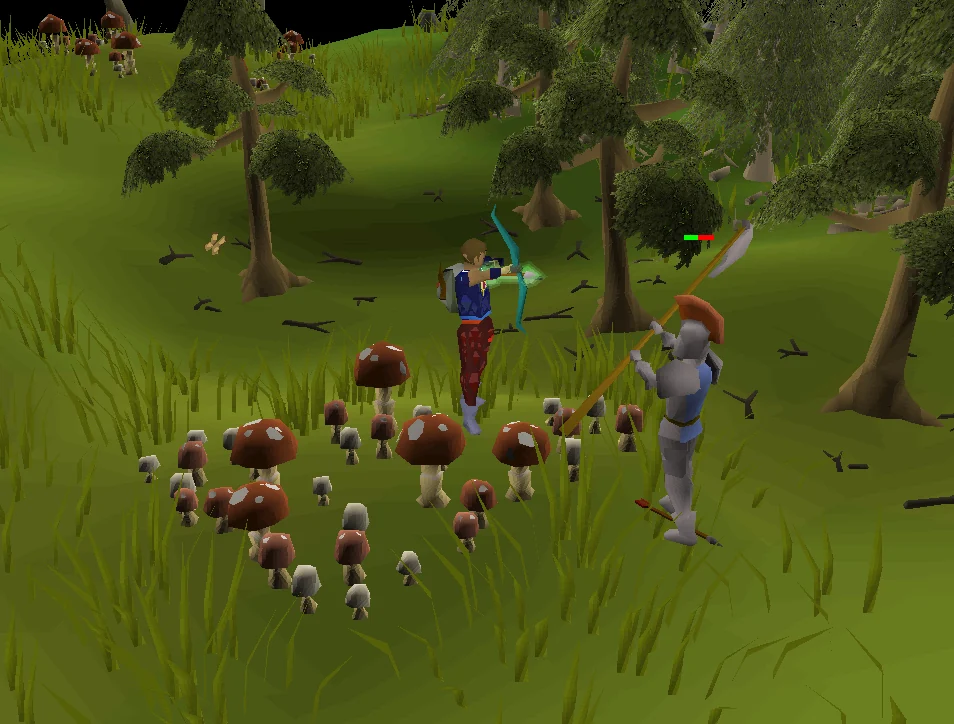
Climb through the dense forest just west of the tracker and a level 110 Tyras guard will attack you, equipped with a steel halberd. Despite having a halberd, he does not have a 2-square attack range. You can use the mushrooms as a safespot or use Protect from Melee to make the fight easier (Prayer flicking is an option as he has a slow attack speed). If you take too long in killing him, he will despawn, and you will have to try to summon him again, or kill the guard by the entrance to the Tyras camp instead. This alternative guard does not despawn, but he does in fact have a 2-square attack range, and his safe spot is more difficult. Lure him to the clump of rocks directly north-east of the dense forest, trap him in the small hollow, and walk east out of his range. He will try to back away from you when you attack from outside his range, but will be caught in the rocks on his west and south.
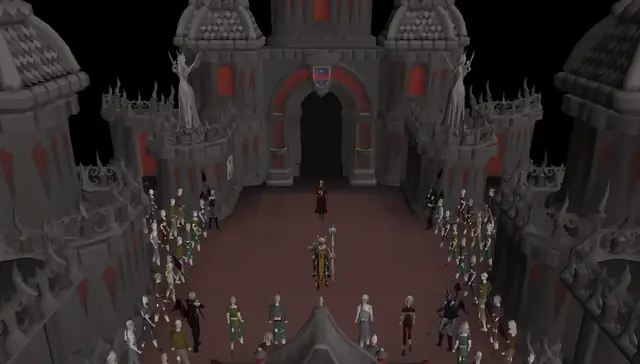
After you have killed one of these guards, proceed to the Tyras Camp, stepping over the tripwire to the north-west if you killed the first guard. Climb through the dense forest to the north and then go west. You will find Tyras Camp past the dense forest that is south of the catapult. If you killed the second guard, he may respawn if you do not enter the dense forest quickly enough but he will not attack you after you have killed him.
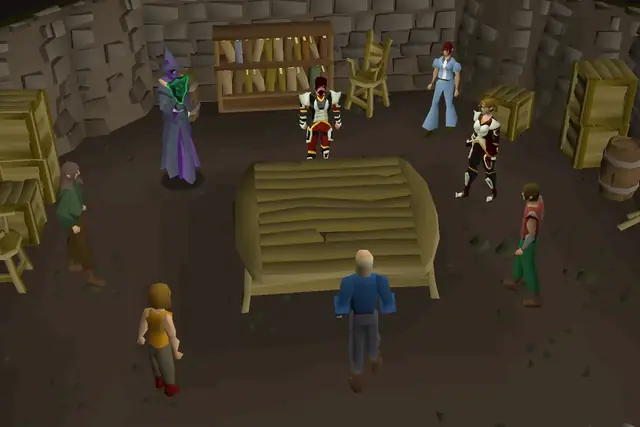
Talk to General Hining. He will tell you that you can't see King Tyras. You can buy bread from the general store if you are low on food, but leave one space available for the Big Book O' Bangs, which will be given by Lord Iorwerth upon returning to him. Go back to the Elf Tracker, then talk to Lord Iorwerth (remember to drop the crystal pendant before talking to Iowerth if you are keeping it).
Lord Iorwerth will give you the Big Book O' Bangs. Don't drop this book - you need it when in Rimmington later.
Talk to Lord Iorwerth and ask him about all the items.
In order to build the explosive, you will need a barrel of coal tar, sulphur, and limestone. Here is how to gather the materials:
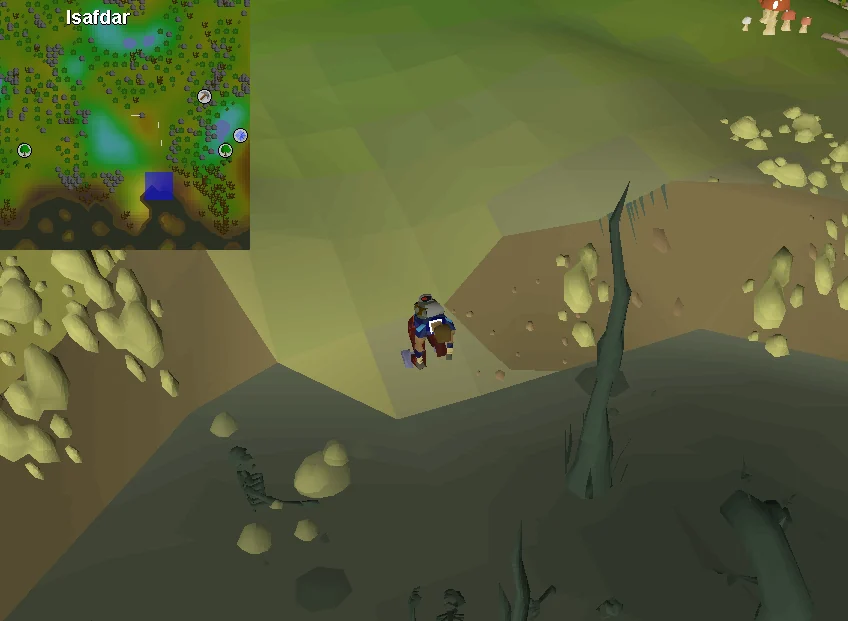
Make sure you have the big book of bangs, at least one barrel of coal tar, and some sulphur. After this, it is safe to teleport out of Isafdar.
Go to East Ardougne and speak with Elena, who will tell you to see the Chemist in Rimmington. Talk to the Chemist about the quest, and he will give you permission to use the distiller. Now, use a barrel of coal tar on the large distiller outside.
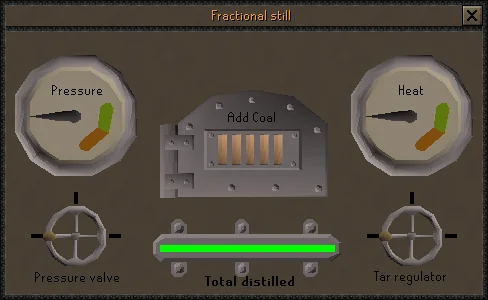
The barrel is only used to access the machine; as long as you leave the window open and have enough coal you can still do the distilling. All you need to do here is to get the green bar filled. You can configure the machine before using any coal.
The valves can be clicked on their left side or their right side to control what side they go to.
The idea of using this distiller is to keep pressure stable on its green area (this is the first segment that the needle reaches, the following one being red) and keep the heat on the green area (tips below) as long as possible while adding coal, but there is tolerance for mistakes.
The pressure valve has 3 positions: Closed, controlled, and released (the last one resets pressure to 0, remember you need some pressure to make the naphtha), it is initially closed (handle on the left side).
The tar regulator has 3 positions as well: Closed, intake, and afterburner, it is also initially closed and once you put it to intake (handle at the top) pressure will start going up.
Let the pressure go up to the green area, but pay attention to the heat level. Add coal as needed, optimally to maintain the heat gauge in the green zone, but it could be played more safely by keeping it well below overheating.
A very easy way to do this is:
The bar on the bottom should start turning green. When it is full, stop adding coal and close the window to replace your empty barrel with a barrel of naphtha. To prevent confusion, note that the barrel of naphtha in your inventory looks almost identical to an empty barrel.
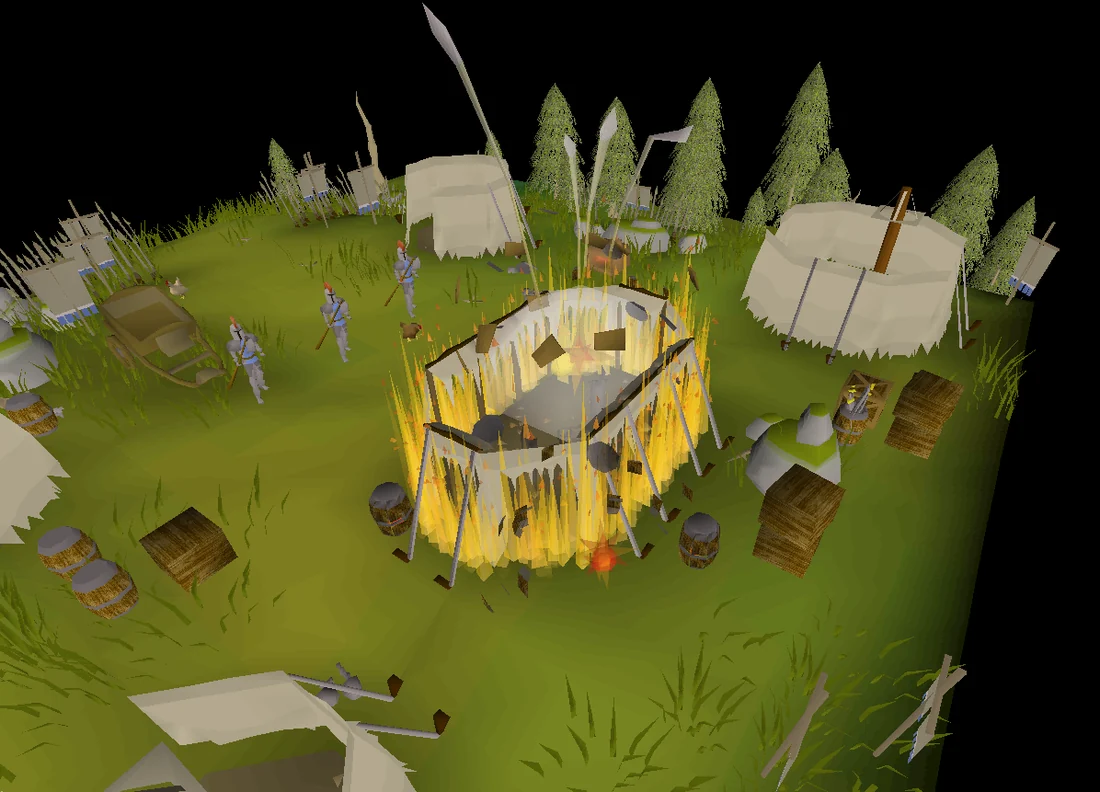
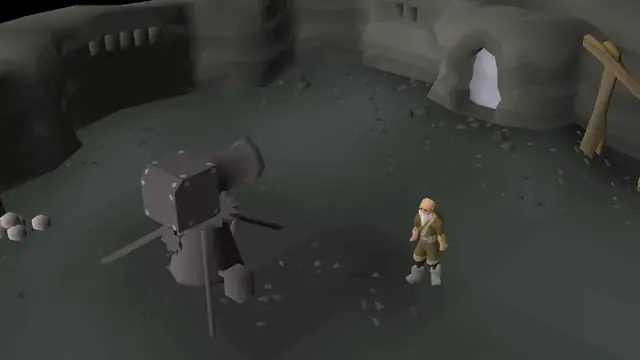
Now that you have the barrel bomb, go all the way through the Underground Pass one last time. The coal, gloves, pestle and mortar, pickaxe, and combat gear no longer need to be brought. Kill a rabbit and cook it on any fire. If you did not bring an axe, there are lit fires in the Elven Camp, as well as in Zul-Andra south of Tyras Camp. Then, go to the catapult outside the Tyras Camp. Talk to the guard, and give him some rabbit meat to distract him. Then, use the bomb on the catapult - you will need your tinderbox for this. (If you forgot your tinderbox, you can buy one from the General Store in the camp). You will see a cutscene of your character loading the barrel onto the catapult and launching it at King Tyras' camp, where it explodes on his tent.
Go back to Lord Iorwerth. He will give you a letter to take to King Lathas and then give you access to the overground pass of Arandar. Teleport out, and go to Ardougne Castle. On the way, you will be approached by an elf named Arianwyn who will break the magic seal on the letter and tell you to read it. You will learn that King Tyras wasn't the main antagonist in the quest and that his brother King Lathas is actually the one serving the Dark Lord. Return the letter to King Lathas to complete the quest. Remember to drop the crystal pendant before talking to King Lathas if you want to keep it.
Congratulations, quest complete!
Use this when you already know the route. The full walkthrough above includes explanations and diagrams.
Talk to King Lathas in Ardougne Castle.
Say: I assume you have a plan? → Yes.
Note: You can start this quest by talking to King Lathas directly after the completion of Underground Pass.
Travel through the Underground Pass, entering on the far west side of West Ardougne. Refer to Underground Pass/Quick guide if you become stuck.
Search the abandoned equipment next to the fire for the cloth. Use the cloth on your arrows, light them, and use your bow and lit arrows to open the gate.
Take a plank to the north, if you did not bring one. Head south, then east, crossing the gap with a rope while ignoring the water.
Cross the grid using the same pattern you did before. Pull the lever.
Search the odd markings to bypass traps, then go directly down the well. You do not need to re-collect the four orbs of light for the furnace.
Dig the loose dirt in the first southern cage, cross the ledge, and take the swamp shortcut (with 50 Thieving) or traverse the maze.
Go south and squeeze through the pipe, pass through the tunnel, and head north-east where the paladins were.
Use a plank on the flat rocks. Open the doors. Optional: Charge your Iban's staff or Iban's staff (u) at the Flames of zamorak well just before entering the large area with Iban's Temple, if you brought either one.
Travel south to Iban's Temple and enter the well (optional: talk to Koftik for some free food).
Exit the cave to the west.
Run west through the forest, then talk to Idris when he spawns (this may take a little while).
Follow the map to Lord Iorwerth.
Run south-west, jump the leaves trap (click the middle square closest to you).
Run west, pass through the sticks trap. (For this stick trap, and any stick traps you may encounter during this quest, simply stand one square in front of the trap and spam-click the trap until your character moves over it. This will negate all damage from the trap.)
Follow the path north-west, jump the leaves trap, and continue north until you reach the Iorwerth Camp. Cross the Log Balance to reach it.
Talk to Lord Iorwerth.
Follow the map to the Elf Tracker.
Run back the way you came and run south-east once you reach the Sticks trap (do not go through the sticks trap).
Talk to the Elf Tracker.
Talk to Lord Iorwerth again. (You must have an open space in your inventory to receive the Crystal Pendant.)
Talk to the Elf Tracker again.
Click to follow the tracks, they are west of the tracker, at the north-west corner of the blue mushrooms.
Talk to the Elf Tracker.
Climb through the dense forest, kill the Level 110 Tyras Guard that immediately spawns.
The guard can be safespotted by the mushrooms to the south-west.
Go north, pass tripwire and go through more dense forest.
Run west then south through more dense forest, talk to General Hining in the camp.
Take at least 2 barrels. 3 is highly recommended in case you fail distillation of coal tar in upcoming steps. The second barrel is needed for Mourning's End Part I.
Go back to the Elf Tracker and use 2-3 of your barrels on the tar just south of him to obtain barrel of coal tar.
Get a piece of sulphur from right next to where you got the tar.
Talk to Lord Iorwerth with one empty inventory slot. Players wishing to keep their Crystal pendant should drop it each time before talking to Lord Iorwerth (or King Lathas) for the rest of the quest. Banking it will not keep it safe!
Read the book and keep it in your inventory.
Talk to Lord Iorwerth about each item (sulphur, naptha, quicklime, barrel, and fuse).
Say: I need some quicklime. → I need some sulphur. → I need some naphtha. → I need a barrel. → I need a fuse. → That's all thanks.
If you don't have a pot grab one from the spawn north of Lord Iorwerth.
If you need limestone, make sure you have your pickaxe. Head east through the Dense forest, jump over the leaves, then into the mine. Beware of Level 88 dire wolves.
Go back to where you got the barrels so you can use the small furnace, or teleport to a bank near a furnace (Falador, Edgeville, etc)
Use limestone on any furnace (make sure gloves are equipped or you will take damage.)
With a pot in your inventory, use your pestle and mortar on the quicklime. If you do this incorrectly, you will need to repeat the previous step with a new limestone.
Use your pestle and mortar on the sulphur.
If you have not already created a strip of cloth, use four balls of wool on the loom in the farm south of Falador or near the house portal in the Hosidius area to make one.
The coal from your bank can be noted, but you will need to un-note it using Phials in the nearby general store once you get there.
Talk to the chemist
Say: Your quest. in Rimmington. Make sure you have the book in your inventory. (If you don't, the Quest Journal will not update!)
Un-note your coal and then use your barrel of coal tar on the fractionalising still outside. All 20 coal should be in the inventory at once, as leaving the interface for the still will reset all process towards making the naphtha.
Read this whole section first before you distill! When you are ready, operate the still:
Turn the tar valve on the right side all the way to the right (third marker).
Wait for the pressure gauge to land in the green zone, then turn the pressure valve on the left to the middle to halt the pressure. If it lands in the red zone, turn the valve right to relieve some pressure, then back to the middle.
Do not touch the valves again. Ignore the pressure gauge.
Slowly add 2 coal, then 1 additional coal whenever the heat gauge falls too low (well outside the green zone). The tar will still distill if the gauge is near the green zone (but not in it). Do not add 4 at once, it is likely to overheat and you will have to start again. A "pop" sound and the valves resetting does not mean you've lost the barrel of coal tar; simply restart from the beginning of the steps without exiting the interface. The process is fast and may use only 4-5 coal. If you forgot or ran out of coal, you can leave and come back.
Once the green bar is full you may exit out of the interface and automatically receive the barrel of naphtha
Make a second barrel of naphtha for Mourning's End Part I. No sulphur or quicklime needed to be added to the second barrel.
Use the pot of quicklime and ground sulphur on the barrel of naphtha to make a barrel bomb (unfused).
Use the strip of cloth on the barrel bomb (unfused) to make a barrel bomb.
Go through the Underground Pass once more. Bringing summer pies this time is highly recommended because you are now carrying a very heavy barrel bomb.
If you did not bring your own cooked rabbit, kill one north-west of the Elf Tracker and cook it. If you forgot an axe, there is a fire in the Iorwerth Camp.
Head to the catapult, north of the Tyras Camp.
If you did not bring a tinderbox, go south to Quartermaster's general store and purchase a tinderbox before you give the guard near the catapult the cooked rabbit.
Use the cooked rabbit on the guard near the catapult.
Use the bomb on the catapult.
Talk to Lord Iorwerth.
Attempt to enter Ardougne Castle.
Talk to King Lathas.
Congratulations, quest complete!
QUEST COMPLETE
OSRS WIKI CONTRIBUTORS
Walkthrough text and preparation lists are adapted from Old School RuneScape Wiki contributors under CC BY-NC-SA 3.0. Game imagery © Jagex Ltd; individual image credits are available from their captions. This page is fan-made and not affiliated with Jagex.
KEEP QUESTING
Game icons © Jagex Ltd, via the OSRS Wiki. Interface icons by Lucide.