1
1Requirements
- Completion of the following quests:
- 31 Herblore [boostable] [required to start]
QUEST 60 · MEMBERS
Sanfew requires a rare herb for the next part of the purifying ritual. Travel back to the Troll Stronghold to find this herb that the trolls use as an ingredient for their favourite dish.
Talk to Sanfew on the first floor of the herbalist shop in Taverley.
God Wars Dungeon route to Trollheim:
Burthorpe route to Trollheim:
Fremennik route to Trollheim:
STEP BY STEP
Follow the chapters below. Click any screenshot or diagram to view it at full size.
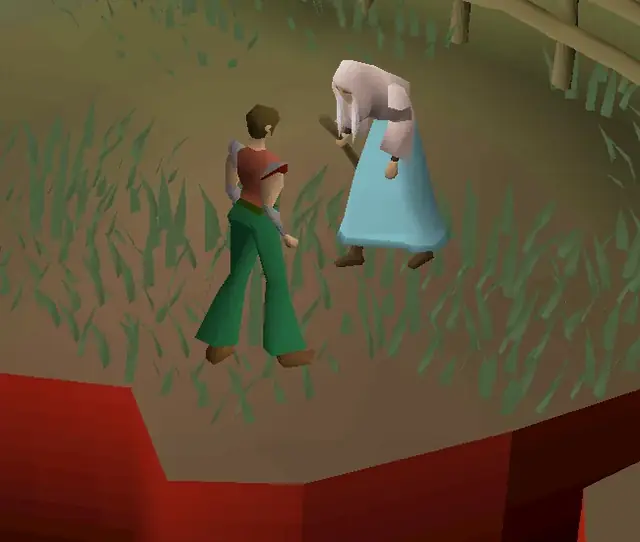
Speak to Sanfew on the top floor of the herb shop in Taverley. Select ask general questions, then ask if he has any more work for you. He will task you to find the secret of the herb goutweed, in order to perform the next part of the purifying ritual on the Druid's circle. Only the trolls in the Troll Stronghold know about goutweed, so Sanfew will suggest you speak to his friend, Eadgar, who lives near there at the top of Trollheim.
Note: Failing the obstacles, though uncommon, deals 1-5 damage, depending on your current HP.
Make your way to Trollheim using any of the routes below.
The fastest and safest method to get to Trollheim is to teleport near the entrance of the God Wars Dungeon with one of Ghommal's hilts, rewarded from completing Combat Achievements. The hilt's 'Trollheim' option will place the player near the boulder/little crack, at which point they may run south to meet up with the thrower troll portion of the Burthorpe route.
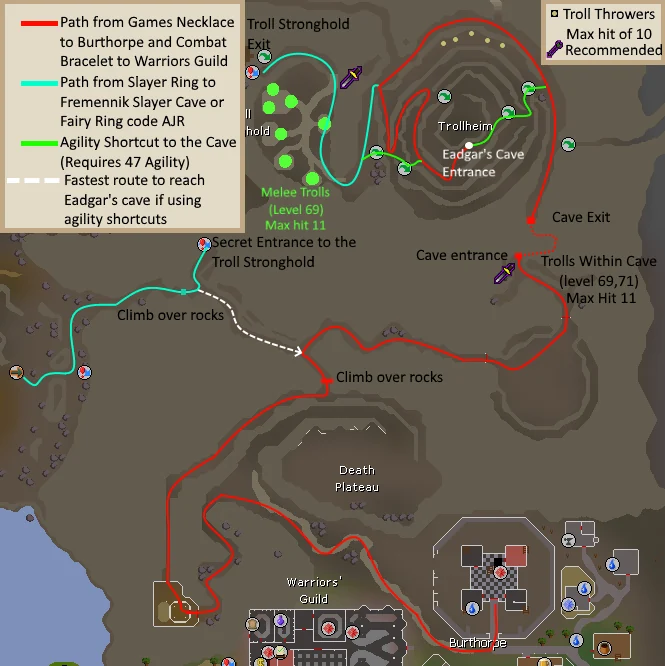
If using a games necklace or a combat bracelet teleport to Burthorpe Games Room or the Warriors' Guild, respectively, and follow the mountain path out of the north-western corner of Burthorpe. Go south at the fork in the path to Tenzing's house. If you don't already have climbing boots, buy some here from Tenzing for 12 coins. Wear the climbing boots, and climb over the stile in his back yard, following the path north. At the next junction, climb over the rocks, follow the path, and go west at the next fork climbing over rocks as required. Head north to the Secret Entrance that will place you on the lower level of the Troll Stronghold.
If using a Slayer ring or a Dramen staff, you must have climbing boots already as you won't be able to reach Tenzing from this path.
For the Slayer ring path, teleport to the Fremennik Slayer Dungeon or use the Fairy ring with (code AJR) to teleport outside the Dungeon entrance. Head north-east to a narrow passage and climb over some rocks (climbing boots required). Head north to the Secret Entrance that will place you on the lower level of the Troll Stronghold.
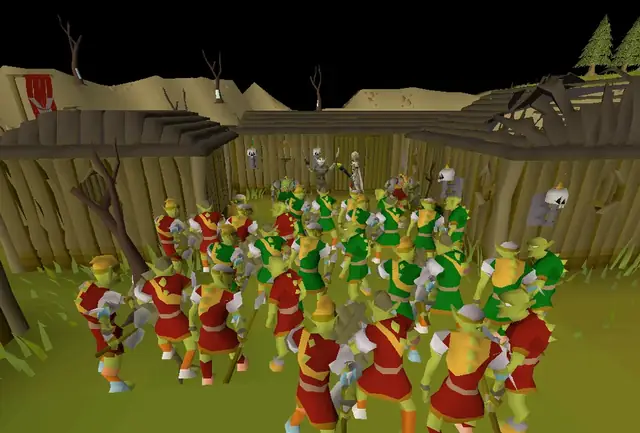
From the Secret Entrance, head north along the corridor, past the jail cells and sleeping guards and take the stone staircase in the north-east corner. Head south and you'll see four Troll Cooks here – one of them will be called Burntmeat. Speak to him, and he will offer to tell you about goutweed in exchange for a human to cook in his stew.
Take the stairs next to Burntmeat and you will be on the upper level of the Stronghold. From here, follow the corridor north until you see the exit on the wall to the east, exit the Stronghold and run south-east to reach the base of Trollheim on the west side.
At the summit of Trollheim, enter the unmarked cave entrance on the southern side. Speak to Eadgar and the player will inform him of your quest and Burntmeat's request for a human stew. Eadgar has a plan to trick him, but first he needs a parrot.
Head to the Ardougne Zoo, and talk to Parroty Pete near the northern wolf enclosure. Ask him when they added the parrot aviary, and then ask what they like to eat. He will tell you their favourite food is pineapple chunks, and that someone recently replaced their drinking water with vodka as a prank.
Use (don't eat) your pineapple chunks on the vodka to make alco-chunks, then use them on the aviary hatch on the west side of the parrot cage. You'll obtain a drunk parrot, with the player telling Parroty Pete that you will take it to the vet.
Do not drop the parrot or it will fly away. Once you have visited Eadgar with the parrot, you will be able to retrieve it from him if lost.
While in Ardougne, it's also a good idea to pick up your logs, tinderbox, grain, raw chicken, pestle and mortar, and unfinished ranarr potion from the bank.
Take the parrot to Eadgar. You need to make it look like a human, taste like a human, smell like a human, and talk like a human. (You must do these steps in order; however, you may hand in the items after hiding the parrot.)
Note: If you boosted your Herblore to start the quest, a level of 31 is needed to make the troll truth potion.
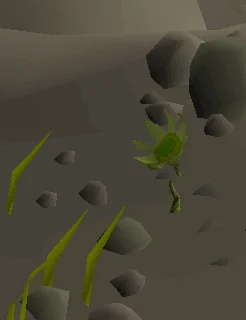
After you've done all of this, Eadgar will tell you that you need to make a troll truth potion so that Burntmeat won't lie to you about Goutweed. Look near the grass patches around Eadgar's hill until you find a tiny thistle growing in one of them and pick it for a Troll thistle. It may take you a while, but keep searching. If unable to find it, one may find it helpful to world hop and check the grass directly north or directly west of the cave. The Thistle's name is yellow when displayed at the top-left of the game window.
Once you've found the troll thistle, make a fire with your extra log and cook it to get a dried thistle. If you forgot to bring an extra log and/or tinderbox, there is a fire in the cave between the arena and Trollheim. Then, grind it with a pestle and mortar to make ground thistle. Finally, boost your Herblore level (if necessary) and add the ground thistle to your unfinished ranarr potion to make a troll potion. (If your character doesn't want to, check your quest journal to re-sync your progress).
Talk to Eadgar again. He will take the potion off of you and tell you that the parrot has had enough by now, so you can get it back from the troll jail. At this point it's recommended that you bank and grab some food for the next part of the quest. Go back to the prison cells in the Troll Stronghold, either through the back door to the jail via Fairy rings, code AJR or with the Slayer ring teleport (bring climbing boots). If you chose not to bank, head back to the stronghold then north through the corridor, then climb down the stone staircase, and unlock the prison door. Finally, climb down the second stone staircase to arrive at the prison cells, search the rack to retrieve the parrot, and then return to Eadgar.
Open the location map on the Wiki ↗
After you give the parrot to Eadgar, he will give you the Fake man. Go back to the cooks in the stronghold by going south of the entrance and then down the stairs, and give the dummy to Burntmeat. He'll give you a piece of burnt meat as a reward (which you can discard as it serves no purpose in the quest). He'll also tell you that the Goutweed is kept in the storeroom and that you can find the key by searching the Kitchen Drawers.
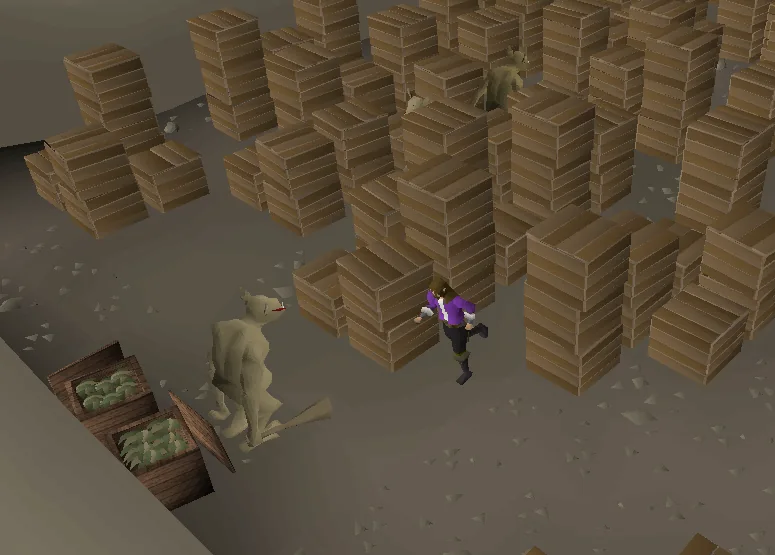
Open and then search the stone drawers in the south-eastern corner of the room to find the storeroom key, then go down the stairs just to the north. Down the hallway is a room with patrolling guards. If one of them sees you, it will throw a rock at you, dealing 0-6 damage, and you will be sent back to the entrance. Protection prayers do not block this damage.
The troll guards walk in cycles of 4, repeating. The easiest way to get a Goutweed is to click the crate with the Goutweed with run on as the two guards closest to the door are about to pass each other. Two of the 4 cycles should succeed using this method, and there is a 4 tile window where you can do this. If you get caught the cycle does not change like with Sorceress's Garden so you can keep trying. If done correctly this should result in a Goutweed every 2 runs. If you prefer you can just click the crate and try to brute force it, players may expect to obtain somewhere in the vicinity of one Goutweed per 5-10 runs using this method. Since you will be running a lot and being thrown out a lot, it is recommended to bring energy-restoring items.
If you wish to utilise the intended mechanics, the best way is to use the two most eastern guards as an indicator of when to move to the second safespot. To do this turn on your run and wait until one of the two guards rounds the northern corner of the boxes that they rotate around. As soon as this happens run to the second safespot. Note that the darker coloured troll patrolling the small section of boxes must also be avoided. Once in the second safespot simply run to the one of the safespots adjacent to the crate when the guard that comes north and closest to you turns west, and then click on the Goutweed crate.
The next way to do this is to use the safespots, which are dead ends surrounded by three crates. Time your movement and run to the first safespot, then wait for your chance to run to the second. You can use the position of the troll guards as an indication of when to move, as the placements of the guards will repeat after one or two cycles. Wait at the second safespot until you get the chance to run to the Goutweed crate and search it. Be careful not to simply click search Goutweed Crate as this will get you stuck on the sleeping troll instead of going up to the crate. Make sure you click on the spot adjacent to the crate, and then click search Goutweed crate. You'll be kicked out after you get one piece of Goutweed. Also, if you plan to do Dream Mentor or Dragon Slayer II at any point, it is recommended to get two extra Goutweed as it is a required item in those quests (Note: You can grab multiple Goutweed if you are quick enough to skip the dialogue and click on the crate).
Give the Goutweed to Sanfew back in Taverley by clicking on the "ask other question" option NOT the "talk about sanfew serum". This will complete the quest.
Congratulations, quest complete!
Use this when you already know the route. The full walkthrough above includes explanations and diagrams.
Talk to Sanfew (top floor of the Taverley herblore store)
Say: Have you any more work for me, to help reclaim the circle? → I'll do it., or → Ask general questions. → Have you any more work for me, to help reclaim the circle? → I'll do it. if you have completed Zogre Flesh Eaters).
Climb to the top of Trollheim, using the agility shortcuts if you can to save time, and enter Eadgar's Cave (see map for path alternatives).
If you have not yet freed Eadgar in the troll stronghold's prison, pickpocket (30+ Thieving) or kill Berry the northern sleeping troll guard and use the cell key 2 on Eadgar's cell. Check your Troll Stronghold quest log and there will be a line that will either say "I've rescued Godric" or "I've rescued Godric and Mad Eadgar" to make sure.
Speak with Eadgar in his cave.
Say: I need to find some goutweed.
Go to Burntmeat's Kitchen, which is at the south end of the middle floor of the stronghold.
Talk to Burntmeat.
Return to Eadgar and speak with him. Secret Door through Rellekka Route Checklist|*For the secret door path, Slayer ring teleport to the Fremennik Slayer Dungeon or use the Fairy ring with (code AJR) to teleport outside the Dungeon entrance.
Head north-east to a narrow passage, climb over the rocks, and go through the secret entrance to the north.
If you have not yet freed Eadgar in the troll stronghold's prison, pickpocket (30+ Thieving) or kill Berry the northern sleeping troll guard and use the cell key 2 on Eagdar's cell. Check your Troll Stronghold quest log and there will be a line that will either say "I've rescued Godric" or "I've rescued Godric and Mad Eadgar" to make sure.
Head to Burntmeat's Kitchen, which is at the south end of the middle floor of the stronghold.
Talk to Burntmeat.
Go speak with Eadgar, whose cave is at the top of Trollheim.
Use vodka (right click it to avoid accidentally drinking it) on the pineapple chunks.
Use alco-chunks on the aviary hatch (west side of parrot cage).
Do not drop the parrot or it will fly away and you will need to retrieve it from Eadgar.
Talk to Eadgar in his cave at Trollheim about making the fake human.
Go back to the Troll Stronghold. You may skip this and use the parrot on your way back to Eadgar in the next section if using the agility way.
Run north and go down both flights of stairs.
Use the parrot on the rack north of the cells.
Talk to Tegid in Taverley south-east of the Herblore store for a dirty robe.
Say: Sanfew won't be happy...
Pick up 10 Grain just south-west of Tegid if you need them.
Kill 5 chickens on the way at Tenzing's house if you need Raw chicken.
Pick a thistle in one of the grass patches near Eadgar's cave entrance. It is very small and coloured the same as the grass. Zoom in close on each patch to find a green flower around the patch of grass. It can be hard to see. Note that it only spawns in one of the patches of grass at a time.
Enter Eadgar's cave and talk to Eadgar.
Light a fire with your other log and cook the thistle on it to make a dried thistle. (You may also use one of the fires near the trolls to the west.)
Use the pestle and mortar on the dried thistle and add it to a ranarr potion (unf).
Talk to Eadgar.
Retrieve your parrot from the rack in the troll stronghold.
Talk to Eadgar.
Give the fake man to Burntmeat.
Search the kitchen drawers by the south wall to obtain a storeroom key.
Go down the nearby stairs inside the kitchen to the storeroom.
Sneak to the back and take goutweed. Note:
Return the goutweed to Sanfew.
Say:
Congratulations, quest complete!
QUEST COMPLETE
OSRS WIKI CONTRIBUTORS
Walkthrough text and preparation lists are adapted from Old School RuneScape Wiki contributors under CC BY-NC-SA 3.0. Game imagery © Jagex Ltd; individual image credits are available from their captions. This page is fan-made and not affiliated with Jagex.
KEEP QUESTING
Game icons © Jagex Ltd, via the OSRS Wiki. Interface icons by Lucide.