Unpowered orb and runes to cast any Charge Orb once (requires the standard spellbook equipped - note that at Magic level 56 you can only cast the Charge Water Orb spell - two casts are needed if taking the "long path" during the second fight with the demon)
Charcoal (2-3 in case it breaks -- obtainable during the quest if travelling via Shilo Village)
3 Papyrus (4-5 in case one is torn -- obtainable during the quest if travelling via Shilo Village or from the spawn on Radimus's desk)
Super restore potion if your levels are not far above the following required levels, as failing will reduce them and you might need them for certain objectives:
50 Agility to squeeze through the crevice behind the bookcase
Follow the chapters below. Click any screenshot or diagram to view it at full size.
01
Before you begin
Talk to the Legends' Guards just outside the legends guild (fairy ring code BLR), and they'll send you through the gates if you meet the requirements to enter. Talk to Sir Radimus Erkle to get your assignment. He will request you map the Kharazi Jungle, befriend a Kharazi tribesman, and bring back a token of friendship to strengthen ties with the Legends Guild. You should receive Radimus notes.
You will need to bank several times during the quest. Depending on stats and risk tolerance, it may be possible to complete more steps in a single trip, so read ahead to see what will be required.
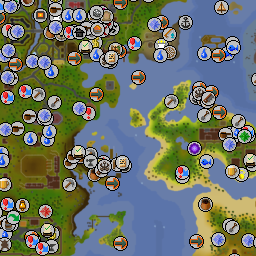
If you have unlocked fairy rings, the shortest way to the jungle is code CKR. When you need to bank, teleport out of the jungle and return using the fairy ring. Wearing a charged amulet of glory or ring of wealth throughout the quest provides a convenient teleport close to a bank and fairy ring (Edgeville and the Grand Exchange respectively). It may be worth taking the alternative route to Shilo Village on the first trip, to buy charcoal and papyrus.
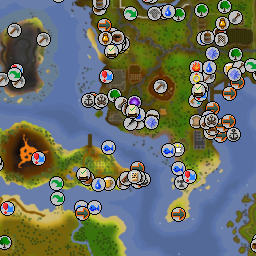
If not using the fairy rings, make your way to Brimhaven by taking a boat from Ardougne or any charter ship. Then, you can take Hajedy's cart to Shilo Village (his fee is 200 coins). Later, you can exit the jungle the same way as entering it, and return to Shilo Village to use the bank.
It will be necessary to exit from the depths of the Viyeldi caves, twice for the short path and three times for the long path. Even for players travelling by cart, teleporting out will be faster than climbing out. If climbing out, you can fail at some obstacles, particularly the strength door (where your attempts to open it from the inside can be interrupted by attacks from death wings). Teleporting out also provides an opportunity to bank before continuing.
03
Mapping the jungle
Items needed:Radimus notes (he will replace at the Legends' Guild for 30gp), axe, machete, at least 1 charcoal (3 to be safe), at least 3 papyrus (5 to be safe) Skills needed: 50 [boostable] to map the jungle with the notes
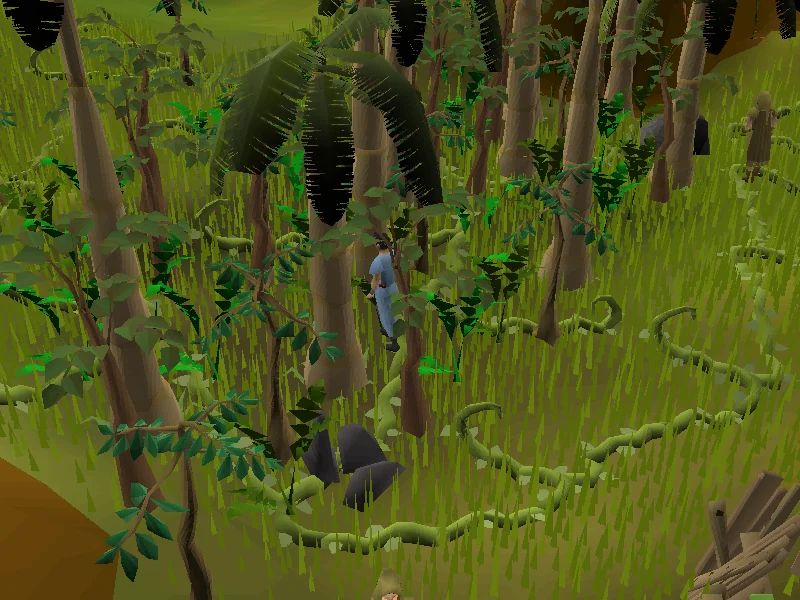
Head to the jungle boundary south of Shilo Village. To get into the Kharazi Jungle, you'll need to cut your way through the overgrown jungle vegetation using an axe and machete.
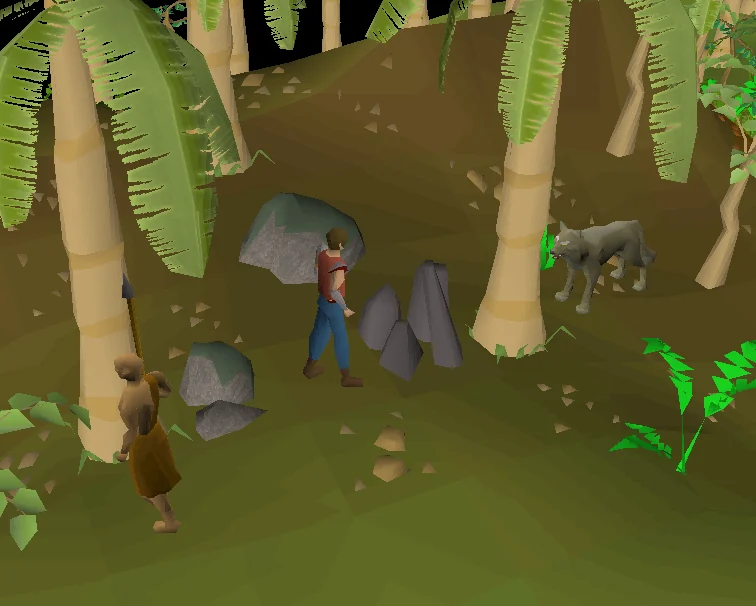
Once inside (preferably on the eastern/western sides, so you don't have to run back and forth), start mapping down the jungle with your charcoal and papyrus by right-clicking on the Radimus notes and then selecting 'Complete' ( 50 ). Sometimes the charcoal and/or papyrus can break, so you should bring extra just in case. Alternatively, you may mess up the papyrus, but be able to salvage it. You should watch out for the jungle wolves, as they are aggressive; the tormented warriors and oomlie birds aren't aggressive unless provoked (see below).
You can drop your charcoal and papyrus after completing the notes all three times.
Shake a leafy palm tree to acquire a palm leaf. Pick up five palm leaves (or pick up and drop the same one five times) to complete a hard task for the Karamja Diary.
Additionally, kill an oomlie bird and collect its meat. Use a palm leaf on the raw meat, then cook the resulting wrapped oomlie over fire (now or later) and eat the resulting oomlie wrap to complete another hard task. The wrapped oomlie cannot normally be burned.
Chop some teak and mahogany trees at the pool or southern coastal end (teak) and south-east (mahogany) of the jungle to complete two medium tasks rather than paying 100 trading sticks to enter the Hardwood Grove.
05
Contacting the locals
Items needed:Radimus notes, axe, machete, 4 free inventory slots Skills needed: 50 [boostable] to squeeze past some rocks
Consider banking here to get the items for the Binding book section.
Talk to one of the jungle foresters, who are standing at various points along the outside of the jungle boundary. They have a bullroarer, which they'll be willing to give up if you give them a copy of your notes. Use the completed Radimus notes on the forester, who will then make a copy before giving you their bullroarer.
Warning: Do not use the bullroarer around tormented warriors or oomlie birds, or you'll be attacked!
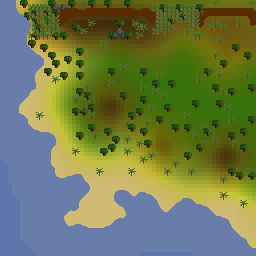
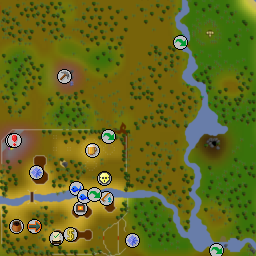
Go inside the jungle again, and swing it near the totem pole found east of the water pool represented by a blue square on the map to call a local named Gujuo out of hiding. (There are multiple totem poles in the jungle, so if nothing happens, try another one.) He'll ask for your help, since his tribe's shaman, Ungadulu, is trapped in his cave.
From now on, you can call Gujuo using the bullroarer from anywhere in the jungle. Towards the north-western edge of the jungle, you'll find some rocks that you can squeeze through to get into the cave ( 50 ).
Investigate (right-click) the Fire Wall and talk to Ungadulu, who warns you not to approach the flames, but becomes possessed and informs you that only pure water can extinguish the flames. Next, search the various items; the bed, table, and crate to obtain Ungadulu's notes: a scrawled note from the crate; a scribbled note on the table; and a scrumpled note on the bed. The crate is in the south-east corner of the room, not near the bed & table. Reading them tells you how the shaman had prepared to summon his ancestors and pay homage to them, but fell prey to an evil presence in the cave.
Once you're back outside again, call Gujuo with your bullroarer. Ask him for more information and tell him you need some pure water to douse some magic flames (option 4). Ask, "What kind of a vessel?" (option 5). He'll give you a sketch of the vessel. (If you do not have these dialogue options, go back inside the cave and speak to Ungadulu again after you read the notes and they should become available).
Items needed:Radimus notes, axe, machete, pickaxe, 1-2 lockpicks (2 to be safe)."SMELL" runes: 1 soul rune, 1 mind rune, 1 earth rune, 2 law runes.Cut sapphire, emerald, ruby, diamond, red topaz, jade, and opal. Items recommended: Supplies to pass level 83 Death Wings, and equipment to kill one for the Karamja Diary if you wish to do it on this trip. (The second trip may be more convenient, as you will need combat equipment anyway. A super restore potion if your level is not far above the required level stated below. Skills needed: 50 [boostable] to squeeze through the crevice, 50 [boostable] to pick the locked door, 52 [boostable] to smash three boulders (consider bringing 2-3 boosts if boosting), 50 [boostable] to force the heavy door.
Make sure that you have all the required items. Go back to the cave. Ignore the fire wall and head to the east side of the room. Squeeze through a crevice hidden behind the easternmost bookcase by searching it ( 50 ).
As you proceed further into the cave, you will come across an Ancient Gate. Attempt to pick the lock ( 50 ). If you fail, clicking elsewhere during the dialogue box will save your lockpick and you can try again.
Once past this door, you'll need a pickaxe to mine three boulders out of the way ( 52 ). If you fail, your Mining level will decrease by 1. Once past these three boulders, use brute force to open the next set of gates ( 50 ); failing this will result in your Strength being lowered. Beware of level 83 Death Wings on the other side; activating Protect From Melee can completely negate their damage. Killing a Death Wing, either now or on the second visit, will complete a hard task in the Karamja Diary.
Run farther into the cave, and jump over the jagged wall. When you get further inside, you'll find a place where there are markings on the wall. Read them and it will give you the riddle:
"Place five stones of magical power - but place them wrong, and your fate will sour. First is the spirit of man or beast (Soul rune), second the place where fools tread least (Mind rune). Third is the soil where plants do grow (Earth Rune) -- and four and five are the rules you must know (Two Law Runes). Solve this riddle, and overcome your ignorance; arranged correct, it should make sense."
It spells SMELL. Use the runes with the wall in the order of Soul, Mind, Earth, Law, Law and then the door will appear. If the runes are used in an incorrect order, you will have to leave and re-enter the cave.
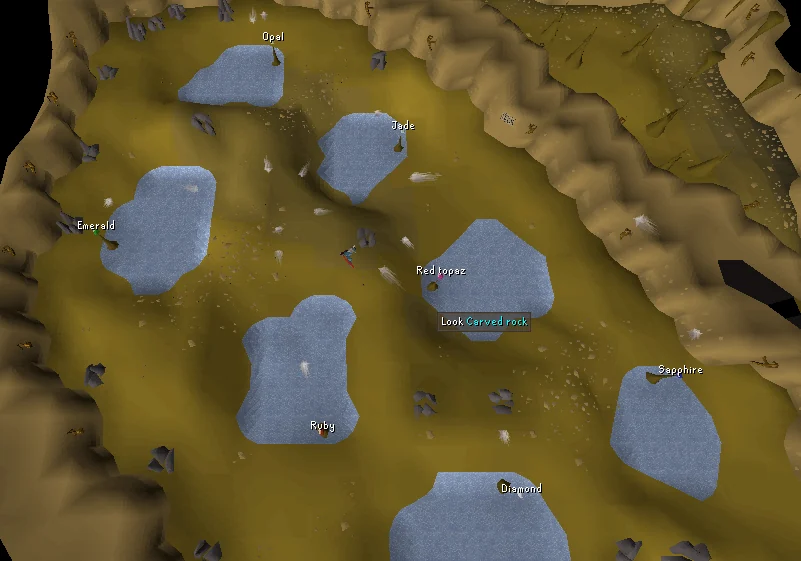
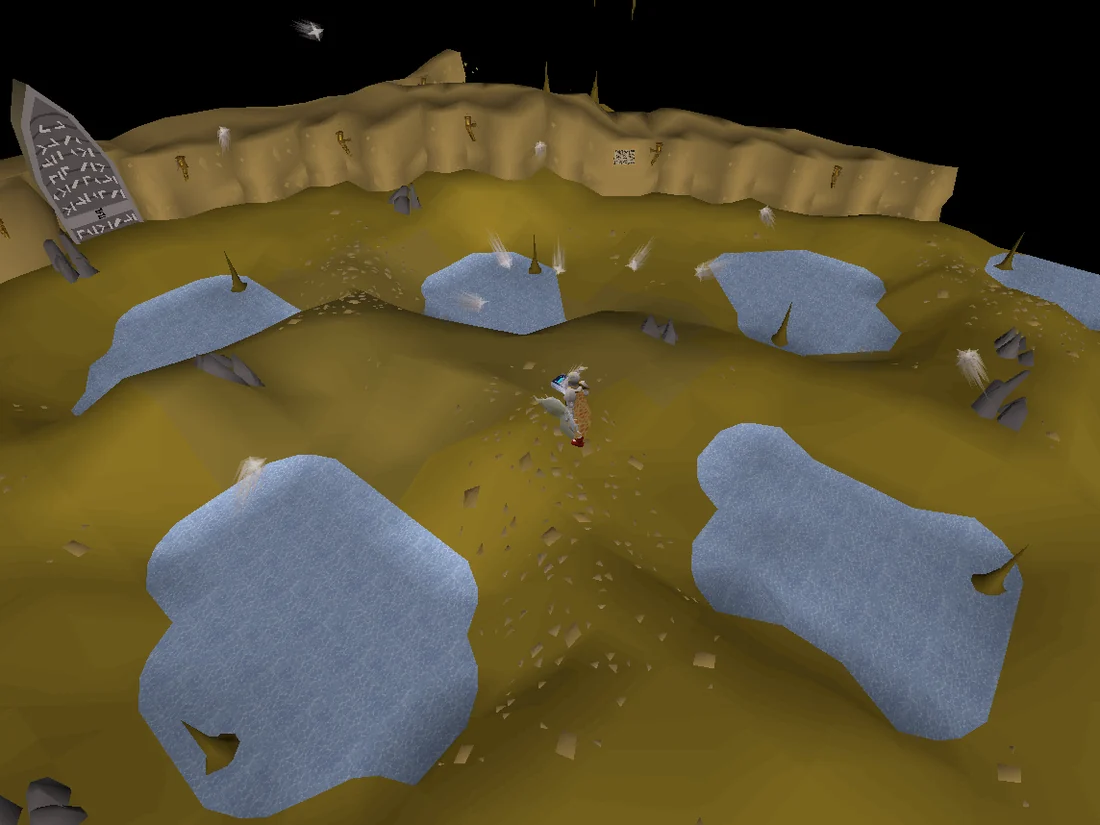
Inside are a number of carved rocks sitting in pools of water. Search the rocks to find the next riddle:
"Once there were crystals to make the pool shine. Ordered in stature to retrieve what's mine."
Crystals refers to gems, and ordered in stature refers to arranging them in ascending order of their Crafting level requirement. Starting at the ancient gate, use the gems in ascending order (from North to South, East to West) on each carved rock (refer to the diagram on the right). The sequence in which you do this does not matter, as long as you use each gem on the correct rock. You will not lose the gem if you use it on an incorrect one.
BugBug:
Attempting to take the gem back after it has been placed on the stalagmites can cause it to be lost forever.
When all of the gemstones are in place, there will be a little light show. Take the binding book that appears.
Once you have the binding book, teleport away or leave the cave to restock.
Note: If you lose the binding book, you must repeat the steps above, though the "SMELL" runes are no longer needed.
Note: If you're planning on gathering magic logs from the yommi tree using the yommi tree sapling method described later, you do not need to make additional gold bowls. (Ironman only)
Go to any anvil while holding the sketch of the vessel you obtained from Gujuo and try to make the gold bowl ( 50 ). You may easily fail even at higher smithing levels, so to be safe, bring more than two bars. If walking, the closest anvil is in Tai Bwo Wannai Village. If you can use fairy rings and have 60 smithing, you can use the minigame teleport to Blast Furnace for an anvil, take a mine cart back to the Grand Exchange, then use the fairy ring there to return to the jungle.
You can now drop your Sketch after successfully making a Gold bowl.
08
Pure water
Items needed:Radimus notes, axe, machete, bullroarer, gold bowl, prayer potion (if you fail to bless the bowl and your prayer drops below 42) Items recommended: Bring the items for Freeing Ungadulu Skills needed: 42 [boostable] to bless the bowl
Head back into the jungle and call Gujuo. He'll help you bless your gold bowl so that it can carry the pure water. Your prayer points must be at or above 42 to attempt this, and if you fail, it will drain 5 prayer points. If it drains your prayer below 42, you'll have to restore it to try again.
To bless multiple bowls, talk to Gujuo again (without saying "thanks for your help").
With your blessed golden bowl, head to the pool of pure water towards the middle of the jungle. Since you can't quite reach the water, cut a hollow reed by using your machete on the tall reeds by the edge of the pool, then use the reed on the pool to siphon the water into your bowl. If you left-click the reeds, you will receive a message saying you need a knife to cut them, but a machete works just as well. Note that if you leave the jungle, the water in your bowl may evaporate, requiring you to refill the bowl again when you return.
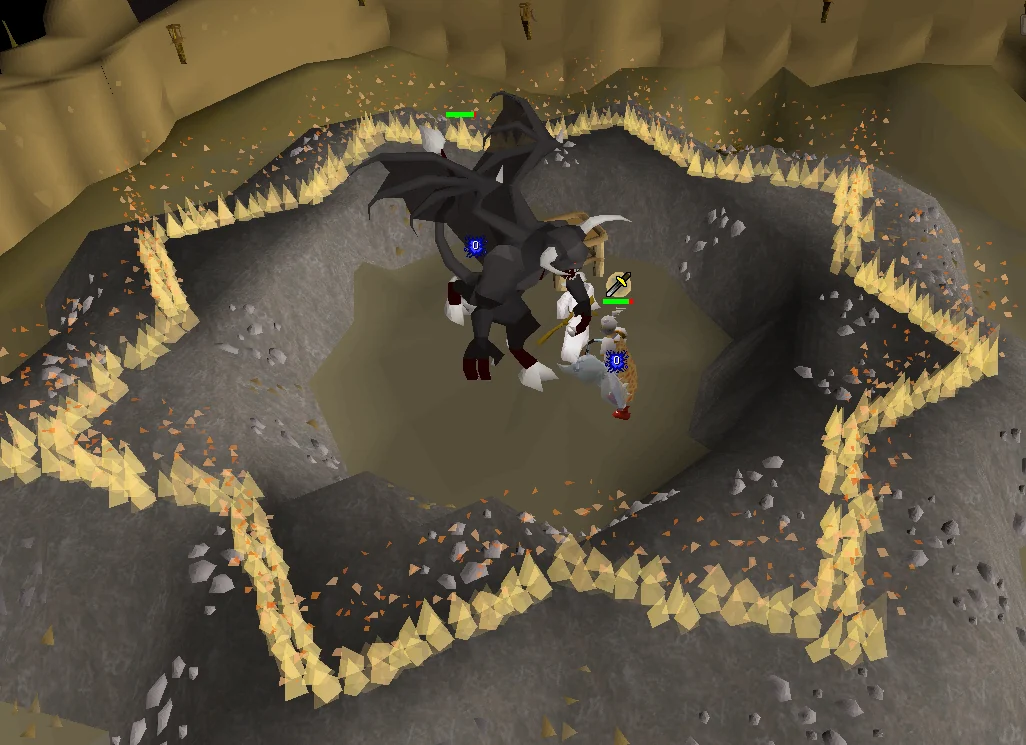
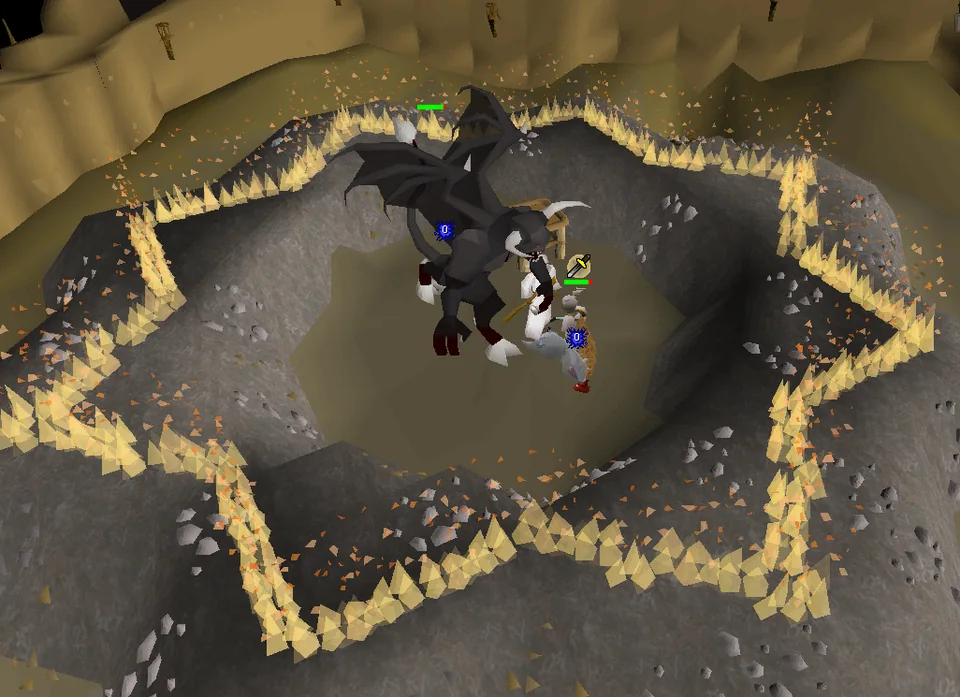
There is an upcoming fight, so be prepared. If you die during the fight, you will have to re-obtain all quest items. When you're ready, use your pure water on the fire wall to step through without damage. Then, use your binding book on Ungadulu to release the demon, Nezikchened. Do not talk to or attack Ungadulu. (If you talk to him, he will damage you. If you attack him, he will damage you and knock you out of the octogram.)
Nezikchened is level 187 and will drain a large amount of prayer (90%) at the beginning of the battle, but never again after that, so be careful if you want to use it while fighting him. Additionally, he'll cast a Fire Blast just before dying, so make sure to keep your HP up so that he doesn't kill you with his last ditch attack. This Fire Blast will hit through the Protect from Magic prayer.
Arclight is heavily recommended for its damage and accuracy boost, as well as its stat-lowering special attack versus demons. If unavailable, other demonbane weapons (e.g. Silverlight, Darklight, Holy Water) may be used alongside a higher-tier weapon. The desk can be used as a safespot, resulting in Nezikchened switching to Magic attacks.
Note: There seems to be a glitch where if there is more than one person in the room (not inside the octagram), Nezikchened may go aggressive on the other player. This then makes Nezikchened completely harmless and unable to attack the player.
Note: If you don't kill Nezikchened fast enough, he will reset, causing you to have to use the book on Ungadulu again. The combat will reset, restoring him to full health and re-draining your prayer.
Once Nezikchened is defeated, talk to Ungadulu. Ungadulu will thank you and give you some yommi tree seeds. Be careful not to attack him as this will knock you out of the octogram and deal some damage, and if your health is low after the fight, this may kill you. You can use the drop trick to get more yommi tree seeds, to save time later if you lose the plants to rotting or if you are an Ironman and want to get magic logs. Ask Ungadulu how to get out, and he will tell you that he cast a spell to protect you from the flames. You can now walk through the flames at any time without the bowl.
You can now drop the Binding Book.
Exit the cave, head back to the pure water pool, and refill your bowl with water if needed. Then, use it on the yommi tree seeds to germinate them. (Doing this will empty all your bowls if you had more than one, and you cannot plant the seed without more pure water.) After germinating the seeds, attempt to refill your bowl again to discover the pool is now gross with sludge. We will need to cleanse the pool during the next section before we can plant the seeds. (You must use a hollow reed on the pool to get the next dialogue from Gujuo.)
Call Gujuo. He will tell you that the underground source has probably been blocked off, and you'll need a bravery potion to be able to make it through the dark tunnel.
Unpowered orb and runes/staff to cast any Charge Orb spell (note that at Magic level 56 you can only cast the Charge Water Orb spell). Bring 2 sets if taking the long path and you don't intend to bank between the two descents of the cave. Be on normal spellbook.
Food and potions to fight the three warriors followed by Nezikchened. If taking the long path and teleporting out of the cave, you can restock before fighting Nezikchened.
Bring boosts needed to access the cave again.
Skills required: 56 [boostable]to cast a Charge Orb spell. 50 [boostable]to use the furnace. In addition, the skills to go through the cave again (indicated above)
Go back to Ungadulu's cave and head down into the cave again, going through all the same areas that you did before. Kill a death wing on the way past if you have yet to complete a Karamja Hard Task.
When you reach the area with the seven pools, head further to where another door is. Cast any Charge Orb spell on it to go through. You'll find yourself in a room with several barrels in it. You can smash them to reveal things like food, rope, weapons, or often enemies. For now though, ignore them.
Use your rope on the winch and drink the bravery potion before heading down into the depths of the Viyeldi caves. If you've brought along a Salve amulet, now is the time to equip it. If the rope disappears, searching the winch again will cause it to reappear. Climb down the winch. You may lose your grip on the rope and fall into the pit, leading to moderate damage (15+).
You'll be on the top of a long, winding path with several rocks covering it. The blue wizard hat to the right of the ladder is the spirit of Viyeldi, which you can take to talk to or skip past for now. Climb over these rocks to the bottom of the path, but be warned. If you fall off, you can take extremely heavy damage (40+), depending on where you fell. You may also be immediately attacked by one of the three warriors mentioned below.
Once at the bottom, you'll see three groups of different undead warriors named Ranalph Devere (level 92), Irvig Senay (level 100), and San Tojalon (level 106), who will drop the lump, hunk, and chunk of crystal, respectively. Approach them and fight them individually. There are multiple of each warrior in the room. If you are using Ranged or Magic, hiding behind one of the empty ore rocks allows you to safespot them. Once you've defeated them, they won't attack again. Take the crystals over to the furnace to the north-east, and put them in to make a heart crystal.
Go south to the shimmering field and look at the minimap. If you haven't noticed already, the area to the north-north-west looks like the head of a dragon.
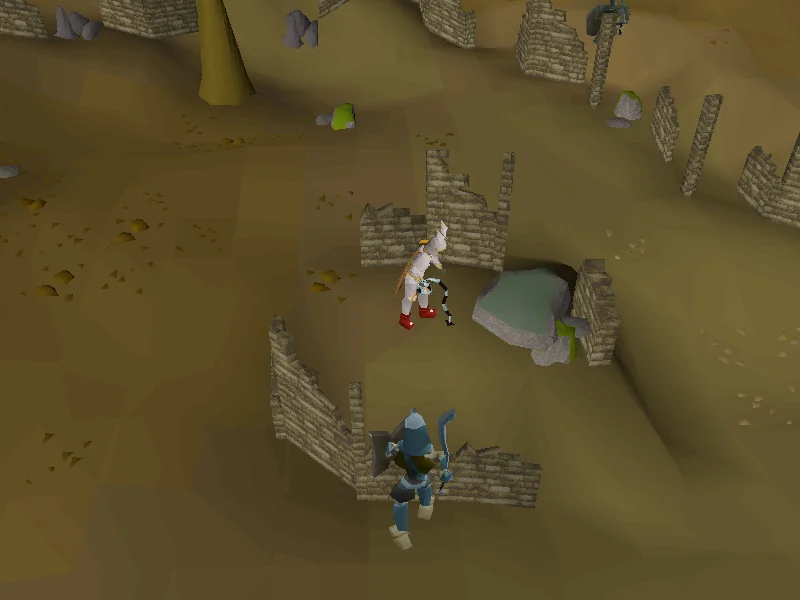
The mossy rock that players must use the heart crystal on to activate it. Image credits →
Go to where the eye is, and use the crystal on a mossy rock there. It will glow. Go back to the shimmering field, place the crystal in the heart-shaped recess next to it, and pass through the barrier. On the other side of the barrier are three lesser demons, and past them to the west is the source of the pure water.
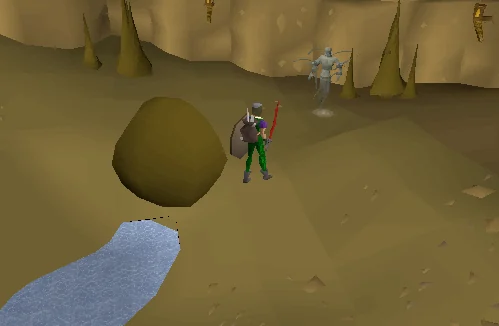
You'll notice that there is a boulder blocking the water flow. Try to push it, and a spirit named Echned Zekin (which is an anagram of Nezikchened) will appear. He'll say he's being tortured and beg you to help him by killing the spirit, Viyeldi. He'll give you a dark dagger to do so.
If you have no intentions of killing Viyeldi, you still have to accept the dagger from Echned, as the dagger must be given to Ungadulu in order to proceed with the quest.
There are now two paths to choose from.
Note: Players who leave the cave will need another Charge Orb spell to get through the door again. You will not need another rope or bravery potion.
The short path
Note: If you choose the short path, you will have to fight the three undead warriors again in the final battle!
Do as the spirit asks. Walk back to the rock path with the blue wizard hat that you climbed down, and climb the rocks back up to the very top (you cannot fail here).
You may have noticed a blue wizard hat on the way in—maybe even tried to pick it up. If you did, you met a spirit named Viyeldi, who Echned wanted you to kill. Stab him with the dark dagger (use the dagger on him while the dialogue is shown); then, go back down to the boulder.
Before pushing the boulder, proceed to the southern boulder if you wish to safespotNezikchened. Tell Echned Zekin that you did as he asked, use dark dagger on him. Nezikchened will reveal himself and attack the player, draining the player's Prayer.
After the battle, push the boulder out of the way of the water's flow and fill the bowl from the pool below it. You may need to try from different angles, try from the East side.
The long path
Items needed:Dark dagger; the same items as for Finding the water source, including another unpowered orb and runes to cast any Charge Orb spell (but you will not need another rope or bravery potion)
Bank if desired. Go back to the beginning of the cave, investigate the fire wall and Ungadulu's magic will allow you to pass through the fire wall safely. Use the dark dagger on Ungadulu. He will recognise the evil in the dagger and take it from you, giving you a Holy Force spell card, which will reveal the spirit's true form.
Now, head back down to the bottom once again. You'll have to use another Charge Orb spell to get back in (including another unpowered orb). Search the winch to make the rope reappear.
At the bottom, you'll have to fight Nezikchened again. Choose the southern boulder if you wish to safespot him. Push the boulder and Echned will appear again. Do not tell him you lost the dagger or he will damage you. To start the fight, cast the Holy Force spell (left-click on the card) when Echned is near you, and he will transform into Nezikchened and attack you. At the start of the battle, your Prayer will be halved. Nezikchened fights with a very ineffective magic attack at the beginning of the battle, and he'll soon realise that it doesn't work and will switch to melee. Defeat him however you like. After the battle, push the boulder out of the way of the water's flow and fill the bowl from the pool below it. You may need to try from different angles, try from the East side.
Note: If you don't kill Nezikchened fast enough, he will reset, causing you to have to push the boulder again to talk to him. The combat will reset, and he will have full health as well as drain your prayer again.
Note for Ironmen: You may wish to do this before proceeding further in the quest. 16 Magic logs are required for other quests, and the logs can be challenging to obtain for ironmen. Allowing a yommi tree to die and then chopping it down has a 1/4 chance to yield magic logs. This can be done quickly by not watering it, letting it die in the sapling stage, and hopping between three separate worlds. At the minimum Herblore requirement to plant the tree, about 192 seeds should be enough to get 16 magic logs accounting for a high (66%) failure rate from planting the seeds. When a dead tree is chopped down, the soil is damaged, so the player will have to hop worlds or move to another spot. It's possible to walk/run between two fertile soils and plant two yommi trees at once. While this method is time consuming, it is more consistent and has lower requirements than other early sources for magic logs.
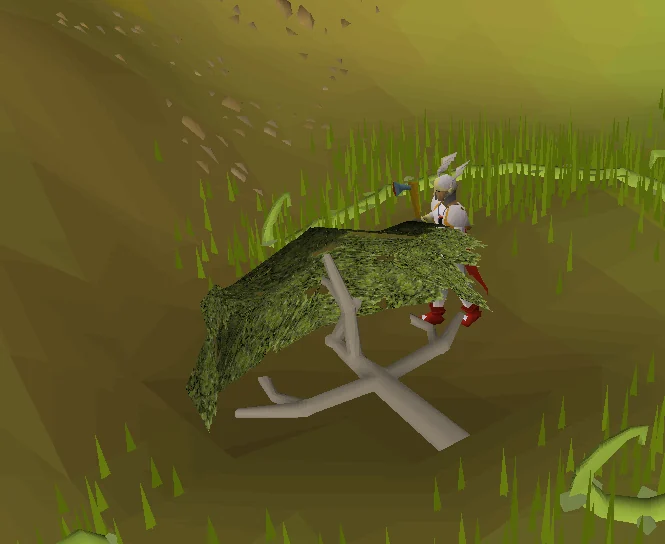
Return to the pure water pool, then use the bullroarer to call Gujuo for instructions on what to do next. Fill the bowl again. Find a patch of fertile soil - it will be bare of vegetation and brown on the map. Plant the germinated seeds in the fertile soil ( 45 ) and wait for the tree to grow. If it says you planted the seeds incorrectly, just keep trying until it works (the chance of planting it successfully is based on your Herblore level). The growing process only takes a matter of seconds so be prepared. Once the tree reaches the second stage, use your bowl of water on it. The third and final stage is the adult yommi tree. Use your axe on it, and keep doing this until you've chopped all the branches off and shaped it into a yommi totem ( 50 ). You'll know it's done when you can pick it up.
Note: Keep alert, because once the Yommi tree has reached the adult stage, you'll have only a brief window of time where you can cut it, or it will go rotten, and you will need to start again.
If you lose all your seeds, you can always go back and get more from Ungadulu in the cave. Remember to germinate them with the sacred water.
14
The final battle
Now, find any of the locations where there's an old, brown totem. One is located just east of the pool, but there are others all over the forest. Once you find one, make all the preparations you need to fight. Turn on Protect from Melee and use your new totem on the old one.
Note: you cannot replace the totem if you have inspected it recently. Wait a short time for it to return to its default state.
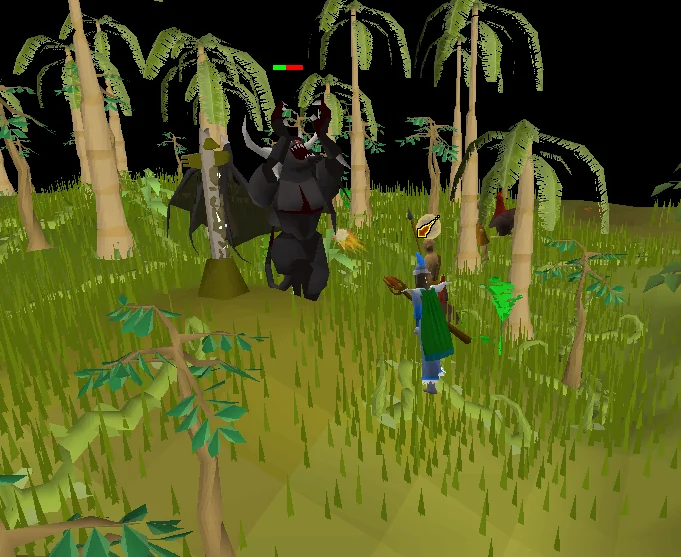
Nezikchened returns to destroy the hero once and for all. Image credits →
When Nezikchened spawns, he will say his dialogue and begin attacking you! You are immobile while he is speaking and can take heavy damage, so it is highly recommended to turn on Protect from Melee before replacing the totem to be safe.
If you chose the short path, you will need to kill the three undead warriors you saw down in the dragon cave once again. He will summon them one at a time, going from the strongest to weakest in terms of combat level. After each hero is killed, make sure that Protect from Melee is up as the interlude repeats, and Nezikchened will freely hit you four times on three occasions, which can deal a lot of damage if he gets lucky with his hits. Low levels should note that if you kill the three undead warriors and then leave, you will not have to fight them again upon returning.
If you took the long path, Nezikchened will not summon the undead heroes because Viyeldi is protecting them, but be cautious as he will hit four times before the fight.
Nezikchened will attack and drain your prayer. He attacks with Melee and Magic, which is much more effective this time. He doesn't use Magic that much if you melee him. Using Ranged, Magic, or a halberd from between the trees with Protect from Magic on will allow you to defeat him without losing health.
Warning: If you take too long to fight him, he will disappear. When you resummon him, he returns with full health.
15
Finishing up
When Nezikchened dies, replace the totem, and Gujuo will appear to thank you for defeating the demon. He'll give you a totem pole as a reward for everything you've done.
Return to Radimus Erkle with the Radimus notes and gilded totem (fairy ring code BLR), who will then let you into the guild. He will train you in one of 12 various skills of your choice up to four times. After all the experience rewards are claimed, the quest is complete.
Note: You will need to talk to Radimus one more time after training to actually complete the quest. Without talking to him again, it will not be marked in the questlog and you won't receive the Quest Points.
Congratulations, quest complete!
Quick checklist 89 instructions
Use this when you already know the route. The full walkthrough above includes explanations and diagrams.
Radimus Erkle
Talk to a Legends' Guard east of Ardougne
Say: Can I speak to someone in charge? → Can I go on the quest? → Yes, I'd like to talk to Grand Vizier Erkle.. Fairy ring BLR.
Talk to Radimus. (A machete can be obtained from the cupboards next to Radimus Erkle. Papyrus can be obtained on the table next to him.)
Say: Yes actually, what's involved? → Yes, it sounds great!
Kharazi Jungle
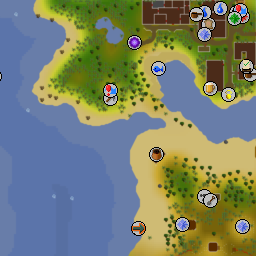
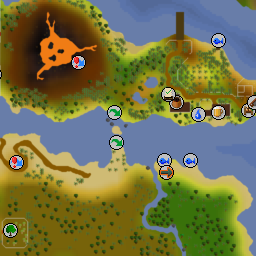
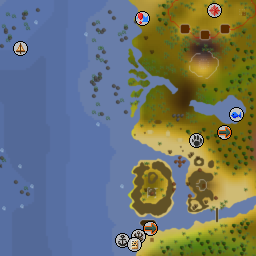
Head to the Kharazi Jungle, south of Shilo Village (fairy ring CKR or gnome glider to Karamja (aka Gandius) then cross the stepping stones towards the south-west). You will need to chop through the jungle bush. (You can get papyrus and charcoal from Shilo village General store, if needed)
Note: The vanilla pod needed for Recipe for Disaster/Freeing Sir Amik Varze is accessible at this point. It is on the southern coast between the West and Middle sections of the jungle. Finish the mapping before leaving to save yourself a trip. You do not need to have started the subquest in order to pick the vanilla pod.
Start mapping on either the east or west to save having to backtrack. For each part of the jungle (west, middle, and east), right-click Radimus notes and select the 'complete' option. Make sure you successfully map a section before moving to the next.
Use the notes on a Jungle forester south of Shilo to obtain the bullroarer. (If they don't want it, read the map first)
Say: Yes, go ahead make a copy!
Cut your way back into the Kharazi Jungle.
Swing the bullroarer by a totem pole to summon Gujuo (if it doesn't work, try another totem pole).
Talk to Gujuo.
Say: I was hoping to attract the attention of a native. → I want to develop friendly relations with your people. → Can you get your people together? → What can we do instead then? → How do we make the totem pole? → I will release Ungadulu...
Search the Mossy rock at the north-western section of the jungle and crawl inside. (50 Agility required)
Investigate the Fire Wall.
Say: How can I extinguish the flames? → Where do I get pure water from?
Leave the cave and use the bullroarer again.
Say: I need some pure water to douse some magic flames. → Where is the pool of sacred water? → What kind of a vessel?
Sacred pool
Use 2 gold bars on an anvil (barbarian anvils do not work) with a hammer to smith a golden bowl. You can fail this. You no longer need a hammer nor the sketch after this step.
Use the bullroarer in Kharazi Jungle and have Gujuo enchant the bowl.
Say: Yes, I'd like you to bless my gold bowl.
This requires 42 prayer points, and you can fail this.
Go to the Water Pool (west of the centre of the jungle), use your machete on the nearby reeds, and use the reeds on the pool.
Enter the cave to the north-west again and search the eastern bookcase to squeeze through the crevice behind it.
Use your lockpick on the gate, then smash the three boulders (failing to smash a boulder can reduce your Mining level by 1, bring a restore potion if needed).
Push open the next gate (requires 50 Strength) then walk south-west then north-west until you reach a marked wall, jumping over the jagged walls on the way. (Kill a death wing for the Hard Karamja Diary if needed)
Search the marked wall. If you fail to do this first, your runes will be consumed and you'll need more.
Use your runes on the marked wall in order (Soul, Mind, Earth, Law, Law).
Use the cut gems on the carved rocks (not the ore rocks). Use the map on the right to see which gem goes where.
Pick up the binding book and read it.
Fighting Nezikchened
Teleport out to prepare for the fight against Nezikchened, and return to the first room of the cave.
Refill your bowl with sacred water, if needed. (Leaving the jungle has a chance to evaporate the water.)
Use the golden bowl (be sure it is filled with sacred water) on the fire surrounding Ungadulu.
Use the binding book on Ungadulu (careful not to left-click attack him).
Defeat Nezikchened. (Lvl-187).
Your prayer will be drained to 1/10 of your level at the beginning of the fight. If you take too long to kill Nezikchened, he will de-spawn and you must leave the circle and repeat the water & binding book steps.
Ranged or melee with Protect from Melee activated is recommended, as he has high magic resistance.
Talk to Ungadulu (careful not to left-click attack).
Say: I need to collect some Yommi tree seeds for Gujuo. → How do I grow the Yommi tree? → What will you do now? → How do I get out of here? → Ok, thanks...
Exit, then summon and speak with Gujuo.
Say: Ungadulu is free, he was possessed by a demon and I killed it. → What do I do now? → Ok thanks for your help.
Use your bowl of water on the seeds.
Cut some more reeds and attempt to refill the bowl.
Call and talk with Gujuo.
Say: The water pool has dried up and I need more water. → Where is the source of the spring of pure water? → If I went, could you help me? → Ok thanks for your help.
Restoring the pool
Using the map above, collect the ardrigal (search the large-leaved palm trees) and snake weed (search one of the marshy jungle vines) if extra were not obtained during Jungle Potion. Mix them with a vial of water for a bravery potion.
Drink the potion now to save space. Prepare to go through the cave again. You do not need the SMELL runes.
Go through the cave to the chamber with the gem-pools where you found the binding book. Cast the charge orb spell on the north gate.
Use your rope on the winch and climb down. Drink the bravery potion first if you haven't already
If you forgot a rope, smash a barrel. A monster may spawn from the barrel.
You can fall and will take a large amount of damage (10-20), so be sure your health is high.
The rope is not needed for future visits; search the winch to find your rope again.
Do not interact with the blue hat if you wish to choose the "good" path.
Climb over the rocks to reach the bottom. You can again fall and take a lot of damage (40+).
Kill each of the 3 different skeletons (Lvl-106, Lvl-100, and Lvl-92) to get the 3 crystal pieces.
Use each crystal piece on the north-east furnace.
There is 1 searchable mossy rock in the middle of this room. Use the heart on it.
Run south-east and use the heart on the recess next to the barrier. Walk through the barrier.
Push one of the boulders to the west and then talk to Echned Zekin.
Say: Who's asking? → What can I do about that? → I'll do what I must to get the water. → Ok, I'll do it.
For the "evil" short path:
Climb back to the top of the ridge, equip the dagger, try to take the hat, and kill Viyeldi by attacking him during the dialogue. Your dagger will be glowing after this step. Make sure this is the case before you go back down the ridge.
Warning: a level 187 demon will spawn as soon as this step is complete and drain your prayer points prior to the fight
Go back and push the boulder. The ghost will take the dagger from you.
Defeat Nezikchened.
Push the boulder.
Fill your bowl with water and use it on your seeds if you haven't done so already.
Note: Teleporting will evaporate the water! However, the water pool is now restored and you can get the water from there.
For the "good" long path:
Do not try to pick up the blue hat or talk to Viyeldi.
Teleport out and bank if desired for traversing the cave again.
Go back to the beginning of the cave. Investigate the fire wall to pass through.
Use the dark dagger on Ungadulu.
Head back into the cave as before, using another Charge Orb spell on the door.
Push the boulder.
Do not tell Zekin you lost the dagger; instead, cast the Holy Force spell to reveal his true form.
Defeat Nezikchened.
Push the far west boulder out of the way, and collect sacred water.
Note: Teleporting will evaporate the water! However, the water pool is now restored and you can get the water from there.
Yommi tree & the final fight
Skills needed: 45 Herblore (boostable) Use the germinated seeds on the fertile soil patch (8 steps north and 5 steps west of the pool). Note: It is possible to be unsuccessful when planting the seeds. Plant the seeds again until a sapling grows. If more seeds are needed, visit the cave and speak to Ungadulu for more.
Once planted, the yommi bush will grow leaves. Use the sacred water on it and it will become an adult yommi tree.
Use your axe on the adult yommi tree. Use your axe on the downed tree twice to make it into a totem.
Warning The yommi tree will rot if you take too much time before carving it and you will need to redo the process, including getting sacred water.
Lift it from the ground and you will now have a yommi totem in your inventory.
If "evil" path was chosen:
Turn on Protection from Melee before the next step, as you will take 4 hits without being able to move, eat, or turn on prayers - you can get hit for up to 72 damage all on the same tick. It is recommended to keep praying at all times.
Use your totem on any old, brown totem pole.
Kill the three skeletons that appear one at a time, then kill Nezikchened. Keep your prayer active after each skeleton dies, as Nezikchened will reappear and hit you four more times.
If "good" path was chosen:
Turn on Protection from Melee before the next step, as you will take 4 hits without being able to move, eat, or turn on prayers - you can get hit for up to 72 damage all on the same tick. It is recommended to keep praying at all times.
Use your totem on any old, brown totem pole.
Turn on Protect from Melee and defeat Nezikchened.
Use your totem on the pole again.
Gujuo will appear and give you a gilded totem. If he doesn't show up, swing the bullroarer.
Collect 5 palm leaves by shaking a Leafy Palm Tree near the Water Pool for the Karamja Hard Diary if needed (you can drop and pick up the same palm leaf several times).
Collect a vanilla pod south-west of the Water Pool for Recipe for Disaster if needed.
Finishing up
Talk to Radimus at the Legends Guild (fairy ring BLR) with the gilded totem AND Radimus notes.
Talk to Radimus again in the main guild hall and select four skills for training.
Talk to Radimus one more time.
Congratulations, quest complete!
QUEST COMPLETE
Rewards
Access to the Legends' Guild (including shop to buy the cape of legends)
The ability to wield the dragon sq shield
30,000 experience each in four skills of your choice (limited to AttackAttack, DefenceDefence, StrengthStrength, HitpointsHitpoints, PrayerPrayer, MagicMagic, WoodcuttingWoodcutting, CraftingCrafting, SmithingSmithing, HerbloreHerblore, AgilityAgility, ThievingThieving. It is possible to choose the same skill all four times)
The ability to charge your skills necklace or combat bracelet at the Legends' Guild or the Fountain of Rune
Access to the Kharazi Jungle and a vine shortcut into it, requiring 79 Agility
Radimus Erkle will provide replacement dark daggers, which can be investigated via right-click to switch appearance between a dark or glowing dagger
You can now receive the Rune spear, Dragon spear, and Shield left half from the Gem drop table.
 4
4