| Harpie Bug Swarm | |||||||||||||||||||||||
|---|---|---|---|---|---|---|---|---|---|---|---|---|---|---|---|---|---|---|---|---|---|---|---|
 | |||||||||||||||||||||||
| Released | 30 January 2006 (Update) | ||||||||||||||||||||||
| Members | Yes | ||||||||||||||||||||||
| Combat level | 46 | ||||||||||||||||||||||
| Size | 1x1 | ||||||||||||||||||||||
| Examine | A swarm of bugs. | ||||||||||||||||||||||
| Combat info | |||||||||||||||||||||||
| XP bonus | +0% | ||||||||||||||||||||||
| Max hit | 6 | ||||||||||||||||||||||
| Aggressive | Yes | ||||||||||||||||||||||
| Poisonous | No | ||||||||||||||||||||||
| Attack style | Crush | ||||||||||||||||||||||
| Attack speed | 4 ticks (2.4 seconds) | ||||||||||||||||||||||
| Respawn time | 25 ticks (15 seconds) | ||||||||||||||||||||||
 Slayer info Slayer info | |||||||||||||||||||||||
| Slayer level | 33 | ||||||||||||||||||||||
| Slayer XP | 25 xp | ||||||||||||||||||||||
| Category | Harpie Bug Swarms | ||||||||||||||||||||||
| Assigned by |  | ||||||||||||||||||||||
 Combat stats Combat stats | |||||||||||||||||||||||
 |  |  |  |  |  | ||||||||||||||||||
| 25 | 54 | 46 | 32 | 1 | 1 | ||||||||||||||||||
| Aggressive stats | |||||||||||||||||||||||
| | |  | |  | ||||||||||||||||||
| +0 | +0 | +0 | +0 | +0 | +0 | ||||||||||||||||||
| Melee defence | |||||||||||||||||||||||
 |  |  | |||||||||||||||||||||
| +10 | +5 | +10 | |||||||||||||||||||||
 Magic defence Magic defence | |||||||||||||||||||||||
|  | ||||||||||||||||||||||
| +5 | 50% weakness | ||||||||||||||||||||||
 Ranged defence Ranged defence | |||||||||||||||||||||||
 |  |  | |||||||||||||||||||||
| +10 | +10 | +10 | |||||||||||||||||||||
| Immunities | |||||||||||||||||||||||
| Poison | 0% resistance | ||||||||||||||||||||||
| Venom | 0% resistance | ||||||||||||||||||||||
| Cannons | Not immune | ||||||||||||||||||||||
| Thralls | Not immune | ||||||||||||||||||||||
Open in DPS calculator | |||||||||||||||||||||||
| Advanced data | |||||||||||||||||||||||
| Monster ID | 464 | ||||||||||||||||||||||
| Link | MOID | ||||||||||||||||||||||

Harpie bug swarms are mid-level slayer monsters that require a Slayer level of 33 to kill. A lit bug lantern, which requires a Firemaking level of 33 to light, is required to damage these monsters (the lantern must be lit and equipped). If you do not have 33 Firemaking, you cannot be assigned harpie bug swarms as a Slayer task.[1]
Harpie bug swarms should be an easy task for well-equipped mid-level players; their abundance as well as the fact that they remain aggressive to players until level 93 combat makes this task very click-easy. As harpie bug swarms are very accurate, and will often hit for up to 6 Hitpoints, it is advisable to have Defence levels from 40-50+ and to bring food appropriate for the player's level, such as lobsters. Another option is to keep Protect from Melee up and recharge prayer at the relatively nearby altars.
It is recommended to bring nature runes while slaying this monster since it has many drops that can be alched to free up inventory spaces, and fire runes are frequently dropped from this monster.
Locations
| Location | Levels | Members | Spawns | Map |
|---|---|---|---|---|
| North-east of Tai Bwo Wannai (DKP) | 46 |  | 14 | Show map |
| East of the Colossal Wyrm Remains | 46 | | 18 | Show map |
Colossal Wyrm Remains
- (Recommended) Building a quetzal landing site at Colossal Wyrm Remains opens up a very convenient, quick shortcut to a bank at Auburnvale and a prayer altar at The Teomat.
- The closest fairy ring is AJP, requiring you to run south across the open savannah, mostly free of enemies and obstacles.
- Alternatively, it's possible to reach the location from the Hunter Guild bank or Civitas illa Fortis.
With an appropriate method of transport, this location is very accessible, offers several safespots, and is free of dangers associated with Karamja (eliminating the need for an antipoison).
Tai Bwo Wannai
- The closest fairy ring is DKP, although you will need to run south, past the Shaikahan and aggressive jogres, use the log shortcut to cross the river and then run north. Fairy ring CKR can also be used, though it's further to the south.
- A Tai bwo wannai teleport scroll will take you to the nearby village, just south-west of the swarms.
- You can also use the Ardougne cloak's teleport to the monastery, run north-east to Captain Barnaby, take the boat to Brimhaven and run south and east to reach the swarms.
- If the player's house is in Brimhaven, you can Teleport to House, then walk south to the mainland, then east.
- If the player's house is in Rimmington, you can Teleport to House, walk west to the ship, then pay 30 coins to travel to Brimhaven and walk south to the mainland, then east.
- You can also use a ring of dueling and take the Al Kharid gnome glider to the crashed Karamja one, which is slightly slower than the fairy rings.
- With 53 Agility, 21 Strength, 42 Ranged, and any crossbow and a mithril grapple, use the Karamja teleport option on a charged amulet of glory, run south-west, and use the grapple agility shortcut. This is faster than any other travel method, but losing an inventory space for the crossbow if not ranging (or the grapple if ranging) may not be appealing to some players.
Completion of Tai Bwo Wannai Trio enables the use of the nearby Tribal Statue to recharge prayer points.
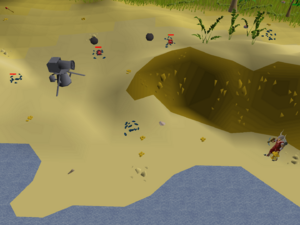
There are two safespots: one between the two trees to the south behind the small jungle plant, and another to the north on the beaches of the fairy ring (DKP). Players can set up a cannon to range or melee 2+ swarms to the west, but will need runes to telegrab any desired drops. You can use a dwarf multicannon in this location, but you have to equip the bug lantern for the cannon to deal damage.
It is highly recommended to bring antipoison due to the presence of other aggressive, poisonous creatures.
Drops
Drop rates are estimated based on 29,222 samples from the Drop Rate Project, unless otherwise cited.
The average Harpie Bug Swarm kill is worth 259.41.
Weapons and armour
| Item | Quantity | Rarity | Price | High Alch | |
|---|---|---|---|---|---|
 | Steel axe | 1 | 4/128 | 170 | 120 |
 | Steel full helm | 1 | 4/128 | 113 | 330 |
 | Staff of fire | 1 | 3/128 | 912 | 900 |
 | Mithril chainbody | 1 | 2/128 | 894 | 1,170 |
 | Adamant med helm | 1 | 1/128 | 900 | 1,152 |
 | Steel boots | 1 | 1/128 | 1,528 | 180 |
Runes
| Item | Quantity | Rarity | Price | High Alch | |
|---|---|---|---|---|---|
| Fire rune | 30 | 20/128 | 150 | 60 |
| Fire rune | 60 | 8/128 | 300 | 120 |
 | Chaos rune | 15 | 5/128 | 1,575 | 810 |
 | Death rune | 3 | 3/128 | 564 | 324 |
Coins
| Item | Quantity | Rarity | Price | High Alch | |
|---|---|---|---|---|---|
 | Coins | 40 | 25/128 | 40 | 40 |
 | Coins | 160 | 20/128 | 160 | 160 |
| Coins | 230 | 10/128 | 230 | 230 |
| Coins | 30 | 7/128 | 30 | 30 |
 | Coins | 490 | 2/128 | 490 | 490 |
Other
| Item | Quantity | Rarity | Price | High Alch | |
|---|---|---|---|---|---|
 | Gold ore | 1 | 8/128 | 157 | 90 |
 | Jug of wine | 1 | 2/128 | 4 | 0 |
Gem drop table
There is a 3/128 chance of rolling the gem drop table.
| Item | Quantity | Rarity | Price | High Alch | |
|---|---|---|---|---|---|
 | Nothing | N/A | 1/85.49; Never[d 1] | N/A | N/A |
 | Uncut sapphire | 1 | 1/170.67; 1/86.67[d 2] | 206 | 15 |
 | Uncut emerald | 1 | 1/341.33; 1/173.33[d 2] | 416 | 30 |
 | Uncut ruby | 1 | 1/682.67; 1/346.67[d 2] | 1,011 | 60 |
 | Nature talisman | 1 | 1/1,820.44; 1/924.44[d 2] | 159 | 2 |
 | Uncut diamond | 1 | 1/2,730.67; 1/1,386.67[d 2] | 2,455 | 120 |
 | Rune javelin | 5 | 1/5,461.33; 1/2,773.33[d 2] | 650 | 1,200 |
 | Loop half of key | 1 | 1/5,461.33; 1/2,773.33[d 2] | 9,737 | 60 |
 | Tooth half of key | 1 | 1/5,461.33; 1/2,773.33[d 2] | 9,917 | 60 |
 | Rune spear | 1 | 1/87,381.33; 1/5,200[d 2][d 3] | 11,769 | 12,480 |
 | Shield left half | 1 | 1/174,762.67; 1/10,400[d 2][d 3] | 65,429 | 66,000 |
 | Dragon spear | 1 | 1/233,016.89; 1/13,866.67[d 2][d 3] | 37,749 | 37,440 |
- ^ The "nothing" drop is removed while wearing a ring of wealth.
- ^ 2.00 2.01 2.02 2.03 2.04 2.05 2.06 2.07 2.08 2.09 2.10 The drop rate is increased while wearing a ring of wealth due to the "nothing" drop being removed.
- ^ 3.0 3.1 3.2 Only dropped if Legends' Quest has been finished; if not, a talisman is dropped instead.
Tertiary
| Item | Quantity | Rarity | Price | High Alch | |
|---|---|---|---|---|---|
 | Clue scroll (medium) | 1 | 1/128[d 1][d 2][2] | Not sold | 12 |
- ^ The medium clue scroll drop rate increases to 1/121 after unlocking the medium Combat Achievements rewards tier.
- ^ Clue scrolls will drop as scroll boxes after the completion of X Marks the Spot.
Collection log
Harpie Bug Swarms have a single collection log item.
| Item | Collections | Comp% |
|---|---|---|
 Steel boots Steel boots | Slayer | 28.8% |
Changes
| Date | Changes |
|---|---|
| 25 June 2025 (Update) |
Harpie bug swarms now have a 50% elemental weakness to fire spells. |
| 8 May 2024 (Update) |
Chaeldar no longer assigns players Harpie Bug Swarm tasks. |
| 10 September 2015 (Update) |
Duradel no longer assigns players Harpie Bug Swarm tasks. |
| 25 April 2013 (Update) |
Harpie bug swarms will no longer be assigned as a Slayer target unless you have the appropriate Firemaking level. |
References
- ^ Jagex. Mod Ash's Twitter account. 1 October 2017. Archived from the original on 25 May 2020. Mod Ash: "I think all three of the checks you list are still in effect on the creatures in question. Reducing requirements tends not to be popular."
- ^ Jagex. Mod Tide's Twitter account. 24 May 2019. Archived from the original on 24 May 2019. Mod Tide: "I know its been a while since the clue expansion but here is the information on clue scroll drop rates and loot chances! If anything changes I will keep you posted."