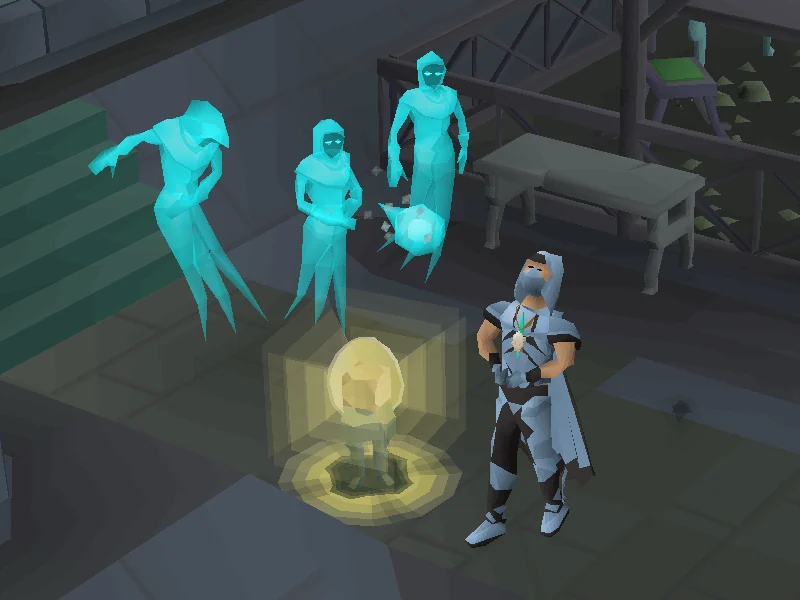
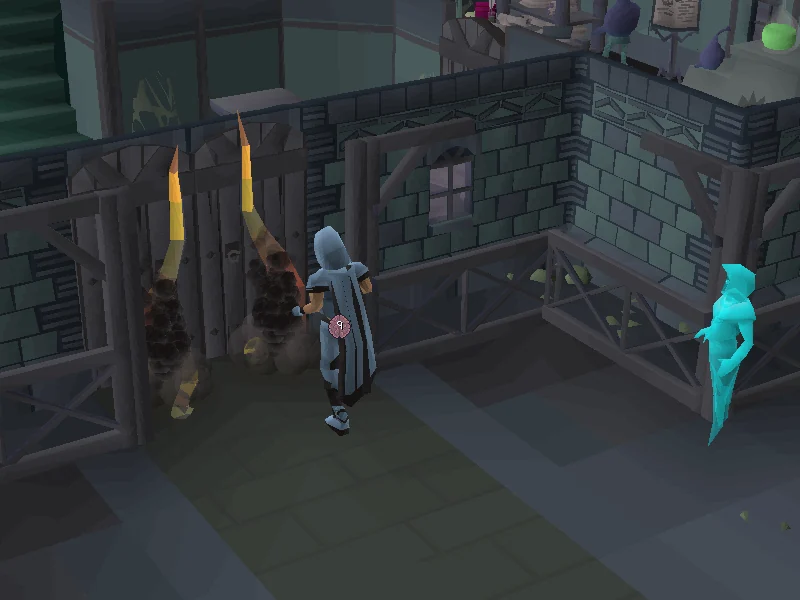
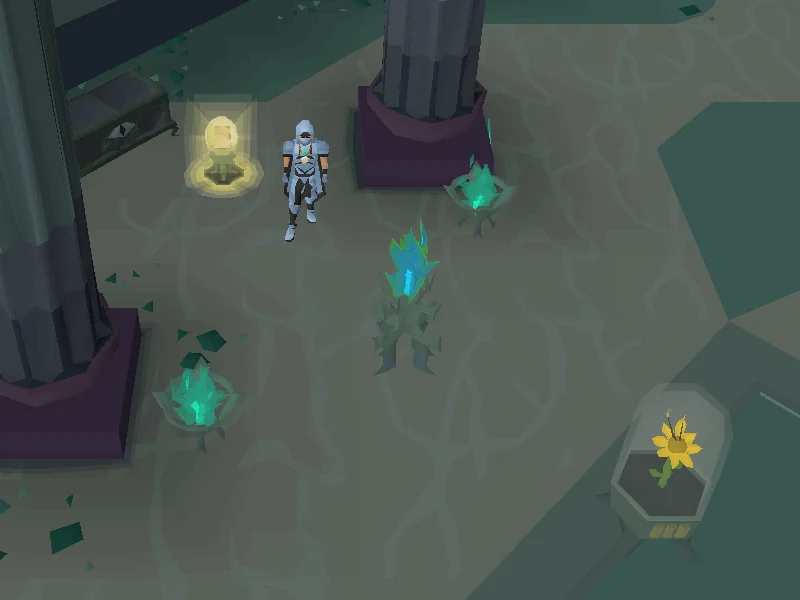
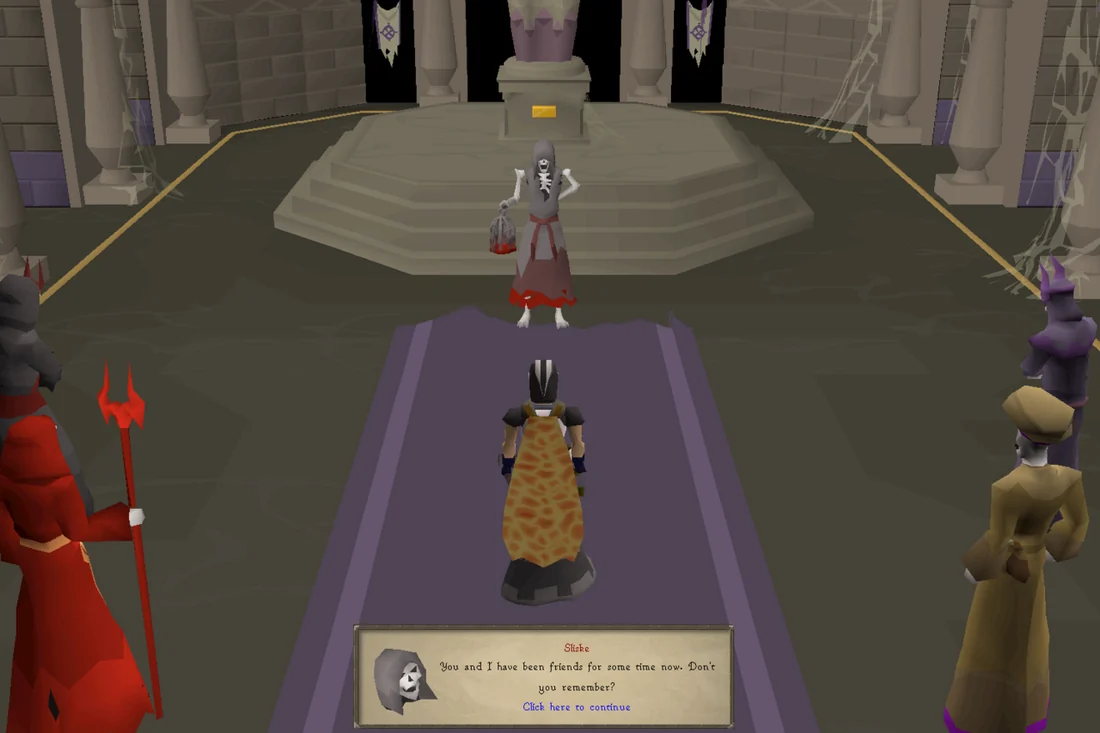
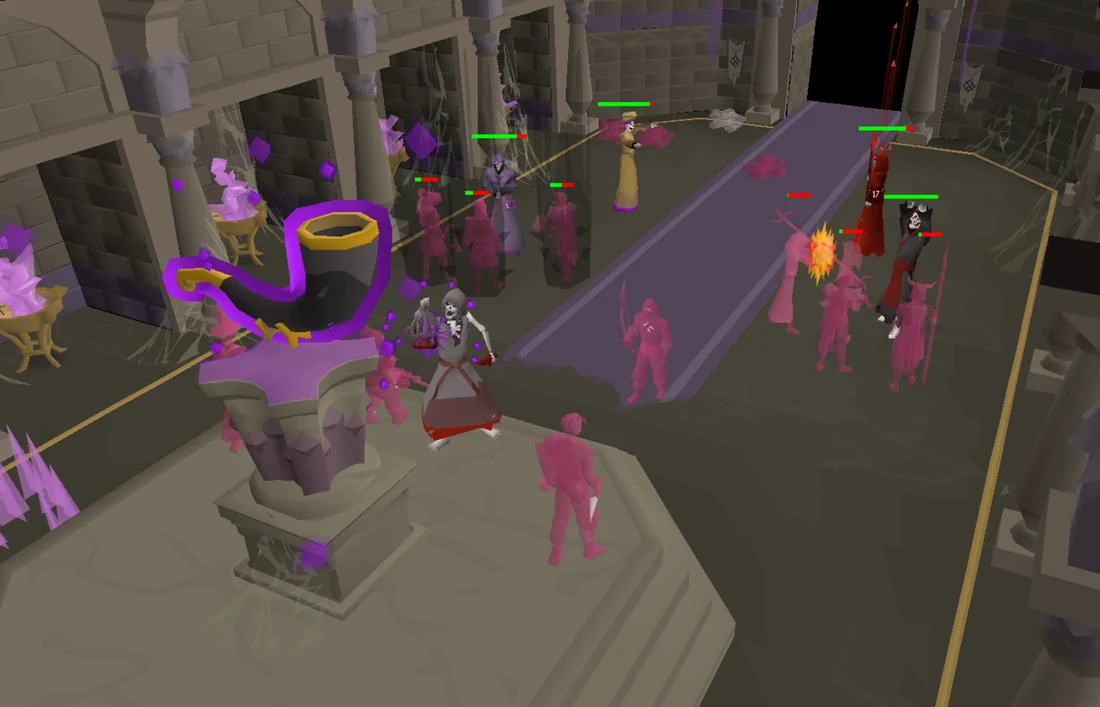
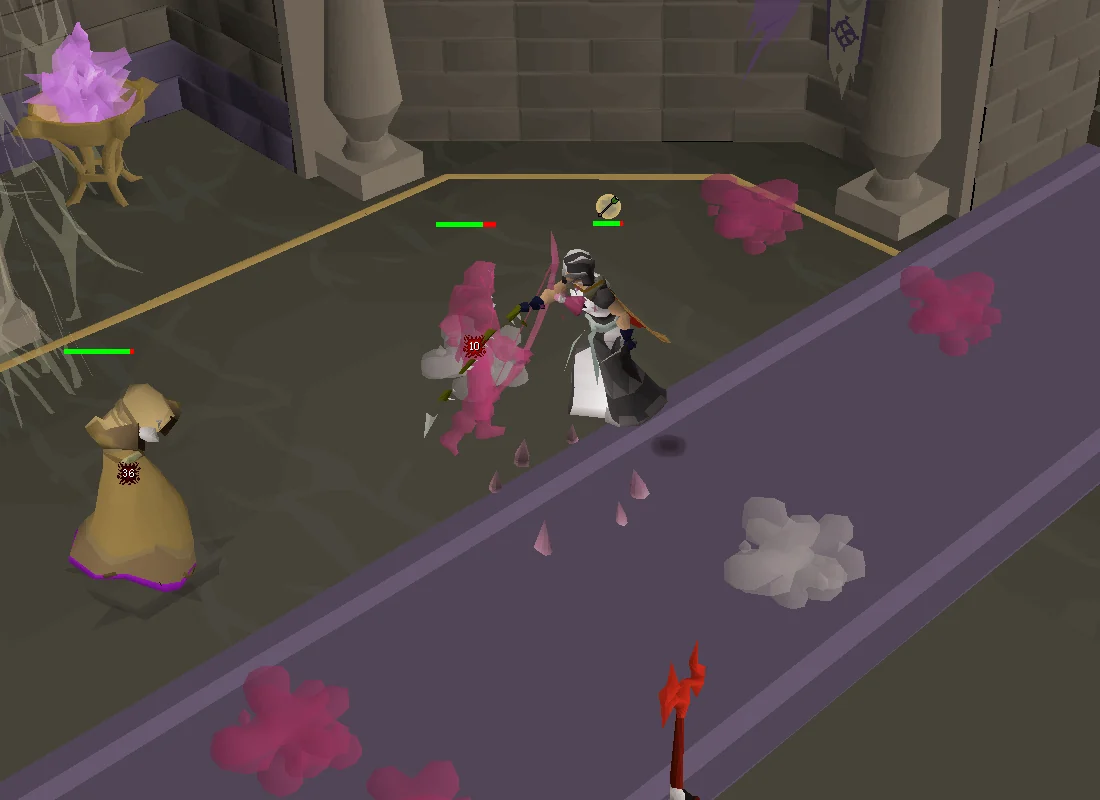
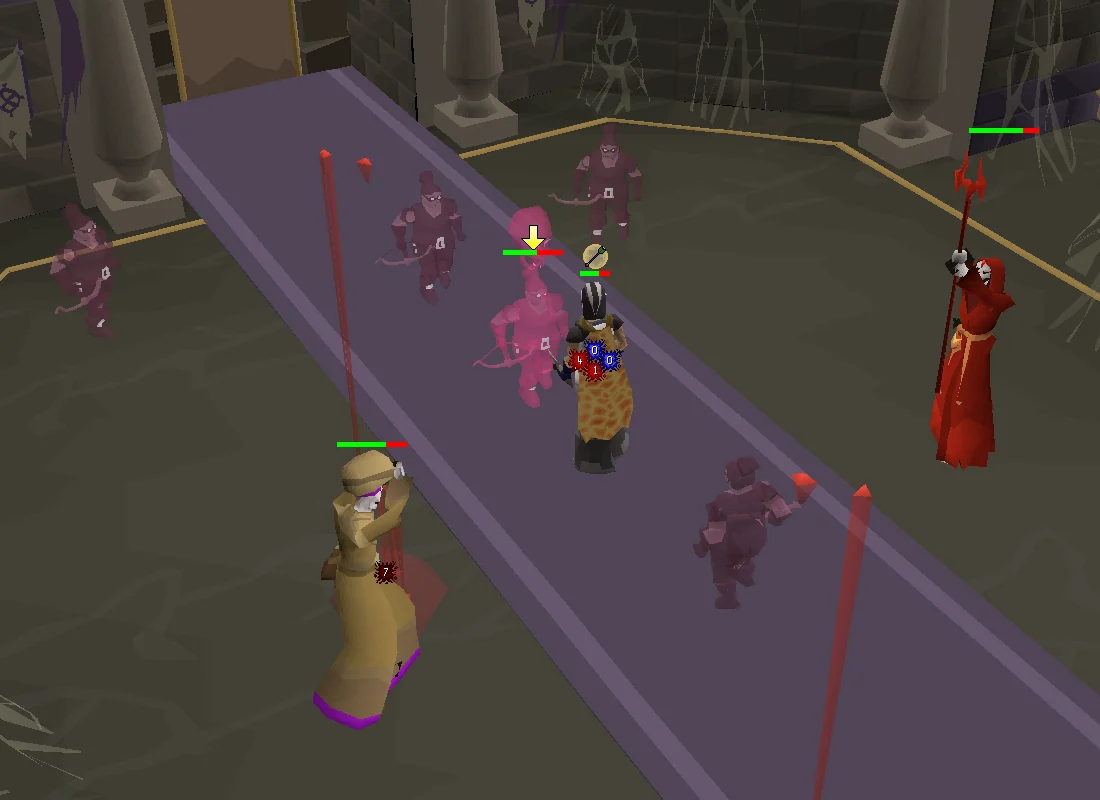
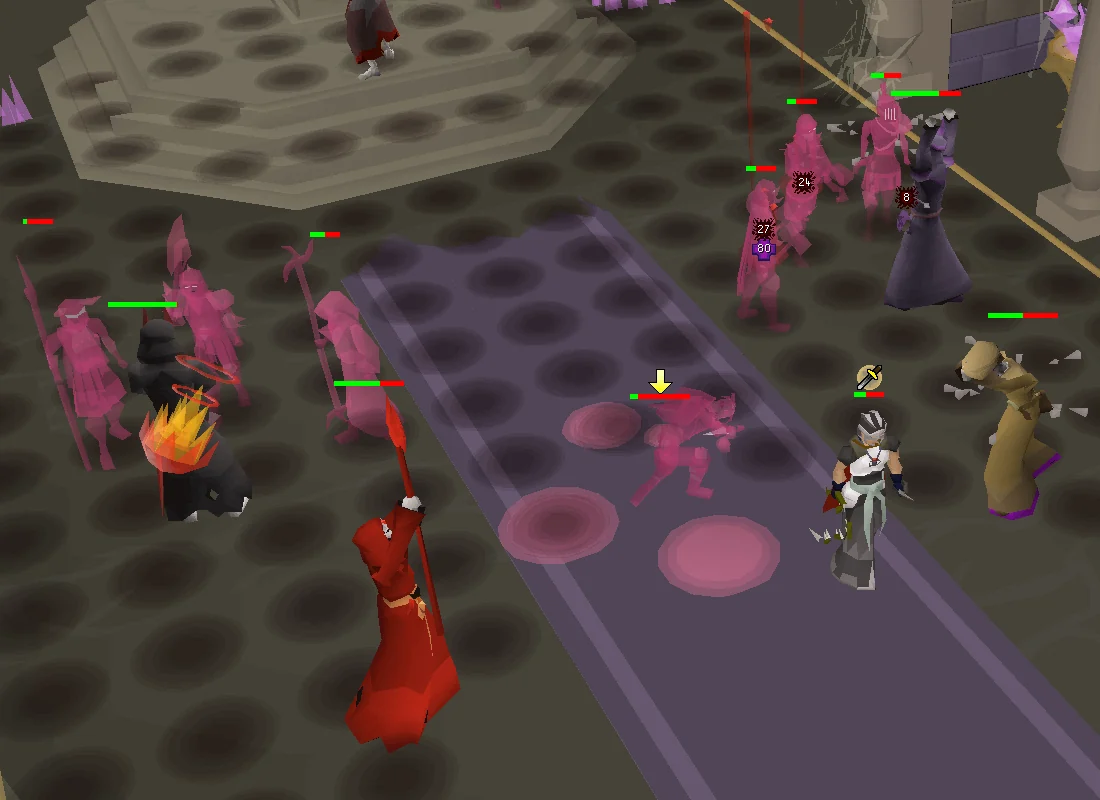
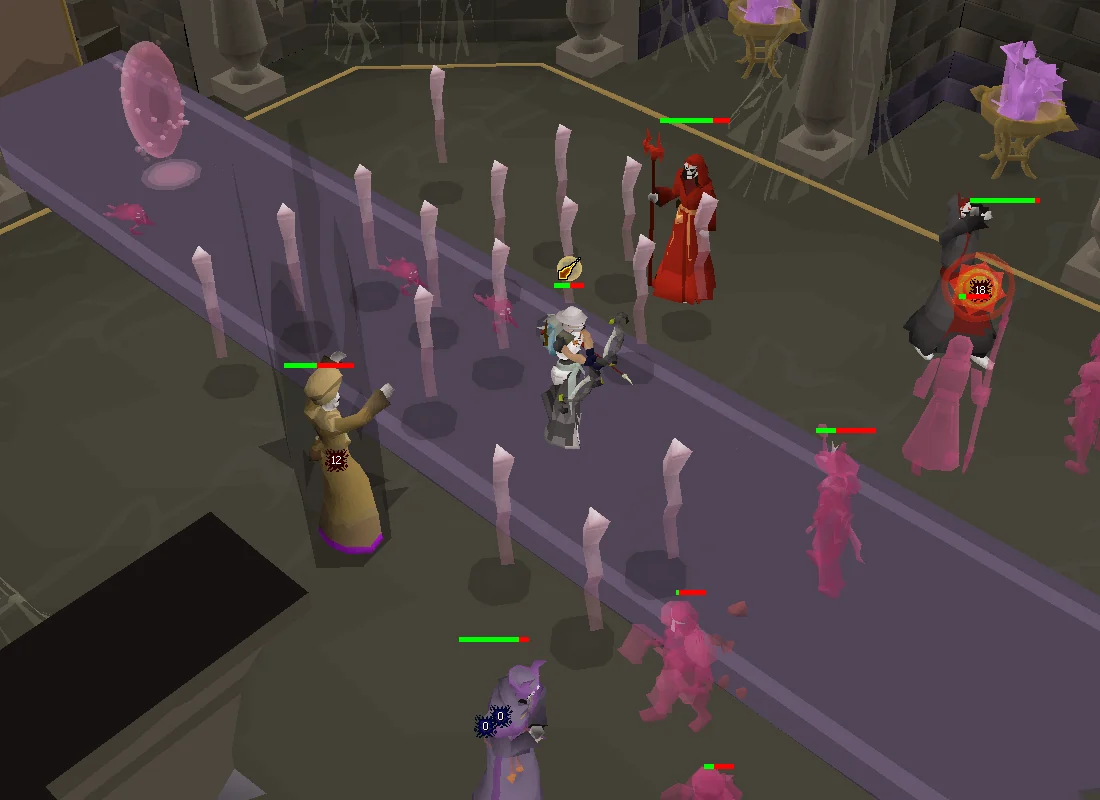
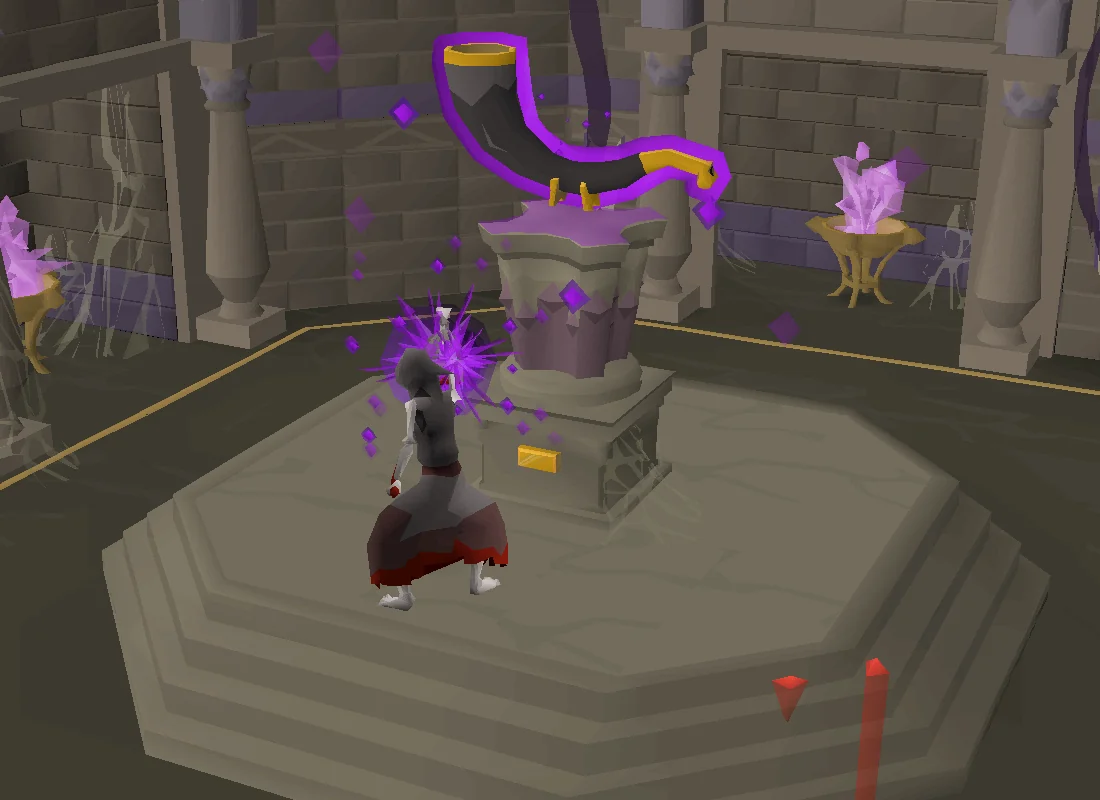
During Gielinor's Second Age, the world was dominated by an empire the likes of which had never been seen. The areas now known as Asgarnia, Misthalin and even the Wilderness all once flourished under the banner of the Empty Lord. With the grand city of Senntisten at its heart, this civilisation washed over Gielinor like an unstoppable tide, pushing the boundaries of magic and science, while crushing any who stood in their way. Fast forward to today, the Fifth Age, and you won't find much trace o
Follow the chapters below. Click any screenshot or diagram to view it at full size.
01
Introduction
Like its predecessor, Desert Treasure I, Desert Treasure II - The Fallen Empire is very combat-heavy and requires large amounts of travelling. Super energies and stamina potions will be of great use, as well as access to various teleportation methods. Players are recommended to read through each section below, and are also encouraged to practice fighting the bosses in order to better understand their mechanics.
Non-ironman accounts with limited access to teleport options can use the Rimmingtonportal on world 330 to enter another player's POH, and utilize their various teleportation and restoration options. Before starting the quest, switch to the Ancient Magicks spellbook, as it is required to start the quest, and it will be needed or provide useful teleports in various sections.
Lastly, for each fight in the quest, a "notes for pures" section will be included, allowing players with unique account builds to determine if completion is possible. Note that unlike Desert Treasure I, none of the bosses are cannonable, and players must gain Hitpointsexperience in order to progress.
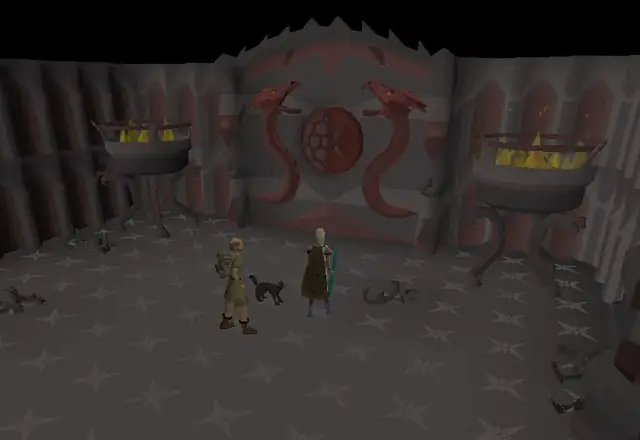
Make your way to the Ancient Vault just north-east of Nardah. It can easily be reached by use of fairy rings (code DLQ) and then running south-east, as well as using a Nardah teleport scroll or the desert amulet and then running north-east. You must be on the Ancient Magicks spellbook to open the vault. Once inside, you will enter a room with four statues, as well as see Asgarnia Smith follow you inside, who proposes another partnership with you after having found no treasure in your previous adventure with him.
After talking to him, inspect the four statues inside the vault, as well as the plaque on the far wall. Note the four names: Vardorvis, Perseriya, Duke Sucellus, and the Whisperer. Speak to Asgarnia again about what you found, and he will tell you to try speaking to Terry Balando for a possible lead.
Make your way to the Exam Centre (either by using Senntisten Teleport or a Digsite teleport) and speak with Terry Balando. Though he tells you that Zaros is still a relative unknown to him, he recommends you to talk to Dr Banikan, who in a stroke of fortune claims to be a Zarosian expert and has set up a new dig on the eastern edge of the Digsite.
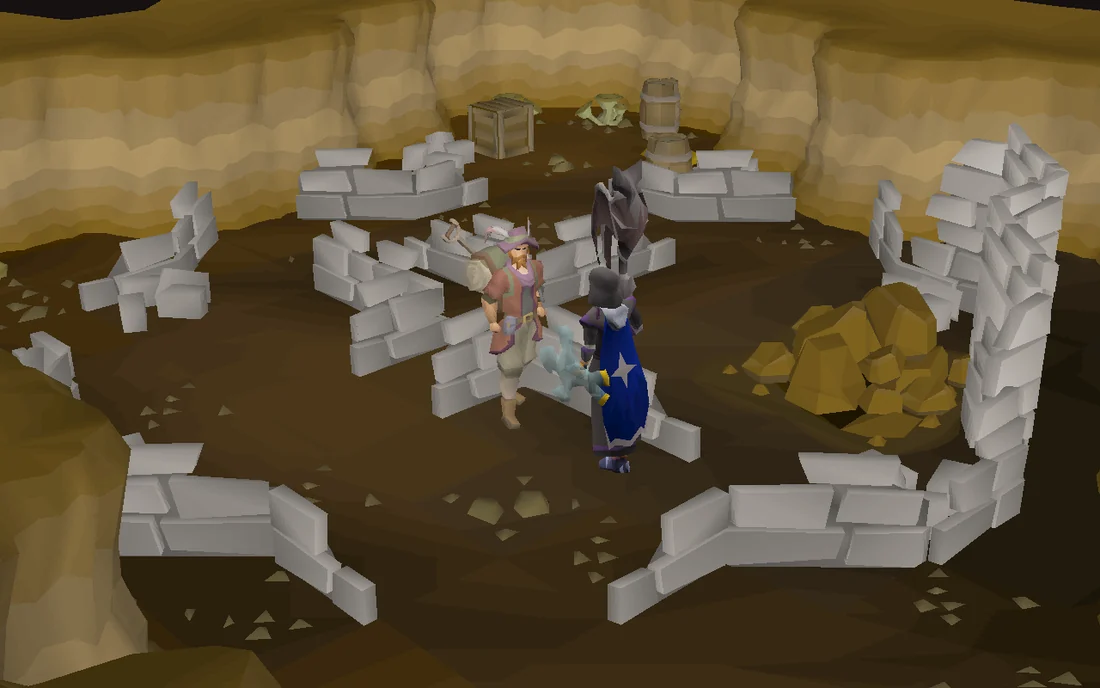
Head to the winch at the easternmost part of the Digsite; the Digsite teleport and Digsite pendant will get you near the area. Operate the winch to descend into the dig, where you'll find Dr Banikan. You will tell him about the Ancient Vault and the four names you saw in there, and he will tell you that they might be mentioned in what he believes is a key military installation underneath here, a remnant of the Zarosian Empire. He will ask that you mine the rocks nearby to clear the way down. If you need a pickaxe, a bronze pickaxe can be found by searching the crate to the north-east corner of the dig.
Prepare for a combat encounter in the next section.
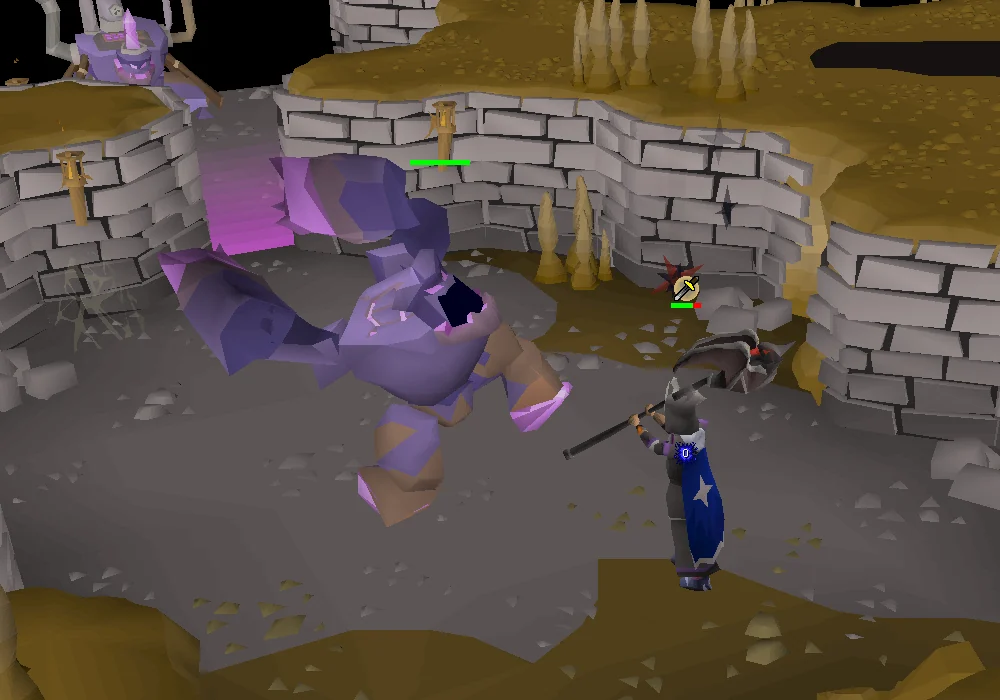
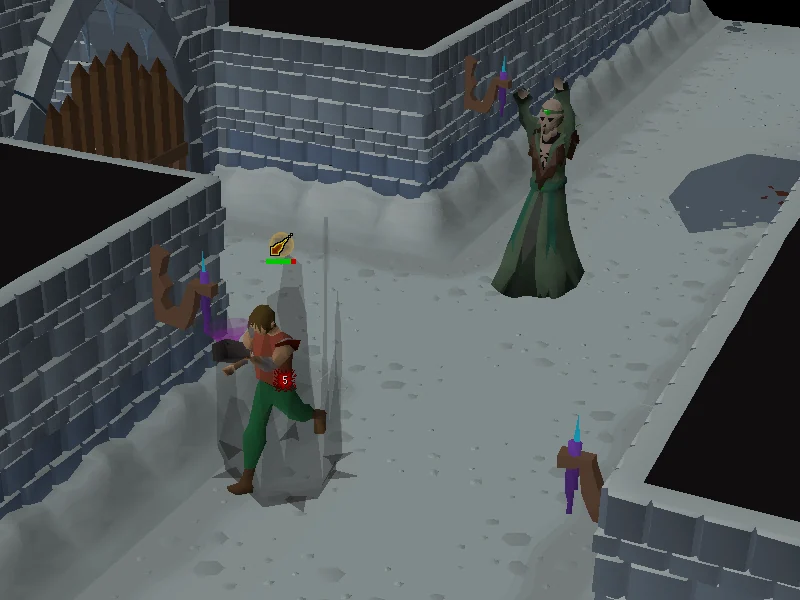
Climbing down will put you in an instanced area, where you will be immediately attacked by an Ancient Guardian. The guardian has 200 health overall; you must first deplete its shield health, then continue with its regular health. Using melee attacks is recommended for this fight, as the shield health will quickly regenerate if you're not using melee. The guardian is weak to crush attacks.
The guardian will only use melee attacks, which can be negated with Protect from Melee. However, every five attacks, the ceiling will crumble and cause debris to fall from above, dealing 15–25 damage if they are not avoided; move away from the looming shadow on the ground to avoid these.
BugBug:
Using burn damage (e.g. with Burning Claws) on the shield HP bar can softlock the fight. If using these special attack weapons, only use it on the normal health bar.
Notes for pures
The need for semi-rapid damage means that it's impossible to drain the guardian's shield without gaining Hitpoints experience. However, any melee style will work. For players who don't use melee, it is technically possible to use magic or ranged to kill the guardian, but high-damage spells or ammunition must be used, and the player must remain in melee distance.
Military Secrets
After defeating the Ancient Guardian, you will call down Dr Banikan, who will follow you around the military installation. Inspect the golem machine further into the area, where you will find that it needs eight cells to power up. Search the nearby crates to receive a stack of eight uncharged cells.
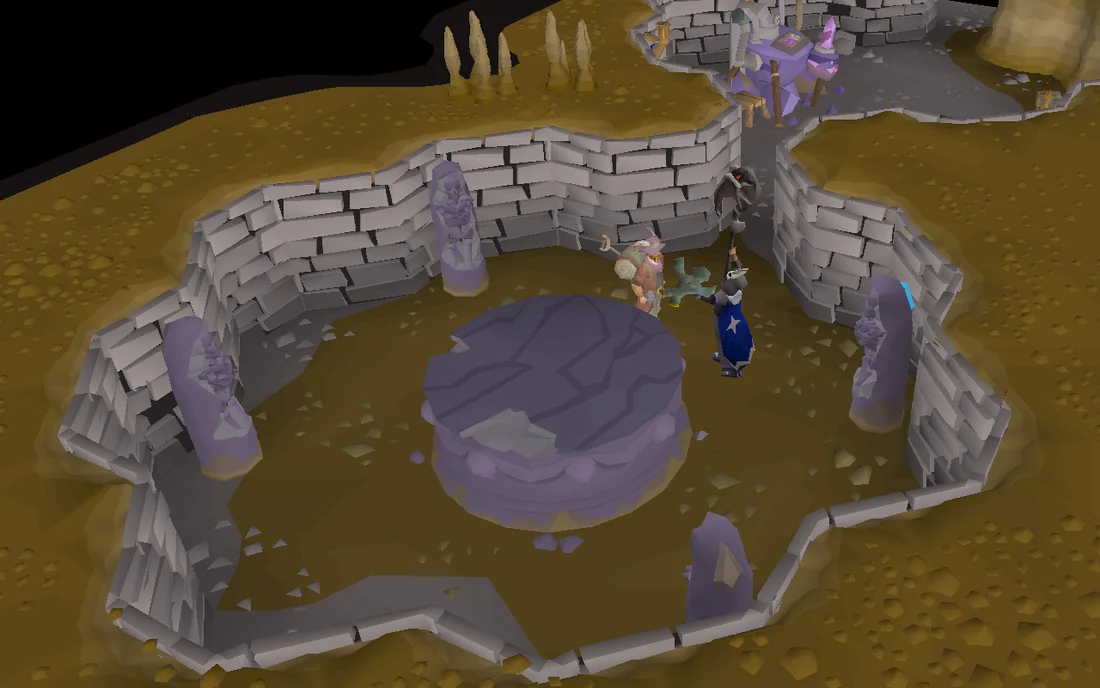
Charging the totems inside the military installation. Image credits →
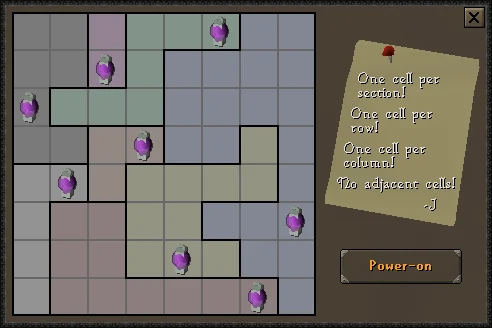
To the west is an altar surrounded by four totems. Cast burst spells or better on the respective totems to activate them, then use the cells on the altar to obtain charged cells. Use these on the golem, where you will need to complete a puzzle to power it up: One cell per section, one cell per row, one cell per column, and no adjacent cells. If you attempt to power the golem with the wrong solution, you will take 5–10 damage from an electric shock.
Solution to the golem puzzle
Once the golem is powered up, search for the names from the Ancient Vault: "Vardorvis", "Perseriya", "Sucellus", and "Whisperer"; the inputs are fairly generous for typos. Other search terms can be put in, though unnecessary to progress in the quest; the player can return here after the quest to search for more terms should they wish to, or view a list of terms here.
After searching the aforementioned terms, Dr Banikan will thank you for your help, and proceeds to use the golem to search for a term, then tells you he will need to consult with a good friend of his and leaves the military installation. Curious, you ask the golem to repeat the last search: the Frostenhorn.
Testing Your Medal
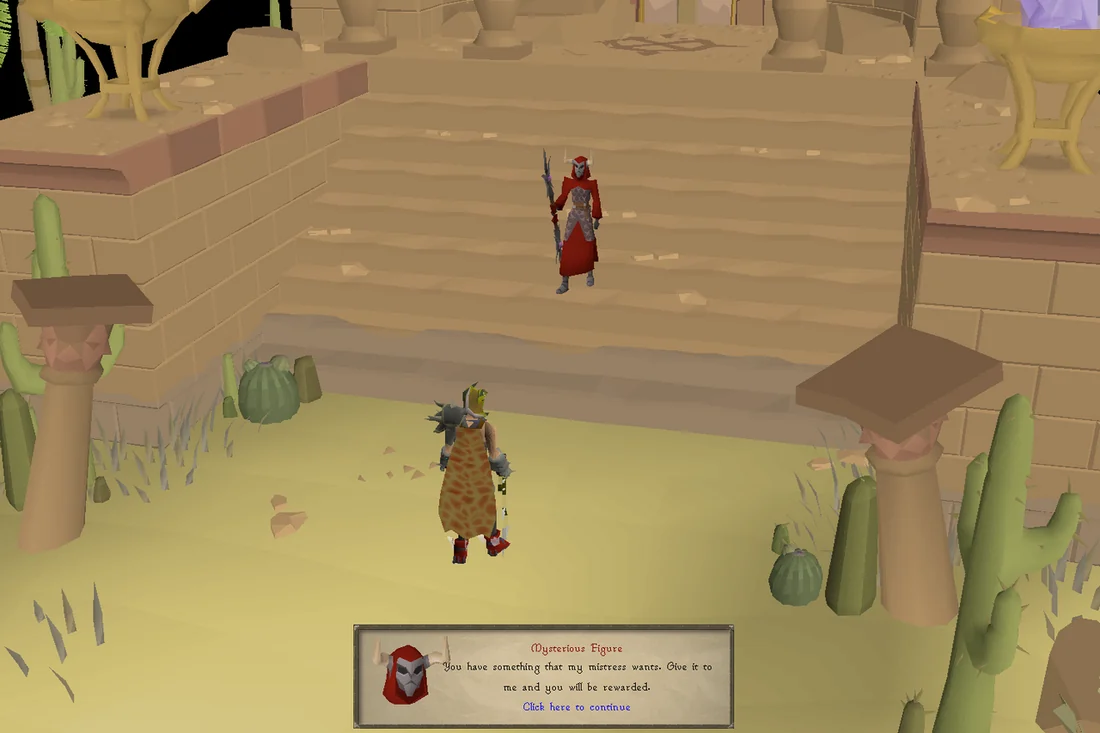
The Mysterious Figure appears after retrieving the first medallion. Image credits →
The next four sections involve retrieving the medallions of the Forgotten Four, and can be done in any order or progressed through concurrently. Note that the medallions cannot be deposited into a bank, and should be returned to the Ancient Vault as soon as possible.
Upon attempting to return the first medallion, you will be greeted by the Mysterious Figure, who demands the medallion be given to her in order to further her mistress' goal. You'll refuse, and she'll say she will let you go this time, but warns you to watch your back before leaving.
Acquiring the second and third medallions may result in her ambushing you (In the case of the last medallion, see the last section of this guide); she uses all three attack styles, hitting up to 18 damage with each. In addition, she is able to run, cast Tele Block, use blood spells to heal herself and ice spells to freeze you to the spot, and utilise protection Prayers. Thus, players should always try to keep some spare food and an emergency teleport on them at all times. Note that she may also disguise herself as the sandwich lady; avoid talking to her if you are holding a medallion to avoid combat.
Teleporting away before she manages to cast Tele Block, or simply entering a room or a separate floor are both effective ways of avoiding her. Defeating her will not prevent her from reappearing at a later time, as she will simply teleport away. Due to this, as well as her high Hitpoints and Prayer switching mechanics, it is not recommended to fight her until her dedicated fight section later in the quest. Note as well that she can spawn multiple times, and will also spawn in a player-owned house. Enabling building mode as default does not ensure your safety.
Players that have access to essential features from their player-owned house may use a teleport to house tablet after they retrieve the medallion. If built, an Ornate rejuvenation pool can restore Hitpoints and more, and a Fairy ring can teleport players close to the Ancient Vault (with code DLQ). Note that the Mysterious Figure can ambush players immediately after teleporting to a player-owned house, so bringing an extra one-click teleport (such as a Nardah teleport) before she casts Tele Block is also recommended.
You will need to access a faraway area in the Kebos Lowlands for this section; having access to fairy rings, the Xeric's Honour teleport (requires unlock) from Xeric's talisman, or the Quidamortem station of the Lovakengj Minecart Network are helpful. Having unlocked all routes from the Mountain Guide will also be of great use.
Exit the military installation and speak to Elissa just north-east of the digsite. Tell her that you heard she visited Lovakengj recently, and that you are looking for information on Vardorvis. Though she doesn't know much, she believes the Burning Man monument in the city, which represents the defeat of an ancient evil, may be a good place to start your search.
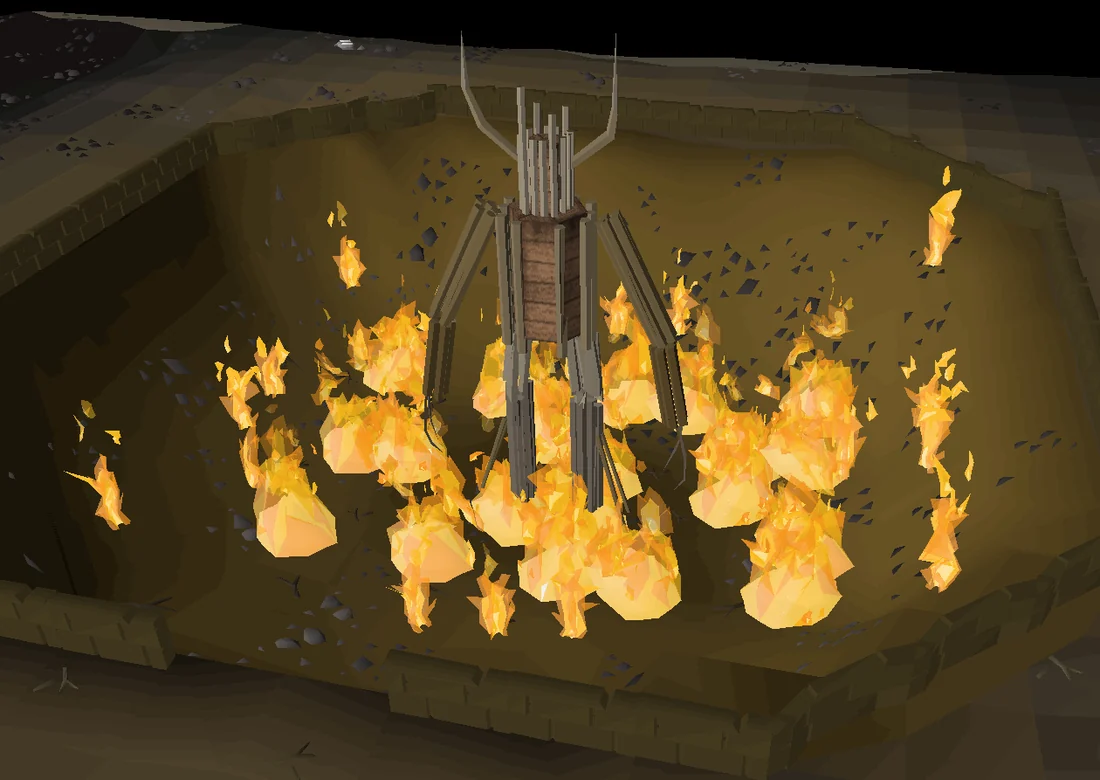
The Burning Man, representing the defeat of an ancient evil. Image credits →
Head to the Burning Man monument, found on the western side of Lovakengj. If you have Xeric's talisman, teleport to Xeric's Inferno, then run south-west. Talk to Barus, a Lovakengj historian who will explain the history of the Burning Man. He will then mention The Stranglewood, a cursed place between the Kebos Lowlands and Varlamore from which the great evil came, and also tells you that a botanist who lived near the Hosidius Estate Agent attempted to explore The Stranglewood and went missing.
The Estate Agent's building is at the north-eastern end of Hosidius, and the botanist's house is adjacent to his. If you have Xeric's talisman, teleport to Xeric's Glade and run north, or use Kharedst's memoirs to teleport to Hosidius and run north-east across the River Hos. In the botanist's house, search the desk to receive a strange potion and potion note. Read the note to learn about the potion, as well as the location of a rowboat to The Stranglewood, found south of Mount Quidamortem.
If you have access to fairy rings, use the code BLS to teleport to the crossroads at the base of the mountain, then run west towards the rowboat. It's marked on the map with a travel icon at the edge of the bay adjacent to Talon's Grasp. The fairy ring nearest to the botanist's house is just north of the Tithe Farm at the Hosidius Vinery. You can use the bank on Mount Quidamortem to resupply between sections by talking to the Mountain Guide to move between the crossroads and the bank, easily accessed through the Xeric's Honour teleport. When you reach the rowboat, drink the strange potion and board the rowboat to travel to The Stranglewood.
Note: You may want more than two free inventory spaces for the upcoming section where you defend Kasonde, since you need to keep the satchels, detonators, and barricades in your inventory. You won't take much damage in the defence section because the Strangled will be focused on attacking Kasonde. Consider banking a few extra food items.
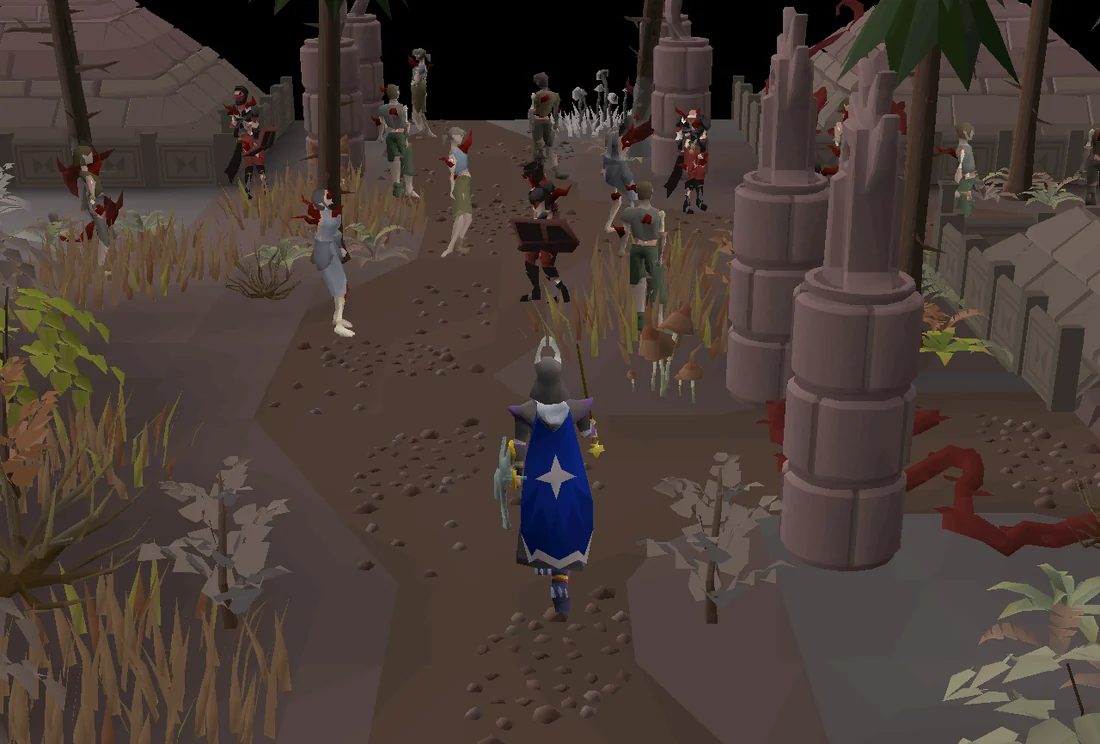
While in The Stranglewood, be aware that the area is full of high-level Strangled who will trap you in place with roots and deal continual damage. There is also a health bar on the top left of the screen that indicates your infection level; if it reaches 100%, you will be overwhelmed by the infection and respawn at the last location you were uninfected. Stone chests can be found throughout the area and searched for tatty pages, which can be read for information on the Zarosians' presence shortly after their arrival here; this step expands the lore of the quest, but is not necessary for completion.
Follow the path south and enter the city as fast as you can. Ignore any Strangled and run south to a fork, and then west to the entrance, at which point a cutscene will play where you run into a large horde of Strangled, and make your way into a nearby barricaded building. You will meet Kasonde Shaw, who you indirectly interacted with during The Garden of Death. He will accuse you of tailing him, but quickly realises you alerted a horde of Strangled by disturbing the tendrils nearby, and tells you to head to safety below.
Protecting Kasonde
Items needed: Free inventory spaces to hold a hammer, barricades, and satchels. Items recommended:Ancient Spellbook to freeze Strangled, a fast melee weapon to kill any Strangled that make it to Kasonde
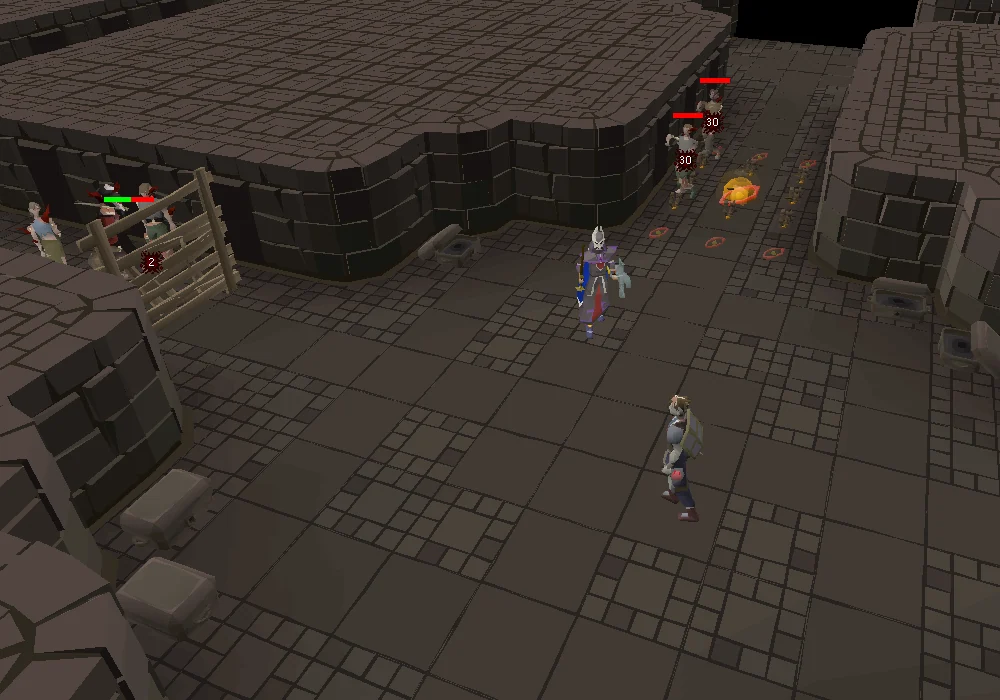
Protecting Kasonde from the oncoming Strangled. Image credits →
For this section, you will have to defend Kasonde for four minutes from oncoming waves of the Strangled. The first minute is a set up period for you to place barricades and explosives. The Strangled will focus their attention on Kasonde and failing will simply start the activity over, so there's no need to worry about death. Around the area are six stone chests, four of which require the player to complete a tumbler puzzle, and which contain barricades and satchels. The satchels contain explosives that can be detonated remotely, which is effective at wiping out large groups; the explosion will instantly kill the Strangled. If the player is in the explosion radius when detonated, they will take heavy damage, so it is recommended to stay a safe distance before doing so. Barricades help provide a temporary reprieve, forcing the Strangled to break it down; players may still attack through them with halberds, ranged or magic.
The basic strategy is to set up whatever barricades you find in the hallways (there are designated slots to set up the barricades on the sides of the halls) and then use your ice magic to freeze and kill the Strangled. Waves consist of multiple fast weaker Strangled with one slow Strangled that takes longer to kill. Try to set up the barricades to block as many of the entrances to the central room as possible, since any Strangled that make it through an open hallway will immediately target Kasonde, who doesn't have a lot of hitpoints.
Pick up the hammer and grab supplies from the first two open chests at the start of the round, place the explosives at a chokepoint where you expect the Strangled to mass up and the barricades in one of the hallways adjacent to the central room. To open the chests, simply move the tumblers by clicking on slots above them. The fastest way to brute force the lock is to simply click confirm, see if any show up as green on the right, and if not, move everything up by one. This will take no more than eight tries for the final combination. You are best off opening the locked chests between waves while the Strangled are walking to the central chamber. If a Strangled makes it past you to Kasonde switch to a four tick melee weapon like the abyssal whip to kill it faster than your five tick magic attack.
Once three minutes pass, any remaining Strangled will automatically die.
Kasonde will tell you where the waves of Strangled are coming in from, so plan accordingly and time the detonations right. If barricades break, use your ice spells to freeze the Strangled, as they will quickly focus down Kasonde.
Breaking The Stranglehold
Talk to Kasonde to learn about the Old Ones, where he tells you The Strangler was the result of a failed ritual to overcome their extinction. He warns you that The Strangler infects living things who get too close, and can alert nearby Strangled if you step on one of its tendrils. However, some plants have an immunity to the infection, and Kasonde believes they can be used to create a better version of the serum you drank before coming here. Before leaving, take some stink bombs from the south-east stone chest. These can be used to attract the Strangled to where you drop it. Should you die during this section your gravestone will appear outside the rowboat you used to enter The Stranglewood.
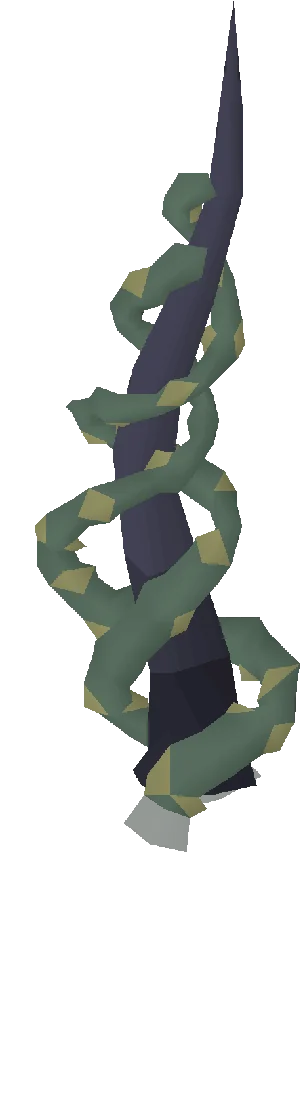
The Strangled move in a shuffle, moving one tile every two ticks. They initially have a very low aggression range, which is 2 tiles around them. If they notice you, they will say Nngh... and begin to run towards you; other Strangled within range of the one that was alerted will yell ! and attack as well. Once made aggressive, the Strangled will rush towards the player and have an even higher aggression range, being able to chase players for a very long distance before losing interest. Given that they are able to bind players with their attacks, the player should avoid them whenever possible.
This unique aggression mechanic only triggers when the player is within 2 tiles of the Strangled, and this can be exploited by attacking Strangled from afar, since they will only shuffle towards the attacker and not alert others near them. As Kasonde stated earlier, the player must avoid the tendrils scattered across the forest whenever possible; stepping or running over one will alert Strangled in a much larger radius, even if they cannot visually spot the player. At certain points there will be no way to get past the Strangled by sneaking around, at which point the player should quickly kill them with a ranged attack before they can close the 2 tile alert distance. They have enough hitpoints and defence that it makes the most sense to freeze them, though it should be noted that they possess slight freeze resistance and will not remain bound for the full duration.
Strange shrines can also be found around the area to restore run energy.
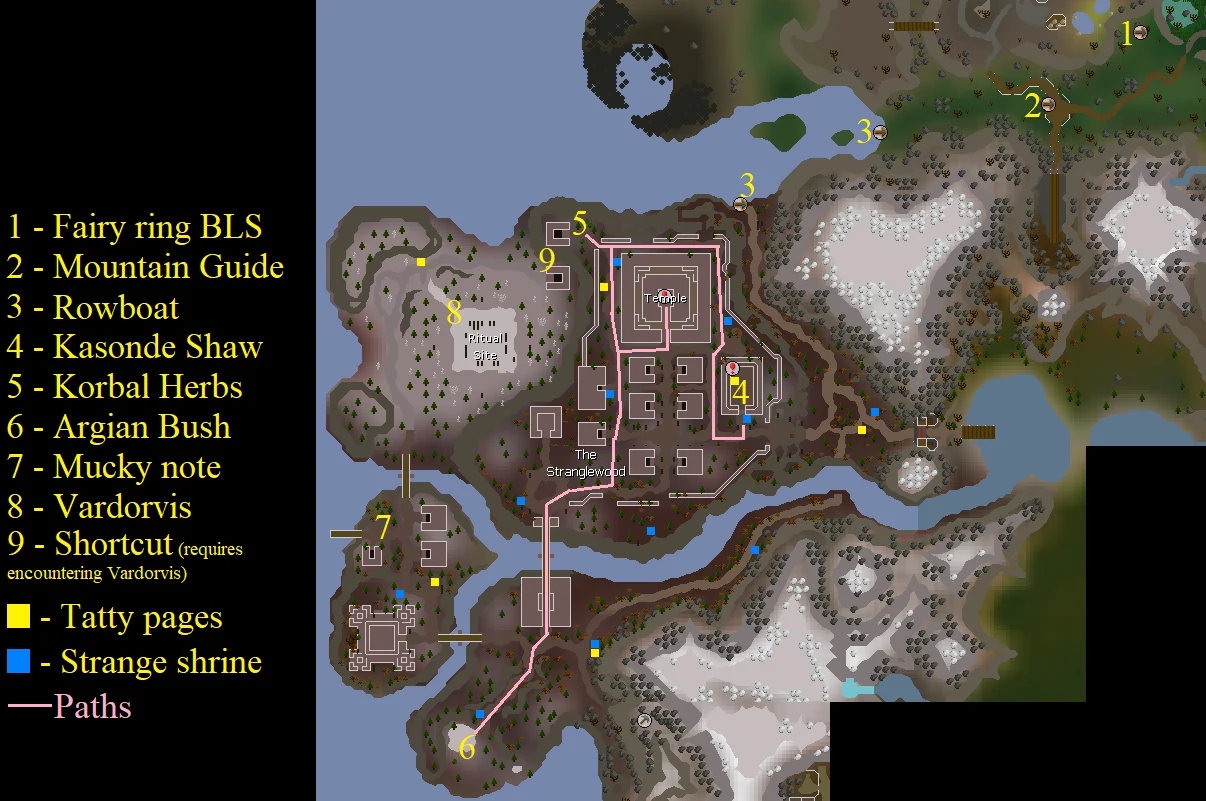
The first item Kasonde requires is a korbal herb, located slightly north-west of the large temple. From the barricade, head south-west to the first intersection. While avoiding the red tendrils, run directly north, take the eastern path north when you reach the south side of the pyramid temple and then go west across the back of the pyramid. The Korbal herb is located on a small outcrop with a strangled boar. Once you have picked this herb, if you become fully infected, you will respawn near here.
The next item is argian berries, found at the south-western camp near a strangled lynx (location six on the Stranglewood map). From the herbs, run south towards the bridge and run south-west near lynx. If you need a break, running south-east after the bridge will lead towards The Stranglewood Mine, which does not contain any Strangled, though you will need to kill any pursuing you if they follow. Once you have picked these berries, if you become fully infected, you will respawn near here. Likewise, leaving and arriving by rowboat takes you back to this camp.
Once you have both items, head to the temple, which is north-west of the building you and Kasonde were hiding in initially. Once inside, kill the two Strangled attacking Kasonde, and then talk to him. You will find out that he has been infected by The Strangler, but that he also has Koreps[sic] Syndrome, which is a deadly disease with no cure. His best hope was the secrets of the Old Ones, which may lie at the ritual site just west from the temple.
He will ask that you brew the potion and head there to see what you can find. He will then give you an unfinished serum; add the korbal herb, then the argian berries to create the Strangler serum. Drinking it will grant you permanent immunity from The Strangler's infection, but not from the damage dealt by the Strangled.
Prepare to fight Vardorvis, who is located in the snowy square west of the temple, marked on the map as "Ritual Site". If you need to visit a bank, consider doing so after first making your way to the ritual site. The first time you go, you will need to run south, west to the bridge, south over the bridge, west across another bridge, and then north over a final bridge until you reach the ritual site. However, after entering the ritual site once, a short cut opens up next to the Stranglewood entrance by the rowboat. Adjacent to the rowboat west is a path up to the back of the temple that was previously blocked by a rock. By going up the path and then west, next to where the korbal herbs were found, you can enter the small pyramid on the outcrop and emerge near the ritual site. This can be especially useful if you die and need to get to your grave, which appears immediately outside the ritual site. You will also find it much easier to run past the Strangled now that you have full immunity. When you're ready, enter the site by climbing the rocks in the north-west clearing and attack Vardorvis, now one of the Strangled.
Vardorvis is weakest to slash attacks, with crush being a somewhat acceptable alternative. He is a 2x2 monster, so players using a scythe of Vitur will only hit twice, though it still outperforms most slash weapons. Despite being an undead vampyre, Blisterwood weaponry does not provide additional bonuses, so stick with high slash weapons such as dragon scimitar, Arkan blade, abyssal whip, abyssal tentacle, zombie axe, or blade of Saeldor. He has a unique mechanic active at all times during the fight in that as his health lowers, his Defence level will decrease by 1 for every 10 damage, but likewise his Strength level will increase by 1 for the same amount. This makes him easier to hit as his health lowers, but his attacks will become stronger (though still negligible with prayers).
Vardorvis uses a melee attack, which can be reduced by 75% with Protect from Melee. It is extremely accurate, so players are recommended to bring strength-boosting gear over defence ones. He will heal for 50% of the damage dealt from his auto-attacks. Due to the highly accurate attacks and healing capability, Protect from Melee is mandatory at all times, or he will likely heal faster than the player can damage him.
Image
Attack name
Description
Priority
Swinging axes
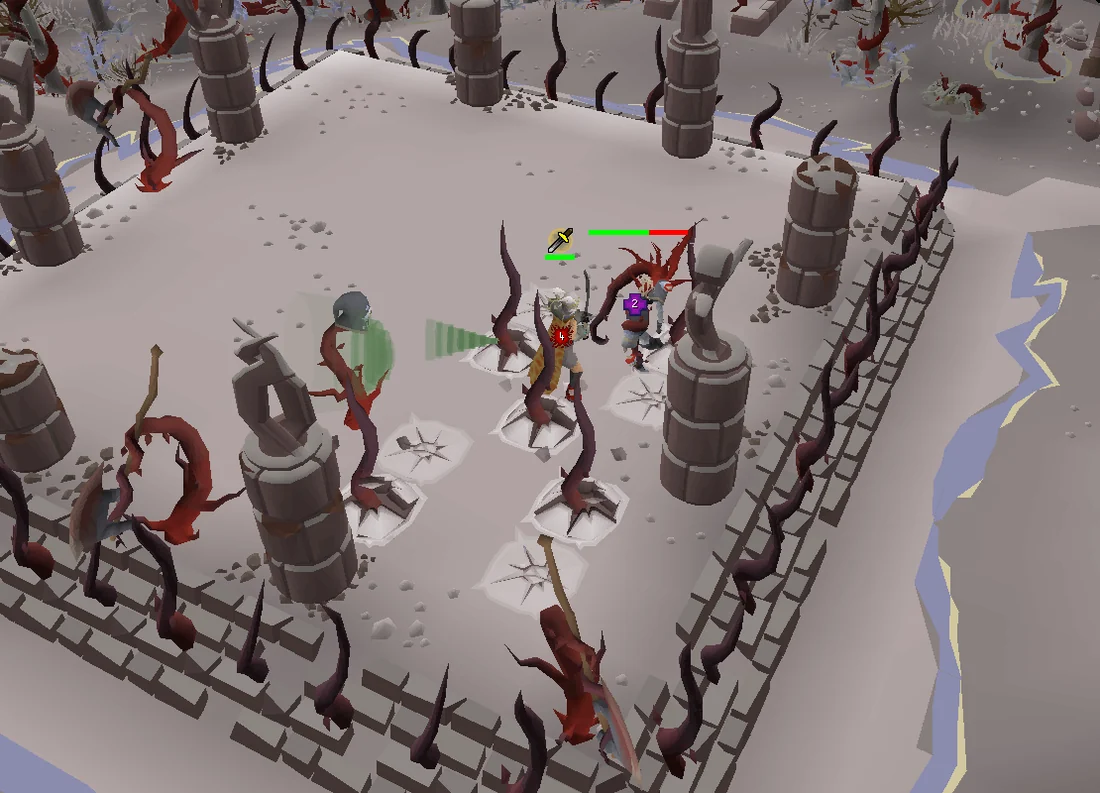
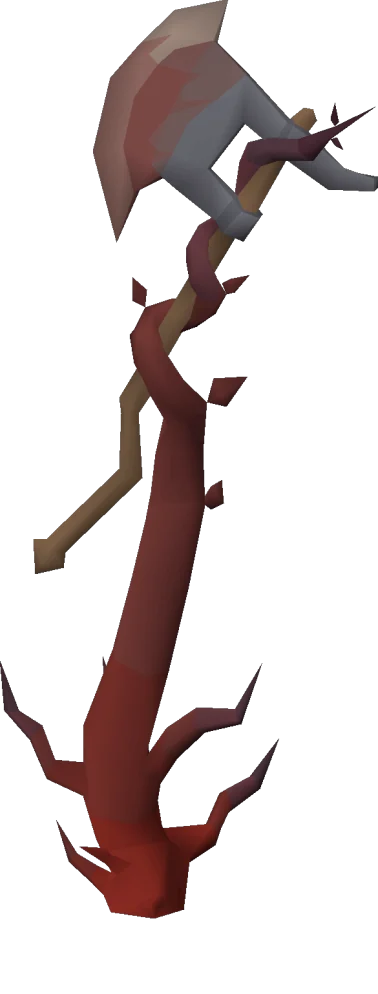
Axes will appear from the nine quadrants around the arena. Find a safe section of the arena to avoid this attack. Getting hit with this attack will incur a "bleed" effect of residual damage hits of 2. Moving around while bleed effect is active will cause the damage to appear more frequently. Bleed can be cured with Haemostatic dressings, which will also heal some Hitpoints. Using Protect from Melee reduces the axes' damage by ~50%. Avoid the centre of the arena, as all axes will travel through there. Two axes normally spawn, with the occasional chance for a third, but three will always spawn once enrage hits.
High
Homing spikes
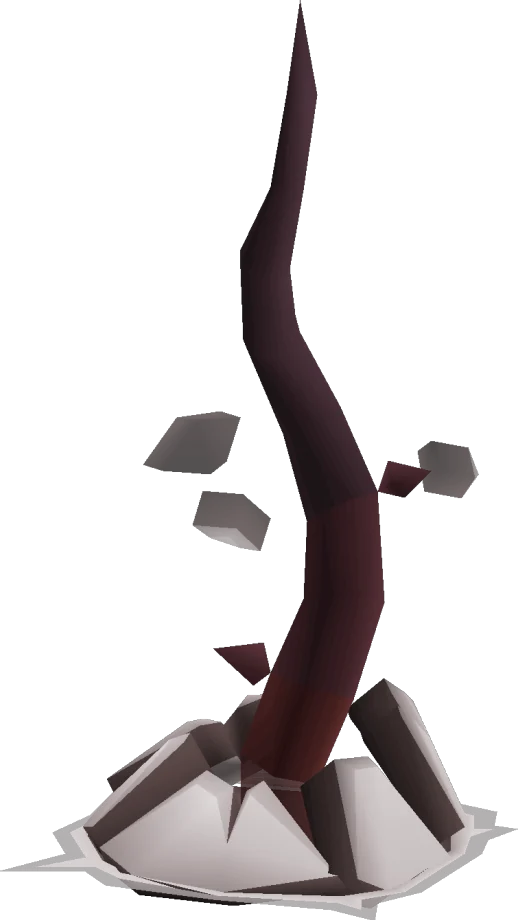
Vardorvis will slam the ground, causing spikes to form underneath the player. Quickly move to avoid taking damage. Standing by the edges of the arena (with the tendrils) will stop the spike from appearing under the player. Vardorvis will make more movements as his health lowers.
High
Head projectile
Vardorvis' Head will appear from the ground and shoot a green projectile that will turn off overhead Prayers. Protect from Missiles negates this special attack, and should be switched to immediately, even if in melee range, as it does not attack in sync with the body. Failing to block the attack drains 10 prayer points and disables overhead protection prayers for 3 ticks, allowing the body to deal potentially high damage.
Highest
Spores
The player's screen will be covered with a red tendril and 3–8 red spores will appear in the centre. Quickly click on all of the spores in order to mitigate damage from the root.
Highest
Upon hitting 33% of his health, Vardorvis begin his enrage phase; a fresh set of axes will appear once the previous set expires and his head will emerge more frequently.
Note that simply standing by the edge of the arena and letting one axe hit you can be significantly less damaging than running around, especially for inexperienced players. The player will take moderate damage from the axe, but as long as Vardorvis' orb attack doesn't land near or on the same tick as an axe swing, the player should not take too much damage. This also negates the need to move, since the darting spikes will never form under a player.
Notes for pures
With practice, it's possible to negate damage from special attacks. Lower-leveled players will take a lot of chip damage. While much more difficult, it's possible to kill him with magic or ranged. Experienced players can kill him with no Prayer. He can be damaged by a ring of recoil, which helps dramatically given his chip damage. He is immune to poison.
After defeating Vardorvis, pick up the temple key and return to the temple. If you die at the same time as Vardorvis or die before picking up the key, it can still be found by searching the rocks.
If the player's supplies were depleted after killing Vardorvis, immediately return to a bank and resupply, as a second boss fight is coming up.
Give the temple key to Kasonde. He will tell you that he found something beyond the doors, but needs to return to Kourend for the medical equipment to treat his condition. However, as he is already infected by The Strangler, you will protest his decision, deeming it too high a risk to spread the infection—leaving him no choice but to fight his way through you.
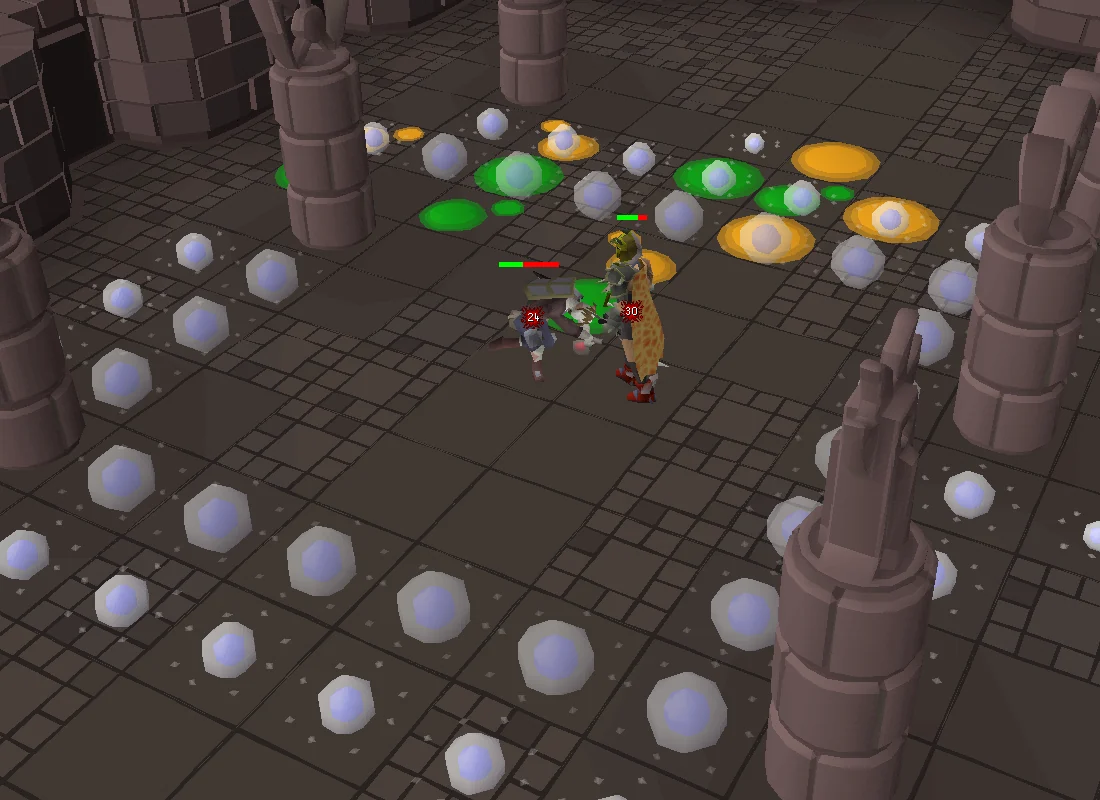
The player fights Kasonde to protect Kourend. Image credits →
Kasonde will attack you with accurate melee and ranged attacks, and will also occasionally heal as you fight; the only way to defeat him is to out-damage his healing. In addition, he also has two special attacks:
Potions - Kasonde will periodically throw potions on where you're standing. Walk away from where he aimed to avoid it, otherwise you will take 35+ damage. If you avoid it, the contents will spill on the floor, preventing you from standing there again.
The green potions will inflict venom, requiring an anti-venom. The serpentine helm is useful here, as it provides high defensive bonuses and blocks venom damage.
The orange potions will damage you for 10–20 Hitpoints, and disable protection Prayers. Running over the orange splats will also cause them to trigger.
Potion Barrage - Kasonde will dash away from you, then turn around and throw 3-4 green and 3-4 orange potions towards you. If you can get him to run back behind a pillar, he will throw the potions in a much tighter cluster, meaning less of the arena will be covered, making running easier.
Explosion - a charged attack. This can be avoided by blocking his line of sight with one of the pillars around the room.
Helpful Tips
The most effective strategy is to attack him with range, while using Protect from Missiles, running around the room so he can't get in melee distance. A crossbow with diamond bolts (e) works well, as do 10-tile range weapons like the Crystal bow or bow of Faerdhinen alongside crystal armour. Try to kite him short distances between the pillars, rather than running from end to end on the arena. You will find kiting him much easier when the blobs are clustered together, rather than spread out. If he starts his Potion Barrage, try to get him behind a pillar so he only throws them in front of himself, in a small area. The Toxic blowpipe can work, and has higher upfront DPS with most setups – especially with decent darts (such as Amethyst darts) and Masori. However, the blowpipe is somewhat limited by its shorter attack range, and thus extra care must be taken to avoid the explosion attack. A strategy is to alternate moving away one tile and attacking in a 2 tick cycle to never get hit by any thrown potions or melee attacks. It can also be used as a switch towards the end of the fight if struggling to finish him off due to his healing.
Kasonde's magic defence is too high for Magic to be effective in most circumstances. However, if using the Tumeken's shadow and Saturated heart with the best in slot magic gear, magic can outperform the best Ranged setups despite his high magic defence. If using this setup, the best strategy is to utilise Tumeken's shadow's long range to kite in the same way as when using ranged.
Although melee can quickly kill Kasonde, it also exposes the player to more of his attacks. As the player takes a lot of damage when up close, it is not recommended to be used as the primary method of killing him. Melee can however be utilised to quickly finish him off. This can be done by using special attacks with weapons such as Burning claws, Dragon claws, or the Dragon dagger. Keep close to full hitpoints before entering melee range, and after using special attacks step back away from the boss in order to heal up and avoid further damage. As the boss heals more when lower hitpoints, it can be beneficial to save special attacks to quickly kill him. By using all remaining special attacks, it's possible to quickly finish him off. This is relatively risky, as Kasonde's damage output up close is incredibly high.
Try to walk diagonally when kiting. This helps create distance between the player and Kasonde. Additionally, the floor splats act as obstacles, and moving diagonally can help to avoid running into them.
Kasonde's explosive attack is preceded by him stopping and throwing his hands in the air. After a short delay, an explosion will hit in a large square around him. If fighting in melee range, you have enough time to run if you look out for this.
If you defeat Kasonde as you die, you do not need to fight him again; Kasonde will be kneeling on the ground, defeated, when you return.
Thralls can also be used to output additional damage to the boss, if struggling, however in other parts of the quest ancients are required so it may be more convenient to stay on ancients.
Notes for pures
Defence is less important for this fight than damage output; lower levels may find it difficult to out-damage his healing, however with careful planning you can burst him down. As mentioned previously, using a special attack weapon like the dragon dagger may aid in finishing him off; simply switch to the special attack weapon and use all of the remaining special attacks in an attempt to finish him off. It's important eat up before going into melee range if lower hitpoints, as he can frequently hit in the high twenties.
After defeating him, talk to him once more to discover that he already had found Vardorvis' medallion before you arrived, and that he kept it hidden fearing you wouldn't help him if he gave it to you. He will tell you it is in a chest back in his hideout, and dies.
Should you wish to, proceed to the next room and search the stone chest for the final entry of the tatty pages. Return to the barricaded building where you first met Kasonde, and search the stone chest in the north east corner to obtain Vardorvis' medallion. Take it to the Ancient Vault and place it on Vardorvis' statue in the north-east corner.
Speak to the Catalytic Guardian by the portal, who has been waiting to inform you that The Great Guardian has detected a magical signal of unknown origin emerging from the rift. You will ask to be transported to The Scar, despite recommendations against it by the Catalytic Guardian, but it will help you enter by using the magical signal as a guide to send you roughly to where it is coming from.
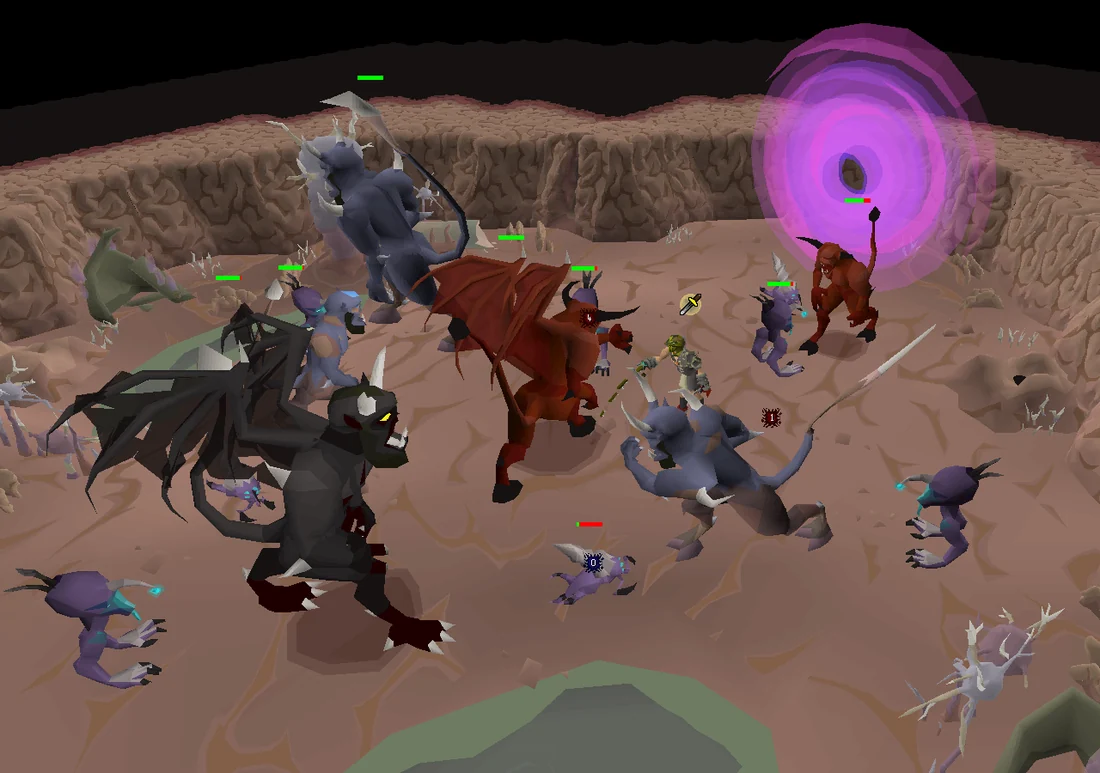
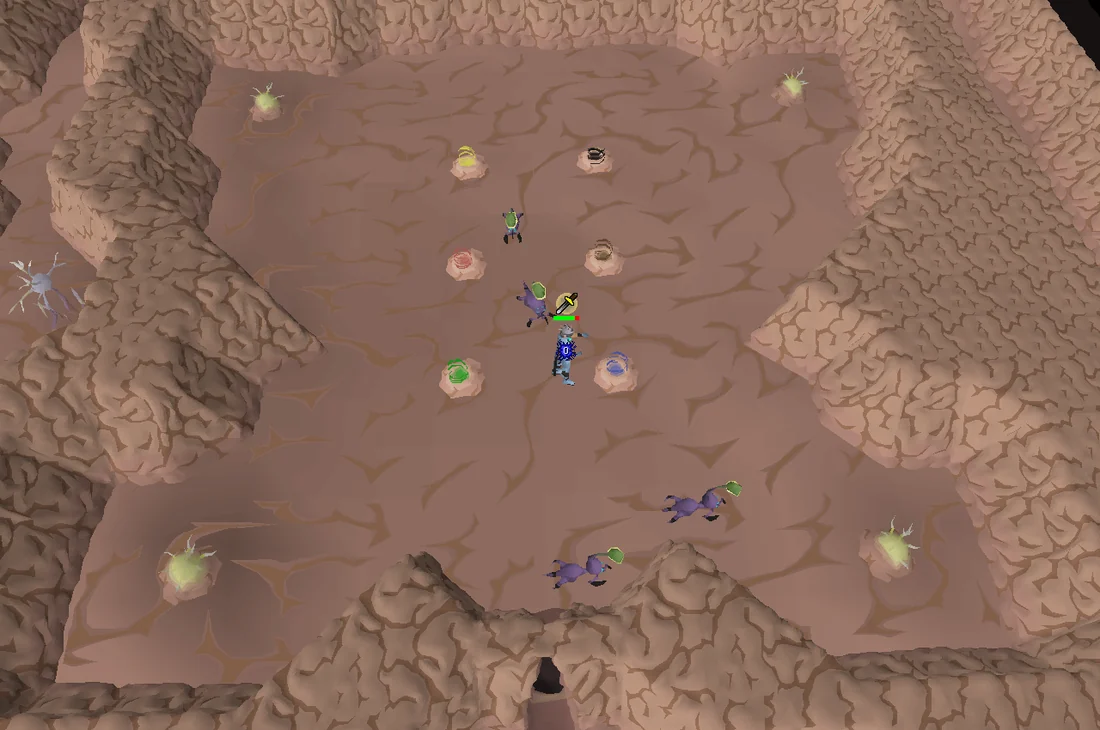
Upon entering The Scar, you will run into a fight between the local inhabitants; several abyssal leeches, walkers against a group of six demons; one lesser, greater and black demon and their scarred variants. The scarred demons are a bit stronger than the normal demons. You need to kill all of them. The monsters will change aggression to you if attacked, so an option for lower-leveled players is to let them fight it out and then mop up the stragglers. Protect from Melee will negate all damage.
Helpful tips: While in The Scar, after entering the passage next to Persten, there are many chests dispersed throughout that contain Scarred scraps. These can be consumed to restore 15 Hitpoints, 25% of the player's prayer points, and 20% run energy, along with the Stamina potion buff. Additionally, if you leave The Scar after killing all of the monsters and return later, you do not have to kill them again.
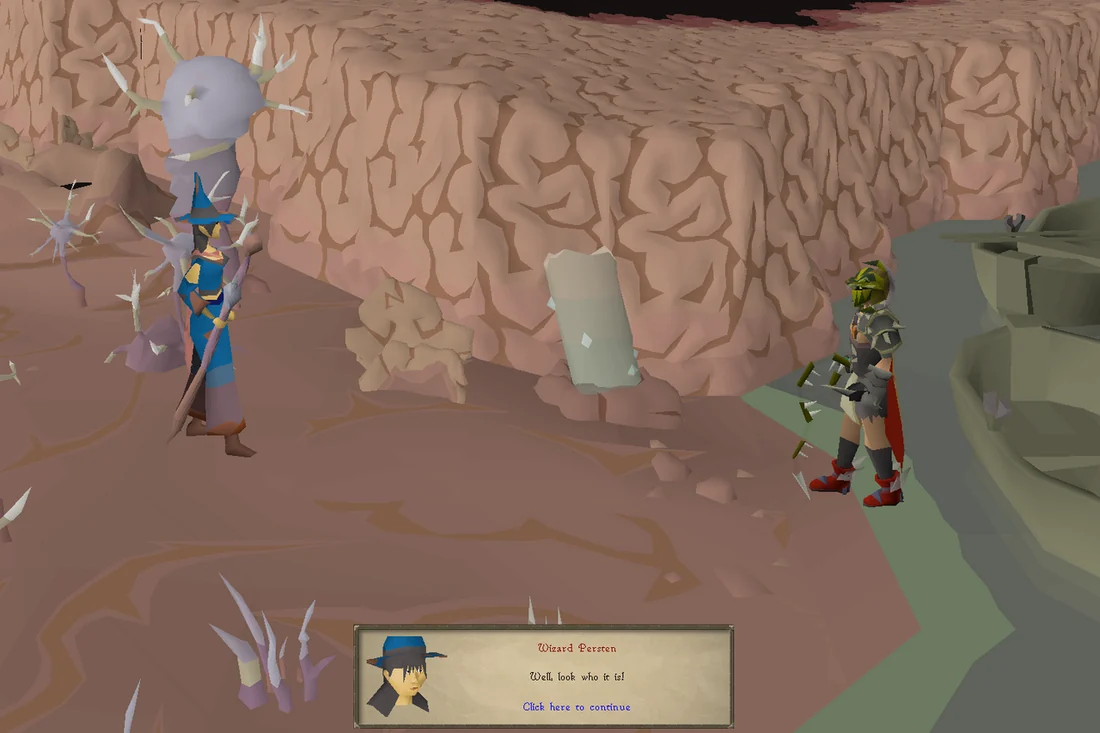
After crossing the stones, run all the way east to the rowboat and attempt to board it, and you will be interrupted by none other than Wizard Persten, who has survived her entry into The Scar. She will take you back to her camp nearby, and tells you that she could have left whenever she wanted to, but she sent the signal in hopes of someone capable following it and joining her. In fact, she believes that an old ship contains something she needs, but cannot get past the sea creature that roams the lake, and you reveal that you were looking for Perseriya's ship, which is the same ship she is trying to reach.
The sea creature will need dealing with, and she proposes that you burn up what remains of Perseriya's fleet to quite literally smoke it out. She asks you to go down three nearby tunnels and set the ships alight so that she can redirect the smoke to the sea creature.
Enter through the first open passage and proceed to solve the puzzles in the maze. You can safely leave The Scar and restock on supplies once you complete a puzzle. Because the passage that players arrive in varies, the next three sections may appear out of order for players, but all three must be completed before the passage to one of Perseriya's ships is opened. Each subsequent passages will have scarred lesser demons with different combat styles, so focus on a single protection Prayers for each specific passage.
Lastly, subsequent passages will require a slayer helmet or facemask, or you will periodically choke and take 10 damage. The final passage will deal damage to the player even with a facemask, although it will be reduced if the mask is worn.
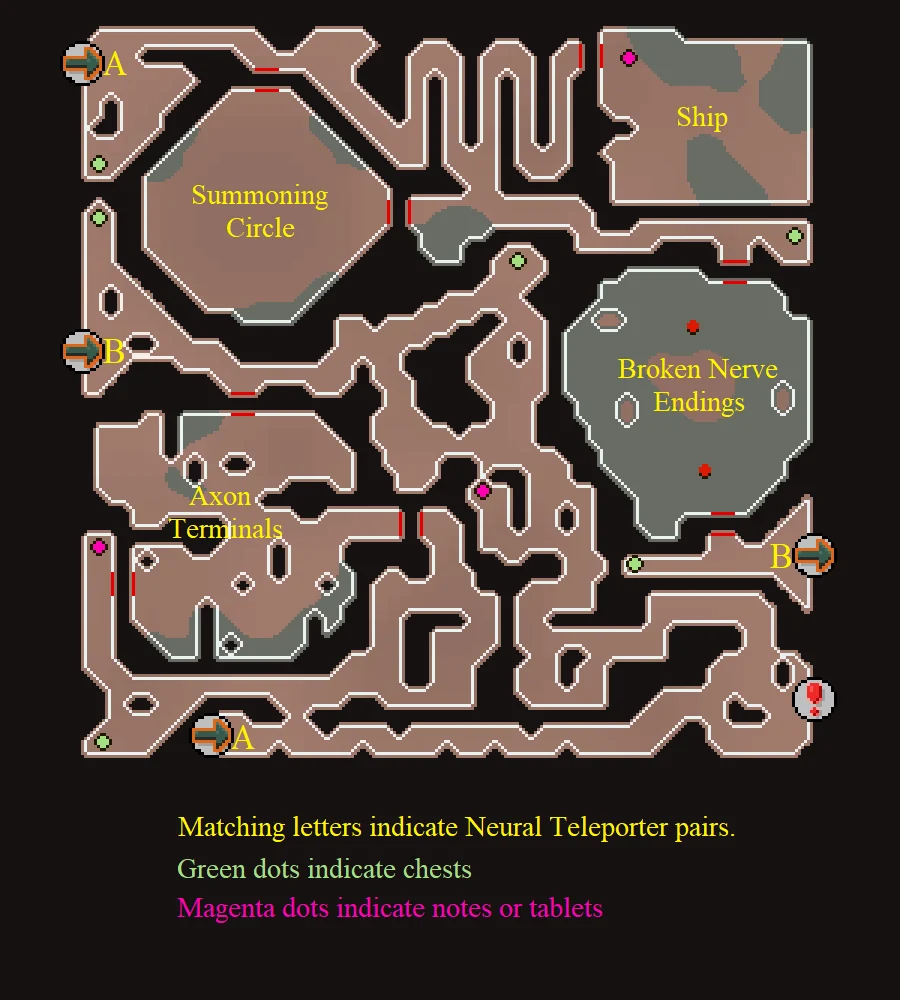
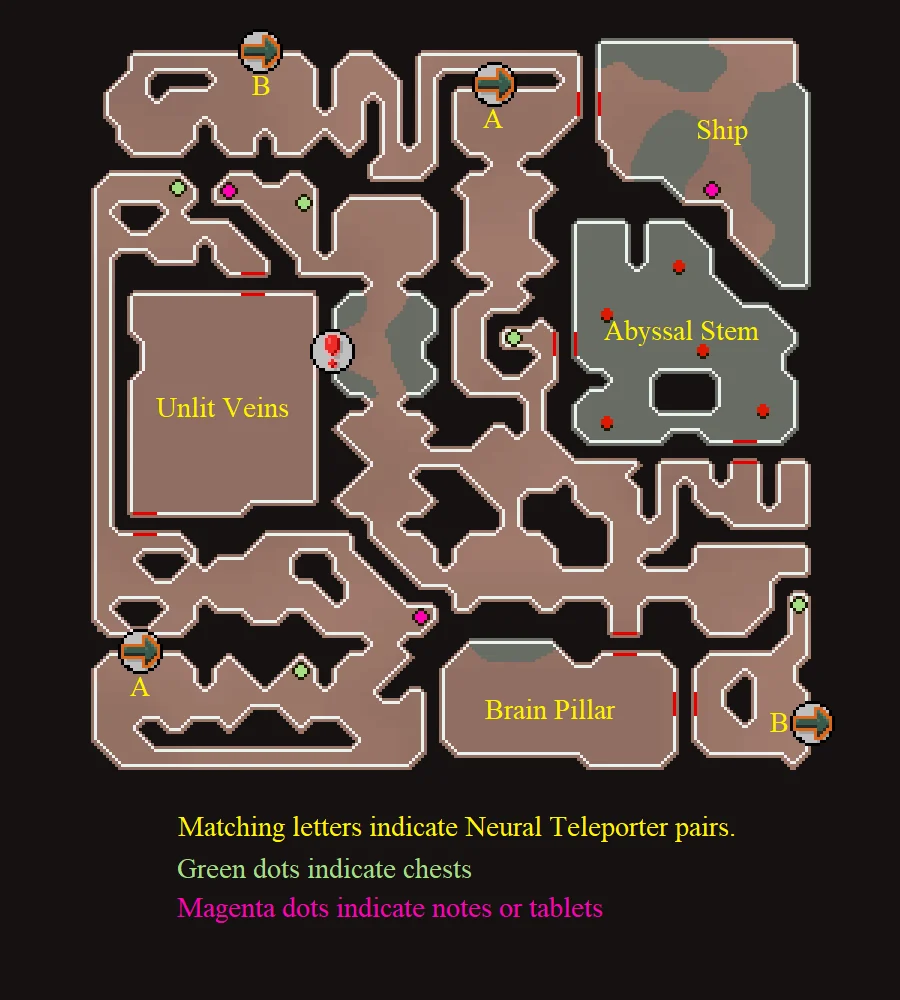
Entering one of the passages will bring the player to the south-east of the first level, by the on the minimap. Each passage will be randomised, meaning one person's North-West passage could be another's South East.
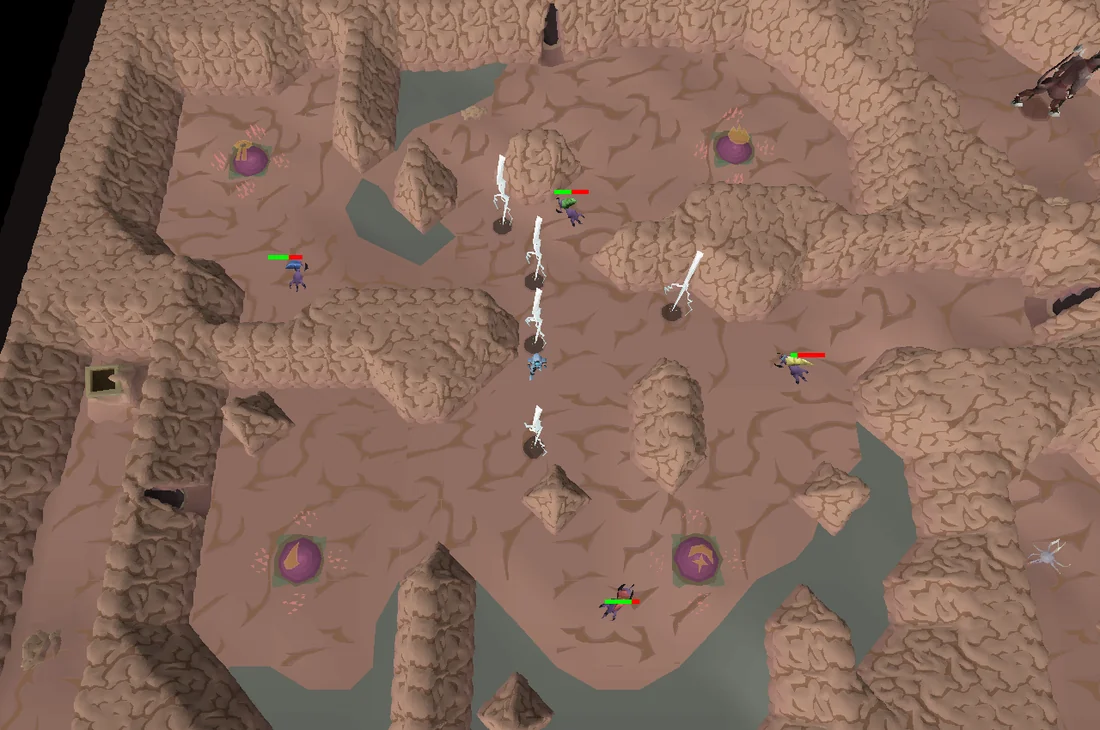
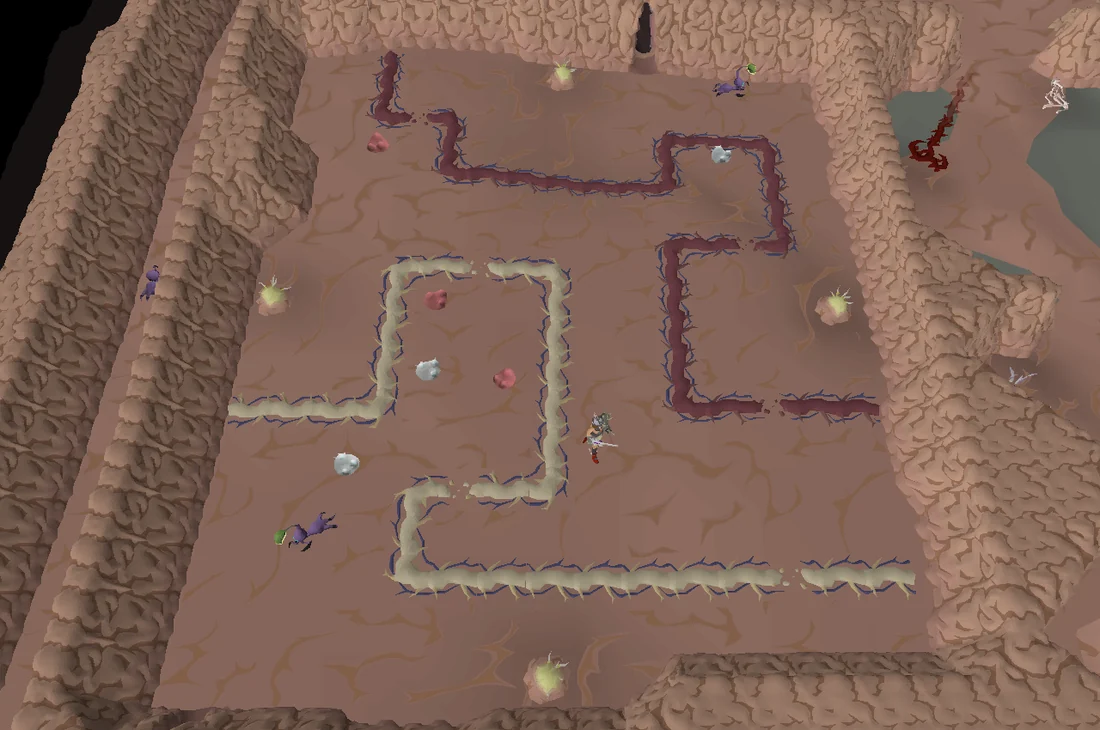
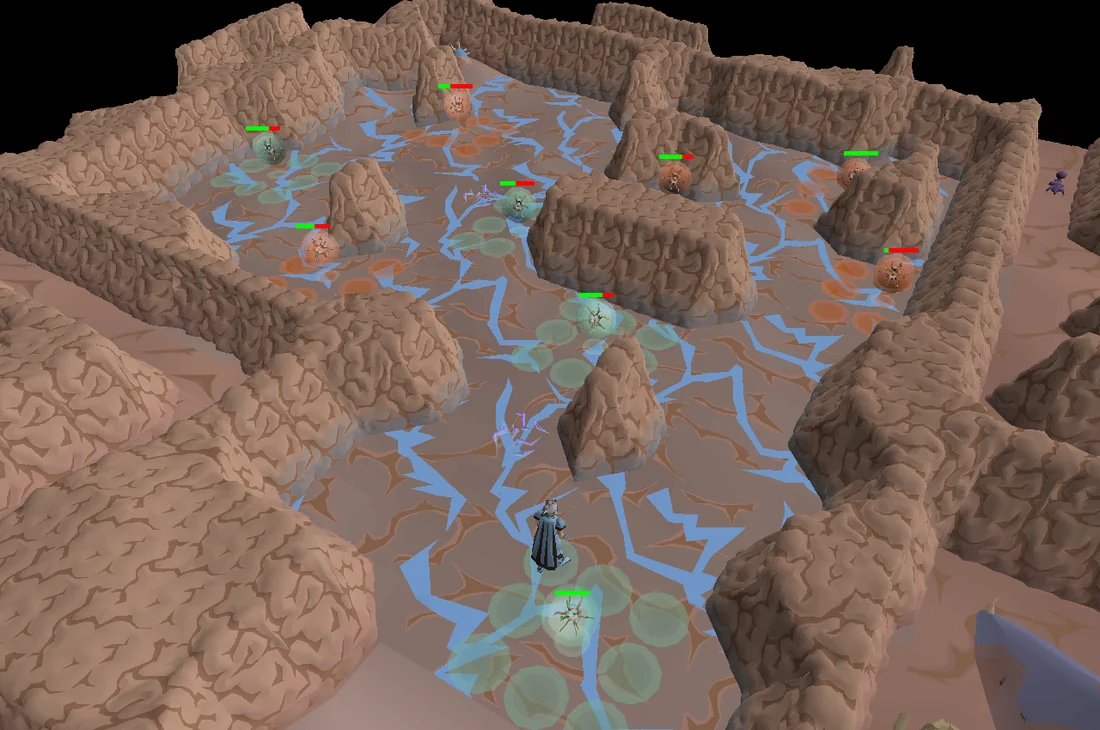
The first room is the Axon Terminal. Here, players must hit abyssal axons toward their corresponding terminal, either diagonally or directly. Players must also avoid lightning strikes in this room, which can deal around 15 damage. The strikes can be easily avoided by walking away from the shadows that appear on the ground. Should players find a monster stuck, they may select the "reset" option on it to automatically kill and respawn it back in its original location.
Broken Nerve Endings
Here, players must break the nerve endings around the area, and combine them to the appropriate nerve endings in the centre of the room. The nerve endings will respond shortly after being broken.
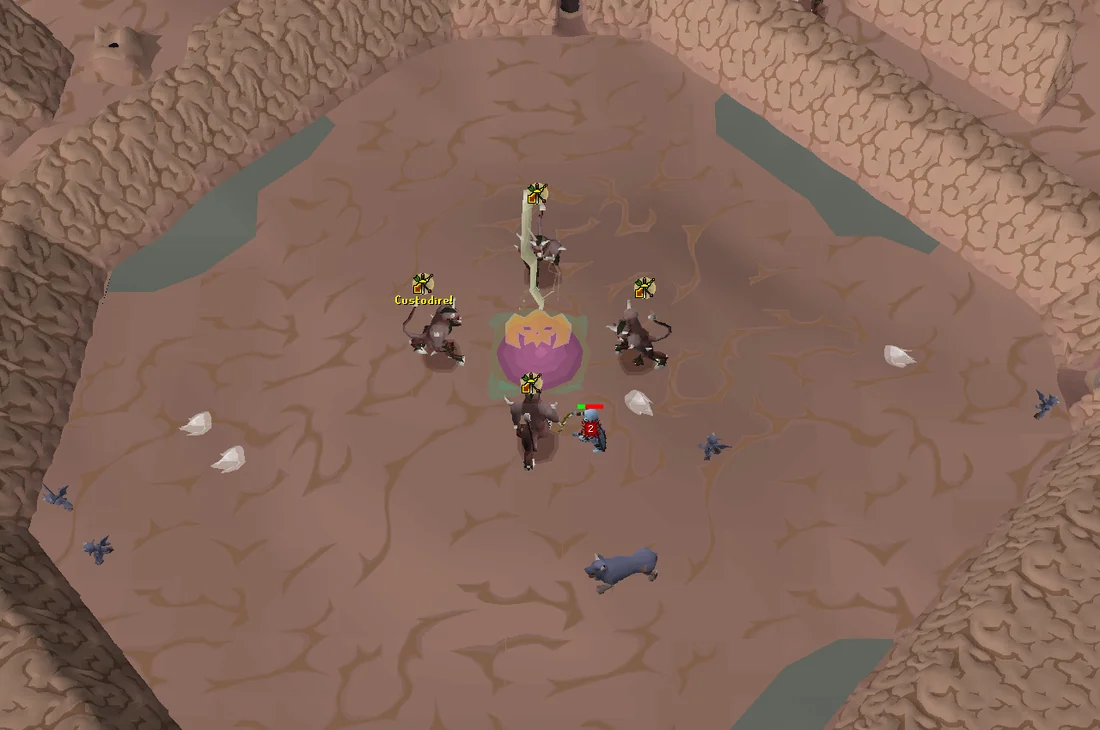
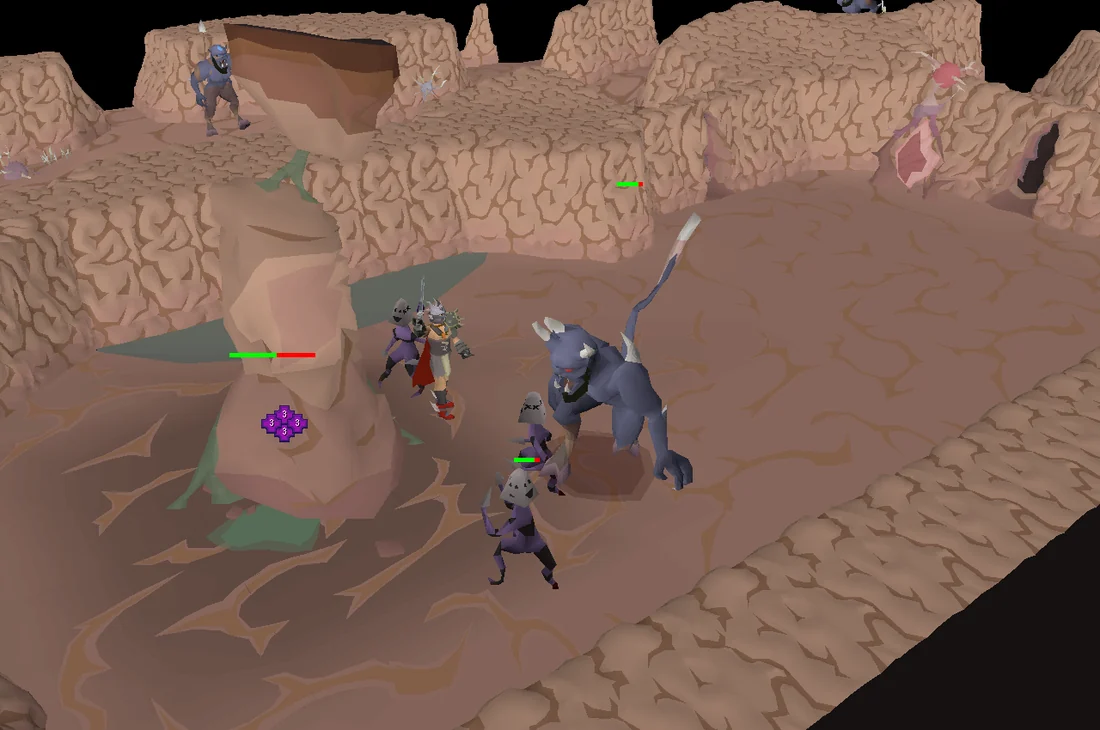
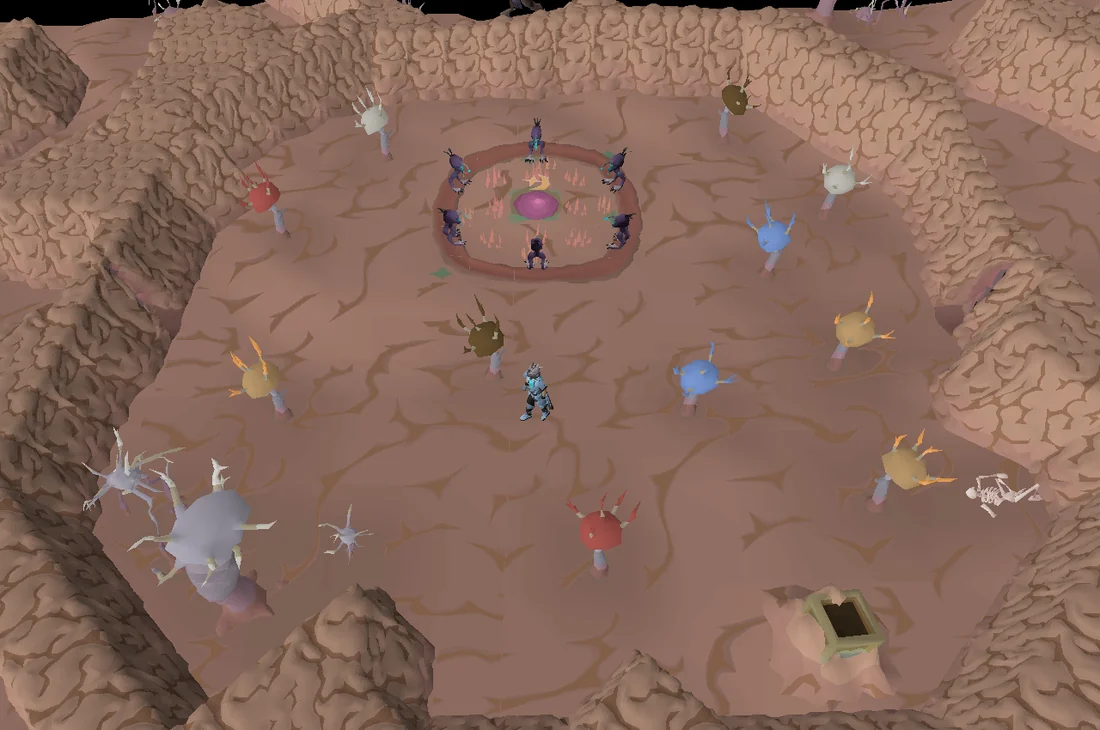
This room is accessed from the southernmost neural teleporter. Here, players must kill all the scarred imps, who are providing protection Prayers to the lesser demons in the centre. The lesser demons will also summon scarred lesser demons and scarred hellhounds to deter the player, both of which can hit through protection Prayers. Focus on the imps and lesser demons; once they are killed, any summoned demons are killed as well. Summoned enemies can be kited around the summoning circle to avoid damage.
After completing all three rooms, this level of The Scar will be fully disturbed, allowing players to enter the passage containing the shipwreck. Search for the following:
Entering one of the passages will bring the player to the middle of the second level, by the on the minimap. Each passage will be randomised, meaning one person's North-West passage could be another's South East.
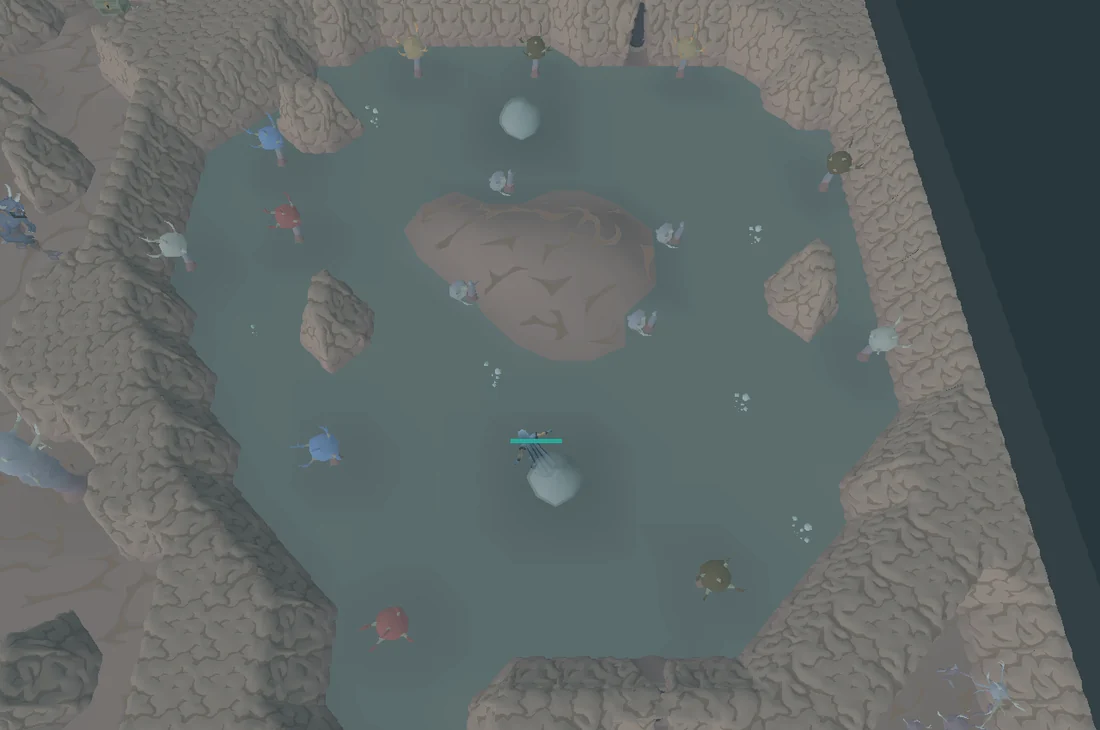
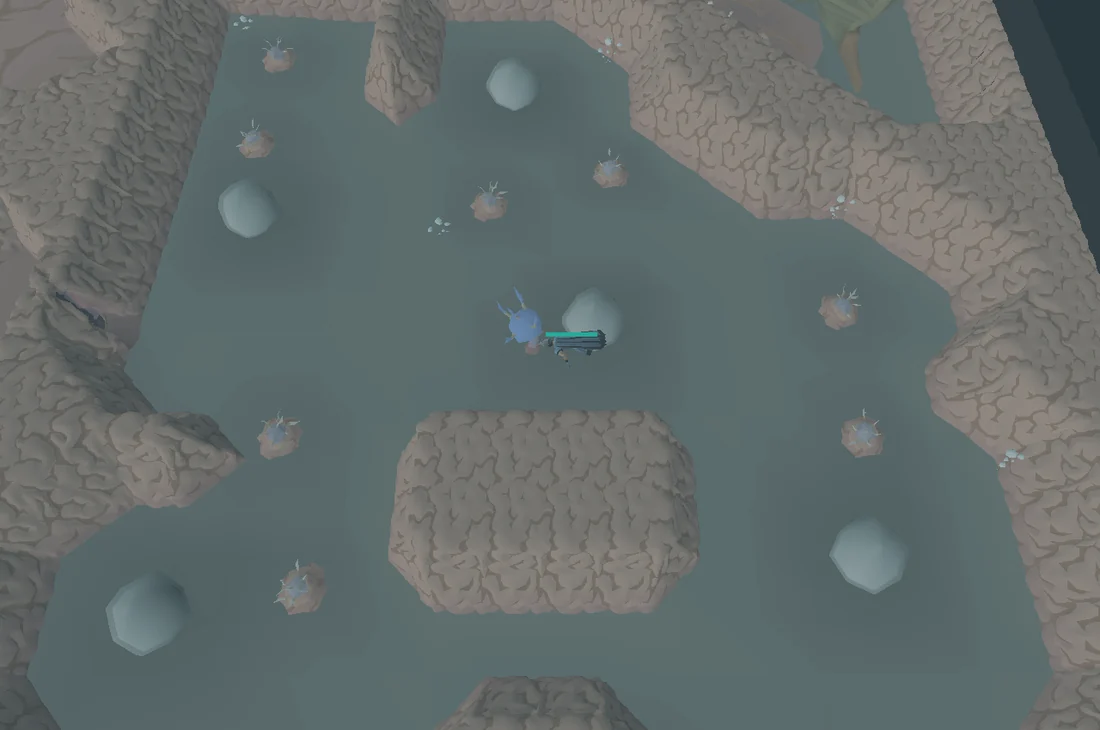
Here, players must dive in and touch the abyssal stem, then observe the order in which abyssal growths glow and touch them in the same order. Players cannot use diving equipment to keep their oxygen levels up; air bubbles in the room will replenish it instead.
Brain Pillar
This room is found right next to portal B. Here, players must defend the abyssal antibodies from the scarred hellhounds and scarred lesser demons until the brain pillar is fully healed. The attackers will only ever attack the antibodies; ignore protection prayers and Defence, and simply focus on killing the waves of scarred monsters as fast as possible. If all abyssal antibodies are killed, the player will be ejected from the room and take significant damage. Leaving early to reset the room if too many abyssal antibodies are killed early on may be preferred.
Unlit Veins
The last room is accessed by using the blue neural teleporter - which can be accessed via the Brain Pillar room (shown as B on the map to the right), then running east to the green neural teleporter (shown as A), then using it and running north.
In the Unlit Veins room, you must take four illuminating lures from the light leeches (you may fail and the leeches will attack with Melee - you may wish to pray Protect from Melee), then lighting all four of the damaged growth. Once the room lights up, the Crimson and Radiant Veins will appear. To repair them, you must use crimson and radiant fibre on the veins, which are acquired from killing crimson and radiant sanguisphera. These use very accurate blood spells that heal them, so use Protect from Magic to kill them quick. You will need to kill three of each.
After completing all three rooms, this level of The Scar will be fully disturbed, allowing players to enter the passage containing the shipwreck. Search for the following:
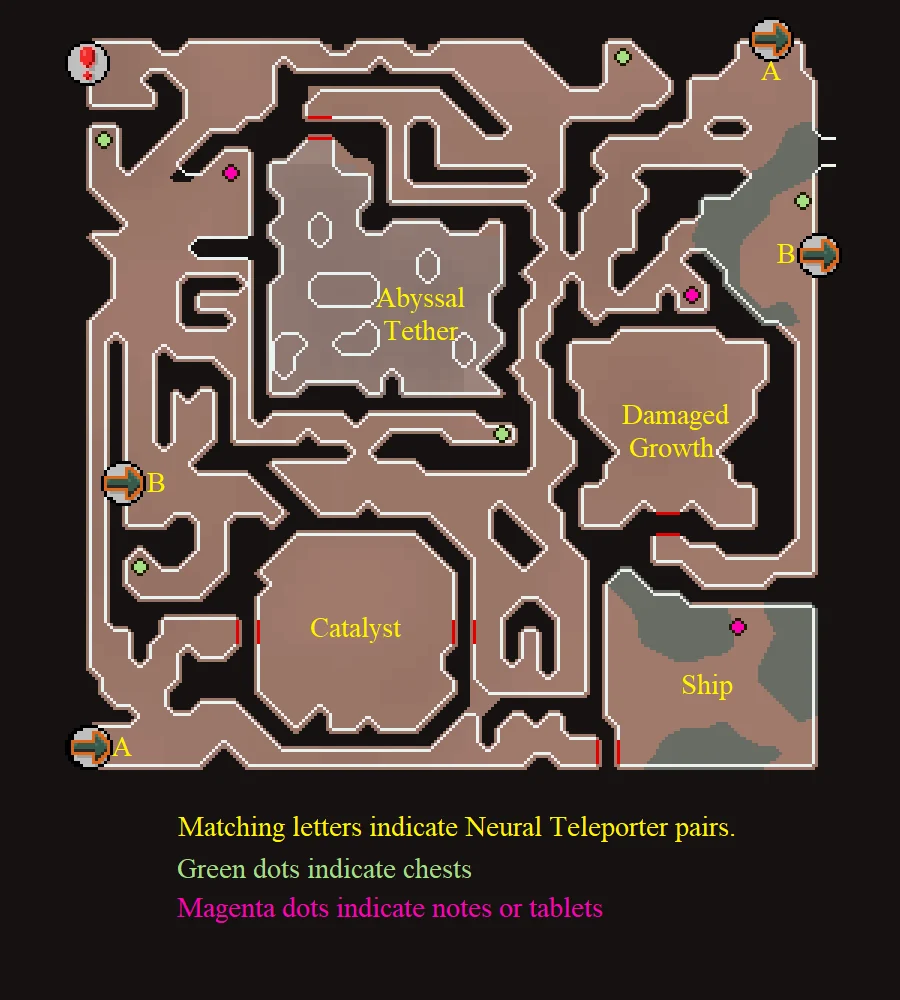
Entering one of the passages will bring to player to the north-west part of the third level, by the on the minimap. Each passage will be randomised, meaning one person's North-West passage could be another's South East.
Here, you must reach the Abyssal Tether at the end of the maze. At all times in this room, you must remain on the 3x3 platform of dots surrounding a pathbreaker. While staying on the platforms, you must move the cerebral orbs while remaining adjacent to the moving orb until it is close enough to the next platform to move to the next platform without stepping off of the grids surrounding the pathbreakers. Leaving the platforms will result in you being electrocuted, dealt 5–10 damage, and sent back to the beginning of the maze.
Cerebral pathfinders (green) will travel in the direction you are facing when you hit them, and cerebral pathbreakers (red) travel in the opposite direction from where you hit them. Ensure that run is turned off for this section, and make your way through the maze:
The next room is the Catalyst, accessed quickly by using the green neural teleporter in the north-east corner. Players must break the nerve endings around the area, and use them on the catalyst with the matching rune symbol to disrupt it. Players can combine the base (elemental) nerves based on the symbol displayed on the catalyst. If players find themselves unsure of which of the combined nerves remain, they can also use the base nerves on the catalyst as well when the correct rune is shown, although this will do less damage to the catalyst.
Warning: Leaving any item on the ground when completing this room will move the items to another instance and make them unobtainable; don't drop anything you're not willing to leave behind.
Damaged Growth
This room is accessed quickly by using the blue neural teleporter in the west corner and then running southwards. Here, you must take four illuminating lures from the light leeches (you may fail) whilst being under attack by them, so use Protect from Melee. After lighting all four damaged growth, the room will light up in the centre showing runic energies, which you must touch in the correct order. You have to return to each energy as you get the order, so for instance when one turns white, try another energy. If the next one does not turn white, return to the first one that turned white, once you get that second white that too will need to stay white to move on to the next colour. (for example; if you get Law Energy first, that must stay white, if you try earth and it doesn't turn white you will have to go back to Law Energy before proceeding).
After completing all three rooms, this level of The Scar will be fully disturbed, allowing players to enter the passage containing the shipwreck. Find the following in the room where the shipwreck is:
Once all three ships have been burnt, you will be spat back out to where Persten is. Exit The Scar and prepare to fight The Leviathan. Once prepared, return to the rowboat in The Scar and select travel. Climb up the rocks (handholds) in the landing area when ready.
A short cutscene will occur where you will encounter a weak snake-like creature, only for it to be eaten and the genuine monster to appear.
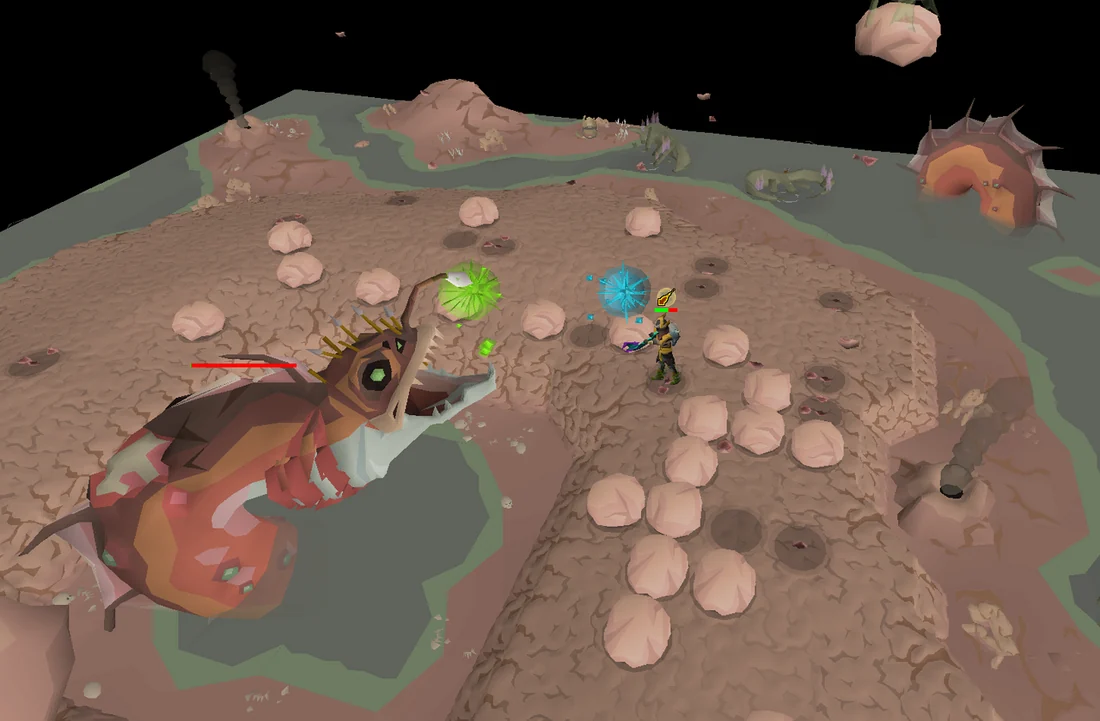
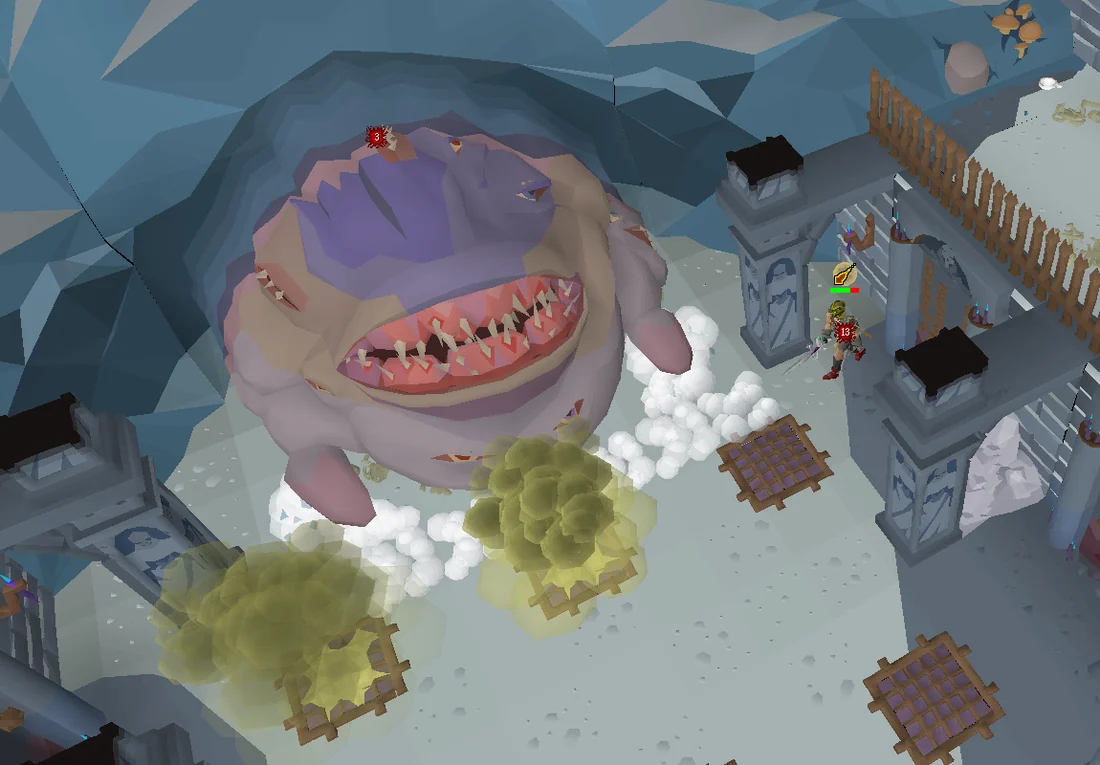
The Leviathan uses all three combat styles. It attacks by launching coloured orbs at the player. These do not deal damage until impact, so a player with late reactions can block them in time. It is highly recommended to stay out of melee distance of the boss during this time, as it will also utilise a powerful bite attack which cannot be reacted to prematurely. Both the melee orb and bite deal significantly more damage than the ranged and magic orbs.
The Leviathan is weak to ranged, which should be used throughout the fight. Also make sure to be on the ancient spellbook as Shadow spells are essentially mandatory for the boss, as the boss has a unique mechanic in which both the speed of the orbs and how fast they're launched increases after every attack sequence; at its highest speed, it will attack in 1-tick intervals, and players likewise have 1 tick to react to it, which will most likely kill them.
Using shadow spells on the boss will stun it for 15 ticks (9 seconds), during which the player should run behind the boss and attack it from there to reset its attack speed and deal high damage. If the player does not hit the boss from the back, its attack speed will not be reset. Be aware, however, that this will cause it to perform a special attack:
Special attacks
Attack
Description
Action
Lightning barrage
A zone of electricity will appear around the boss.
Run in a circle to stay ahead of the electricity.
Stand as close to the boss as possible while doing this.
Boulder rain
10 boulders will fall around the player, taking two ticks to land.
Move away from the tiles with shadows.
Smoke blast
Immediately after boulder rain, a blast of smoke will be launched.
Hide behind any of the boulders that were launched during the last attack.
Regular boulders will not block the attack.
At 20% health, the Leviathan will enter an enrage phase; during this phase, shadow spells will no longer stun it. A moving abyssal pathfinder will also spawn in a corner of the arena. The boss's attacks will now begin to pierce prayers unless the player is standing near the pathfinder. Additionally, standing near the pathfinder will grant the player's attacks perfect accuracy and increase their minimum hit to 20% of their max hit.
After defeating the Leviathan, climb down the handholds to the north-east and cross the stepping stone to reach Perseriya's ship. Upon arrival, Wizard Persten will row out to join you. You both will find out that Imperium, the artefact mentioned in the damp and old tablets, was found by a crewmember in Perseriya's private cabin, despite the tablets claiming that it had been "safely delivered to the east".
Once Persten leaves, search the nearby debris to retrieve Perseriya's medallion. Take it to the Ancient Vault and place it on her statue in the south-east corner.
05
Duke Sucellus of the Sixth Legion
Items needed: Melee combat gear, food, combat potions for lower levels, a method of restoring 50 or so Prayer points. Items recommended:Icy basalt or POH teleport to Weiss, three or more free inventory spaces.
As you begin this section, note that all your items will be temporarily removed while you're in the prison. When you're ready, head to the Ghorrock Prison, located below Weiss, in the salt mine, and enter the heavy door in the north-eastern room. You will be interrupted by Captain Malleta, who you'll convince to let you in. However, you will be knocked out and teleported into a cell upon entry.
Between Ghorrock and a Hard Place
Inspect the wall in the north side of the cell to hear a mysterious voice. He will tell you that he is one of General Khazard's soldiers who couldn't mind his own business, so he was locked in a cell next to yours. He'll ask that you try and find something that may help the both of you escape. Search the skeleton for a prisoner's letter, which indicates that something is in the latrine bucket; search it to obtain a knife. Give it to the soldier, who will use it to obtain a chisel, which he gives to you. Next, search the bed, where you'll use the chisel to pry out the loose slab of stone under it for a lockpick. Though you can't use it to unlock your own cell, give it to the soldier, who will free you after he frees himself.
After leaving your cell, talk to the soldier, who you realise is actually the Assassin you encountered during Devious Minds and Secrets of the North. He will tell you that Jhallan was the one who imprisoned him, and that he needs to search the asylum for something, which is also where you need to go. He will propose that you find the key to the cell containing your items, while he searches for a way to reach the asylum. He will then give you back the lockpick and disappear.
Sapphire key
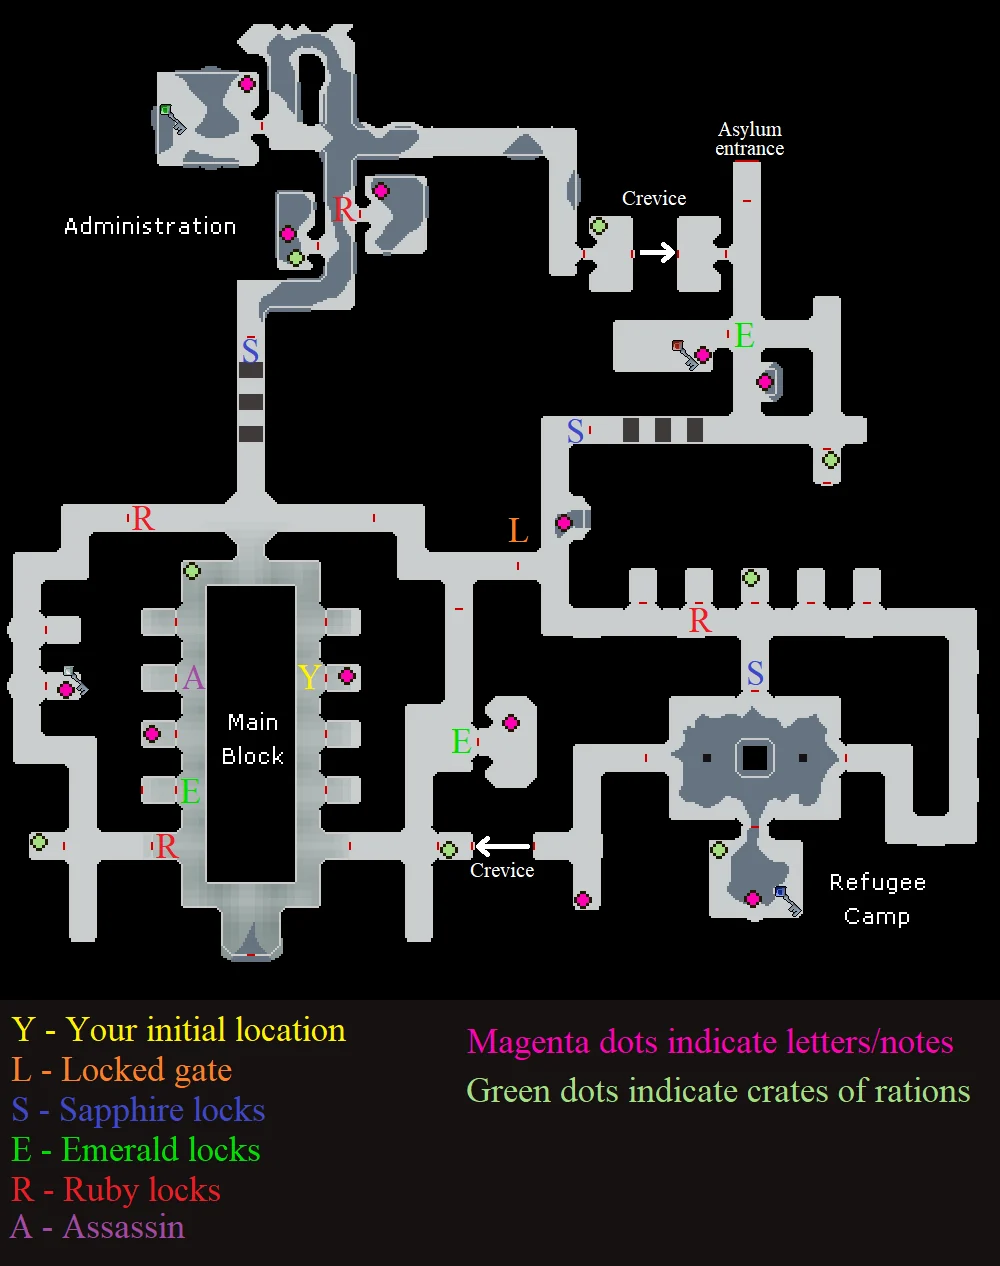
Throughout the prison, you will find crates with rations. These act similarly to the scarred scraps from your adventures in The Scar. The crates reset over time so you can use them to stock up.
If you logout you will be returned to the prison entrance but you will not have to repick locks that have already been unlocked.
You will need to search for several keys to unlock gates throughout the prison. Using the map, point Y is where the Assassin left you. Make your way to point L, where you'll need to use a lockpicking interface to open it. This will be the same as the one found when defending Kasonde, but this time it has six tumblers; use the brute force method to unlock it. Take the south path and make your way around, looping south, to the east entrance of the refugee camp.
Open the southern gate and enter the room with the altar. Search it for a warning letter, which hints towards the passcode to the chest in the south-east corner. Around the room will be six candle stands with a flag hanging behind them. The number of strokes on the symbol of each banner varies; for example, the north-east candle holder has two candles on it, with the flag having one stroke. This indicates that the number 2 is the first digit of the passcode. Following the others, the passcode can then be figured out as 214013, which must be entered to the chest located in the south-east corner of the room to get the sapphire key. Logging out will now return you to this room.
Emerald key
Make your way back to the main block, and open the sapphire gate directly north. From here, make your way to the Administration room - the north-western most room on the map - which has a grid of chests. Search the crate in the north-east corner for a requisition note and grid note. The capitalised letters of the requester's names in the requisition note spell out "VIAL", while the grid note indicates the locations of the first letter of the items inside the chests. The grid is correctly oriented when the player is facing west, as the top-right square of the grid (marked "H") corresponds to the north-westernmost chest. Thus, by filling in the blank slots in the grid note, the chest containing vials would be found in the first row and third column (directly in front of the west door).
The chest is locked with a passcode, which can be figured out by looking at the identifier column of the requisition note. The first digit indicates the row, and the second the column, so the first letter of the passcode would be found at the second row and fourth column, which is L (for Lanterns). Following the others, the passcode can then be figured out as LIES, which gives you the emerald key.
From this point, Jhallan will begin to pursue you after you exit the room. Though using Protect from Magic reduces the damage he deals, entering any room will cause him to teleport away. If he manages to kill you, you will respawn back in the room with the emerald key.
Run down the eastern passage into a small room with a blocked crevice. Unblock it and enter the next room, then enter the room with seven beds in it. Search the crate in the south-east corner to receive a code converter and a magic lantern. Attempt to open the seven chests that are next to the beds, which will give you the names of seven people: Vedius, Grazon, Phalina, Marcus, Nithrak, Baelys, and Atreus. Note down their locations, then stand next to the exit and equip the magic lantern, where you'll see a purple arrow pointing outside. Follow the arrows, where you'll also see coded letters appear; using the code converter, the entire route will spell out the letters AGVMNBP - the initials of the seven names you saw earlier.
By mapping out the movement from each chest to the next (e.g. Grazon's chest is to the north of Arteus'), the passcode of the chest in the south-east corner can then be figured out as UP RIGHT LEFT DOWN RIGHT UP, which gives you the ruby key.
Diamond key
Return to the Main Block, and open the ruby gates to the south-west. Make your way to the cell with the locked chest, and search the bed for a library note and strange slider. The note instructs you to look for books written by Duke Quirinius in the library, and also to remember the phrase "Various people emerged near us" (taking only the first letter of each word, this spells VPENU). Make your way to the library in the administration section of the prison, where the ruby gate is.
Searching all the bookcases in the library will result in you finding three books by Duke Quirinius: Innocence, Longing, and Harmonious. Notably, the location of Innocence is equally spaced between Longing and Harmonious, hinting that the sequence on the strange slider should have the letter I on the bottom equally spaced between the letters H and L on the top based on the orientation of the bookcases. Lastly, by looking at the top letters of the phrase from the library note (VPENU), you will find that the bottom letters spell out the passcode of the locked chest as WRATH. Return to the cell with the locked chest, enter the code and you receive the diamond key.
Distracting Jhallan
Return to the main block and talk to the Assassin on the west side. You will demand answers from him before you open the diamond gate, and he'll oblige, telling you that he was paid by someone to look for the Frostenhorn, the artefact Dr Banikan was searching on the golem machine in the military installation. He also admits to framing the Hazeel Cult for breaking into the Carnillean Mansion, and resurrecting Hazeel (if the player didn't do so during the Hazeel Cult quest), as it made the motives believable. Satisfied, you can now enter the cell and open the chest to recover your items. The Assassin will tell you that while you were busy, he has found a way into the asylum, but will need to deal with Jhallan before going there. He will ask you to light a pack of firecrackers he left in the refugee camp to attract his attention. Search the pack next to the centre pillar and light it up. You do not need open inventory spaces to light the fireworks and any items on the ground will despawn when you do.
You now need to survive for two minutes until the Assassin arrives. Due to his Mahjarrat status, Jhallan is nigh-invincible and attacking him is not recommended. Occasionally, you will be teleported to him and become frozen, and shadows will converge on your location, at which point you should rapidly click away to escape. Part-way through, some shadow clones of Jhallan will also spawn; they will not follow you if you run behind the pillar, but can pile on if you stay in melee range. If you remain in place when the illusions first spawn, you can take heavy damage.
Note that it is possible to kill the illusions by attacking them in the order in which Jhallan summons them (they have one health each), but not necessary. Players struggling with the damage can bring baskets of strawberries or other high-healing food that's spread out across several bites, such as pizzas, to survive without overhealing. A Prayer potion is helpful here, as is a stamina, although it is possible to do without them if players get lucky with their spawns.
Once three minutes are up, a short cutscene will play where Jhallan is frozen by way of Ice Barrage. The Assassin will then appear and tell you that the asylum entrance is now open. If you did not bring combat equipment and supplies before coming here, leave and do so, as you will face Duke Sucellus.
The fight will require a pestle and mortar and a pickaxe; both of these can be found in the boss arena, though a better pickaxe will result in faster mining.
Before fighting Duke Sucellus, you will need to wake him up by creating two arder-musca poisons from resources found in the room. Up the stairs on both sides of the chamber, there are extremities that periodically open their eyes and emit a red gaze with a cone AoE; the tile in front of it, the next three tiles in front of the first and then the next five from the second are all dangerous spots when an eye is opened, and getting caught in their gaze will deal extremely high damage. Each of the extremities opens their eyes in succession, after which there is a brief period of rest, allowing you to run past. Watch the extremities to see which one opens their eye first, and then let the other two open theirs as well, and immediately after seeing the last of the three close its eye, run past to the mushrooms. Alongside this, you must also avoid the ice fall attacks, which emit on the floor as a growing shadow; getting caught by these will deal moderate damage and bind the player. At the end of the path, pick three arder and three musca mushrooms (or two of both if you have 80 Herblore). Use your pestle and mortar on the mushrooms, and you will end up with at least 12 of each powder.
On the sides of the arena in front of the Duke are salt deposits which you must mine for 12 salax salt. Lastly, fill the fermentation vats with the ingredients and then empty it to retrieve the arder-musca poisons. Note that this can be accomplished in any order. When ready, use both potions on Duke Sucellus to begin the fight. Alternatively, you can simply grind the mushrooms and feed it to Sucellus; each powder inflicts 5 damage to him.
Note: Teleporting out will remove ingredients and potions from inventory.
Duke Sucellus has several attacks, most of which deal a lot of damage if they hit you:
Attack name
Description
Priority
Magic orb
When out of melee range, Sucellus will fire a blue orb. Protect from Magic reduces damage, but players are advised to attack him with melee, pray against melee, and tank the magic hits should they come.
Lowest
Slam
When in melee range, Sucellus will slam his arms on the floor, summoning spikes of ice on every tile directly adjacent to him. The spikes can deal up to 12 damage, and Sucellus' melee hits can deal upwards of 30. Protect from Melee is advised.
Low
Acid gas
Sucellus will launch a projectile towards one of the vents (two later in the fight), causing it to emit gas which deals rapid damage every game tick the player stands next to it. As soon as the gas emerges, run to the pillar on the other side of the room while avoiding standing on any tile that's directly adjacent to Sucellus.
High
Freezing gaze
Every 6 attacks, Sucellus will open his eye and unleash his gaze upon you. Immediately hide behind a pillar as soon as this happens, or the player will take up to 90+ damage, likely causing instant death.
Highest
Sucellus is best defeated through melee, as he is weakest to slash attacks. Arclight is particularly effective, though while he is a demon, demonbane weapons are only 70% effective, so players with a scythe of Vitur should use that instead. If available, bring any defence draining weapon as Sucellus has very high Defence.
Since accuracy is less important here, Strength-boosting gear will help improve damage per second. Players should bring their strongest melee style and stand directly behind one of the two pillars closest to him. Every time Sucellus uses his slam attack, as soon as his arms hit the ground, hit him once and immediately run back behind the pillar before the icicles shatter, as if you were flinching him. You will take chip damage from the icicles initially spawning, but with high-healing food such as Karambwan, the fight is very manageable, even at mid-level melee stats. Upon reaching 25% of his health, Sucellus will enter an "enrage" state and attack one tick faster.
After defeating Duke Sucellus, take the odd key that he drops and enter the room on the west side of the main hallway. Talk to the assassin and open the chest in the corner to receive Sucellus' medallion, then take it to the Ancient Vault and place it on his statue in the south-west corner.
Note: If the player and Sucellus died simultaneously, you can claim the odd key by interacting with the door to the Asylum.
Notes for pures
For players that don't use melee, Sucellus can be defeated in the same style as above by clicking the ground to manually put yourself in melee range, attacking once with a fast weapon such as a blowpipe, and returning behind the pillar. While more click-intensive, it's very possible to complete a kill with minimal additional damage. Since his attacks are very accurate (even when using high defence gear), it is best to bring armour with prayer or strength bonuses instead.
Make your way to the Ruins of Camdozaal. Once inside, speak to Ramarno at the Sacred Forge to the north (if you have not previously talked to him, he will instead be at the entrance), talk to him and then talk to him at the forge. Ask him if he's seen any other archaeologists in the area, and he will tell you that some arrived recently, and points you towards the bank chest slightly south-east from him. Head to the chest and speak to Prescott, the head archaeologist; he will tell you that he's found several non-dwarven artefacts, including a particularly strange icon. He will then mention add that he hasn't returned to the place he found it, due to hearing strange voices from the large sinkhole. You'll ask him about going down there, and he'll commend your bravery and give you a very long rope to use.
Head west of Ramarno and then north into the Camdozaal Mines, until you reach the sinkhole. Attach the very long rope on the rock with the "attach-rope" option, and you'll climb down and find yourself in the Lassar Undercity.
Ruin Scape
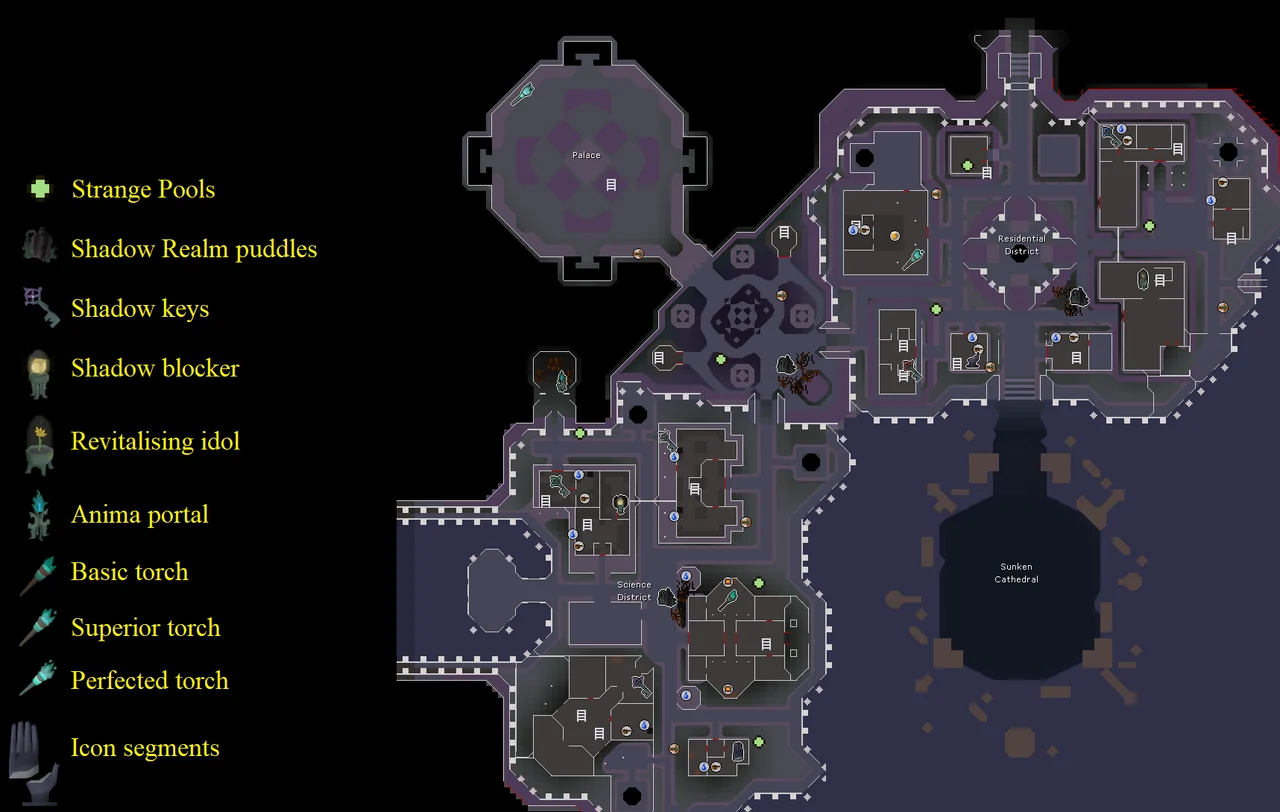
Throughout the undercity, you will see transportation icons () on the map; these are teleporters that allow easy navigation of the area, and should be activated whenever you first pass by them. There are also Strange Pools around the undercity that can restore the player's run energy and grant a two-minute stamina buff (Warning: drinking from the Strange Pool with a Ring of Endurance equipped will use charges).
Make your way to the Science District in the south-west. In the north-western building, marked by two icons, take the shadow blocker schematic and the green shadow key, then take the purple shadow key from the building south of the one you were in. Head north-east towards the Residential District, then south towards the Sunken Cathedral. You will faint and reappear in the house of Ketla, an Imcando dwarf. She will tell you that a shadowy entity was responsible for your blackout, and that it must be stopped by breaking the totem that links the real world with the Shadow Realm.
You will mention your ring of visibility, which she will then ask to see. After showing it to her, she will tell you that it is useless on its own, only letting you view a small glimpse of the Shadow Realm, but that she has a shard from the totem that can allow you to actually enter the Shadow Realm completely: the blackstone fragment. Ketla believes the totem is located in the Sunken Cathedral, to which the entrance is blocked by shadows. She will then give you the fragment, and tell you that you must destroy the totem.
Give the shadow blocker schematic you picked up earlier to her, and she will make you a shadow blocker. Whenever the player gives her new schematics, the devices she builds can be picked up by searching her workbench.
Seeing Shadows
Standing next to the shadow blocker in the Shadow Realm will ensure players stay sane, no matter how many voices they hear in their head. Image credits →
Players will now need to find schematics and shadow keys throughout the undercity, which involve going in and out of the Shadow Realm using the blackstone fragment. The Shadow Realm can be entered by using black puddles found throughout the undercity; Upon entry, a sanity meter will be displayed that reduces by 1 every tick, and is further depleted by 8-10 by the Lost Souls in the area. Should a player lose their sanity completely, they will begin taking damage at a rapid pace; players can use the blackstone fragment to instantly depart from the Shadow Realm, at which point their sanity will restore by 10% every tick.
Note: If you die in the Shadow Realm your items can be retrieved from your grave in the Ruins of Camdozaal where you placed the rope to initially get into the Lassar Undercity.
In addition, there are bright, white remnants scattered throughout the Shadow Realm. All but one are optional to touch during the quest, and touching some of them will result in a shadow keeper attacking you. Thus, it is recommended not to touch these until you have acquired the shadow blocker later in this section.
The first of the schematics will be the basic shadow torch schematic, found in the middle of the Science District (the building with the furnaces). Enter the building, then place the shadow blocker next to the locked doors. Next, enter the Shadow Realm from the black puddle nearby and unlock the doors with the purple key; this is a slow process. As long as you are adjacent to the shadow blocker, your sanity will not be lowered. Once the doors are unlocked, head to the north room and pick up the schematic. Use the blackstone fragment to leave the Shadow Realm, then right-click "Recall" on it to retrieve your shadow blocker. Use the nearest teleporter and select the Western Residential District as your destination. Bring the schematic to Ketla and retrieve the basic shadow torch.
Stronger shadow torches are needed to burn away some of the tentacles. Image credits →
The next schematic you'll need is the revitalising idol schematic, found in the large building east of the black puddle in the Residential District. Enter the Shadow Realm, destroy the tentacles at the south-east entrance, and either enter the building in the Shadow Realm or the real world to retrieve the schematic. Before returning to Ketla, open the door in the real world and run east to activate the last teleporter, then use it to teleport to the Western Residential District. Give the schematic to her and retrieve the revitalising idol.
As the basic torch is not strong enough to destroy any of the other tentacles, the next schematic needed is the superior shadow torch schematic. Use the nearby teleporter to teleport to the Eastern Residential District, then place the revitalising idol directly next to the teleporter. Enter the Shadow Realm from the same place as with the idol schematic, and then run and touch the revitalising idol, which will restore 50% of your sanity. From here, run north until you reach the drain, and run west and around until you are at a door with tentacles. Destroy the tentacles and open the door, and pick up the blue shadow key in the north-west corner of the building. If your sanity is running low after destroying the tentacles, you may retrieve the shadow key in the real world instead. Next, head to the western building (next to the Western Residential District teleporter) and place the shadow blocker next to the entrance, then enter the Shadow Realm and picklock the doors. Once the doors are unlocked, enter and pick up the schematic. Give the schematic to Ketla for the superior shadow torch.
The next item you'll need is the anima portal schematic. Recall your devices via the blackstone fragment, then enter the Shadow Realm via the Science District (Northern teleporter). Make your way around the north-western building, climb the stairs to the north of the building, destroy the tentacle, and then pick up the schematic and return to the real world. Give the schematic to Ketla for the anima portal.
An ideal placement of devices for the last schematic. Image credits →
The last schematic available in the undercity is the perfected shadow torch schematic. Teleport to the Plaza (between the palace and the residential district) and enter the Shadow Realm from there, then head south down the stairs and destroy the tentacles at the building (has two water sources in it and a teleporter right outside). Return to the real world, and enter the building, making your way west to the outside area where you'll find the white shadow key. Exit the building and teleport to the Palace. If you left any devices placed somewhere, recall them all via the blackstone fragment.
Head to the north-west corner of the Palace, where you'll see a locked chest. Place the shadow blocker in front of the chest, the anima portal between the two braziers, and the revitalising idol several tiles south-east of the anima portal. Enter the Shadow Realm from the Plaza, then make your way back to the Palace. Use the revitalising idol, then light the four braziers around the chest; the anima portal will distract the lost souls while you do so. Once they are lit, they will disappear and the chest can be opened for the schematic.
The Silent Choir
Return to the real world, recall your devices, and give the schematic to Ketla. She will tell you that it is a fake, marked by the black hand of the Silent Choir. When you ask for more questions, she will enter a trance again, and you will break her out of it. She tells you that time is running out, and asks that you find the church of the Silent Choir, hidden somewhere in the city.
Enter the Shadow Realm from the Residential District, and run to the building with the pub icon () where you obtained the superior shadow torch schematic. Head upstairs and touch the remnant in the north-eastern room; while going through the dialogue your sanity will not deplete, and you will not need to fight any demons, unlike other remnants. You will discover after touching the remnant that the church is found in the cistern below, and that you'll need some sort of icon to reach them.
Return to the real world, and reenter the Shadow Realm once your sanity is replenished. Burn the tentacles from the doors of the southern building next to the Cathedral teleporter, and then the tentacles from the other building just west. Return to the real world and pick up the final shadow key from the south-western rectangular building. Head inside the square building, and then place the shadow blocker by the chest and picklock it from within the Shadow Realm. You will acquire one half of the icon segment. For the other half, enter the Shadow Realm from the Science District and head south to the building next to the South Science District teleporter. Destroy the tentacle there, open the chest inside, and assemble the segments to create the strange icon, which will mirror the icon shown to you by Prescott earlier in the section.
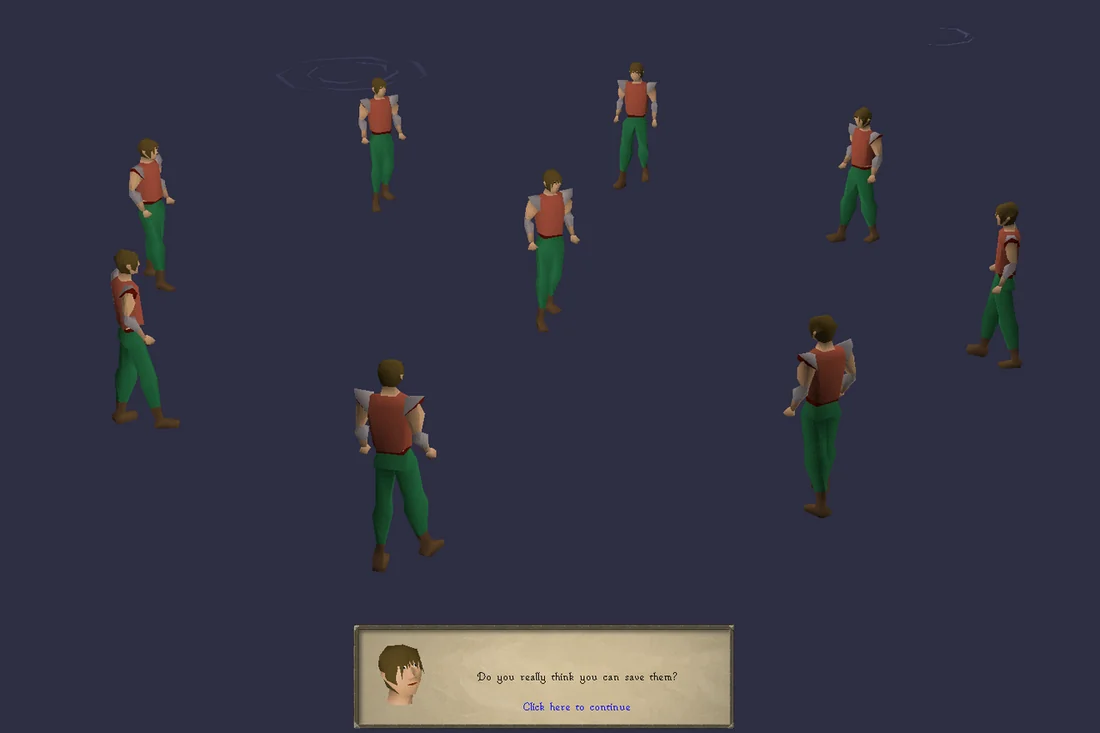
Do you really think you can hide? Do you really think you can save them? Image credits →
With the icon in tow, enter the drain in the centre of the Residential District, and go through the door in front of you and down the ladder to the east. Head to the centre of the room and inspect the ancient pillar; you will suddenly see multiple versions of yourself speaking to you, slowly surrounding you as the screen steadily fades to darkness. You will then appear in the middle of a body of water, still surrounded by hallucinations, beckoning you with the same phrase you heard from Ketla: "Do you really think you can save them?"
As you cry for help, Ketla snaps you out of it, revealing that you succumbed to the darkness, and that you were able to return to reality because she destroyed the totem. Without it, the darkness cannot spread beyond the undercity, but it still remains in her. She will also tell you that she found the real schematic and has the perfected shadow torch ready for you, and that she will be leaving for a new journey away from the undercity.
Take the torch from Ketla's workbench, and burn down the row of tentacles blocking the Sunken Cathedral from the Shadow Realm. Head back to the Ruins of Camdozaal and resupply, as you will be fighting The Whisperer in the next section.
Before departing, make sure to bring the blackstone fragment, as you cannot start the fight without it. Bring your best magic combat gear, and also bring runes for ice spells to counter one of her attacks.
The Whisperer is considered one of the hardest bosses in this quest. If the player is struggling, it is recommended to focus on keeping sanity high; her regular projectile attacks do not drain sanity and are less important to get right than avoiding tentacles and completing her special attack mechanics successfully.
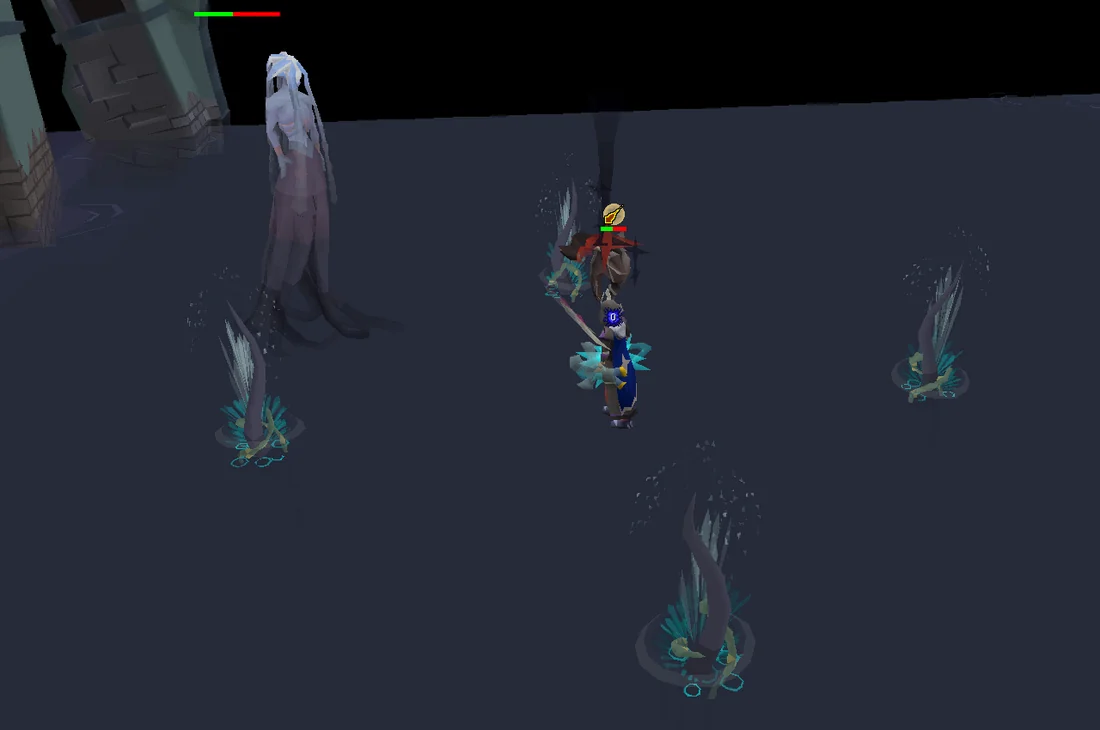
The Whisperer has two primary attacks, launched in sets of three rapid-succession volleys towards the player. The projectiles will only deal damage upon hitting the player, not when they are launched. After each set of three volleys, a set of homing tentacles will convene towards where the player was standing when they first appeared, hitting players for 10 damage and draining their sanity by 10% if they make contact.
The pattern of these attacks are dependent on the phases of the fight:
Whisperer volley phases
Phase
Pattern
One
One combat style used per set of volleys
Two
Both styles are used in each set of volleys, with the first two in one style and the final in the other
Three
Both styles are used in each set of volleys, with an attack in one style sandwiched between two attacks in the other style (either magic, range, magic or range, magic, range)
Four
Volley shots alternate; she starts with range, and switches every 2 attacks
After depleting one-third of her health, she will unleash one of three special attacks from within the Shadow Realm; activate the blackstone fragment when it glows yellow.
Shadow Realm attacks
Image
Name
Description
Method
Soul Siphon
Twelve lost souls appear from which she siphons energy. If a single set of spirits are not killed in the allotted time, the attack will deal 30 damage, drain sanity by 30% and heal the Whisperer for 75 health.
Kill one set of spirits chanting the same phrase. The quickest will be to kill the two yellow spirits chanting "Vita!". The player will have enough time to kill 5 or 6 quickly. A venator bow can kill all twelve spirits in the allotted time.
Corrupted Seeds
She will set orbs around her, which appear both dark and light green colours within the Shadow Realm. Activate the Blackstone Fragment to see the different coloured seeds.
Step on all the light green seeds and avoiding the dark green ones, which deal 20+ damage. Stepping on all light green seeds restores 15% sanity. Click on the nearest Light Green seeds for efficiency.
(Note: When running you 'skip' a tile, allowing you to run over the bad tiles to the highlighted ones without triggering them.)
Screech
The Whisperer will teleport and prepare to gather energy for three successive screeches. At the same time, pillars will emerge from the water, which have 20, 40, or 60 health. If the player is struck by the attack, they will take 35 damage and drains sanity by 35%.
Stand behind pillars to block the incoming attacks. Stay behind the weaker pillars first, then run to other remaining standing pillars.
Binding Blow
After each special attack, the Whisperer will launch a binding projectile and move towards the player for ~10 tiles in an attempt to melee them.
The simplest method is to freeze her with an ice spell, which will stop her from moving. Alternatively standing far enough from her position when she launches the projectile will result in her giving up once she reaches the final tile.
Upon reaching 0 health, the Whisperer will become enraged and drag the player into the Shadow Realm, restoring 100 of her health. She will have an increased attack speed and enter phase four, alternating between ranged and magic every two volley shots. Only one tentacle will appear per attack. The volley shots will not drain sanity if hit off-Prayer, but the tentacles will.
After defeating the Whisperer, search her entrails for her medallion. If you defeat the Whisperer on the same tick or earlier that your health drops to 0, then you can still retrieve the medallion from her entrails and will not have to fight her again. If the Whisperer dies on any tick after your health goes to 0, you will need to repeat the fight. Before heading to the Ancient Vault, head to a bank and prepare for another fight in the next section.
07
The Desert Treasure
Items needed: Gear for two combat styles (Ranged and Melee recommended) Items recommended:Food, prayer potion, stat-boosting potions. Players returning to the quarry will benefit from an amulet of glory to teleport to Al Kharid, and 5 coins to buy a Shantay Pass after taking the boat to Unkah.
Recidivism
Upon attempting to return the last medallion, you will be knocked unconscious by the Mysterious Figure, who has rigged the vault doors with magic. You will once again be imprisoned, this time in an underground temple; search the bed for a hair clip to pick the lock on the door, then brute force the lock the same way you have done so several times before in the quest. Head to the eastern room and search the chest for your items, although the medallion will be missing. Inspect the altar in the western room and the Mysterious Figure will appear. You must now defeat her for the last medallion.
The Mysterious Figure is identical to her previous form in the quest. She can attack with all three attack styles, dealing up to 20 damage each time, and with fairly decent accuracy. She will also periodically switch to pray against the attack style you are using; for this reason, you need at least two attack styles to defeat her.
Every ten or so attacks, she will stun you with either melee (shove) or mage (Ice Barrage - this can splash). Immediately after she stuns you, she will launch a large purple orb, which can deal up to 35 typeless damage if not evaded. To avoid the orb, simply spam-click the ground away from where you were frozen; the freeze or stun will wear off two ticks before the orb lands.
It is recommended to pray Protect from Magic at all times, as her magic attack is by far the most accurate, damaging, and effective, draining your stats when it hits. Attacking her with Ranged and Melee while praying against magic attacks will give the best combination of offensive and defensive damage.
She is immune to venom, poison, and the effects of a ring of recoil.
If you need to leave mid-fight, leave via the barrier and you'll find yourself just south of the Desert Quarry. You can enter the temple again by using the same portal (it can easily be missed due to being coloured yellow). The barrier is the only way out. Teleportation is not possible, even with the Escape crystal, as attempting to teleport out produces the message A strange magical force blocks your teleport. Players who cannot click "yes" fast enough before being attacked can also choose the "quick-leave" option or press "1" to select the option to confirm leaving.
After defeating the Mysterious Figure, bank and re-gear to prepare for the final battle.
Disputes of the Mahjarrat
Items recommended: Melee equipment with high ranged defence, ranged weapon swap, knives/darts, antipoison, Prayer potions, food, combat boosting potions (preferable to pre-pot then run to the fight).
Asgarnia Smith stands before the treasure of the vault. Image credits →
An easy way to deal with all of the bosses in the upcoming section is to bring justiciar armour, the Bow of Faerdhinen, and the ring of suffering (i) along with the best ranged gear the player has for the other slots. An anti-venom before the fight is usually enough, and good food along with some backup saradomin brews can aid the player in winning the fight. All of the demi-bosses for the next section can be ranged effectively, and the justiciar armour allows the player to avoid getting killed too quickly. With this setup, the player isn't required to switch gear and can comfortably deal with the enemies.
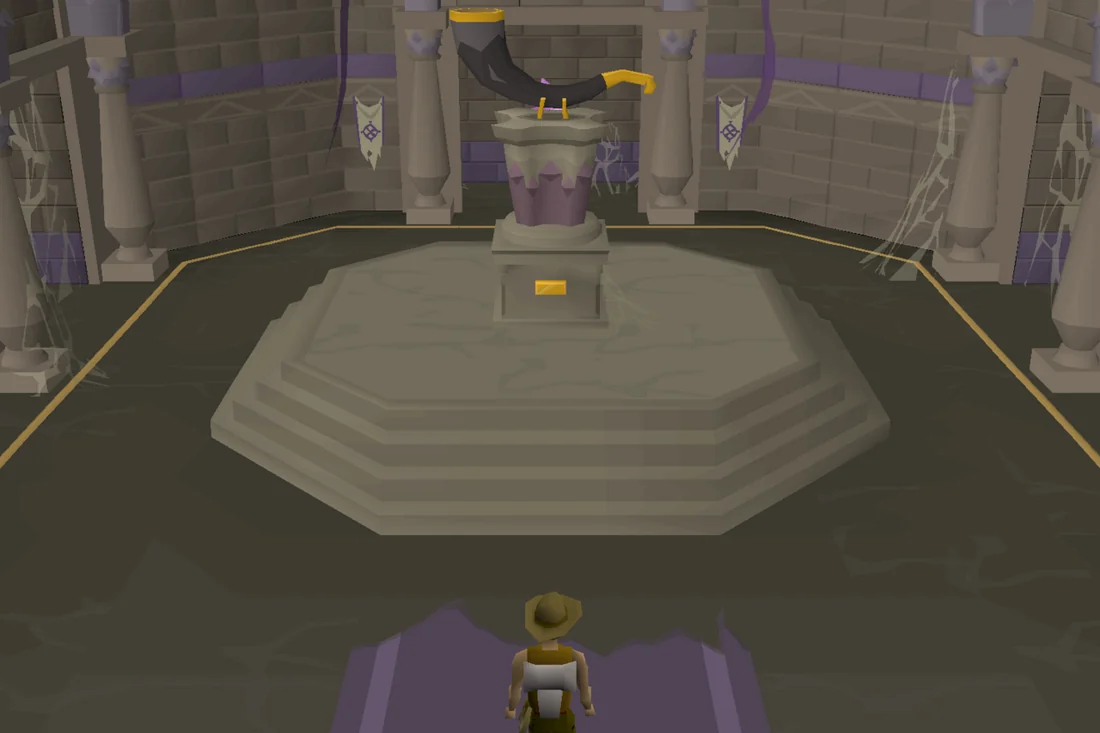
Return to the Ancient Vault. A cutscene will play where you and Asgarnia Smith will argue over the treasure, after which he throws a smoke bomb at you, leaving you dazed. As you come to, you will see him place the final medallion and open the way down. Follow him down into the vault, and you will find him gazing at the sight of the treasure - a massive horn. As you note the familiarity of the power it's radiating, believing it to be the Frostenhorn, Dr Banikan will appear, revealing that he not only followed you to the vault, but that he is actually Azzanadra, the Mahjarrat you freed in the Ancient Pyramid.
Azzanadra will explain that the horn is in actuality an extremely powerful and ancient artefact known as the Elder Horn, which grants absolute control, capable of subjugating entire armies without lifting a finger. You recognise this ability as that of Imperium, which Azzanadra confirms is one and the same; you then conclude that the Imperium Perseriya delivered to the east must have been a fake, and that she had always intended to seal the real Imperium in the vault. Azzanadra will then ponder about the location of the Frostenhorn, when suddenly Hazeel appears, having been hiding in the Shadow Realm before revealing himself.
Hazeel will inform Azzanadra that the Frostenhorn was destroyed while you were inside the Ghorrock Prison, prompting Enakhra and Akthanakos to appear as well. They will tell you that they were waiting for you to open the vault, as it was sealed specifically to prevent Mahjarrat from opening it. The four of them then argue briefly, before Azzanadra senses that there is a fifth Mahjarrat inside the vault, with Akthanakos believing it to be Khazard. However, Hazeel will tell him that Khazard is elsewhere, and believes him to be hiding another Mahjarrat.
Enakhra will realise that Asgarnia Smith is not who he claims to be, and fires a revealing spell at him, breaking his disguise and revealing him to be a Mahjarrat named Sliske. Sliske reveals that he had planned to take the Elder Horn from the very beginning, and had assumed the identities of Asgarnia Smith, Mia Persten, Kasonde Shaw, Ketla, and the Assassin in order to retrieve the Horn, as well as test the player's worthiness of becoming one of his wights, just like the Barrows brothers. He will then implore the Mahjarrat that their sacrificial ritual is not sustainable in the long run, and that they eventually will face extinction by their own hand. He then claims the Elder Horn will be used to break this cycle and cease future rituals, at which point Enakhra and Akthanakos will argue and begin to fight each other, and Sliske summons the Barrows brothers to distract Hazeel and Azzanadra. This leaves you to stop him, at which point he will summon the wights of the four people he disguised himself as after you.
You will now need to fight all four of Sliske's wights, one at a time; if you die or leave, you will have to start from the beginning again. If you die at the same time as you kill Persten, however, the quest will progress upon your return, and you will not have to fight the four again. Note that Sliske's wights are immune to leech-life effects[1] and ring of recoil.
It's recommended to have a rune pouch with runes for thralls, a damaging special attack weapon such as a Dragon dagger, and a Super combat potion or Bastion potion, along with food and prayer potions. All of the wights either switch styles or have some other means of hitting through prayer, so damaging them as quickly as possible is crucial to be able to defeat them before they wear your resources down. Armour with high ranged and melee defence will also be useful. The wights are all weakest to slash and ranged, and all have consistently high magic defence, so either a slash weapon or a ranged weapon is recommended.
The Forsaken Assassin
Lure the assassin towards white smoke to deal damage. Image credits →
The Forsaken Assassin uses both ranged and melee on a whim, though he seems to use range more often. Similar to the fight during Secrets of the North, he cannot be damaged in normal combat; in order to damage him, you must lure him towards the white smoke clouds that he throws around the room to make him vulnerable to attack. If the Assassin stands in the pink smoke, he will heal for around 25 Hitpoints, and if you stand within them, they will damage you for around 10 damage per tick.
He will also throw bottles of poison on your current tile that are indicated by a throwing animation. He will throw either two or three in a row; they can be avoided by simply moving away from the tile with a shadow, which will appear after the bottle-throwing animation begins. The bottles will deal a high amount of damage and inflict poison; prioritise escaping them over doing further damage.
The Assassin will always perform an auto-attack almost immediately after throwing the third bottle; pray against his ranged attack using Protect from Missiles, and make sure you keep your prayer topped up.
Ketla the Unworthy
Quickly kill some of Ketla's shadow clones to avoid excessive damage. Image credits →
Ketla the Unworthy only uses ranged attacks, but she will periodically summon four or five clones of herself to attack alongside her. She follows a simple attack rotation: two auto-attacks, shadow clones, two auto-attacks, one or two charged shots, repeat.
Ketla's shadow clones have a max hit of 7 through Protect from Missiles. As such, it is suggested to have armour with high ranged defence, in order to preserve your supplies for the next two fights. Shortly after summoning shadow clones, a skull will appear above her (similar to a player casting Vengeance), indicating the oncoming charged shot. If her charged shot hits you, she will heal an equal amount of Hitpoints dealt by it. To evade the charged shot, quickly move behind a shadow clone and the shot will hit them instead. If you're using ranged, it's recommended to move behind one of the clones immediately after they spawn, so you don't have to risk not getting behind one in time when you see the skull appear.
Ketla can fire her special attack up to two times per batch of shadow clones summoned, so make sure to keep at least two of them alive to survive her charged shots. They each have one Hitpoint, so a fast attack weapon such as a blowpipe or darts will dispose of them quickly. Alternatively, one can simply tank the clones and focus on dealing damage to Ketla, as the clones will despawn upon her death. If doing this, it's recommended to focus on healing when avoiding the charged shots. Regardless of what method you use, it's important to kill Ketla as quickly as possible, since her clones will continue to deal damage through prayer as long as she's alive. A high-damage spec weapon such as a Dragon dagger may be used to help with this. Keep Protect from Missiles up throughout the fight, and drink a stamina potion if your run drops below half, so that you're prepared for the running in the next fight.
Kasonde the Craven
Kasonde's explosions have a small area where you can stand safely. Image credits →
Kasonde the Craven uses both melee and range; he will use an accurate melee attack if you are near him, but will switch to a ranged attack if you keep a distance. His fight is similar to when he was alive, with a few key differences. Instead of inflicting venom, his vials will inflict corruption, draining 6 prayer points over the course of 12 seconds. The vials deal typeless damage in the low 30s when hit or subsequently standing on the residue. He will additionally not heal during this fight. Finally, his shockwaves attack is dramatically stronger.
His shockwave attack will cover three quarters of the arena, there will be a small section close to him where you may safely stand and continue to attack him. As soon as you see him run to the centre, run close behind him to position yourself in the section as the attack is just two ticks from starting. He will perform between one and three shockwaves in a row.
As his potions will not disappear on the ground, it is important to leave yourself room to navigate the area, or you will be unable to avoid Kasonde's explosions, which deal typeless damage in the low 30s. Positioning Kasonde in one area of the room (such as the corner) will leave space to move and additionally provides ample warning when the shockwave attack begins as he must run farther to the centre. Use Ranged and pray Protect from Missiles, running around the edges until you see him run to the centre, or use melee and pray Protect from Melee, being extremely careful to step back one square when you see him throw a vial. It is also possible to position him in the centre, and run to a corner to avoid the shockwave.
Persten the Deceitful
Persten the Deceitful chathead Image credits →Avoid Persten's lightning strikes and quickly destroy her wighted portal. Image credits →
Persten the Deceitful attacks with magic and uses two special attacks. The first is an attack where she will channel power to launch lightning strikes, indicated by looming shadows, around the area for moderate damage, hitting in the high 20s and low 30s. As her Hitpoints get lower, she will channel subsequent lightning strikes in a row, up to three.
She will also conjure a Wighted Portal that has 30 Hitpoints, which spawns wighted leeches until destroyed. She can create two at a time, and they will always be near the entrance of the room. The wighted leeches have 5 Hitpoints and move at a speed slower than walking, but attack at the same speed as darts on rapid style with 100% accuracy, dealing between 4 to 6 typeless damage.
If you're fast, you can close the portal before it spawns any leeches. A dragon dagger's special attack can be useful for doing this quickly. If you brought a ranged weapon swap, kill her with it using Protect from Magic. If too many leeches spawn to be able to kill them all, they can be kited around the room while attacking Persten with ranged attacks: do not attempt to attack them in melee since they will drain your health very quickly if they get into melee range. The leeches can be blocked by the duelling Mahjarrat and often lose aggression due to their slow movement. Because of this, and Persten's tendency to stay near the horn end of the room away from the portals, melee is viable, though you want to be extra careful of leeches and lightning bolts if so, and may want to consider using your special attack weapon on her directly to end the fight as quickly as possible.
Once the last wight is killed, Sliske will successfully teleport the Elder Horn away. Pleased with the results, he will tell you that you will make a worthy vessel, and that you will meet again in the North. Enakhra and Akthanatos will then leave to inform their other allies of this development, leaving Azzanadra and Hazeel behind. Hazeel scolds Azzanadra for not controlling his "pet", though Azzanadra states that Sliske always acted on his own. Nonetheless, he realises that he would have to work with the Zamorakians to stop him, though Hazeel does not confirm nor deny the idea before he leaves.
Azzanadra will then apologise to you for his multiple deceptions, and comments that you are now a player in the Mahjarrat's affairs, whether you like it or not. To show his thanks, he will upgrade your ring of visibility to a ring of shadows, and advises you to prepare when the time comes.
Congratulations, quest complete!
Quick checklist 250 instructions
Use this when you already know the route. The full walkthrough above includes explanations and diagrams.
Walkthrough
Before starting the quest, switch to the Ancient Magicks spellbook.
Also, be aware that a level 271 Mysterious Figure may attack whenever you carry a medallion. Teleporting away or climbing a level works to escape combat, so always keep an emergency teleport.
Familiar Faces
Enter the Ancient Vault, found south-east of fairy ring DLQ or north-east of Nardah.) (Teleport: Nardah teleport, Desert amulet)
Say: Yes.
After finishing the conversation, inspect the four statues and the plaque.
Talk to Asgarnia Smith.
Make your way to the Exam Centre and speak to Terry Balando. (Teleport: Senntisten teleport)
Operate the winch at the easternmost part of the Digsite. (Teleport: Digsite teleport or Digsite pendant)
Talk to Dr Banikan. Once the option to mine the rocks is available, you do not need to ask him any more questions.
Prepare for combat, and mine the nearby rocks when ready. A bronze pickaxe can be found in the crate to the north if needed.
The Ancient Guardian
Enter the crevice and kill the Ancient Guardian.
Talk to Dr Banikan.
Inspect the golem machine.
Search the crates for uncharged cells.
Cast burst spells or greater on the matching totems.
Use cells on altar to get charged cells.
Use the charged cells on the golem and solve the puzzle as seen below:
Search "Vardorvis", "Perseriya", "Sucellus", and "Whisperer".
Operate the golem machine once more.
Exit the military installation and speak to Elissa north of the winch.
Say: I hear you visited Lovakengj recently.
Carnifex Maximus Vardorvis
Visit the Burning Man (south-west of Xeric's Inferno teleport) in Lovakengj and speak to Barus.
Search the desk in the house south of the Hosidius Estate Agent (north-east of Xeric's Glade Teleport) for a strange potion and potion note. Read the note.
Go south of Mount Quidamortem (Xeric's Honour teleport) or west of fairy ring BLS to the boat dock to the west. Drink the strange potion and board to get to The Stranglewood.
Beware that The Stranglewood is full of high level (combat 138, 149) strangled who will root you and deal continual damage.
Immediately upon arriving by boat, inspect the statue / totem nearby as it acts as a stamina potion.
Follow the path south, enter the city, and talk to Kasonde after the cutscene.
Go down the entry and defend Kasonde from the strangled for three minutes by building barricades, detonating satchels, and attacking them. Failing will simply start the activity over.
Around the area are 6 stone chests. 4 need to be picked. They contain 2 barricades and 4 satchels with explosives.
To pick the chests is to just click confirm, see if any show up as green on the right, and if not, move everything up by one.
The first wave will come from the south, so build the barricade there.
You can attack over the barricade with Magic.
Always prioritise the strangled attacking Kasonde.
Go upstairs and talk to Kasonde.
Gather korbal herb and argian berries.
Run directly north, head west past the (south side of) large pyramid, then north again. The korbal herb is located on a small outcrop with a boar.
The argian berries are found at the south-west beach with a lynx. Run south from the boar, west once you hit a wall, then south across a bridge. Cross the bridge and run directly south until you see a lynx. The argian bush is in the camp south-west of the old campfire.
Travel to the largest pyramid at the north end of the city.
Enter the pyramid and fight the strangled attacking Kasonde.
Talk to Kasonde.
Use the korbal herb and then the Argian berries on the unfinished serum.
Drink the strangler serum; the strangled will no longer root you, nor will you gain infection and be forced to restart. However, you will still take normal damage from them.
Gear to fight Vardorvis, who is located in the north west snowy square. The first time you go, you need to run back down south-west across the bridge, west, and around the long way. After entering the lair once you can start to use a shortcut by going down the entry in the north-west, near where the herb was found, and then running west to the square. Vardorvis is weak against slash, and weapons such as scythe of Vitur and abyssal tentacle work well.
After you've entered his area you unlock a shortcut near the boat to get back. It's the path north of the temple. You do not need to complete the boss battle to unlock this shortcut.
The boss hits with Melee and the arena spawns axes which must be dodged or else they inflict a bleed damage.
There is a green dart that is shot at you which disables Prayer for a few ticks. Pray Protect from Missiles to prevent the effect. You have time to get your Protect from Melee back up before the boss starts attacking again.
The boss also roots you and small blood splats appear on the screen. Click them all to not take 30+ damage from the root. It can be helpful to eat before or after clearing this special to avoid losing DPS ticks to eat delay.
An easy way to get past this boss is by purposely standing in a quadrant and accepting the axes that hit you. It's significantly less damage than running around misreading. The axes do sub 20 damage and the bleed only ticks for 2 dmg when you attack/move. Keep movement to a minimum and only dodge the floor spikes (1–2 tiles).
After defeating Vardorvis, pick up the temple key and bring it back to Kasonde in the Temple. Be aware that you are about to fight another boss.
Kasonde will attack you. Dodge his explosions and poison splats.
Pray Protect from Missiles and kite while attacking with Ranged. Crossbow with diamond bolts (e) works well.
The green splats will venom you, bring anti venom of some sort.
Stepping on orange splats will damage you around 15 Hitpoints and disable protection Prayers.
He will do a charge attack, have one of the pillars block line of sight to avoid damage.
He will continue to heal as you fight. The only way to kill him is to out dps his healing. Ironmen using melee will find a dragon dagger useful. When his health is low, use the dragon dagger special attack. Strangely, a Zamorakian Hasta special attack clears all liquid on the floor left from vials.
The bow of Faerdhinen with crystal armour is very effective for the fight.
After defeating him talk to him to find out where the medallion is, then proceed to the next room and search the stone chest for a tatty page.
Return to the hideout with the barricade and search the stone chest in the north-east corner to obtain Vardorvis' medallion.
Take the medallion to the Ancient Vault north-east of Nardah and use it on Vardorvis' statue in the north-east corner.
Praefectus Classis Perseriya
Make your way to the Guardians of the Rift minigame. This can be reached quickly via the Amulet of the Eye teleport, Minigame Teleport or via the portal in the Wizards' Tower basement (Fairy ring DIS)
Talk to the Catalytic Guardian near the entrance and enter The Scar.
Say: Yes.
Kill the monsters before crossing the stepping stones. Some of these can be safe spotted behind the vent in the north-west corner. Praying against melee will result in no damage taken.
Attempt to board the boat and talk to Wizard Persten.
Enter through the passage and proceed to solve the three puzzles in each room. Leaving the Scar will reset all the puzzles already completed.
Note: Because the passage that players arrive in varies, the next three sections may appear out of order for players, but all three must be completed before the passage to one of Perseriya's ships is opened. In addition, a slayer helmet or facemask are required for the second and third passages. During your third scar, you will take minimal periodic choking damage, do not AFK for extended periods outside of the puzzles (This damage does not occur in either finished or unfinished puzzles).
Throughout The Scar you will find chests with scarred scraps. These restore run energy, health, and Prayer, as well as providing a stamina effect. Praying Protect from Missiles is effective against the scarred lesser demons.
Middle/Central passage
Axon Terminal:
Groups of lightning will appear and strike randomly during this puzzle (DO NOT AFK).
Hit the creatures to navigate them to their corresponding terminal.
You can hit them diagonally or directly.
Broken Nerve Endings (underwater):
Use the breakable nerve endings on each other to create the right combination and repair the endings in the middle of the room. Use air bubbles to regenerate oxygen level. The player will need 3 fire nerves, 2 air nerves, 2 earth nerves, and 1 water nerve in total:
Steam ← Fire + Water
Lava ← Fire + Earth
Dust ← Earth + Air
Smoke ← Fire + Air
Summoning Circle:
Kill the four scarred imps around the room that are providing protection prayers to the circled demons, who also summon scarred lesser demons and scarred hellhounds to deter the player.
Kill the lesser demons.
After completing the puzzles, go to the shipwreck room.
Tinderbox - the crate in the south-west corner
Gunpowder - the skeleton near the crate
Slimy key - the skeleton in the south-east corner
Old tablet - the chest in front of the ship. This must be acquired and read before the ship can be burned.
Go to the east side of the room and burn this section of the ship.
North-west passage
Abyssal Stem (underwater):
Talk with Wizard Persten once again.
You will need both your hands empty. Once you enter you will start to run out of oxygen, swim into (and stay inside) an air bubble to regain oxygen.
Touch the abyssal stem in the middle, it will then light up 4 of the abyssal growths 1 by 1.
Touch the abyssal growths in the same order they light up.
Brain Pillar:
Defend the Abyssal antibodies healing the pillar from the creatures. Freeze spells do not seem to work very well against the creatures. If all of the abyssal antibodies are killed, the player will be forced out of the room and take major damage. A message in the chatbox will say "The pillar has no way to sustain itself and crumbles, pushing you out the room".
Unlit Veins:
Take the illuminating lures from the light leeches and repair the 4 luminescent growths until the crimson and radiant veins both appear.
Kill the corresponding creatures to obtain crimson and radiant fibre. These creatures attack with blood spells. Protect from Magic seems to negate damage.
Use the fibre to repair the veins at their breakpoints.
After completing the puzzles, go to the shipwreck room.
Tinderbox - the crate in the north-east corner.
Gunpowder - the skeleton in the south-east corner.
Slimy key - the skeleton in the north-west corner.
Damp tablet - the chest by the south end of the room. This must be acquired and read before the ship can be burned.
South-east passage
Abyssal Tether:
Your goal is to reach the Abyssal Tether at the end of the maze. Not standing on a circle tile next to a cerebral orb will make you take a small amount of damage (5–10 Hitpoints). Green cerebral orbs move in the direction you push them while orange cerebral orbs move in the opposite direction you push them.
Hit the first pathfinder south, then move to the nearest pathfinder.
Hit the pathfinder east, then move to the pathfinder.
Hit the pathfinder south, then move to the nearest pathbreaker.
Hit the pathbreaker west by standing on the west side of it, then move to the southern pathbreaker.
Hit the pathbreaker east, then move to the nearest pathbreaker.
Hit the pathbreaker south by standing on the south side of it, then touch the tether.
Catalyst:
Warning: Leaving any item on the ground when completing this puzzle room will move the items to another instance and make them unobtainable. Don't drop anything you're not willing to leave behind.
The catalyst in the middle of the room will cycle through several different types of runes, all of which have to be destroyed by the correct nerves.
If the catalyst takes the form of any of the following types, use two nerves together to form another type of nerve. Then use the newly combined nerve on the catalyst to destroy it:
Damaged Growth:
Take the illuminating lures from the light leeches and repair the 4 luminescent growths. This will make the second part appear. This action can fail and result in additional damage.
The second part is an order puzzle. Use trial and error to find the correct order to click the elemental lights for them all to turn white (During this portion the leeches will attack for 3–5 damage in multi and can quickly stack. Protect from melee seems to negate it).
After completing the puzzles, go to the shipwreck room.
Tinderbox - the crate in the south-east corner
Gunpowder - the skeleton in the south-west corner
Slimy key - the skeleton in the north-west corner
Damp tablet - the chest between the ship wreckage. This must be acquired and read before the ship can be burned.
Fighting the Leviathan
Pray against his attacks as follows:
Blue - Protect from Magic
Green - Protect from Missiles
Orange - Protect from Melee
When the spell lands, it will stun him, you must then shoot his back for bonus damage and prepare for a special attack. (Attacks don't register until the animation comes into contact with your character, therefore standing further away will give you more time to react).
Kill The Leviathan.
After killing him leave the area to the north-east and talk to Wizard Persten again.
Search the debris nearby on the small island and receive Perseriya's medallion.
Be wary that the Mysterious Figure may attack you as you attempt to return the medallion. You can cheese the Stranger by running to Nardah and using the statue to heal and restore Prayer. You need to have two combat styles to kill it, and once you do The Stranger will teleport away. NOTE: YOU CAN SPAM CLICK THE VAULT AND THE STRANGER WILL NOT FOLLOW YOU INSIDE.
Bring the medallion with you back to the Ancient Vault and place it on the south-east statue.
Duke Sucellus
You can bring gear to fight Duke Sucellus in advance, as during the puzzle your worn items and inventory will temporarily be removed and stored.
Go underneath Weiss dungeon and follow it around and north to get to the prison door.
Once you get into the prison you will run north and get teleported to a cell.
Inspect the wall north of the cell.
Search the skeleton inside the cell to find a letter and read it.
Talk to the voice in the wall again.
Search for a knife - it will be in the bed or bucket.
Talk to the voice in the wall again.
Search for a lockpick - it will be in the bed or bucket (whichever one you haven't found something in).
Talk to the voice in the wall again to escape.
Talk to the assassin. You must finish the conversation (they will teleport away).
From point Y on the map, head to point L. Complete the puzzle to unlock it.
Take the south-east path all the way around, and go through the gate to the refugee camp.
Open the gate to the south to access the room with the altar.
Open the chest in the south-east corner. Input the password 214013 to get a sapphire key.
Make your way to the sapphire gate north of the main block.
Run to the most north-western room filled with 25 chests.
Open the chest directly beside the west door. It should say "Vials".
Attempt to open it and enter the password LIES for an emerald key.
After you leave the room, Jhallan may attack you. Re-entering the room with the chests may get him to disappear, and Protect from Magic greatly reduces the damage he does. When opening some doors, Jhallan may re-appear and attack again.
Run east and unblock the crevice. Squeeze through.
Head directly south one room and open the emerald gate in the room with seven beds.
Click on the chest in the south-east part of the room. Enter the combination UP, RIGHT, LEFT, DOWN, RIGHT, UP for a ruby key.
Return to the main block and open the ruby gate to the south-west
Enter the first cell with a chest in it. Enter the passcode WRATH for a diamond key.
Head back to the main block where the assassin is. Talk to him.
Once the conversation is over, enter the cell and collect your items.
Talk to the assassin again. When this conversation ends, he will teleport away.
Head to the Refugee Camp, and search the pack next to the centre pillar to light the firecrackers.
Survive Jhallan's onslaught until the assassin arrives. Pray Protect from Magic and run around the centre pillar to avoid being hit. Occasionally you will be teleported and frozen. When the illusions appear, kill them to avoid taking damage (1 Hitpoint each).
Duking It Out
Prepare to fight Duke Sucellus. You can go to a bank and return safely.
Enter the Dragonstone Gate, in the very far north-east section of the prison (NOT IN ADMINISTRATION AREA).
Once inside the Asylum, Duke Sucellus' chamber is located directly north of you but the Duke himself is asleep. On the sides there are extremities that periodically open their eyes, their gaze emitting a red cone. You will need to run past the extremities while also avoiding stunning energy attacks emitting from the floor indicated by a shadow: If hit by the extremities, you will take large amounts of damage..
Once past the extremities, there are arder and musca mushrooms, one on each site. 80+ Herblore: Pick 2 of each mushroom and use a pestle & mortar on them, under 80 herblore: pick 3 of each; afterwards make your way to the centre of the room where there are two barrels you must deposit the grounded mushrooms into. On the sides of the arena, near the middle pillars are salt deposits which you must mine: You need 12 parts of salt and each mushroom dust to fill the two barrels and obtain two Arder-musca poisons.
When you have the two poisons, drink your potions and activate Piety and use the poisons on Duke Sucellus which will begin the fight. Sucellus has several attacks, most of which deal a lot of damage if they hit you:
Sucellus slams his arms on the floor, summoning spikes of ice on every tile directly adjacent to him. The spikes deal 0-12 chip damage, but Sucellus' melee hits can deal upwards of 30.
If you're not within melee reach, Sucellus will fire a blue magic orb that can hit through Protect from Magic, though with reduced damage.
Sucellus spits out acid clouds, which can deal rapid damage upwards of 10 every game tick. As soon as you see him spit the acid, run to the pillar on the other side of the room while avoiding standing on any tile that's directly adjacent to Sucellus.
Every 6 attacks Sucellus opens his eye and unleashes his gaze upon you: Hide behind one of the pillars closest to you as soon as this happens or the attack will deal 90+ damage.
Sucellus is weak to demonbane weapons and his spike attack deals less damage than his Magic so Arclight is an ideal weapon to dispose of him. An easy way to defeat Sucellus is to equip as much Strength-boosting gear as possible and stand directly behind one of the two pillars closest to him. Every time Sucellus uses his ground slam attack, as soon as his arms hit the ground hit him and immediately run back behind the pillar, as if you were flinching him: You will take chip damage from the spikes initially spawning but with high-healing food such as Karambwan the fight is manageable. When Sucellus fires acid, run to the other side of the room while being careful not to get hit by the spikes or his arms, and when he opens his eye make sure you're hiding behind the pillar closest to you!
After Sucellus is taken care of, take the key that he drops and enter the room on the west side of the main hallway. Talk with the Assassin and open the chest in the corner to receive Sucellus' medallion.
After obtaining the medallion, place it on the south-west Statue at the quest start location.
Be wary that the Mysterious Figure may attack you if you return to your home before placing the medallion on the Statue. You can escape the Stranger by exiting your home. The previous suggestion of having two combat styles may apply here as well.
The Whisperer
Make your way to the Ruins of Camdozaal and speak to Ramarno
Say: , located near the Smithing icon just north of the entrance.
Speak to Prescott, near the bank chest south-east for a very long rope.
Go to the north-western part of the ruins and attach the rope to the rock by the sinkhole.
Climb down and activate the teleporter ( ) on the map.
Activate the teleporters whenever you pass by one.
In the north-western building of the Science District, take the shadow blocker schematic and the green shadow key.
Take the purple shadow key from the building south of the one you were in.
Walk towards the Sunken Cathedral.
Finish the conversation with Ketla for the blackstone fragment.
Give the shadow blocker schematic you picked up earlier to Ketla
Say: , then search the workbench for a shadow blocker.
Activate the teleporter just south-west of Ketla's building.
Head to the building with the furnaces in the Science District.
Enter the building, and place the shadow blocker in front of the locked doors.
Enter the Shadow Realm from the black puddle nearby and pick the lock on the doors.
Take the basic shadow torch schematic from the north room.
Use the blackstone fragment to leave the Shadow Realm, then right-click "Recall" on it to retrieve your shadow blocker.
Use the nearest teleporter and select the western Residential District.
Bring the schematic to Ketla and retrieve the basic shadow torch.
Enter the Shadow Realm from the puddle in the Residential District.
If you die in the shadow realm your items can be retrieved from your grave in the Ruins of Camdozaal where you placed the rope to initially get into the Lassar Undercity.
Destroy the tentacles at the doors east of the black puddle.
Return to the real world and pick up the revitalising idol schematic from the building.
Before returning to Ketla, head east and activate the last teleporter, then use it to teleport to the western Residential District.
Bring the schematic to Ketla and retrieve the revitalising idol.
Use the teleporter and head back to the Eastern Residential District.
Place the revitalising idol next to the teleporter.
Enter the Shadow Realm from the same puddle as before, and touch the revitalising idol, which will restore 50% of your sanity.
Keep running north and around until you are at the door with the tentacles, then destroy it
Pick up the blue shadow key in the north-west corner of the building. (If your sanity is running low after destroying the tentacles, you may retrieve the shadow key in the real world instead.)
Head to the pub ( ) next to the western Residential District teleporter.
Place the shadow blocker next to the entrance, then enter the Shadow Realm and picklock the doors.
Once the doors are unlocked, enter and pick up the schematic.
Bring the schematic to Ketla and retrieve the superior shadow torch.
Enter the Shadow Realm via the Science District.
Make your way around the north-western building and destroy the tentacle found further up north.
Pick up the anima portal schematic and return to the real world.
Bring the schematic to Ketla and retrieve the anima portal.
Teleport to the Plaza and enter the Shadow Realm from there.
Destroy the tentacles at the building to the south-west and pick up the the white shadow key.
Right-click "Recall" on the blackstone fragment to get your devices back.
Exit the building and teleport to the Palace.
Head to the north-west corner of the Palace, where the locked chest is.
Place the shadow blocker in front of the chest, the anima portal between the two braziers, and the revitalising idol several tiles south-east of the anima portal.
Enter the Shadow Realm from the Plaza, then make your way back to the Palace, using the revitalising idol as needed.
Light the four braziers around the locked chest.
Open the chest for the perfected shadow torch schematic.
Return to the real world, recall your devices, and give the schematic to Ketla.
Enter the pub from the Shadow Realm.
Head upstairs and touch the remnant (your sanity will not lower when viewing the remnant).
Return to the real world, and reenter the Shadow Realm once your sanity is replenished.
Burn the tentacles from the doors of the building next to the Cathedral teleporter, and then the tentacles from the other building just west.
Return to the real world and pick up the red shadow key from the rectangular building.
Head inside the square building to the east, then place the shadow blocker by the chest.
Picklock the chest from within the Shadow Realm for one half of the icon segment.
Enter the Shadow Realm from the Science District.
Head south to the building next to the South Science District teleporter.
Destroy the tentacle there and open the chest inside.
Use the icon segments on one another to create the strange icon and then talk with Ketla.
Enter the drain in the centre of the Residential District.
Go through the door in front of you and down the ladder to the east.
Interact with the ancient pillar.
After finishing the conversation with Ketla, search the workbench for the perfected shadow torch.
Enter the Shadow Realm and destroy the tentacles blocking the entrance to the cathedral.
Run towards the water of the Sunken Cathedral in the real world.
The final boss is weak to Magic. You will need to Prayer switch often. See The Whisperer for specific details on the boss fight.
The Desert Treasure
Attempt to return the last medallion but get knocked unconscious by a rigged area.
Find a hair clip in the bed to unlock the cell, and retrieve your items in the chest to east.
Inspect the altar to the west.
Fight a Mysterious Figure who launches dangerous orbs after freezing you. Spam click away while frozen to dodge.
If you die or leave, you can return to the fight via a portal just south of the quarry.
Enter the Ancient Vault and finish the cutscene.
You must now fight each of Sliske's wights one by one. Bring high ranged defence armour to deal with Ketla's clones. If you teleport out or die you must re-start the entire fight from the first clone. It is best to use a range weapon with high accuracy for each stage of the boss such as a crossbow.
The Forsaken Assassin fight involves luring him into white smoke bombs and dodging poison bottles. The pink smoke bombs heal the Forsaken Assassin if he stands in them and damage you if you stand in them.
Ketla the Unworthy uses ranged attacks and summons clones. Protect from Missiles. You can avoid damage by using darts to kill all but 2 clones. Stand behind each of them so they tank her special attack.
Kasonde the Craven fight has a shockwave and slam attacks. Protect from Missiles. Dodge the corruption bottles. His special can be dodged by running close to him and standing on the tiles not marked by a shadow.
Persten the Deceitful uses magic and summons a portal spawning leeches. Protect from Magic. Quickly close the portal with special attacks, or kite the spawns. Similar to Kasonde, Persten's lightning special can be dodged by running to the open tiles.
Finish the conversation with Azzanadra.
Congratulations, quest complete!
QUEST COMPLETE
Rewards
Three ancient lamps, each offering 100,000 experience in Attack Attack, Strength Strength, Defence Defence, Hitpoints Hitpoints, Ranged Ranged, Magic Magic, or Prayer Prayer at level 60 or above.
The ability to smelt Chromium ingots at the Blast Furnace; the first bar smelted gives 35,000 Smithing Smithing XP.
Access to Scar essence mine
Ring of shadows
The ability to wear ancient rings.
The ability to repeat the Forgotten Four encounters as boss fights, along with the ability to challenge their awakened variants.
The ability to fight Demonic Brutus using abyssal potatoes.
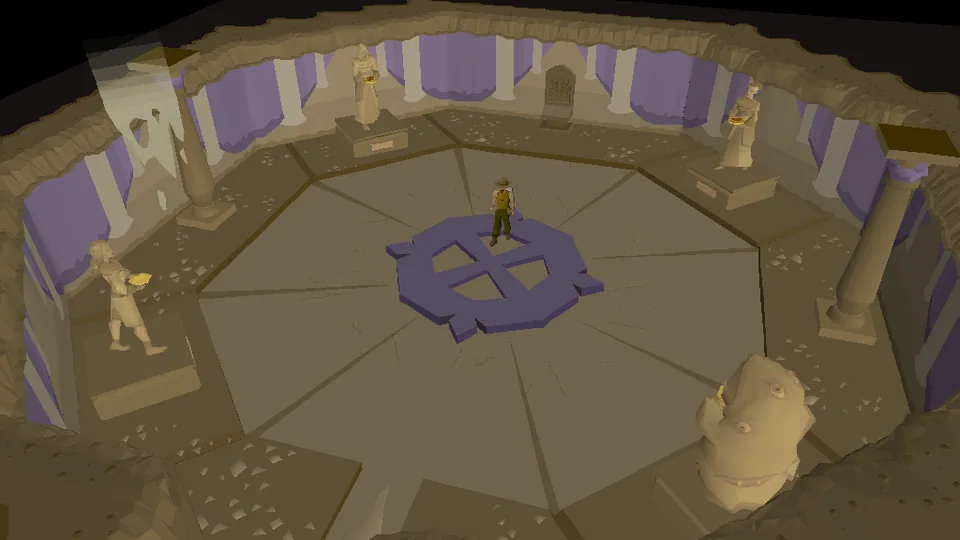
 5
5