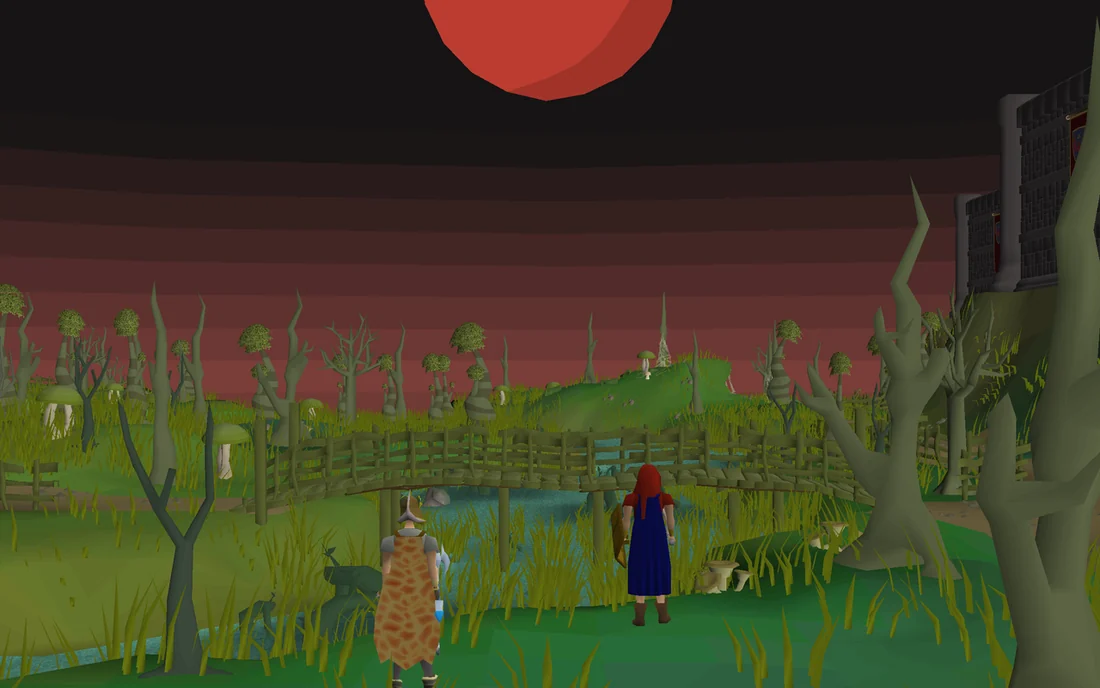
Long ago, before the vampyres were united as one, they lived in disparate clans in their ancestral home of Vampyrium. For the Drakan clan, strength ruled above all else. Clan leaders were selected during a brutal festival of combat known as the Night of the Blood Moon. Along with leadership of the clan, the victor of this festival was granted a title: they became known as the Blood Moon. Now, thousands of years later, Lord Lowerniel Drakan, the last Blood Moon has returned. He has but one goal:
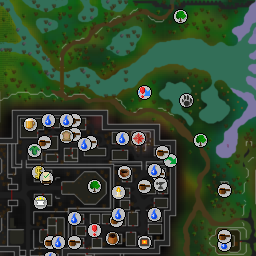
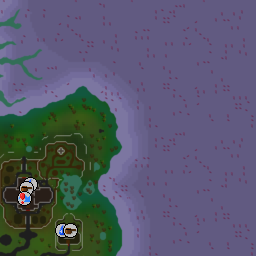
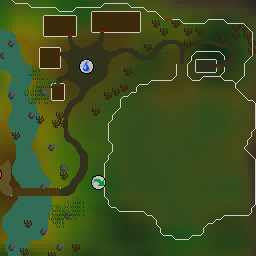
Make your way to the Icyene Graveyard, accessed via the boat in the southernmost part of Burgh de Rott or Meiyerditch, or south-west of Slepe. Once there, speak to Sarius Guile, who will inform you that she is leaving Morytania soon. She will tell you that Vanescula left behind some money for her in case of emergencies, which she will use to pay mercenaries from Misthalin for safe passage.
Sarius will mention that the kidnapped Myreque member Safalaan and Sarius' mistress Vanescula are being held prisoner by Lowerniel Drakan in his castle. She'll also share that all vampyres have been ordered to attend a gathering outside the castle for an announcement in regards to the future. Finally, she'll ask that you try to help Vanescula, who Sarius says has always been good towards her. You will tell her that you'll do what you can, and that you need to go find Ivan.
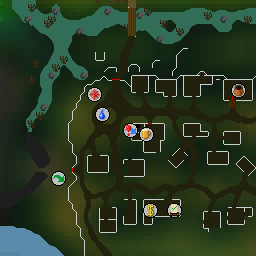
Make your way to the Myreque Hideout in Meiyerditch, located under Old Man Ral's house ( View start location ↗), to find a makeshift shrine. Inspect it to initiate a cutscene where Ivan will arrive. You will inform him of Drakan's announcement and Safalaan's imprisonment, and despite his initial hesitance, he will eventually agree to come with you. If you haven't already, search the chest to the north to pick up a set of vyre noble clothing, and buy a flail if you don't already have one.
Before you make your way to Castle Drakan, bring food and prayer potions, as you'll be protecting yourself and Ivan from multiple vyrewatch and sentinels for several minutes. Once you're ready, equip the vyre noble clothing, then speak to Ivan to depart and initiate a cutscene.
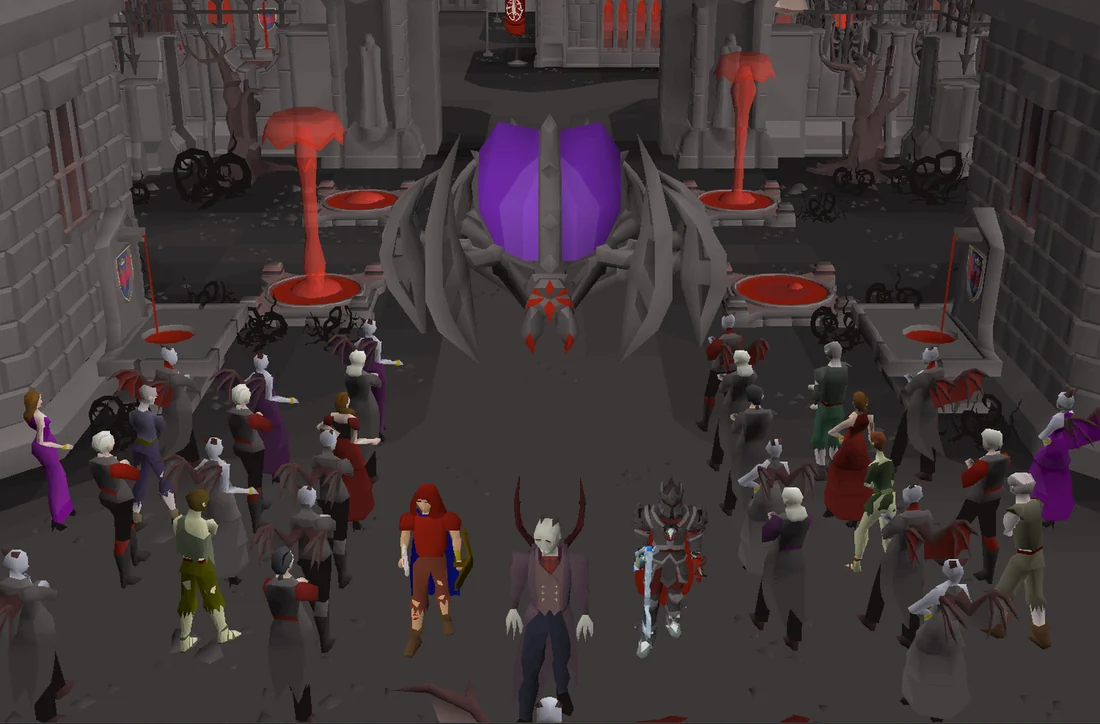
The crowd goes wild
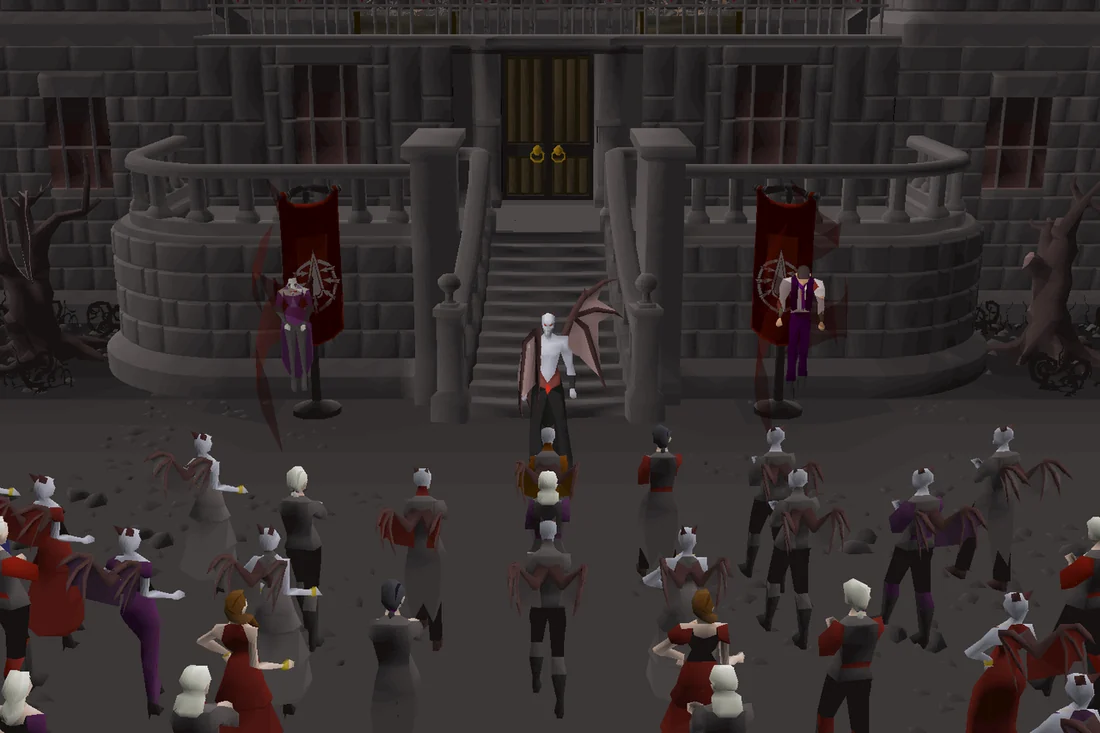
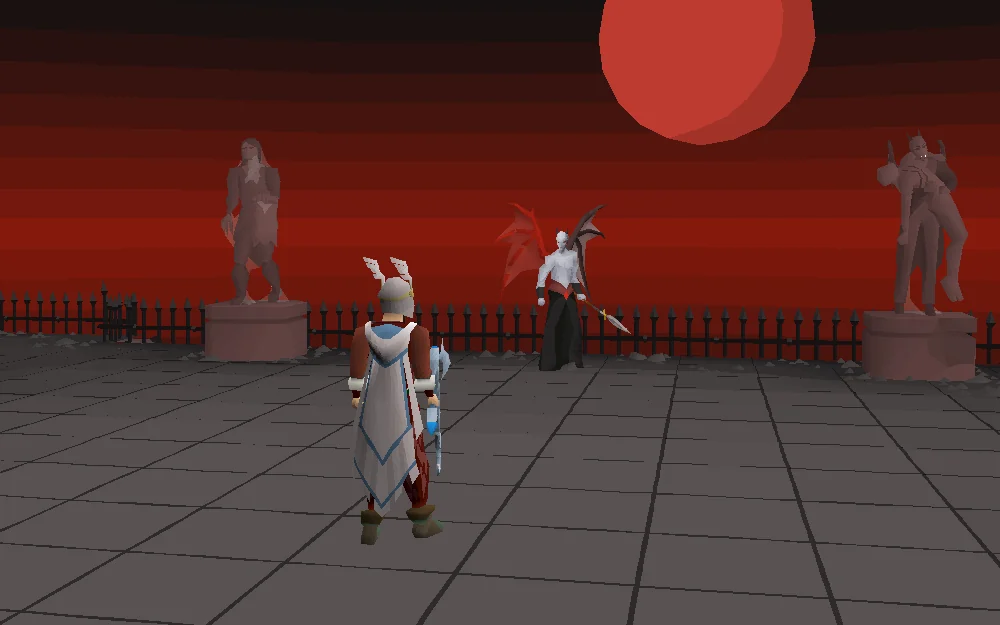
Drakan addresses his subjects, with Safalaan and Vanescula in tow. Image credits →
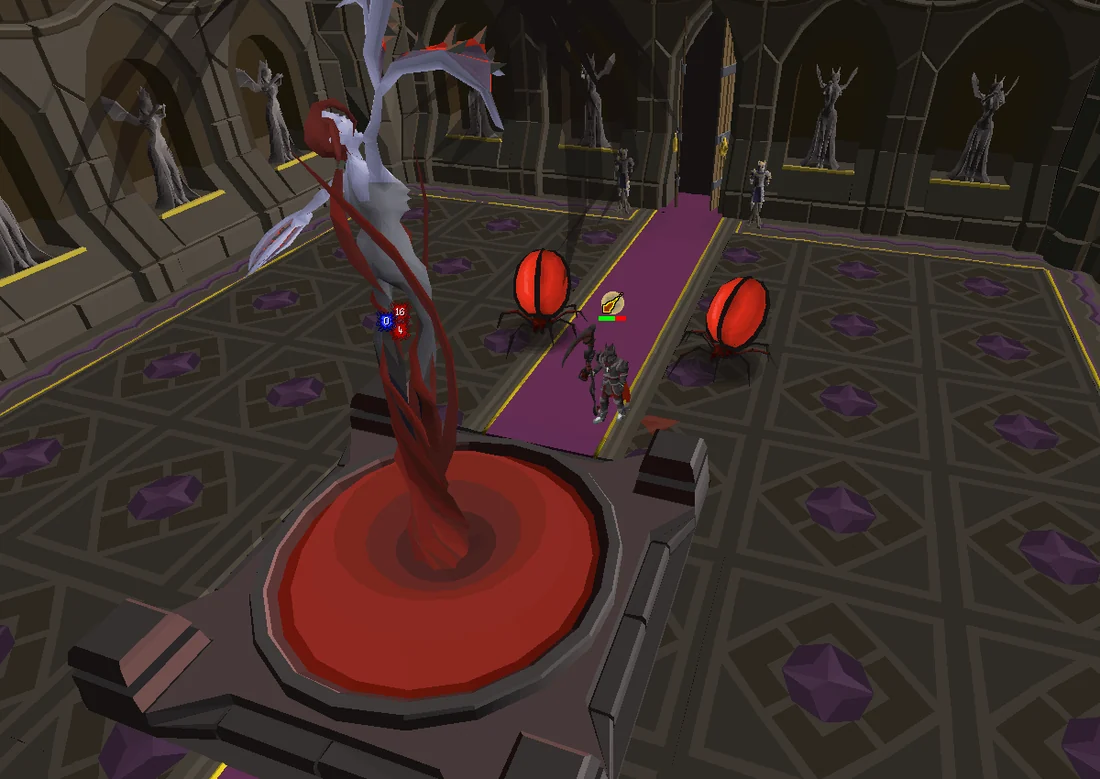
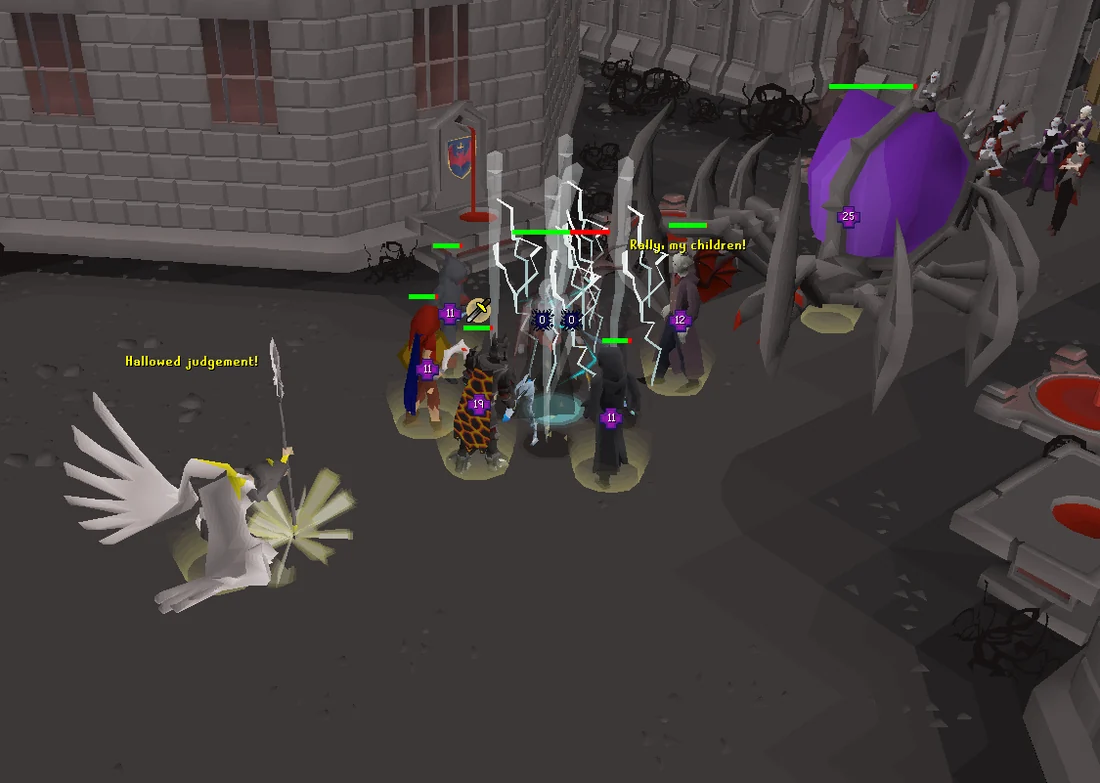
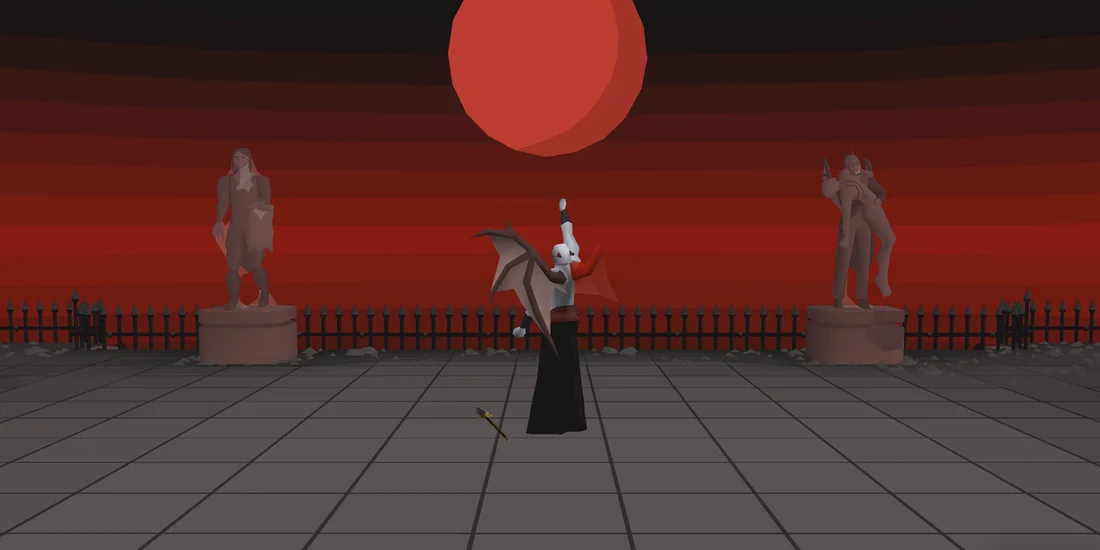
Upon arriving at Castle Drakan, Vanescula and Safalaan can be seen hanging unconscious before the crowd. Drakan will arrive, proclaiming the vampyre race has been weakened by becoming civilised and aristocratic; rather than the hunters they once were, they have now become no more than farmers. He will announce that he has found a way to return to their homeworld of Vampyrium, and that he will return their race to one of hunters, rather than aristocrats. The nobles Lord Alexei Jovkai and Lord Mischa Myrmel will voice their scepticism and opposition, content with their lifestyle on Gielinor and telling him that he's welcome to take any that are deluded enough to follow him.
He will then announce the Night of the Blood Moon, a festival of hunting and carnage in which the vampyre with the most kills becomes the leader. The blood shed from this festival will supposedly provide the blood needed to enable mass transport for the remaining vampyres. Before he departs, he points out both you and Ivan to the crowd, ending the cutscene.
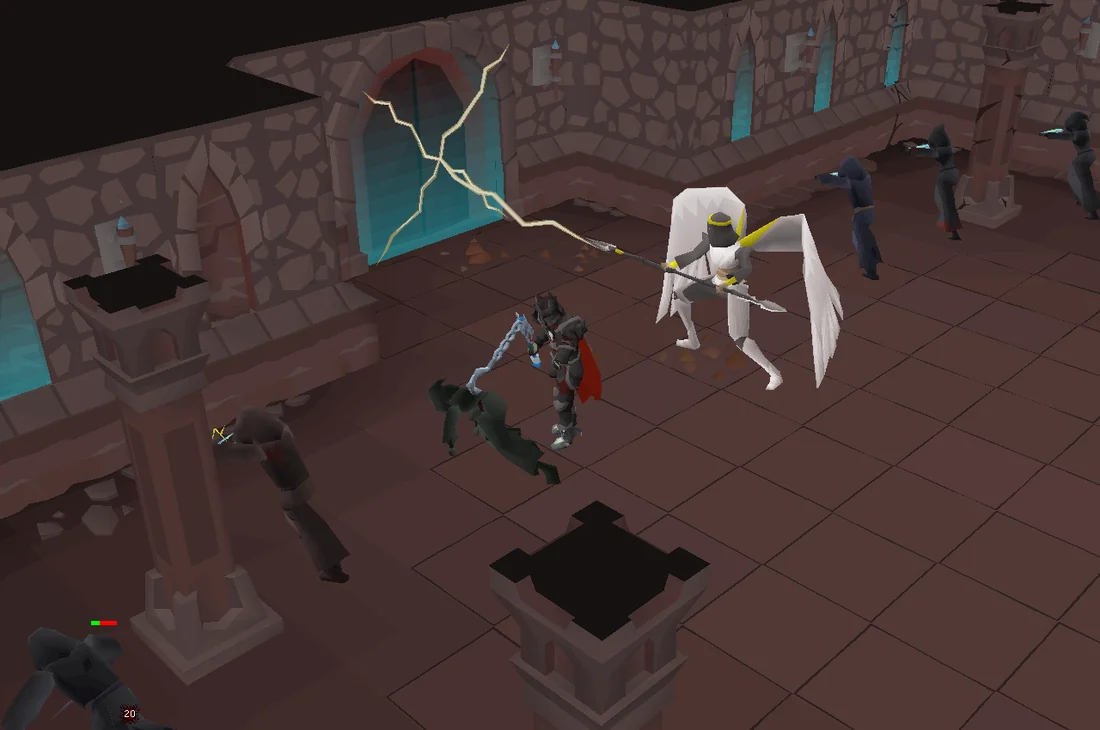
Pray Protect from Melee, and immediately attack the three vyrewatch to keep them from damaging Ivan, who is initially traumatised due to the previous events there. All enemies will change aggro to you when attacked, but will refocus on Ivan if they are unable to attack you for some time. Make note of this when safespotting the vyrewatch.
Acidic bloodvelds will begin to occasionally spawn. If they reach Ivan, they will explode for 25-30 damage onto him and any nearby targets, including the vyrewatch. You should still try to kill them before they reach him. As the battle goes on, vyrewatch sentinels will also join the battle. Unlike the sentinels outside Darkmeyer, these sentinels attack using blood spells, healing them for a portion of damage dealt. Prioritise the sentinels while praying melee. After several minutes, Ivan will complete the spell, teleporting you both out of Castle Drakan and back to the hideout.
02
The Truth Hurtz
Items needed: Pickaxe and combat supplies. Items recommended: Drakan's medallion.
Those with lower stats should consider bringing a method of stat restoration such as a super restore potion as the Monks of Zamorak below will lower your stats temporarily. Leave seven inventory spaces free and make sure you do not have a pet out.
Now aware of Drakan's plans, a plan is formed to find a way to Vampyrium, rescue Safalaan, return to Gielinor, then close the portal in order to permanently trap him in Vampyrium. However, when you ask Ivan about Veliaf, Ivan will tell you not set your expectations too high, given that he abandoned you and Ivan. However, Ivan will mention that he heard he might be in the nearby town of Slepe.
Make your way to Slepe, either by running north from Ver Sinhaza, or by using the ectophial and paying Andras (at the docks north-east) 10,000 coins to row a boat nearby. Head to the graveyard by the church and speak to Ivan. He'll suggest that, as with most things in the game, a pub is usually the best place to start asking for someone's whereabouts. Make sure Ivan is following you to the pub.
Head south-east to the Rat & Bat and speak to Roy, the bartender who replaced Carl. He will say that someone fitting Veliaf's description came in earlier and had quite a bit to drink; he'll also mention that he heard a commotion at Crombwick Manor shortly after that man's departure. As the doors to the manor remain locked, you'll have to enter the manor through the Sisterhood Sanctuary, the same way you did during Sins of the Father.
Go down the stairs of the building just south of the graveyard, then head north until you reach a gate. Pass the gate, then climb up the nearby ladder to reach the inside of the manor. Once inside, you will find a drunk Veliaf cleaning house; help speed him along by killing all the vyrewatch in the manor. All damage during this battle can be negated with Protect from Melee.
Once the final vyrewatch has fallen, talk to Veliaf. You will inform him of Drakan's plans, and Ivan will reprimand him for losing faith in the cause. Ivan will then reveals to Veliaf that he discovered for himself that he was the descendant of Ivandis Seergaze, a secret that Veliaf had kept from him his entire life. After a few harsh words, Ivan will leave for the Paterdomus Temple.
Legacy of Seergaze
Make your way to Drezel in the temple basement, which can be quickly reached via fairy ring (CKS). Speak to Ivan, and after a brief conversation with Drezel, he'll give you a squire's journal, which belonged to a squire that served Ivandis. The journal will share that after the river was blessed, Ivandis intended to kill Drakan himself, even though the war had already been won with the vampyres trapped east of the River Salve. The squire writes that Ivandis gave him a book before departing to Vampyrium, the contents of which reveal what the Seven Priestly Warriors did leading up to the River Salve being blessed. However, the squire notes that revelations from Ivandis' book horrified him so much that he regretted reading them. As ordered, he preserved Ivandis' writings, but chose to hide them somewhere within what would become Paterdomus, away from the public eye.
Return to Drezel, who will decry the squire's writings as heresy. Ivan will tell the player that to properly search the temple, the monks of Zamorak taking residence will need to be dealt with. Head west through the basement and up to the temple, then kill all the monks. They can drain combat stats, but should not prove to be an issue after all the vyres you've killed so far.
Head upstairs and speak with Ivan. Then search through the bookcases for six books (you'll need the squire's journal). You must now solve the first puzzle of the quest. Each of the books describes a person, and must be placed on their corresponding plinth. Each plinth sits in front of a stained-glass portrait that depicts the subject of one of the books.
Upon placing the last book, they will disappear in a puff of smoke and a click will be heard from the desk behind Ivan, who then searches it. Speak to him to receive Ivandis' writings, revealing the ritual to bless the Salve was derived from haemalchemy, which caused Ivandis to begin the process of vampyrification. Refusing to become the very thing he and his comrades fought against, he resolved to find a way into Vampyrium, and either kill Drakan or die trying. After much scouting, a tunnel was found that went directly to Castle Drakan; however, nothing was heard since, and Ivandis likely passed in the ensuing fight against Drakan.
Speak to Ivan again to return to the mausoleum, where you will find a now sobered Veliaf. You will discuss what you've discovered to Veliaf, (Ivandis' vampyrification aside), and conclude the tunnel to Castle Drakan is most likely around Ivandis' tomb. Ask Veliaf to lead the way, and the three of you will be transported to the tomb.
Inside job
Inspect the blockage to the south, then mine through it. If you didn't bring a pickaxe, speak to Ivan for a bronze one. Upon entering the blockage, you arrive in a cavern with railroads and mine carts filled with daeyalt ore. Head north-east to a tunnel and enter, where you will be attacked by vyrewatch and vyrewatch sentinels.
You must now kill multiple vyrewatch, including two vyrewatch sentinels. The sentinels will periodically summon blood orbs which increase their damage; the vyrewatches can be lured toward them, and will take heavy damage if they come into contact. Be sure to stay at least two tiles away from the orbs, or you will take damage as well. Pray protect from Magic, and take out the sentinels as fast as possible.
If you die or teleport out of the fight, you can find it again by going back into the Myreque Hideout via the trapdoor directly south of the Hair of the Dog in Canifis. Once you enter the trapdoor, search the southern wall of the room to enter the caves, and enter the cave entrance that is immediately to the east.
After killing them all, you discover that you are in a daeyalt refinery, where the process of vampyrification takes place. You will inform the slaves of the way out, then arrive at a basement. Head out through the north exit and climb up the large stairs to arrive at Castle Drakan. Before continuing, pray at the vampyric shrine to the east to unlock the teleport back here via Drakan's medallion.
03
Escape from Castle Drakan
Supplies and death mechanics
During your time in Vampyrium, you will have access to unique supplies. Some of the supplies can be found as individual spawns or by searching chests in the castle.
Jars of congealed blood, which immediately restores all Hitpoints and Prayer. Although only one of these may be taken from the supply chest at a time, more can be picked up throughout the castle regardless of how many you already have.
These supplies can only be used within Vampyrium and cannot be banked.
Additionally before each major fight there is an object, e.g. a tent or table, which can be looted for an unlimited number of the supplies. These supply locations are usually located near where you spawn following a death. During fights with Drakan, players are supplied with unlimited quantities of the aforementioned Vampyrium combat supplies, allowing indefinite attempts at defeating him without needing to leave Vampyrium for supply runs.
Death also differs here in that you will respawn at predetermined checkpoints with all your items kept. However, hardcore ironmenwill still lose their status if they die at any point during the quest.
After entering the portal, you will arrive at Vampyrium. However, several venators will chase you, forcing you to split up and escape to another room.
The world map icon will be replaced with one of the castle, which shows the rooms you've visited, unlocked doors, and puzzles left to solve. You must now complete a series of puzzles to incrementally unlock more parts of the castle.
While exploring the rooms, you may come upon a few creatures in them; initially sanguidae, small fly-like monsters that are very accurate and initially deal light damage that gradually increases and will inflict a small bleed of 2 when they deal 4 damage and Webbed-winged crows, which are not initially aggressive but will eventually become so. The crows are always found in pairs, and killing one will cause the other to become enraged, attacking faster, harder and piercing through prayer. Finally, as more rooms are unlocked, venators will also appear. They will attack with melee up close and ranged from afar. They also have a special attack in which they will screech; if the player has an overhead protection prayer active when this occurs, they will clench their ears in pain, dealing light damage for 3 ticks and delaying their attack by a few ticks. When a venator is killed, it is guaranteed to drop a piece of mysterious jerky. Most of the enemies can be ignored, and it is recommended to do so.
The castle will only contain a few of the aforementioned supplies - mostly jerky, foul and sticky potions, either on tables or by searching crates and chests. Items of interest will have a sparkle of light periodically emitting from them.
Fixing the clocks
On the table you'll find a poem scroll, which speaks of a father and son. Next to the table are two large clocks; they must be reassembled, after which the times must be set according to the hint given in the poem. Read the poem, and hold on to it if you need to reference it later.
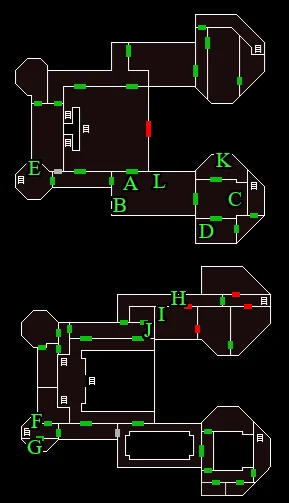
Route to get the first emblem and large clock hand. Image credits →
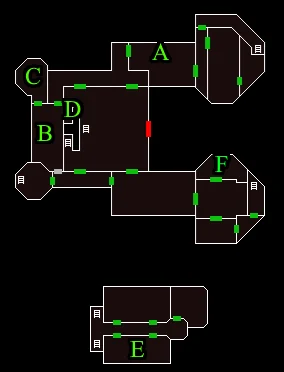
With (A) as the starting point on the map, Pick up and read the poem scroll on the table just south (B).
Go through the east door and then search the throne (C), which will reveal four levers in the busts to the east.
From north to south, pull the 3rd, 4th, 1st, and 2nd busts in that order
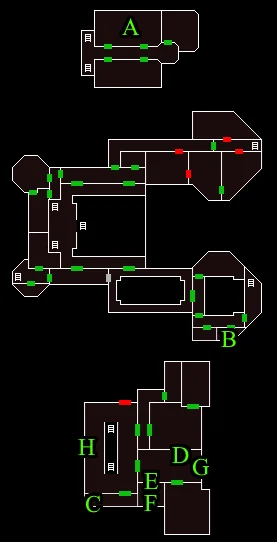
Starting from (A), go through the west door, then north door, then up the stairs, then enter either north door.
Go through the north door to the west of the crescent moon door, then enter the south door (D).
Place the emblem by the east door receptacle (E), then enter.
Use the explosive barrel on the cracked wall to the south-east (C) to open a hole.
Enter the hole in the wall, running past or killing the venator.
The venator will attack with ranged from a distance, and melee up close, healing itself when melee damage is dealt. Players struggling to compete with the healing may find it helpful to stand back, wait until it launches a ranged attack, and then do one melee hit, immediately running out of melee distance afterwards. Pray ranged while using this strategy.
Take the emblem out from the receptacle by the north door (F).
Use the hole in wall again.
Use the west door. Take the emblem out from the door you just exited (E).
Enter the north door, and take the emblem out from the door you just exited (D). You should have three emblems.
Place a Drakan emblem on the receptacle next to the east door (B), then enter.
Place a Drakan emblem on the door to the north, then enter.
Take the ornate skull off the table (G). Leave, and remove the emblem from the receptacle.
Climb down the stairs (H).
While avoiding the trap in the corridor, place a Drakan emblem on the receptacle next to the only door in the corridor (I), then enter.
Place a Drakan emblem on the receptacle next to the west door (J), then enter to find Veliaf. Talk to him.
Search the chest on the northern wall (K) and enter the code: right, down, right, left, left. Unlocking the chest gives the crescent moon key, which can be used to unlock crescent moon doors.
The code to the chest is based on the order of the vampyres listed on the southern plaque, and the direction each is pointing in their respective painting. right, down, right, left left.
Return to the laboratory (B) through the south door.
Use the sharp knife on the venator corpse to receive a pair of tongs.
Use the tongs on the sink for a syringe needle. Use one of the syringe parts on another to assemble an empty syringe.
Use the empty syringe on the venator stomach to receive a full syringe.
Use the full syringe on the chest to receive a left crest half.
From the laboratory, exit through the north-east crescent moon door, then go through the nearest door to return to the main hall.
Climb down the stairs (D), then enter the first door on the south side (E). Deal with the venator; pray Protect from Melee or Missiles depending on distance, and turn it off when it is about to screech to avoid damage.
Search the weapons rack at the east end of the room.
The statues must be mirrored on the north and south sides of the rooms. From east to west, they should be holding battleaxes, spears, maces, and swords.
From the fireplace, return to the main hall by going through the south, west, then north doors.
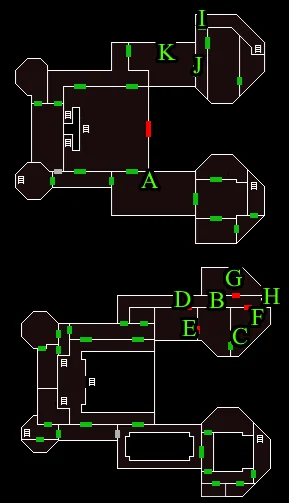
Climb down the stairs to the basement, then enter either of the doors on the north side (A) to initiate a cutscene where you free Safalaan and Vanescula.
Climb up the stairs to the main hall, then climb up the stairs again to the 1st floor (UK).
Enter the south-east door (the gibbous moon door).
Go through the east, south, then south-east doors. Search the crate for an ornate knife(B).
Pull the lever on the western wall. Enter the portal, teleporting to (C). Then go through the north-east door.
Enter the eastern gibbous moon door. Kill the venator to prevent being disrupted from solving the room puzzle or just run past it.
Light the fireplace, then search the chest (D) just east for a lockbox.
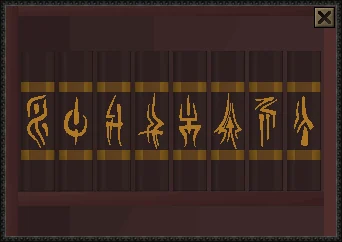
Open the lockbox with the code (from left to right): the ⠿, the ᴟ, and symbol that looks like ⁘, to get a fancy gem.
The hint for this is obtained by inspecting the venator head for the code "426". The 4 banners in the room have the first symbol. The 2 shields have the second symbol. Lastly, the 6 braziers have the third symbol.
The hint for the south-west door's passcode is obtained by inspecting the ancestral dagger and reading the grid note, both of which are in the room.
Enter the south-west door (E) by inputting the passcode "SPEAR".
One of the bookcases (F) will be searchable; do so for a mysterious book.
Open the book for another fancy gem, then leave the room.
You will need to place a chemical vial onto the basin until the panel reads 53 HP (haemalchemic potential).
Use a vial of blood and pure essence on the refiner to receive a chemical vial measuring 17 HP. Do this again for another.
Use a vial of blood and vial of water on the refiner for a vial measuring 13 HP.
Use a pure essence and vial of water on the refiner for a vial measuring 6 HP.
Use all four chemical vials on the basin.
Go through the unlocked north door and destroy the blood stockpile.
After destroying the blood stockpile, a cutscene will play where the five of you are ready to leave. Before you can do so, Lowerniel appears and shuts the portal down. However, missing the thrill of the hunt, he lets you out into the land of Vampyrium, giving you a brief head start before the hunt begins.
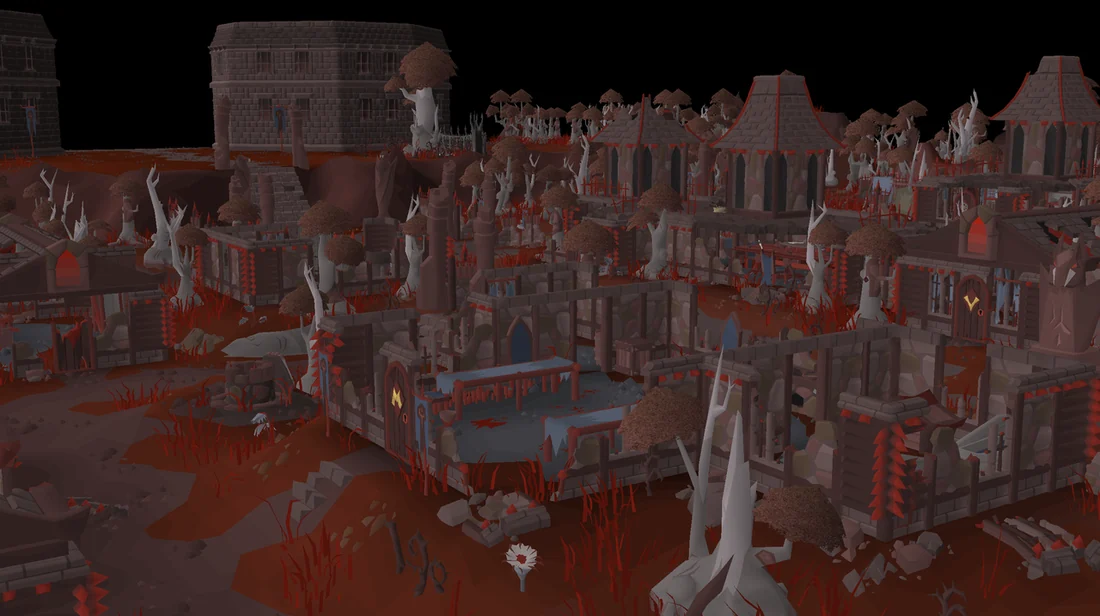
You'll now find yourself in the land of Vampyrium, the ancient homeworld of the vampyres. Like in Drakan's castle, the area will contain multiple spawns of the same food and potions. A cutscene will play in which the group arrives at a bridge in the ruined village of Sangvesti, and Vanescula will say that the nearby drawbridge needs to be lowered.
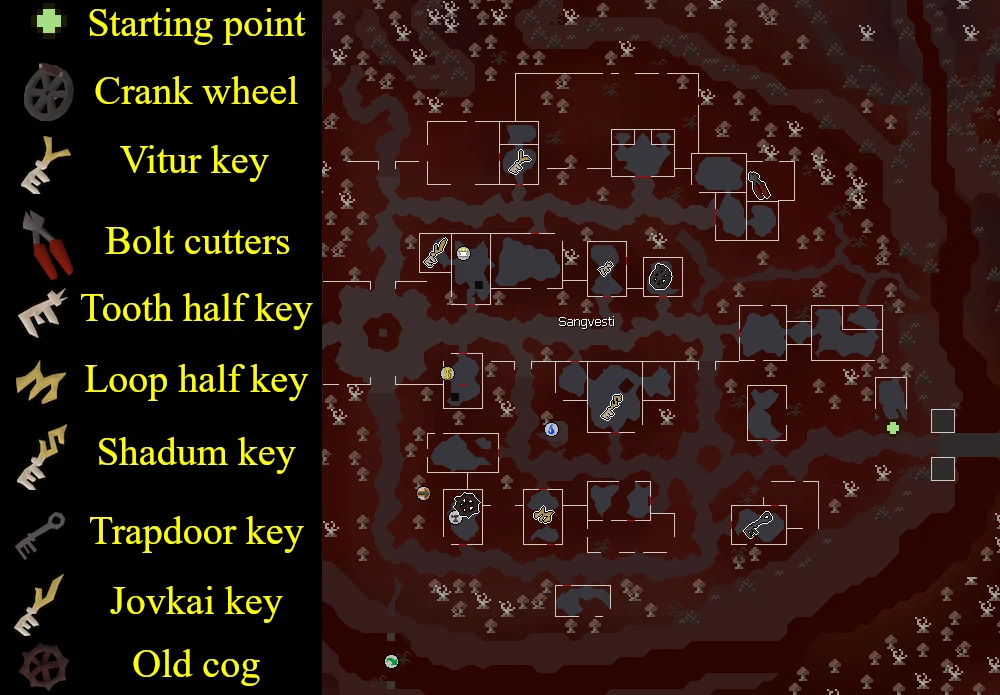
You must now complete another series of connected steps to put the old cog on the drawbridge. While doing so, more supplies can be found in the ruins, such as jerky and potions, as well as smelly kebabs, which are equivalent to cooked karambwans. Be warned that you may log out, but if you teleport out before repairing the drawbridge, the cog will not stay in inventory and you'll need to get it again.
You will no longer be allowed to enter the castle from Vampyrium. If you didn't already unlock the Castle Drakan teleport, you must return the same way you originally entered: go to the Myreque Hideout south of the pub in Canifis, enter the first cave entrance to your right after passing the wall, then enter the next south-eastern cave entrance. Follow this path all the way way to the red portal, then pray to the shrine to unlock the Castle Drakan teleport.
At the small building three houses east of the altar, enter the building from the south door to pick up the crank wheel. Afterward, make your way to the building north of the altar. There will be a crank base in front of the door for you to operate. Once you start operating the base, Drakan will begin his pursuit. Click the crank base several more times until the yellow bar fills up, then quickly enter the door. Once inside, search the bookshelf for a dusty book, then read it to receive a Vitur key.
From this building, run all the way east until you see a set of Vitur doors. Enter to find various searchable objects that, when searched, show a combination lock with poorly secure passcodes, such as the passcode for the food being simply "FOOD". This hints to the passcode to the shed outside: "TOOLS". Once you enter the passcode, you will receive a pair of bolt cutters.
Make your way to the building east of the altar (the one with a Vitur door on its south side); enter and take the tooth half of key from the table. Next, head to the building directly south of the well ( map icon), enter through the chained doors from the north side, then pick up the loop half of key and combine the two halves for the Myrmel key.
Depending on where Drakan is, you may wish to either exit this building from the north or south side to avoid him. Make your way to the building east of the well. Enter through the Myrmel door, then pick up the bucket in the north-west corner. Fill it with water from the well outside, then quickly return inside. Use the bucket of water on the northernmost barrel in the building to receive a Shadum key.
Next, make your way to the building south-west of Ivan and the group, and enter through the Shadum door from the west side. Take the trapdoor key on the crate, then make your way to the bank just south of the altar. Operate the crank base inside until the yellow bar fills, then open the gate and enter the trapdoor. This will take you into the building with the altar.
In the dining room are five chairs, which reveal a verse from an ancient religion when inspected. These verses hint at which prayer must be active in order to restore prayer points from the altar; for example, praying at the altar with Thick Skin on will restore 8 prayer points.
The order of the chairs, and the amount of prayer restored, hint towards the passcode for the chest in the western room: 35158. Once the passcode is entered, you will receive the Jovkai key.
Make your way to the building with an anvil, enter through the Jovkai door from the south side, and take the old cog. Once you leave this house, Drakan will start pursuing the player at running speed, so wait until he is as far from you as possible before rushing back to Ivan and the group. Once you reach the group you are safe from Drakan until proceeding.
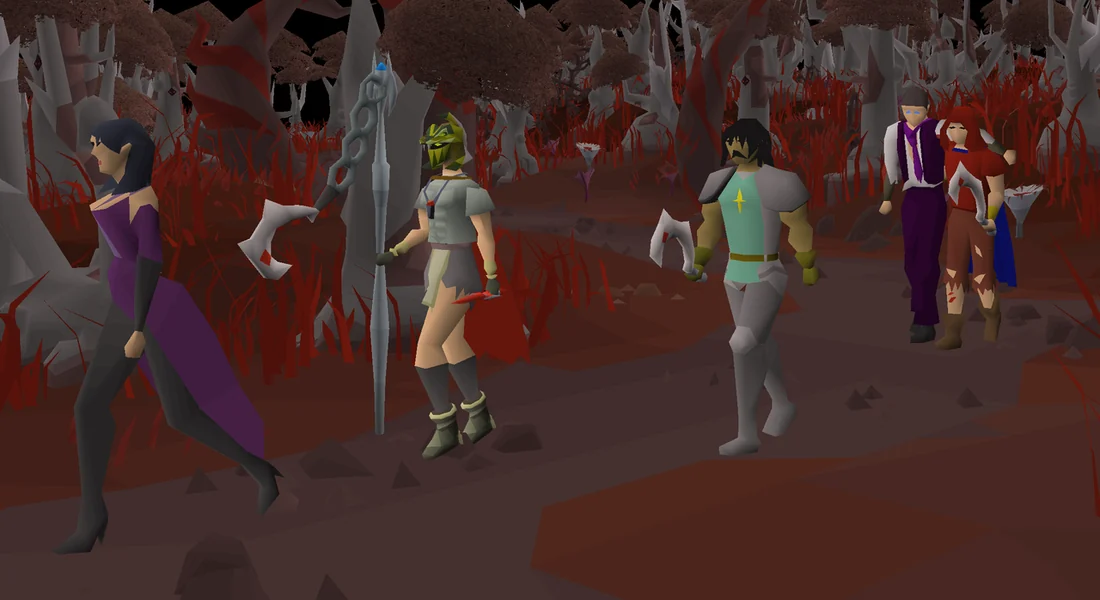
Before leaving, Ivan will reveal that he had acquired some supplies from the ruins. Alongside the aforementioned items found in the castle, he will also supply rancid slimy potions and rank frothy potions. These are the equivalent of Saradomin brews and super combat potions respectively, although the slimy potions drain combat stats by 1 rather than the larger amount brews penalise. Take as much as needed, then speak to either Veliaf or Vanescula to initiate a cutscene where you all trek through the forests of Vampyrium.
First blood
A cutscene will play, showing the group arriving at a Ruined Village, where Drakan is waiting. Lowerniel will ask Vanescula if she remembered this place, and she tells them that it was where he killed their father, akin to putting down a beast, while Lowerniel felt as if it was him giving his father the honourable death he deserved. It's time for the first fight, during which you will be assisted by both Vanescula and Veliaf, but don't expect them to deal a lot of damage. Pray Protect from Melee and dodge the attack described below.
Drakan will immediately attack Vanescula. You will not be able to deal damage to him immediately; you must first dodge several of his lunging attacks. Once a few (3-5) spear strikes are dodged, you will become able to deal damage.
When Drakan focuses on you, he will use melee attacks and telegraphed spear attacks which will deal moderate damage if caught by one. During the spear attacks, he will draw a mark of blood into the left or right side of his body, indicating the tiles that he will strike. Opposite to the side the marks are absorbed, tiles will sparkle with a glimmer animation, these are the safe tiles. If you click on the safe tiles, at the right moment, you will dodge and roll out of the way. You will always need to step at least one tile back.
Once he is below 2,900 health, these sparkles no longer appear, and the player must rely on the mark of blood and their reaction time to avoid it.
The timing to dodge the spear attacks is extremely precise and requires input to be tick perfect. Drakan will glow red just before he lunges. This is the cue indicating when the player must move in order to avoid the attack. There is also a distinctive sound cue that indicates which tick to move. It is recommended for players to enable game sounds and gain familiarity with the sound cues in addition to the visual ones.
It is extremely helpful, in this fight as well as any subsequent fights to come, to keep the camera oriented from a high angle such that the player and Lowerniel are on the same vertical axis. This will give the best possible view of his signals priors to the dodge opportunity.
To the south, players can right click "quick escape" the encounter if they are to run low on supplies. If you escape the encounter, you will return to a forested area with a run-down tent, from which you can gather more supplies.
Drakan starts with 3,000 health, but you only need to do 450 damage during this round. Upon hitting 85% of his health, a cutscene will ensue in which you all scatter into the forest, but become separated from each other.
Over the river and through the woods
Before leaving the area, resupply if needed, as you'll be fighting several monsters native to the forest. Upon leaving the safe area through the darkwood trees to the west, you will be attacked by two ancient feral vyres. When fighting multiple of them at once, one will swap places with the other and begin healing, whilst forcing you to attack the vyre that took its place. Simply switch targets to resume attacking the initial vyre. Two more will spawn, who must also be slain before the encounter is complete.
The next section is an area with many choppable darkwood trees that block the path. If you do not have an axe, take the bronze axe from the stump upon reaching this section. During this time, ticks may crawl into your inventory and begin dealing 1 damage in fixed intervals; to remove them, simply find the tick in your inventory and click on it—alternatively, if you have a full inventory, then the ticks will not bite you. Odd trees with spikes around them will also deal damage if you stand next to them.
To fell a tree, it must be chopped from two different sides; you may need to jump over the tree stumps multiple times from different sides in order to reach another side of a tree. Chop your way until you reach the north-east corner of the area, from which you can enter the next part of the forest. Optionally, you may chop one of the darkwood trees at the southern end of the area to receive a rotten diary.
The next section is an S- shaped pathway patrolled by maxilla beasts. They cannot be attacked, and will knock you and deal 30-50 damage if you are too close to them. Examining them will reveal that the beasts are blind; as such, their hearing is very strong, so players must also walk during this section or they will begin to run towards you. Follow the pathway until you reach the cave. As supplies are unlimited, players may wish to simply run through and eat along the way.
The player fights a horde of nylocas in their native environment. Image credits →
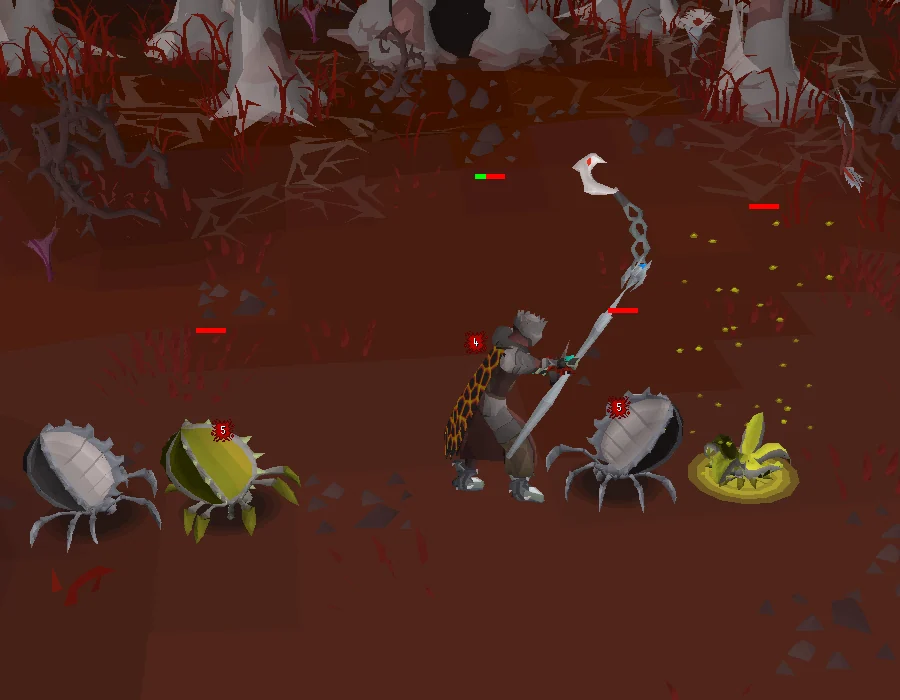
The next section after you exit the cave is a face-off with a horde of nylocas, who spawn from two corners. The white ischyros must be attacked with melee, while the green toxobolos must be attacked with ranged. They behave the same way as their Theatre equivalents, becoming immune to attacks if attacked with the wrong style, and exploding if left alone long enough.
There are throwable spines on the ground which act as darts, so there is no need to re-gear for range. You can also harvest the dead venator for more spines if required. It is recommended to leave and return with fast hitting weapons, such as the toxic blowpipe, if players are having trouble making it through this section.
The final section is a river crossing. Players must wrangle the three blood serpents around the area; they can only be picked up whilst you are directly behind them, otherwise they will deal 5 damage. Once you have picked up three dead blood serpents, use them on each other to create a serpent rope, then use it on the long branched tree to swing across the river.
Upon entering the trees, a cutscene will play in which you emerge from the woods, with Drakan on coming out on the other side. He will argue that if he gets what he wants, then vampyres will no longer be present in Morytania, freeing the humans from their rule. However, you will claim the cost to do so is too great, and that Vanescula already had plans in place before he shut it down. Drakan will refute this, claiming it was she who ceased operations. He will then draw his spear, but several aranei will appear and distract him, before a winged woman flies down and asks you to come with her.
Once you're safe, she will reveal herself as Efaritay Hallow, Safalaan's mother and the former queen of Hallowvale. She will further tell you that she has rescued your companions, and that there is someone who wants to meet you. You both then enter a palace at the side of a mountain, where you find Ivan and Veliaf. You point out the resemblance of the mysterious strangers to the ones you've encountered during A Night at the Theatre, and you will have an audience with a mysterious vampyre, claiming they're glad to finally speak with you in person.
The player meets the master of the mysterious stranger. Image credits →
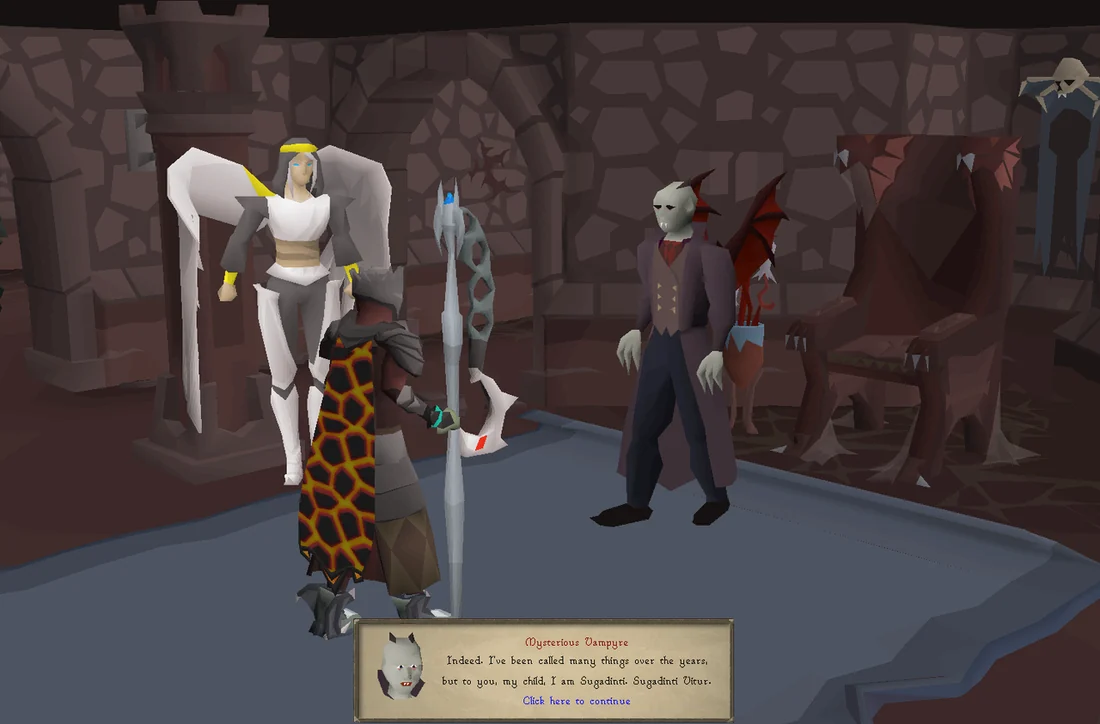
You will recognise them as the master of the mysterious strangers, and he'll formally introduce himself as Sugadinti Vitur, the father of Verzik. He will tell you that he has remained in Vampyrium since before Drakan united the vampyre clans, and that despite his opposition, Verzik conspired with Drakan to kill Sugadinti in order to lead as head of House Vitur. He will then tell you that he has Vanescula imprisoned, as she smuggled daeyalt ore at some point during your escape from the castle, suggesting she may have other plans.
However, now that they've revealed themselves to Drakan, Sugadinti must now enact his plans to travel to Gielinor and trap Drakan in Vampyrium, a plan for which he'd been laying the groundwork for many years. You will be hesitant to trust another vampyre, but Efaritay will vouch for him, despite their differences.
05
Hallowed Preparations
You must now complete several short tasks to help prepare for Drakan's attack. Note that additional dialogue is available from many characters during this section.
Preparing the potion to cure Safalaan
First speak with Efaritay, who is preparing a potion to help Safalaan recover. She will ask that you make a stew mixed with amitire leaves from ingredients around the palace.
Exit the palace and pick the amitire plant to the east, then return inside
A bowl can be found in the shelves next to the sink, with a potato and raw impaler meat being found in the cupboard by the western wall
Use the bowl on the sink, then use the bowl of water on the potato
Cook the meat at the range, then use it on the incomplete stew
Cook the stew at the range, then finally add the leaves to create an amitire stew.
Speak to Efaritay, then use the stew on Safalaan
He will briefly become lucid, and Efaritay tells you that in time, he will return to normal. You will then ask for advice on Drakan, to which she cannot offer much. However, she will make some recommendations on improving your blisterwood flail, telling you that pure silvthrill, now only found in hallowed marks, is also effective. She will lastly recommend you shorten the flail's shaft and incorporate an enchanted diamond to further improve your flail, before giving you some hallowed marks for you to use.
Flailing around
Creating the Hallowed Flail
Free up seven inventory spaces and then head to the east side of the palace.
Take all the tools from the workbench, then search the nearby crates for blisterwood logs and a blessed silver sickle.
Next, search both chests in the room for a diamond and an enchant diamond tablet
Use the diamond and tablet on the sickle, in that order, to create an enchanted diamond sickle (b).
Use the logs on the sickle to create a blisterwood sickle (e)
Lastly, upgrade the flail into a Hallowed flail by using the blisterwood sickle (e) on the anvil
After making the flail, speak to Ivan, who will introduce you to Sarei, the stranger you assisted during A Night at the Theatre. They will explain why they could not take direct action or assist the Myreque, and follow up on your work in the Theatre. They will also advise you to craft some blisterwood stakes from the log stockpile; you must do this to progress, however only one set of stakes (5) is required. Speak with Ivan afterwards to notify him you have done so. Lastly, head downstairs and speak to Veliaf and Vanescula, who claims the daeyalt she smuggled was for insurance in case things went awry.
After finishing everything with your allies, speak to Sugadinti who will order the aranei to prepare for Drakan's arrival. You will offer your assistance in the defence, in spite of Sarei's objections, but he ultimately allows you to do so as long as you stick close to him.
Leave the palace to initiate a cutscene. You will offer your assistance in the defence, in spite of Sarei's objections, but they ultimately allow you to do so as long as you fall back when they order you to.
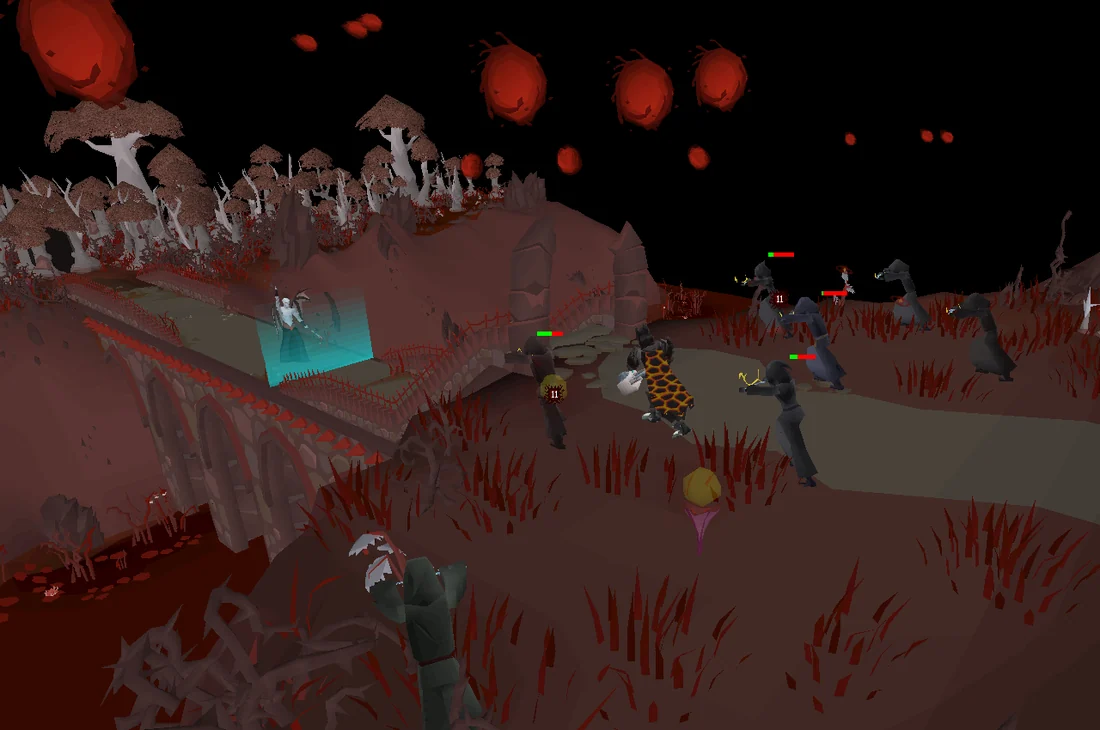
The bridge will be full of aranei, ready to defend the palace. Drakan will emerge from the forest and begin eliminating the aranei in front of him with frightening ease, before they manage to cast a barrier to stop him from going further. In response to the obstacle, Drakan simply raises his arm, conjuring numerous blood portals above that rain projectiles on the aranei. One of the aranei will try to shoot them down but will be quickly killed by the projectiles, leaving behind a silvthrill ballista and some silvthrill javelins, which you notice and immediately pick up.
The player assists the aranei in defending the bridge. Image credits →
You will need to defend the aranei from the incoming portals with the ballista. The portals will always be one-shot, but they will eventually begin to spawn faster than you can shoot them down. You will still need to have some participation, or you will fail the defence; once actively participating up until the defender integrity reaches ~60%, you will be able to progress without any further actions. Once this occurs, the protective barrier dissipates and Sarei sends you back inside, fighting Drakan to the death.
The player assists Efaritay and the aranei in defending the palace entrance. Image credits →
Afterward, Lowerniel will begin breaking through the palace doors. Some of the ceiling rubble will fall on one of the aranei holding Vanescula, freeing her to kill the other. Upstairs, Efaritay will join the defence. Similarly to the bridge, you must have sufficient participation in this sequence, or you will fail and have to restart from the beginning. The events consist of rubble falling on aranei, stunning them, and cracks on the windows and front two pillars. Actively participating up until the hideout integrity reaches ~50% will be sufficient participation to progress.
Round two
Drakan will breach the palace and you will have to once again fight him off. This time, the aranei and Efaritay will help you, but expect to pull your weight. Like the spear lunges from the first fight, he will begin incorporating targeted AoE attacks that the player will need quick reactions to. Efaritay will occasionally heal you and the aranei, and you can always grab more supplies from the supply table if you die or have to retreat. Drakan's attacks grow stronger the less HP he has left, his special attack ranging about 12-19 in the beginning, but rapidly increasing towards 40-50 by the end of the fight.
Drakan has 85% health (or 2550 HP) by the beginning of the fight, and the player will need reduce his health to 58% (or 1740 HP) so 810 HP in total in order to progress. A cutscene will ensue in which you and Efaritay retreat further into the hideout, but Lowerniel busts his way through while Vanescula attacks Safalaan. Surprised to see Sugadinti, Lowerniel offers to let you go in return for either Efaritay or Safalaan. Efaritay refuses and tries to stop him, while Drakan casts a spell on the portal, expanding it and sending everyone to Gielinor.
You and Ivan will arrive at the Haunted Woods, and see that the blood moon has risen on Gielinor as the vampyres begin bringing humans for the festival. You will reconvene with Veliaf and Sugadinti in Burgh de Rott, where preparations will be made to bring the Nylocas Queen onboard as an ally, with Sugadinti ensuring she will comply. You and Sugadinti will head to the Theatre, while Ivan and Veliaf will search for Vanescula's whereabouts.
The player battles the Maiden of Sugadinti once more. Image credits →
Before you leave, you can ask Sugadinti various questions, such as whether you believe the Nylocas Queen will be of help or what he'll do if Drakan is deposed. Once you're ready, make your way to Ver Sinhaza and gear up for fight against several waves of enemies previously fought in the Theatre of Blood. They are significantly easier to fight than during A Night at the Theatre, and should not prove an issue with sufficient supplies. Deaths during this section are treated like normal deaths; you will be sent to your respawn location and have to get back to your gravestone and pay any associated fees for reclaiming your items. As such it is highly recommended that you bank your Drakan's medallion (or ensure that you have multiple) to make returning easier.
Attack with ranged from the southern side of the room. At 70%, 50%, and 30% hitpoints, the maiden will summon two nylocas matomenos on the south side of the room; immediately kill them or they will heal the Maiden for 40 health. Avoid the blood pools she will throw out or which appear around the blood spawn.
The Nylocas Vasilias will switch between white, green, and blue. It will both attack with, and be weak to, the corresponding attack style. Prioritise switching prayers over damage, as prayers block most damage
After defeating the Vasilias, a cutscene will play where Sugadinti reveals he and the Nylocas Queen have made a deal. Moving forward, she will keep the Theatre open for willing participants, feasting only on those who fail to survive the challenges. An aranei will enter and inform you both that Vanescula has been located in a ruined building north-east of Burgh de Rott. Head to the Burgh de Rott bank and prepare for another challenging fight.
Head to the ruined building north-east of Burgh de Rott, then speak to Veliaf or Ivan. Upon entry, a cutscene will play in which you discover that the building is another vampyrification lab, and Vanescula has put Safalaan through the process; with his Icyene blood, the vampyrification process has transformed him into a monstrous wyrd. Too powerful for even Vanescula to handle, he knocks her and Veliaf back with ease. If you die while fighting Wyrd, you will be placed outside the laboratory with all your items intact. You can use the bank at Burgh de Rott as needed to resupply.
Fight mechanics
The wyrd has 1,100 health and will attack with melee that will push the player back one tile. Protect from Melee will significantly reduce the damage of his attacks, although if there is no tile behind the player to be pushed into, they will take light damage from the recoil. If using ranged to stay out of Wyrd's melee range, he is unable to perform any special attacks, but will instead use magic attacks the entire fight which can hit up to 25 damage each and cannot be blocked by protection prayers. Players who can deal high damage per second may find this method superior to learning the melee mechanics. It is highly recommended to use quick-prayers for this fight, as this removes the need to switch tabs.
At the beginning of the fight, the wyrd attacks in a repeating cycle with 2 melee attacks, a screech, another 2 melee attacks, another screech, then a double slam. This cycle repeats until around 60% health, where he will sometimes use a bloody screech in place of a regular screech.
Attacks description
Attack
Prayer
Mechanics
Normal attack
A melee attack with one of his arms, which will push the player back one tile. He will attack with two regular attacks before doing a screech.
Screech
OFF
The wyrd will screech at the player similar to the venators faced earlier. If overhead protection prayers are active during this time, you will take 15-20 damage and your next attack will be delayed by a few ticks. Earmuffs or a slayer helm will reduce the damage by half.
Double slam
N/A
The wyrd will slam the area to either his left or right twice, dealing 25-30 damage if the player is caught in the wave. This damage can be fully negated: during the second set of melee attacks in his attack cycle, pay attention to which arm the wyrd uses, as this is a visual cue indicating where he'll slam. Once he screeches, move to the opposite side of the arms slammed to avoid his slams and the damage wave. See the video below for examples.
Bloody screech
OFF
The wyrd will deploy five layers of blood pools around him (but not on the tiles adjacent to him) and prepare a screech. At the same time, a blast of energy will emit from him, which will generate lightning strikes that vaporise some of the blood pools to allow the player to escape. The blast will deal heavy and rapid damage while caught in it, so you must run away from him while having prayers off to avoid being affected. Stepping on a blood pool will likewise deal heavy damage.
Players struggling with this fight should ensure that they immediately start running to a side when the blood pools spawn. Some damage is likely, and trying to avoid taking any damage can result in much more damage than stepping on one or two pools. Wait to turn prayers back on until the blue has completely disappeared.
Upon reaching ~10% of his health, the fight will end and a cutscene will begin in which he knocks the player back and escapes. Upon exiting the lab, follow the trail of blood northwards until you reach the walls of Castle Drakan. Inspect the broken fence to the north. You will then automatically return to Burgh de Rott, and then you, Ivan, and Sugadinti will leave for Castle Drakan after discussing the next steps. Veliaf will be too injured to come. As you leave the hideout as part of the cutscene, the population of Burgh de Rott will be glad to see the Myreque return, and everyone, including the player character will cheer on, "Myreque Prevail!"
09
Night of the Blood Moon
Prepare for a third round against Drakan. Bring a full inventory of food, as well as a prayer restore potion. Brews are not needed during this fight.
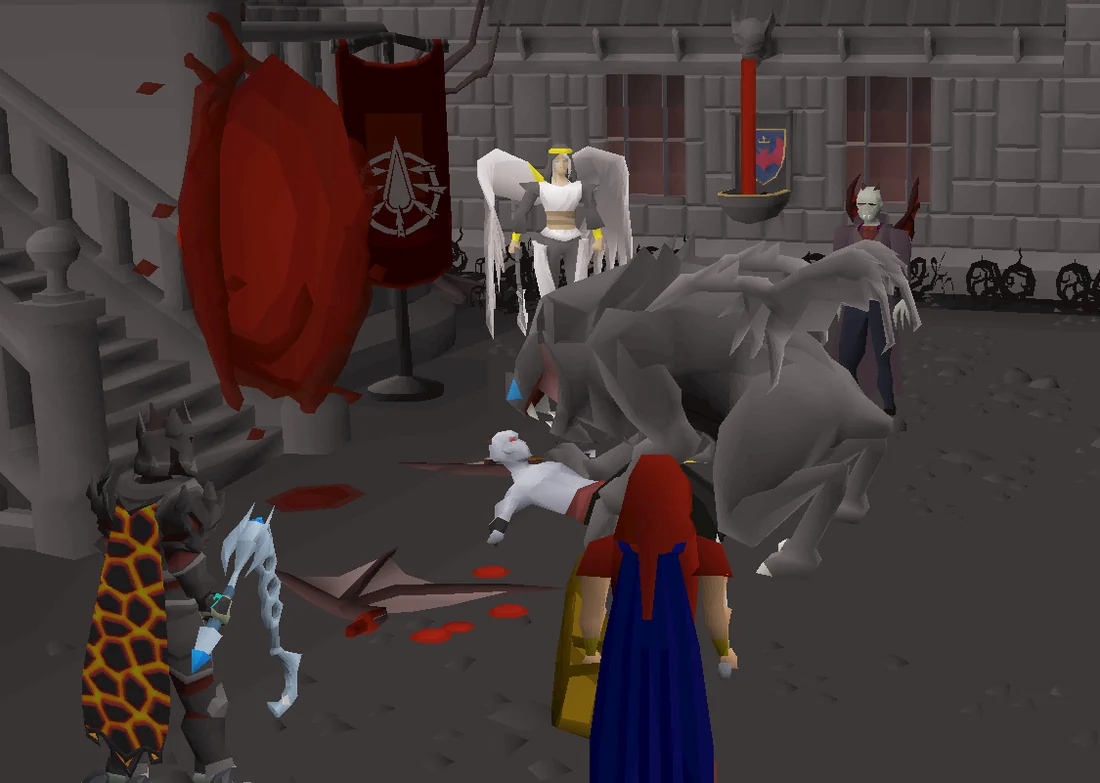
A cutscene will play in which Drakan will commence his speech, noting that the sacrifices his people have brought are not enough before noticing that Jovkai is nowhere to be seen after all he said previously. Lord Myrmel will claim that Jovkai had no interest in such a farce, and Drakan will commend his courage, believing that he would hide with him. Stating that he doesn't need his sister and is capable of adapting, he proceeds to immediately vaporise Myrmel into a bloody pulp, using his blood along with Efaritay's to power a portal back to Vampyrium. As this happens, you, Sugadinti and Ivan will arrive and confront him. Drakan states that he has the ability to rectify all his failings right now, and Sugadinti tells him that his daughter isn't here to stop him in this time. Taking it as a hollow threat, Drakan claims that he doesn't need her, and Sugadinti clarifies that he isn't fighting him alone as the Nylocas Queen enters the courtyard. Intrigued, Drakan will assume a combat stance, releasing Efaritay from his hold.
Round three
This fight is arguably easier than the previous, as Efaritay, Ivan, Sugadinti, the Nylocas Queen, and her nylocas will all assist in damaging Drakan. You will still need to pull your weight, but you will receive substantially more help, and Efaritay and Ivan will both heal you periodically. The mechanics for this fight are the same as before; however, the blood swipes will now take place three times, and Drakan will begin firing an additional orb after every special attack.
The small stage for this fight means that it's easy to take damage when backed into a wall. Try to remain in an area where you can move at least three tiles back, and run to the other other side of Drakan if needed. If you need to escape, the castle doors to the east can be used; if you die during this fight, you will respawn by Veliaf. Players who die or teleport out can return to the fight by talking to him. Once Drakan reaches ~30% of his health (900 hitpoints), a cutscene will trigger in which Safalaan, having progressed further into his wyrd form, attacks Drakan and rips one of his wings off, then tackles him into the portal. Sugadinti will then quickly close the portal, believing that Drakan is permanently trapped as he cannot use Safalaan's now-tainted blood to return. Efaritay however, refuses to believe this and leaves.
Sugadinti will ask that you wait for him inside the castle whilst he addresses the vampyres. They will accept him as their ruler, and will ask Ivan and Veliaf to travel to Misthalin to reassure the kingdom that war will not be on the table. Meanwhile, you will be tasked with finding Efaritay, with Sugadinti saying that saving Safalaan's life cannot be done at the risk of Drakan's return.
The Nylocas Queen arrives at Castle Drakan. Image credits →The battle against Drakan with the entirety of Darkmeyer as audience. Image credits →Safalaan arrives at the end of the battle, ripping Drakan's wing off. Image credits →Drakan retreats. Efaritay awaits his fall. Are you up for the task? Image credits →
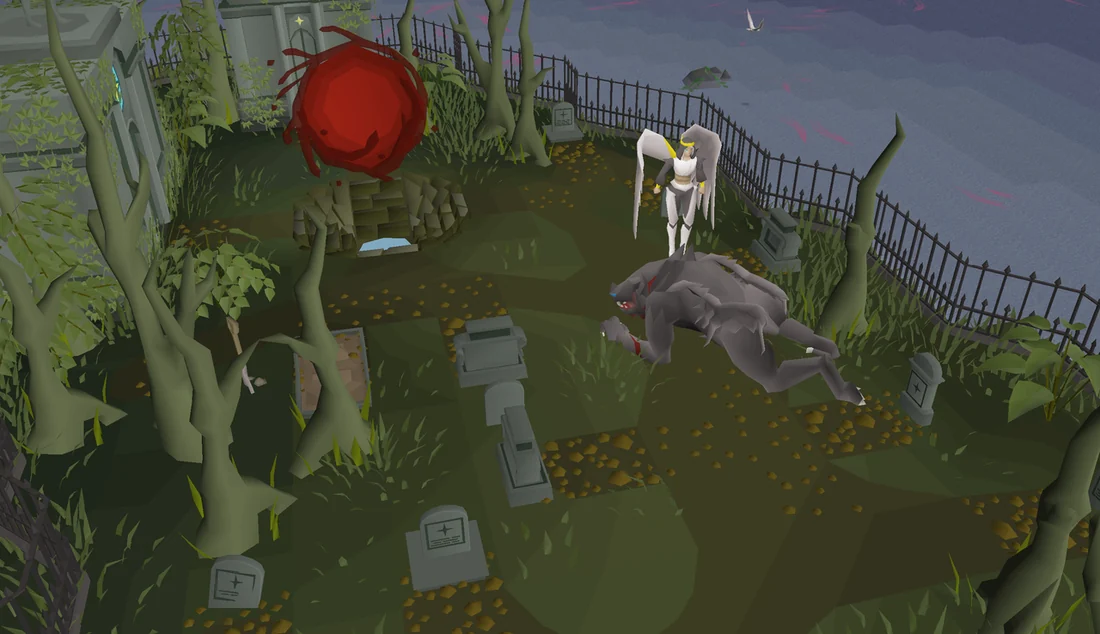
Efaritay can be found in the Icyene Graveyard, where the player will tell her that they are going to Vampyrium with her, at which point she will create a portal.
The player should come through the portal with their best melee setup including the mandatory hallowed flail. Drakan has significantly higher ranged defence, and there is no Vampyrium equivalent to ranging potions, so using blisterwood stakes is not recommended. As before, the player's damage is capped between 26-28 damage per hit.
Preparing for the final battle
After stepping through the portal, Safalaan will be found in the 2nd floor (UK) of the castle, with his wyrd transformation progressing. The player tells Efaritay to get Safalaan to Morytania and promises her to deal with Drakan. After the cutscene, Drakan awaits on the top of the castle, accessible via the northern door. As with two of the previous fights with Drakan, Vampyrium supplies are provided in the chest just outside the door which leads to the fight:
Equivalent to a Stamina potion. Has no use in the final fight.
The jar of congealed blood should always be taken for emergency healing, often needed in Phase 3 when Drakan's combos reach their highest tempo and the environment can disable Protect from Melee. Two rank frothy potions (green) should be taken to keep combat boosts high. Three to four foul chunky potions (pink) should be taken to restore prayer. The remaining slots should be rancid slimy potions (yellow) for healing. The final fight is fairly long and therefore the rancid slimy potion is preferred over the jerky and kebab as it allows for vastly more hitpoints restored per inventory space. The potion also has a shorter attack delay than the jerky.
Players can prepot the fight by dropping a full yellow, pink, and green potion on the ground. They should then sip potions in their inventory in that order, yellow, pink, and green, drop those partially full remainders, and pick up the full ones left on the ground at the beginning. This will allow the player to start the fight overhealed with the maximum possible combat stat bonuses.
The player must remain mindful that with each heal from the yellow potion, their Attack and Strength will drop by one. Continue to use pink and green potions to keep those stats boosted. Keeping these stats higher for as long as possible is more important in the first two phases than keeping the player's health above 60.
An Efaritay's aid will raise the player's DPS against Drakan. A fresh ring should last nearly the entire length of the fight. However, as the player can only use the supply chest to deposit to their bank and not withdraw, the player must either sacrifice inventory slots for spare rings or teleport out and return for each attempt. It is recommended to use a non-degradable ring at least until the player can consistently reach Phase 3. That said, Efaritay's aid is not essential for success for most setups. Note that a Black mask/Slayer helmet with a vampyre task does NOT increase damage or accuracy.
Drakan is immune to life-leech, recoil, venom and poison damage. Thralls cannot be summoned during the fight.
If you die while fighting Drakan, you will be placed with full health and prayer by the door leading to the fight with any remaining supplies you had. There are no death fees and more supplies may be taken from the chest. However, you must start over from the beginning of the fight. If you teleport away from the fight or supply room, you will need to return to the Icyene Graveyard by boat and re-enter the portal.
Show animation: Drakan regenerates his wing with haemalchemy as he readies to perform his last hunt.Drakan regenerates his wing with haemalchemy as he readies to perform his last hunt. Image credits →
Much of the fight will be spent executing dodges. Drakan's signals prior to each attack will increase in tempo with each phase. The player will also be required to execute precise running movement, switch protection prayers, and both avoid environmental hazards and learn to dodge another special attack later in the fight. Similar to prioritising switching protection prayers when fighting TzTok-Jad in the TzHaar Fight Cave, the player must prioritise seeing the dodge patterns in order to survive. Healing or using another potion only once per attack is recommended. That said, perfect play is not required: there are only a few consistent points in the fight in which mistakes are harshly punished. Beyond the dodge mechanics practised in the previous encounters, the fight is relatively straightforward. However the length of the fight and the sustained concentration required will challenge many players.
Players should activate Protect from Melee and Piety immediately on beginning the fight. During the prolonged special attacks sections which begin phases two and three, neither one is essential to keep on, and the player will need to activate Protect from Magic once those sections end.
Once again, players struggling to see which direction to dodge in should keep the camera oriented from a high angle such that the player and Drakan are on the same vertical axis. This will give the best possible view of his signals priors to the dodge opportunity. Using true tile for both the player and the boss can also be very helpful.
Phase 1
Drakan's health is restored to 3,000. He has three distinct phases. Each phase has roughly 1,000 hitpoints, with his attacks speeding up with each phase. He will use his spear combos and his two area of effect attacks (front/back and semicircle) from the previous three fights. Once at around 2,700 health, he will begin to use four attacks in his combos which also incorporate the slam attack. He will also intermittently attack the player with normal melee, dealing unavoidable chip damage even with prayer. Drakan's successful hits, including the chip damage, will slightly heal him throughout the fight. If you find that you're having trouble timing Drakan's spear attacks, focus on the red visual highlight before his combo attack starts, since clicking to dodge before that will lead to you taking hits. Because of the precise timing required it can be worth it to quick escape through the stairs and do this first section over several times until you feel comfortable with your ability to reliably dodge the combo attack, as it will return slightly faster in later phases. You don't need to be perfect but you do need to dodge the majority of damage to still have brews at the end. A good first phase should use between 2-4 brews.
The area of effect attacks tend be used in clusters. There is a subtle visual and audio cue between the front/back attack and the semicircle, and the semicircle has a significantly longer charging period. When charging for the semicircle, Drakan will hold his spear in front of his chest. When charging for the front/back attack, the spear will be held at his side. If the attack is the semicircle, click well beyond Drakan's character model to avoid clicking the elongated hitbox of his charge.
It is important to stay mindful of the space behind the player after each attack. Dodges that have been clicked correctly will fail if the player cannot move backwards. If there are fewer than three or four tiles of space behind the player after a dodge sequence, immediately move 90 degrees to an adjacent side of Drakan before his next combo begins. You can also move to his far side by passing through him, but this is riskier because he might start his attack wind up while you're running so stepping around one of his corners to change sides is preferred. If passing through him you should click two spaces past Drakan, because he will try to follow you and can intercept you so that you wind up on an adjacent side instead. Remember to always reposition the camera while moving to see the next combo pattern.
To simplify things, remember that after Drakan performs an explosion/ground slam attack, further attacks will always be in an alternating pattern. For example: left, slam, right, left.
Phase 2
Once Drakan drops below 2100 hitpoints, he will vanish from the arena and flood the eastern side of the roof with blood pools. Twelve portals will spawn outside the arena, four each to the north, east and south which will discharge solid walls of blood waves in a set pattern. These waves deal moderate damage and disable overhead prayers.
Damage from the wave can be evaded by running straight toward them. True tile is very helpful to understand the player's true position relative to the waves. Ideally, the player should be moving past the wave by four tiles. The player must try to run as straight as possible. Avoid spam clicking, and ensure you are confident with your clicks to avoid unnecessary diagonal or extra pathing. Moving diagonally will cause the player not to dodge the wave and take damage, as will running away from the wave or being caught standing still. There is a brief cooldown period after being hit by a wave where other waves won't deal damage. At the beginning of the phase, it is recommended to turn the camera to face east, or directly over head, and zoom out a considerable amount so that they can see all the waves on screen at once. With the camera east, the blood pools will be at the top of the screen. From this angle, the waves will come from the left, right, and top of the screen in the following set pattern: right, left, down, right, left, right, down, pincer (left and right simultaneously), then the preceding sequence again before finishing with right, down, and left. At the beginning of the sequence, it's recommended to run as far west (i.e., toward the camera) as possible to have enough time to avoid the downward waves.
As soon as the last blood wave is crossed, Drakan will reappear and sacrifice between 80 and 110 of his own hitpoints to launch four blood strikes at the player. These appear as red projectiles that will strike the player all at once. These will deal 80+ damage which will likely be fatal if not blocked with Protect from Magic. The player must have the prayer active before the projectiles reach them. If you find it difficult to notice Drakan when he appears, consider highlighting him as an NPC so he has a stronger outline to announce his arrival.
The player should then immediately switch back to Protect from Melee as Drakan will approach and issue a combo attack which, if dodged perfectly, will guarantee that the player deals 155 damage on their next hit. If the player succeeds at this, the blood wave sequences will end and normal combat will resume. If the player is not successful, the blood waves, red projectiles, and combo attack sequence will play out up to two more times, or three times total.
After the blood waves finish or are skipped, Drakan will return for combat until the next phase begins. For the first few minutes, Drakan will weave in magic attacks consisting of a single red projectile. The player must switch to Protect from Magic again to avoid taking up to 20 damage. Once the zero hitsplat appears, return to Protect from Melee. Around 1500 hitpoints Drakan will stop using his blood magic attack and focus on using his full combo attack again. You will know you're still in the blood magic phase if Drakan is using simple two or three hit combo attacks without the slam attack. Once the blood magic phase ends Drakan will start using four hit combo attacks with slams. As soon as this happens make sure you're in protect from melee and then switch back to your inventory tab to brew through any damage taken. Now is also a good time to reup your free super combat boost because this phase of the fight will last for 500 more hitpoints. The combo attack telegraph animation will run a little faster here so it's important not to complacently use the same timing you did for the attacks in phase one off muscle memory. Pay visual attention to Drakan and move when his red outline appears. Around 1250(?) hitpoints Drakan will add his wind up spear cleave attack from before to the rotation, but now the single red orb lunge he does after the AoE is two red orbs on the same side. Click a tile back twice on the opposite side to dodge them. In terms of meta-strategy it's important to make sure you can dodge a good portion of the attacks in this phase, ideally at least half, so that you go into phase three with a good number of brews and the blood pot remaining.
Phase 3
After dropping below 900 hitpoints, Drakan will vanish from the arena once more. Blood pools will spawn around the arena and lightning will also randomly strike, preceded by a circular, dark grey shadow. If you step onto a blood pool, you will take heavy damage and your overhead protection prayer will be disabled. Lightning will also disable overhead prayers. Initially during this phase, Drakan cannot be targeted, and will appear at inconsistent intervals to deliver a 3x5 AoE spear lunge attack. These attacks will be preceded by him appearing briefly three times facing the player around a 90-degree rotation, with the final direction marking the direction of his attack. For example he might briefly appear in the east and then swing around 90 degrees to attack you from the north. This attack will deal 20-30 damage, but is avoidable by moving 2-5 tiles perpendicular to his attack direction, for example by moving east or west if the attack is coming from the north. To consistently hit this dodge, stand mostly still while minding the lightning bolts, and immediately click in the direction where Drakan first appears. If you have trouble processing Drakan's initial spawn location it's okay, there's a slight delay before the attack and you can still dodge by clicking a few tiles away in a direction that will move you out of Drakan's line of sight. Your character will perform a roll that dodges the attack. This seems to not work if you click too far away from your current position, so be mindful to click 2-5 tiles away from where you're currently standing. If you fail the dodge eat before he appears again. Keep in mind that if Drakan appears while you're moving it will be almost impossible to dodge his attack, so you want to move the minimal amount necessary to dodge the lightning and blood pools. He will perform this lunge four times consecutively before reappearing. Unlike the blood waves, some diagonal movement is tolerated for a successful dodge. Normal pathing mechanics do not apply when dodging the attacks, as the player can move more than two tiles at once. So if there is a blood pool two tiles away from the player in the direction they must dodge, they can click beyond the blood pool and still be safe.
Similarly to the end of each blood wave sequence, following the four lunges Drakan will reappear and sacrifice some of his health to again launch four enhanced blood strikes which must be blocked with Protect from Magic. Just as before, Drakan will use a combo attack to follow up. If dodged perfectly, the player will deal a guaranteed 80 damage on the next hit. Unlike the blood wave phase, successful dodges and punish hits after the blood strikes will not skip the remaining lunges. In total, Drakan will perform the lunge sequence followed by the blood strikes three times
When all three of his lunge attack sequences are finished, Drakan will resume normal combat at a slightly faster tempo. Unlike the beginning of phase 2, he will not issue any single blood strikes which require flicking to Protect from Magic, but the blood pools and random lightning strikes will persist and continue to deal damage and disable overhead prayer, so the player must be mindful of them as they dodge. Always ensure Protect from Melee is enabled before Drakan attacks again. Because of the high damage that may be incurred from dropping prayer, it is recommended to save the jar of congealed blood for this phase to heal back to full health in an emergency. If you're on track to win you should still have several brews remaining by this stage. If you and Lowerniel each hit 0 hitpoints at the same time, it will count as your victory. You will reappear in the castle - simply walk through the northern door to activate the cutscene.
The sun rises
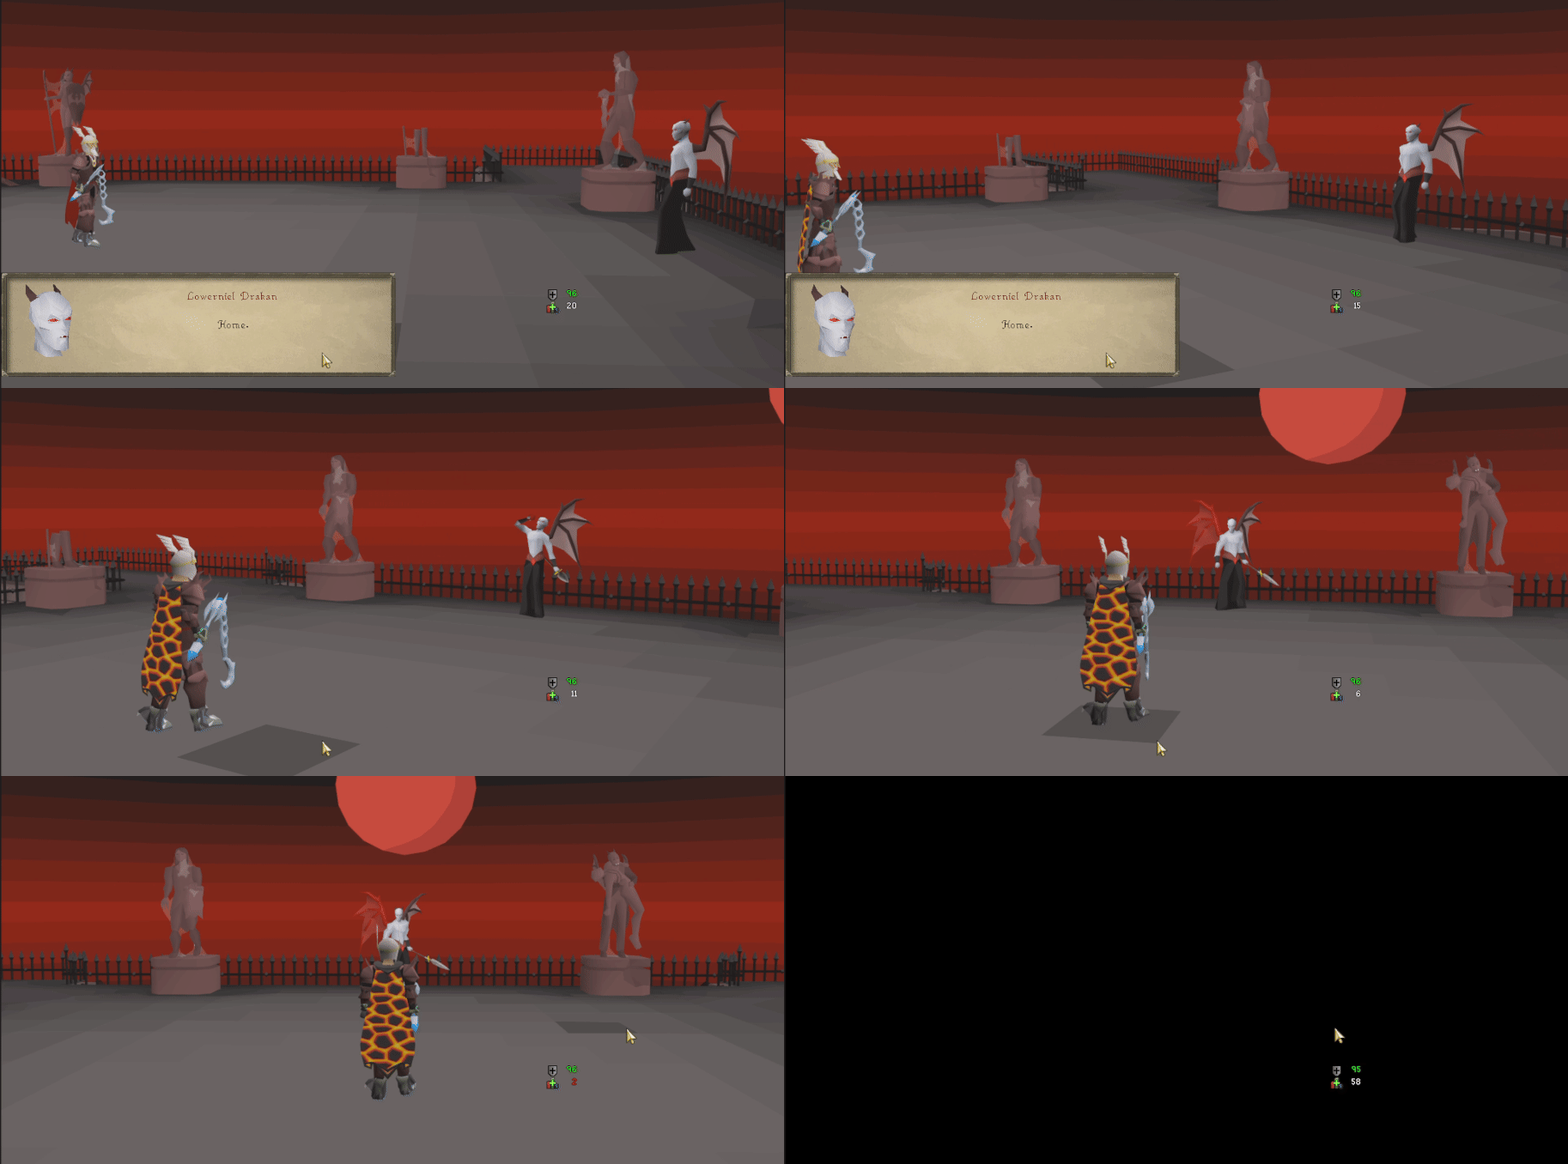
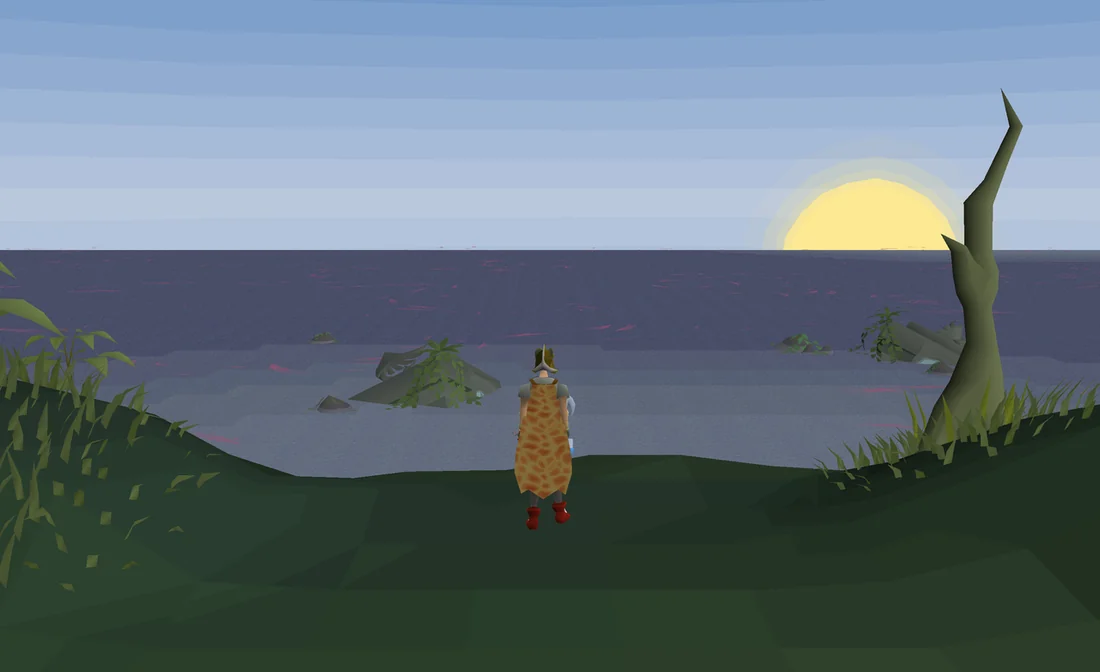
Once Lowerniel hits 0 hitpoints, a cutscene will trigger in which he stumbles away from you in pain, looking and reaching out to the blood moon before collapsing and dying from his injuries. You will take the Sunspear from his corpse and return to Gielinor, where Safalaan's wyrd transformation has fully completed. Safalaan will beg you and Efaritay to kill him, but both of you refuse, and Safalaan will relent, thanking both of you for not abandoning and giving up on him. You will offer the Sunspear back to Efaritay, who refuses and allows you to keep it, as she is tired of fighting, while she herself decides to oversee her son's affliction with potions and rituals. As the two leave, you will stare out into the ocean as a new sun rises in the horizon, an indicator that all of your efforts in saving Morytania have not gone to waste.
Use this when you already know the route. The full walkthrough above includes explanations and diagrams.
Starting off
Head to the Icyene Graveyard, accessed via the boat in either southern Burgh de Rott, Meiyerditch, or Slepe. Players can also use the Drakan's medallion teleport to Ver Sinhaza, exit into Meiyerditch, then run to the boat in the south-western corner of the area.
Bring 40,000 coins with you if you do not have a flail already.
Speak to Sarius Guile.
Say: Yes.
Head to the hideout under Old Man Ral's house in Meiyerditch Via the Trap Door Located In the House. ()
Search the nearby chest to obtain a vyre noble outfit if you forgot to bring it.
Wear the vyre noble outfit, then inspect the makeshift shrine for a cutscene.
Talk to Ivan Strom.
Say: So you're ready to go to Darkmeyer? → I'm ready.
Prepare for a fight. The fight is a battle of endurance, you are required to protect yourself and Ivan from multiple vyrewatch and vyrewatch sentinels for several minutes.
Pray Protect from Melee, and attack all the vyrewatch to keep them from damaging Ivan.
You can heal Ivan with food when he is low health.
Acidic bloodveld will spawn which you must kill before they reach Ivan.
You will initially be attacked by 3 vyrewatch. If you kill one, another will spawn. As the fight progresses, a magic-using vyrewatch sentinel will spawn, with two further sentinels spawning throughout the encounter.
Talk to Ivan afterwards, and he'll tell you to meet up at the church in Slepe.
The Truth Hurtz
Travel to Slepe, either via Drakan's medallion teleport to Slepe, or if that is not unlocked, teleport to Ver Sinhaza and run north to Slepe.
Talk to Ivan Strom in Slepe, just west of the church.
Say: Let's get going.
Go into the Slepe pub and ask the bartender Roy about a friend.
Say: We're looking for a friend of ours.
Enter the Sisterhood Sanctuary through the stairs south of the church's graveyard.
Head north until reaching Kroy's laboratory, then climb the ladder to enter Crombwick Manor.
Help Veliaf Hurtz kill the five vyrewatches.
Talk to Veliaf.
Make your way to Drezel in Paterdomus Temple, which can be quickly reached via fairy ring (CKS).
Talk to Ivan, read the squire's journal, then talk to Ivan again.
Head west through the mausoleum and up to the temple, then kill all the monks of Zamorak.
Head upstairs and talk to Ivan.
Search through the bookcases for six books. Place them books on the plinths in the following order (from north to south):
Pious proceedings
The Life of Friar
Scruffy notebook
From Misthalin to Morytania
Sarl's journal
Essiandar's notes
Talk to Ivan to obtain Ivandis' writings, then read it.
Talk with him again to return to the mausoleum.
Stock up on supplies for a fight with multiple vyrewatches and sentinels.
When ready, return to Paterdomus and talk to Ivan or Veliaf.
Say: Lead the way.
Mine away the blockage immediately south of Ivan.
Say: Yes. If you do not have a pickaxe, talk to Ivan for a bronze pickaxe.
Enter the blockage and head north-east through the tunnel.
There will be a few vyrewatches and vyrewatch sentinels to defeat inside. Focus on the sentinels first while praying protect from magic. They will occasionally spawn a blood orb that will do passive damage.
You can lure the vyrewatches into the blood orb to deal massive damage. Be sure to stay at least two tiles away from the orbs, or you will take damage as well.
If you die or teleport out of the fight, you can find it again by going into the Myreque Hideout, south of Canifis, then going through the closest hole after the hidden door. If you die, the grave is in Ivandis' Tomb.
Talk to Ivan.
Head north through the entry.
Head north-west and climb up either of the stairs.
Head east and pray to the shrine to unlock a teleport back here with Drakan's medallion.
Enter the portal at the centre of the room.
Escape from Castle Drakan
Mysterious jerky, a high-healing food.
Smelly kebab, a fast food.
Foul chunky potions, a mix of super restore and prayer regeneration potions.
Putrid sticky potions, the equivalent of stamina potions.
Rank frothy potions, the equivalent of super combat potion.
Rancid slimy potions, similar to a Saradomin brew but drains the same stats by 1 instead.
Jars of congealed blood, which immediately restores all Hitpoints and Prayer. Although only one of these may be taken from the supply chest at a time, more can be picked up throughout the castle regardless of how many you already have.
Fixing the clocks
With (A) as the starting point on the map, Pick up and read the poem scroll on the table just south (B).
Go through the east door and then search the throne (C), which will reveal four levers in the busts to the east.
From north to south, pull the 3rd, 4th, 1st, and 2nd busts in that order
Search the throne again for the half moon key.
Go through the south door, then search the shelves (D) to the south-west to find the small clock hand.
Go through the doors to the north, then west, to return to the dining room.
Go through the west door using the half moon key to arrive in a corridor. Walk around the traps to avoid them.
Optionally, search the crate in the corridor to find mysterious jerky.
Go through the west door. Quickly search the crate for a tinderbox (E), then climb up the stairs.
Take the explosive barrel (F), then enter the south door. Search the crate for a Drakan emblem (G), then exit the room.
Go through the east door, then through the north door.
From the first floor of the main entrance hall, go through either of the north doors.
Go through the north unmarked door (not the crescent moon door), then head to the south door (next to empty receptacle) while avoiding traps.
Place the Drakan emblem on the receptacle (H), then enter. Search the crate in the north-west corner for a large clock hand (I).
Exit the room, then return through the western door while avoiding traps.
To the east of the crescent moon door is a lever (J); pull it to open a portal.
Enter the portal which will teleport you to (K), then use the south door, then the west door, to return to the dining room fireplace (L)
Place the small hand on the western grandfather clock. Set the big hand to 11, and the small hand to 9.
Place the large hand on the eastern grandfather clock. Set the big hand to 12, and the small hand to 4.
Inspect the fireplace and select "search" to receive a second Drakan emblem.
Crescent moon key
Starting from (A), go through the west door, then north door, then up the stairs, then enter either north door.
Go through the north door next to the crescent moon door, then enter the south door (D).
Place the Drakan emblem on the receptacle next to the east door (E).
Enter the east door, then use the explosive barrel on the cracked wall to the south-east (C) to open a hole.
Enter the hole, run past or kill the venator.
Take the emblem out from the receptacle by the north door (F).
Use the hole in wall again.
Use the west door. Take the emblem out from the door you just exited (E).
Enter the north door, and take the emblem out from the door you just exited (D). You should have three emblems.
Place a Drakan emblem on the receptacle next to the east door (B), then enter.
Place a Drakan emblem on the door to the north, then enter.
Take the ornate skull off the table (G). Leave, and remove the emblem from the receptacle.
Climb down the stairs (H).
While avoiding the trap in the corridor, place a Drakan emblem on the receptacle next to the only door in the corridor (I), then enter.
Place a Drakan emblem on the receptacle next to the west door (J), then enter to find Veliaf. Talk to him.
Search the chest on the northern wall (K) and enter the code: right, down, right, left, left. Unlocking the chest gives the crescent moon key, which can be used to unlock crescent moon doors.
The code to the chest is based on the order of the vampyres listed on the southern plaque, and the direction each is pointing in their respective painting.
New moon key
From the chest room (A), go through the west door, then the south-westernmost door to enter a laboratory (B). Kill all the sanguidae.
Take the syringe barrel from the table.
Search the crate to the south-east for a venator stomach.
Inspect the sink to the west, and remove the sink plug.
Enter the north-west door (C). Use the sink plug on the sink, then turn the tap on when prompted.
Take the broken pipe from the sink. Use it on the nearby cabinet to receive a sharp knife.
Search the crate near the sink for the syringe plunger.
Return to the laboratory (B) through the south door.
Use the sharp knife on the venator corpse to receive a pair of tongs.
Use the tongs on the sink for a syringe needle. Use one of the syringe parts on another to assemble an empty syringe.
Use the empty syringe on the venator stomach to receive a full syringe.
Use the full syringe on the chest to receive a left crest half.
From the laboratory, exit through the north-east crescent moon door, then go through the nearest door to return to the main hall.
Climb down the stairs (D), then enter the first door on the south side (E). Deal with the venator; pray Protect from Melee or Missiles depending on distance, and turn it off when it is about to screech to avoid damage.
Search the weapons rack at the east end of the room.
The statues must be mirrored on the north and south sides of the rooms. From east to west, they should be holding battleaxes, spears, maces, and swords.
Search the chest to receive a right crest half. Combine it with the left to create the full crest.
Exit the basement through the north-west door, then up the stairs to the west, then from the portal room, go through the doors to the south-east, east, then north.
Use the full crest on the fireplace. Inspect the fireplace and select "search" to receive a new moon key.
Gilded key
From the fireplace, return to the main hall by going through the south, west, then north doors.
Climb down the stairs to the basement, then enter the either of the doors on the north side (A) to initiate a cutscene where you free Safalaan and Vanescula.
Pick up the gibbous moon key.
Leave the jail room through either south door, climb up the stairs to the main hall, then climb up the stairs again to the first floor.
Enter the south-east door (the gibbous moon door).
Go through the east, south, then south-east doors. Search the crate for an ornate knife (B).
Pull the lever on the western wall. Enter the portal, teleporting to (C). Then go through the north door.
Enter the gibbous moon door on the eastern wall. Kill the venator to prevent being disrupted from solving the room puzzle or just run past it.
Light the fireplace, then search the chest (D) just east for a lockbox.
Open the lockbox with the code (from left to right): the ⠿ , the ᴟ , and symbol that looks like ⁘ , to get a fancy gem.
The hint for this is obtained by inspecting the venator head for the code "426". The 4 banners in the room have the first symbol. The 2 shields have the second symbol. Lastly, the 6 braziers have the third symbol.
Enter the south-west door (E) by inputting the passcode "SPEAR".
The hint for the south-west door's passcode is obtained by inspecting the ancestral dagger and reading the grid note, both of which are in the room.
One of the bookcases (F) will be searchable; do so for a mysterious book.
Open the book for another fancy gem, then leave the room.
Use both fancy gems on the mounted venator head to the east (G).
Search the head for an ornate hourglass, then go through the west door.
Use the ornate skull, hourglass, and knife on the display case to the west (H). The order does not matter.
Search the display case for a gilded key.
Full moon key
From the display case, climb down the staircase, then through the north door - beware of Sanguidae, quickly go through the west door after entering.
After this west door (the gilded door), go through the north-west door.
Kill the venator in the room, then talk to Ivan.
Search the northern bookcase for a gilded book.
Search the south-eastern bookcase for a vampyre book.
Use the gilded book on the western gilded bookcase, then inspect the books when prompted.
Rearrange the symbols of the Vampyric Houses in alphabetical order.
Enter the secret passage to the south. Take the full moon key from the table.
Solid key
Enter the east door, then the east gilded door.
Enter the unmarked north door.
Enter the easternmost door, while avoiding the traps.
Climb down the stairs, then run west and enter the door.
Enter the east full moon door. Kill the webbed-winged crows if necessary.
Search the north-west shelves and take one of each potion: cloudy grey, weightless black, thick red, and cold bluish-white.
Based on the inscriptions on the basin, place the potions in the following basins:
Cloudy grey: south-west (To rise without wings and choke all who are there.)
Weightless black: north-east (To be a faithful follower that flees the light.)
Thick red: north-west (To be a river that runs through the body's land.)
Cold bluish-white: south-east (To crack with no voice and slip with no legs.)
Search the altar for an ancient symbol.
Enter the east door, then pull the lever in the north-west corner.
Enter the portal, then go through the south door.
Go through the east, east, south-east, then north doors.
Search the crate by the window for an ancient shield.
Combine the shield and symbol to create the shield with symbol.
Go through the south, west, and north doors, then head upstairs.
Go through the south-east (the southern door on the eastern wall) gibbous moon door, then through the south-east full moon door.
Use the shield on the empty mount at the southern wall, then search it for a solid key.
Destroying the stockpile
Go through the north and west doors, then go through the east full moon door.
Enter the solid door directly across to reach a laboratory.
Search the shelves to the north-west. Take 2 vials of water, 3 vials of blood, and 3 pure essence.
Follow the next steps to place a chemical vial onto the basin until the panel reads 53 HP (haemalchemic potential).
Use a vial of blood and pure essence on the refiner to receive a chemical vial measuring 17 HP. Do this twice.
Use a vial of blood and vial of water on the refiner for a vial measuring 13 HP.
Use a pure essence and vial of water on the refiner for a vial measuring 6 HP.
Use all four chemical vials on the basin.
Go through the unlocked north door and destroy the blood stockpile.
Blood Hunt
Pick up the crank wheel in the small building 3 houses east of the prayer altar.
Go to the building north of the altar and operate the crank base located just outside the house. After you operate the crank, Drakan will start chasing you. Click the crank several times to unlock the door.
Enter the house and search the bookshelf for a dusty book, then read it to retrieve the Vitur key.
Exit and head to the north-easternmost house with the Vitur door.
Search the shed input the passcode "TOOLS" for a pair of bolt cutters.
Head to the building east of the altar to and pick up the tooth half of key from the table.
Head to the building directly south of the well ( map icon). Use the bolt cutters on the chained doors on the north side.
Pick up the loop half of key.
Use the loop and tooth halves together to obtain a Myrmel key.
Use the Myrmel key to enter the building north-east of the well ( map icon), and take the Bucket in the back left corner. Use the use Bucket on the well, then go back inside the Myrmel house and use the Bucket of water on the Northern barrel to get the Shadum key.
Use the Shadum key on the house south-west of Ivan and the group, then pick up the trapdoor key on the crate.
Enter the bank directly south-east of the red fountain to the west and operate the crank (spam click the crank) to open the gate.
Enter the trapdoor to arrive in the house with the altar.
Open the chest to the west with the passcode "35158" to receive the Jovkai key.
Enter the house with the Jovkai door ( map icon) to find the old cog on a crate.
Once you leave this house, Drakan will start pursuing the player at running speed, so wait until he is as far from you as possible before rushing back to Ivan and the group. If you teleport out, you'll need to get the old cog again.
Take some supplies from Ivan if needed, as you'll be facing Drakan.
Talk to Veliaf or Vanescula to initiate a cutscene.
Fleeing Through the Woods
After the cutscene, you will be fighting Drakan. You will be assisted by both Vanescula and Veliaf, but don't expect them to deal a lot of damage.
Alongside melee attacks, Drakan will frequently use spear lunges that are preceded by a visual cue. The timing of this is precise and so requires tick perfect movements to avoid damage.
For a detailed breakdown of the fight, see here.
You must continue dodging his attacks until you are finally able to damage him.
Resupply at the tent if needed after your encounter with Drakan. You must use the escape option to access this tent. You can always escape and return here, and you'll respawn in this area if you die.
Enter the west darkwood trees.
Two ancient feral vyres will spawn and attack with melee. When fighting multiple of them at once, one will swap places with the other and begin healing, whilst forcing you to attack the vyre that took its place. Simply switch targets to resume attacking the initial vyre.
Kill the additional two vyres that spawn, then proceed to the next area.
To fell the darkwood trees blocking your path, they must be chopped from two different sides; you may need to jump over the tree stumps multiple times from different sides in order to reach another side of a tree.
A bronze axe can be taken from the nearby stump.
Occasionally, ticks may crawl into your inventory and begin dealing 1 damage in fixed intervals; to remove them, simply find the tick in your inventory and click on it.
Optionally, you may chop one of the darkwood trees at the southern end of the area to receive a rotten diary.
Chop your way until you reach the north-east corner of the area, from which you can enter the next part of the forest.
To avoid the maxilla beasts, you must disable run and walk along the path until you reach the cave. If you are running or are too close to them, they will deal 30-50 damage.
Head south-east and enter the cave.
Follow the path north and enter the Exit.
Waves of nylocas will spawn from two corners. They behave the same way as their Theatre equivalents, becoming immune to attacks if attacked with the wrong style (melee against white, ranged against green), and exploding if left alone long enough.
There are throwable spines on the ground, so there is no need to re-gear for range. You can also harvest the dead venator for more spines if required.
It is recommended to leave and return with fast hitting weapons, such as the toxic blowpipe and event rpg, if players are having trouble making it through this section.
After defeating all the nylocas enter the darkwood trees to the north.
Stand behind each of the three blood serpents and "wrangle" them to collect them. Catching them from the front will cause them to attack for 5 poison damage.
Use three dead blood serpents on each other to make a serpent rope.
Use the serpent rope on the long branched tree to the south-east to progress.
Talk to Efaritay, then leave the palace via the northern doors and pick amitire leaves from the amitire plant east of the entrance.
Return to the palace. Search the shelves next to the sink (south of Efaritay) for a bowl. Fill it with water.
Search the cupboard by the western wall for a potato and raw impaler meat.
Use the bowl of water on the potato.
Cook the impaler meat at the range, then use the incomplete stew on the cooked meat.
Cook the stew, then use the leaves on it to create an amitire stew.
Talk to Efaritay, then use the stew on Safalaan.
Talk to Efaritay again until you receive some hallowed marks.
Free up seven inventory spaces, then head to the east side of the palace.
Talk to Ivan or Sarei.
Take all three tools from the workbench.
Search the nearby crates for blisterwood logs and a blessed silver sickle.
Search the chests in the room for a diamond and an enchant diamond tablet.
Use the items on the sickle in the following order: diamond, tablet, logs.
Create the hallowed flail at the anvil. The blisterwood flail must be present in the inventory.
Using a knife on blisterwood logs create blisterwood stakes
Make your way downstairs, then talk to Veliaf and then Vanescula. Talk with Veliaf again.
Go back upstairs and talk to Sugadinti Vitur
Gear up. Take ~15 rancid slimy potions, ~5 foul chunky potions, and 1 rank frothy potion from the supplies table in the base. Combination foods can be helpful, but it can just be easier to spam rancid slimy potions since they do not deplete your stats significantly.
Go outside to the bridge to start the defence section.
You will need to defend the aranei from the incoming portals with the ballista. The portals will always be one-shot, but they will eventually begin to spawn faster than you can shoot them down.
The next defence section requires you to heal aranei and repair the pillars and windows.
You will fight off Drakan once again. This time, the aranei and Efaritay will help you, but expect to pull your weight.
Alongside the spear lunges from the first encounter, Lowerniel will begin using cleaves that land as a 2x3 AoE in front of and behind him. Efaritay will occasionally heal you and the aranei, and you can always grab more supplies from the supply table if you die.
Once Drakan is at 58% health, a cutscene will play.
Complete the dialogue at Burgh de Rott after the cutscene.
Teleport to Ver Sinhaza using Drakan's medallion.
Gear up for a wave based encounter against waves of nylocas, the Maiden of Sugadinti, and the Nylocas Vasilias. It is recommended to bring your strongest melee weapon, as well as fast weapons for each style for ease of completion.
The rooms are significantly easier than during A Night at the Theatre, so full gear swaps are not necessary, but can be helpful when fighting the Nylocas Vasilias.
Talk to Sugadinti just outside the notice board to begin the encounter.
Wave 1 - Nylocas (range, melee, and mage)
Wave 2 - The Maiden of Sugadinti
Wave 3 - Repeat of wave 1
Wave 4 - Nylocas Vasilias
Make your way to Burgh de Rott. Gear up for a melee-based fight with the hallowed flail.
Head to the ruined building to the north-east to find Ivan and Veliaf. ()
Talk to Veliaf and enter the nearby entry
You will fight the wyrd. He will knock back the player with every punch, so ensure there is space behind you.
The wyrd attacks in a repeating cycle with 2 melee attacks, a screech, another 2 melee attacks, another screech, then a double slam. This cycle repeats until around 60% health, where he will sometimes use a bloody screech in place of a regular screech. See the clips below for a demonstration.
Once the wyrd is at 10% health, a cutscene will play.
Night of the Blood Moon
Climb over the broken fence
Follow the bloody trail
Inspect the fence
Exit the Burgh de Rott hideout and gear up at the bank for another fight against Drakan.
When ready, talk to Sugadinti or Ivan to initiate a cutscene.
This fight is arguably easier than the previous with the assistance from all your allies, but you will still need to pull your weight. You will receive substantially more help, with Efaritay and Ivan both healing you periodically.
The mechanics for this fight are the same as before; however, the blood swipes will now take place three times, and Drakan will begin firing an additional orb after every special attack.
If you die or leave the fight, you can restart the fight by walking through the Drakan castle gates.
Once Drakan reaches ~30% (900hp) of his health, the fight will be over.
The Blood Moon Falls
Talk to Ivan after the cutscene ends.
Talk to Sugadinti
Travel to the Icyene Graveyard
Talk to Efaritay
Enter the portal to Vampyrium
Gear up at the supply chest on the north wall before starting the fight.
The final fight against Drakan has three distinct phases; for a detailed breakdown of the fight, see here.
Drakan can now use a four-attack spear combo once he is below 2,700 health, which also incorporates the slam attack.
Drakan will start phase 2 of the fight with blood waves, and can squeeze in magic attacks alongside his melee attacks.
Drakan will start phase 3 of the fight with spear dashes.
After defeating Drakan, finish the cutscene to complete the quest.
QUEST COMPLETE
Rewards
Access to Vampyrium
Access to the Maggot King boss, bloodwood trees, seeking arrows, leechfin fishing, stymphike and letvek hunting, and venator slaying.
A tome of experience, granting 30,000 experience to any skill over level 70. This reward can be utilised six times and may be used for the same skill.
This tome can be destroyed and reclaimed from Efaritay Hallow at Castle Drakan at a future time if desired
Hallowed flail
Sunspear
A new fermenting vat for brewing, located in the Burgh de Rott Myreque Hideout. The pub itself is restored, and is run by Veliaf Hurtz.
As the monks of Zamorak are cleared out of Paterdomus during the quest, Ivan now resides there. His role of selling vampyrebane weapons is taken over by Efaritay.
The vyres of Morytania will now be tolerant to the player, and Darkmeyer services can be used without utilising a vyre noble outfit. This is unlocked before the final fight with Lowerniel.
The Vyrewatch can bring players to the Meiyerditch mine upon request, and players can leave without needing to mine 15 daeyalt ore or wearing the outfit to leave the mines.
Vyrewatch Sentinels will no longer be aggressive to the player by default. To reactivate their aggression, speak to the werewolf that was hired by Mischa Myrmel, in the house due south of the Drakan's Medallion teleport. He will offer garlic cocktails for 20 coins each; when one is in the player's inventory, vyres will become aggressive to them. These can be bought before the final Drakan fight.
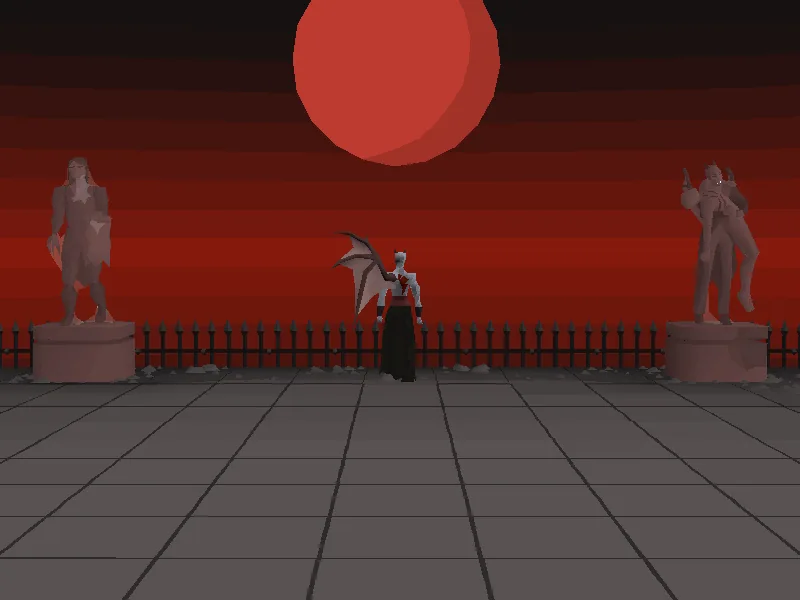
 4
4