Glough, the war criminal set on eradicating humans and overthrowing Gielinor, has escaped the watch of the Grand Tree gnomes. With a history of leaving large-scale conflicts and warfare in his wake, Glough must be tracked down and stopped. King Narnode Shareen needs your help.
Follow the chapters below. Click any screenshot or diagram to view it at full size.
01
Chapter I
Warning:Ape Atoll and its underground dungeons are very dangerous. Always be sure to have food, anti-poison or superantipoison potions, and an emergency teleport when travelling through the island and be prepared to use protection prayers.
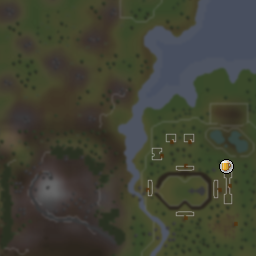
To start the quest, speak to King Narnode Shareen. He will tell you that Glough has escaped, and you will be instructed to search for clues of his whereabouts, starting with his house. Glough's house is located just south-east of the Grand Tree. Climb up the ladder and then climb up the tree on the other side of the house. Now, right click the tree branch, and select 'Investigate'. You will receive a handkerchief that has the initials 'A.A.' embroidered on it.
You will then need to speak to his girlfriend Anita, located in her house up the most north-western staircase in the Gnome Stronghold. She will be in tears. Ask her what's wrong, and she will begin telling you that she is worried Glough may be seeing another woman. Tell her that Glough might be in trouble, and that you may be able to help her. She tells you that she heard whispering upstairs in his house but couldn't reach the higher level.
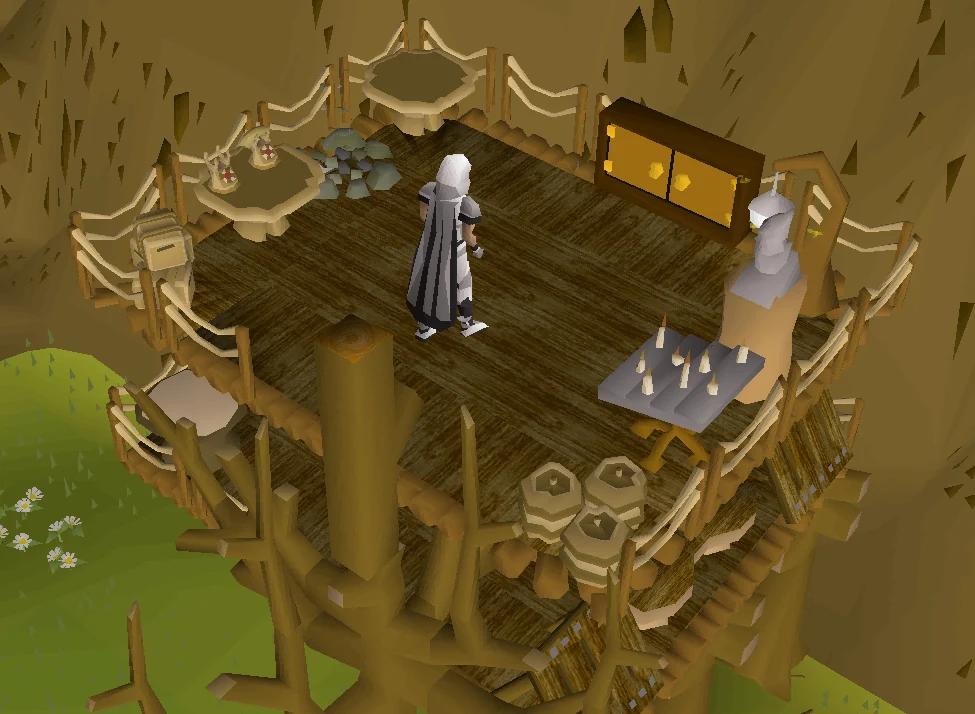
Return to Glough's house, and climb up the tree twice to reach the additional level of his house. Investigate the gnome statue to activate a hidden switch. Now, search the cupboard to receive a book of spyology. Read through it — the book mentions a method to reveal text on a document encrypted with spycraft. Search the crates to the north-west to receive a brush, and investigate the fire remains to receive a mysterious note. Follow these steps in order to decrypt the note:
Use your pestle and mortar on the lemon to apply it to the note. Caution, left clicking the lemon first will consume it.
If you don't already have the translation book, return to King Narnode, and talk to him to obtain the book. Use the book on the note before speaking to the king again. (You may already have this book in your bank from The Grand Tree quest.) He will suggest you speak to the book's author, who is Anita. Go back to her, and ask her to translate it for you. She will give you a translated note. Read it, and return to King Narnode, who discovers it was Assistant Le Smith who helped Glough escape.
Talk to Assistant Lori south of Glough's tree and ask who he is. He will tell you that he is Le Smith's replacement, and that he does not know what happened to him, and recommends that you ask Auguste about it. Fly to Entrana using the balloon. This requires one regular log. You must bank all of your weapons and armour at this point, as you cannot bring them to Entrana. If you wish to save time getting back to the Gnome Stronghold, bring one magic log with you as well so that you can return quickly via balloon. Talk to Auguste who will explain that Le Smith was lost while attempting to travel to Ape Atoll via air balloon.
Return to King Narnode, who will tell you to travel to Ape Atoll, to speak with Garkor.
Make your way to Ape Atoll (Fairy ringCLR). Equip your M'speak amulet and ninja monkey greegree or ancient gorilla greegree and head to Garkor on the eastern side of the island. Speak to Garkor who will tell you to speak to King Awowogei. Talk with Awowogei, and ask him about military plans. He will explain that he will not speak to anyone other than Kruk. Report back to Garkor. You will need to find and kill Kruk to create a greegree from his remains to disguise yourself as him.
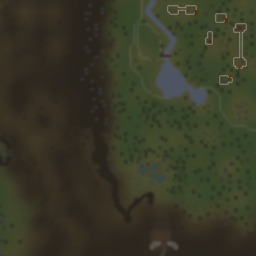
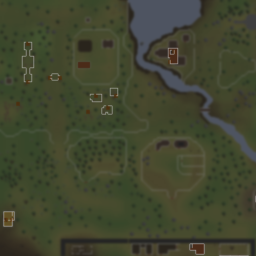
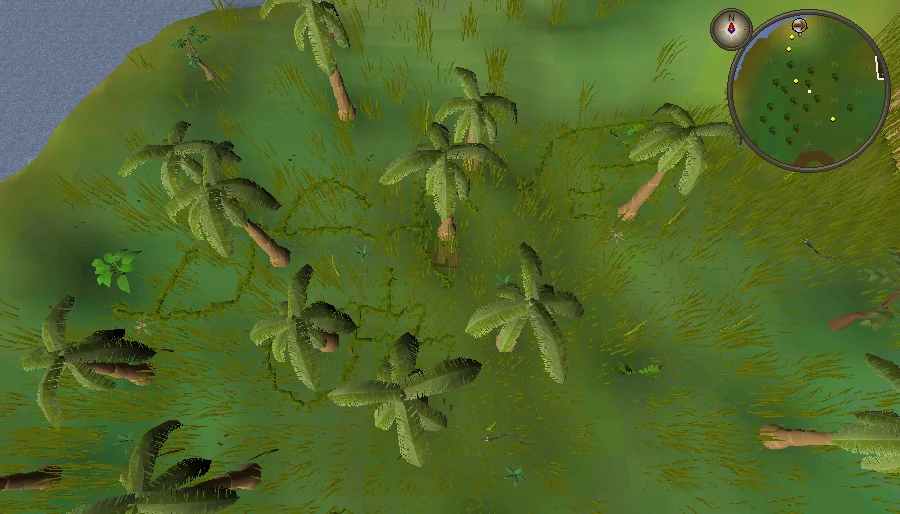
Head onto the hill west of the main gate to where the monkey archers are; one of them should have a talk option. Talk to the monkey, and ask him where Kruk is. He will tell you that he has been disappearing from his post a lot lately, and that he would start tracking him from the bottom of the hill. Head back down the hill, and you should see some footprints. Follow them to a trapdoor hidden in long grass, just south of the northern transport icon on the minimap.
Open the trapdoor and enter Kruk's Dungeon. The greegree will lose its effectiveness when you enter the cave and "wrench itself from your hands." If your inventory is full, the greegree will drop to the ground when you enter.Kruk is located beyond the monkeybars north of the entrance, but as the player cannot use them yet they will have to traverse one of two lengthy routes to Kruk.
Players with around level 70 Agility or higher are recommended to take this route, as it is less dangerous. However, players must be ready to activate the correct protection prayer quickly whenever they fail an obstacle, as they will fall to the lower floor filled with many hard-hitting monkeys - either maniacal monkeys or maniacal monkey archers, depending on where the player falls. Make sure to bring a light source, as the lower floor is dark.
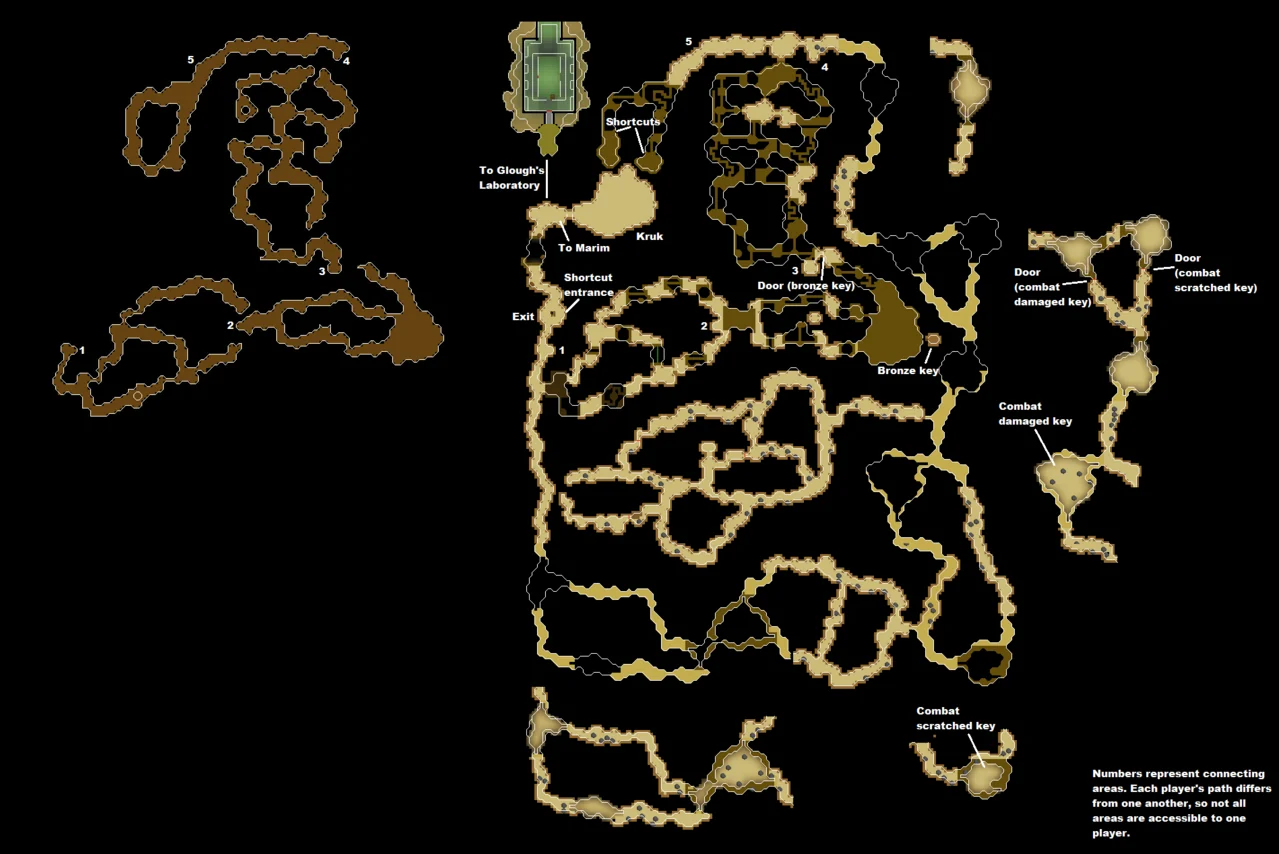
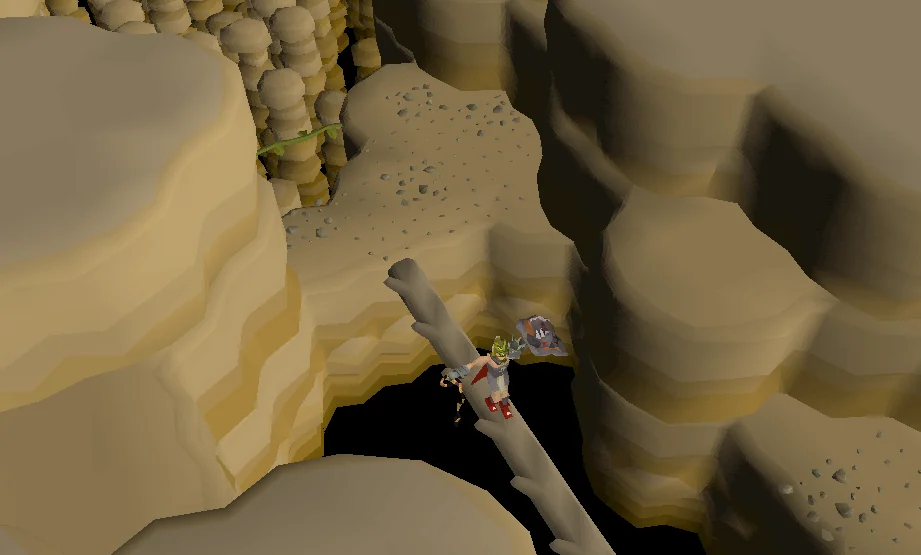
This section of the dungeon will consist of many agility obstacles. The overall layout is predetermined but there is only one correct path to take, which is randomized for each player. You will often have to find the correct route by trial and error. If, when failing an obstacle, the message Something about this route feels wrong. (or something similar) appears in the chatbox, then that path has a 100% fail rate for you. Whenever this occurs, remember which obstacle it occurred on and try another one next time. If "Tile highlighting" is enabled in the settings, you can mark tiles to indicate the correct path by using shift and right click.
There are five holes (labelled 1-5 on the map) to the lower level. When players fall and climb back up from the lower level, they will reappear at the last hole they passed, so they act similarly to checkpoints.
Follow this path:
To start the route, head south and then east from the entrance. If you fall to the lower level, use Protect from Melee immediately.
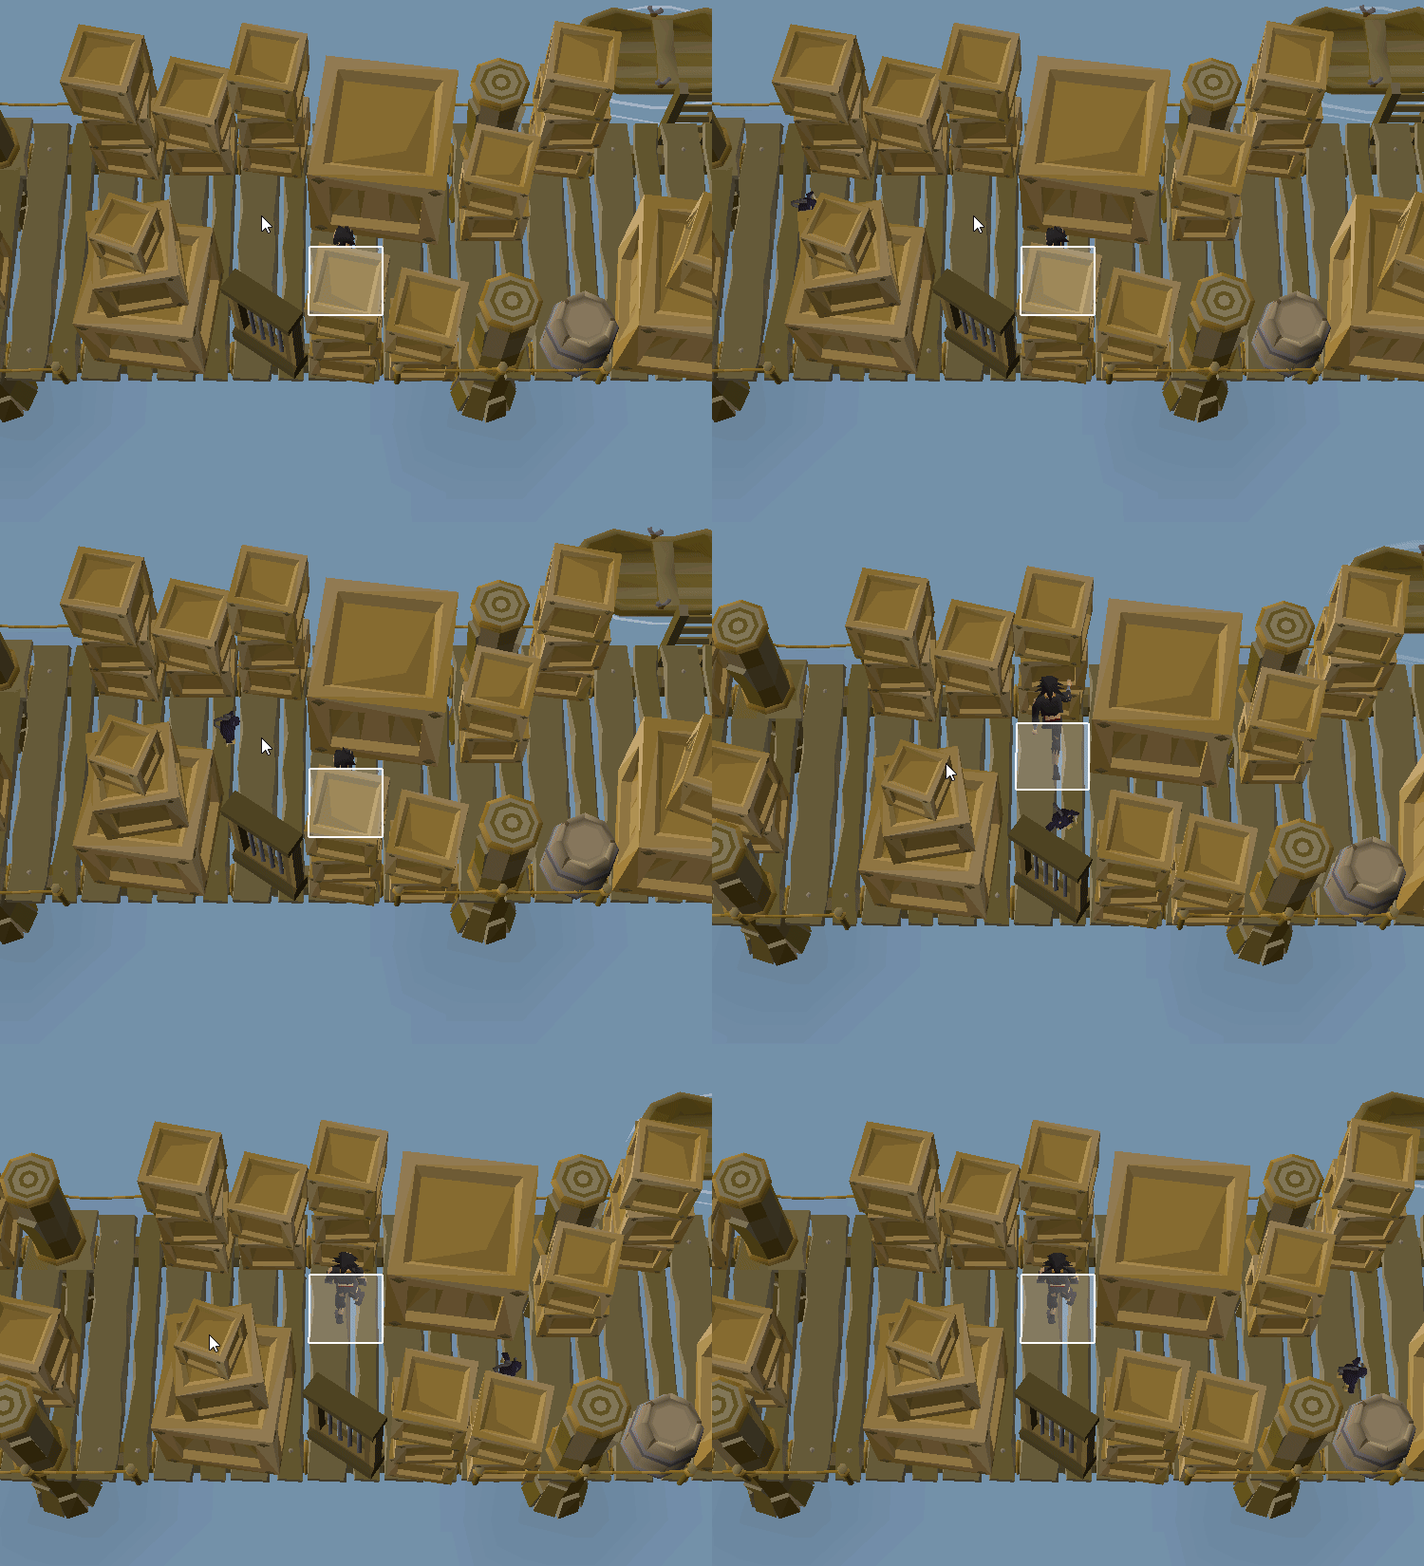
You will come across Dodgy ground. All you have to do is to follow the flat-looking parts of the ground, and avoid the parts with an "X" pattern, which the player will fall through.
Continue eastwards past the obstacles (towards Hole 2 on the map), using trial and error to determine the right path to take.
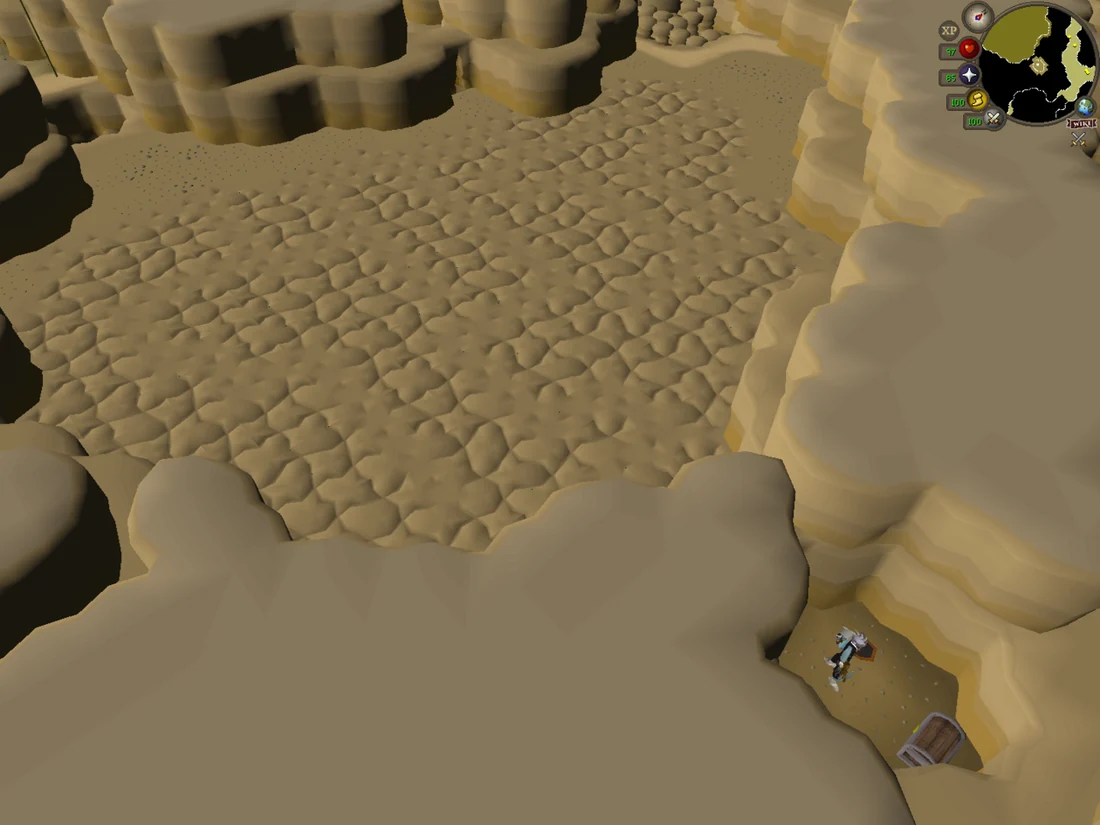
You will reach a huge room filled with dodgy ground. Carefully navigate to the crevice on the east side and enter it to find a chest. Unlock it (right-click) and search the chest to obtain the bronze key. Now navigate back over the dodgy ground to the north side of the room and unlock the door with the key (if you die or teleport out past this point, the door will not remain open so you will have to reobtain the key). You will arrive at Hole 3.
In the section after the door, use Protect from Missiles if you fall. The lower floor in this area also contains many dead ends, so it can be helpful to consult the map to avoid getting lost in it. Additionally, you will continue taking damage for a few ticks after exiting the lower floor if not praying. To progress, head northwards through the maze of obstacles. Note that the correct route through this area may be very long and circuitous, so it is important to remember exactly which obstacles you have failed on.
You will emerge at a corridor at the north end of the dungeon. Head west to Hole 5. If you fall here, use Protect from Melee. Note that there are falling rocks that deal damage, and some melee-using maniacal monkeys here, so pray melee until you pass them.
Navigate one last set of obstacles to the south-west. Near the end of this section, before the final dodgy ground, there is a strange wall (marked 'Shortcuts' on the map). Make sure to investigate this wall to open a shortcut to the entrance! Otherwise you may have to traverse the entire dungeon again. Past the final dodgy floor is Kruk's room.
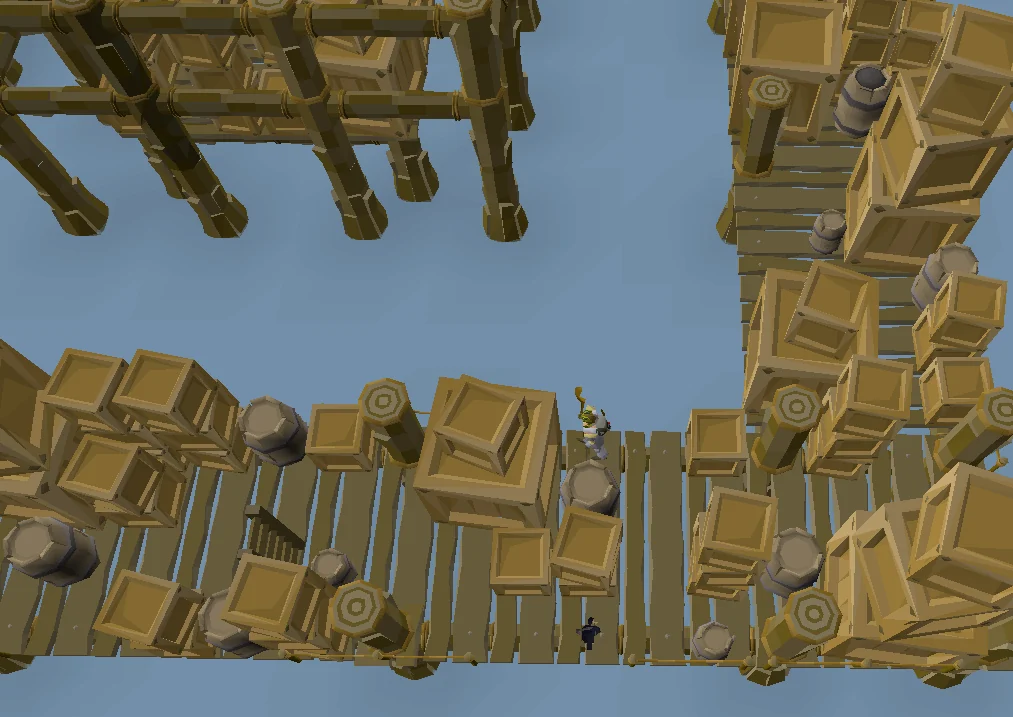
The location of the chest that possesses the bronze key Image credits →
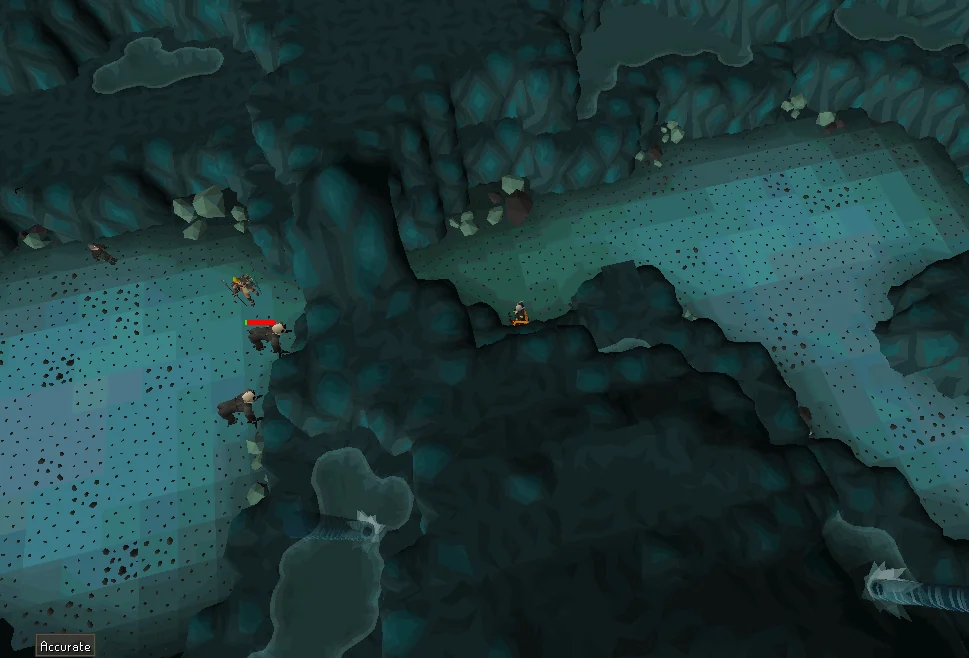
A player navigating through obstacles in Kruk's dungeon. Image credits →
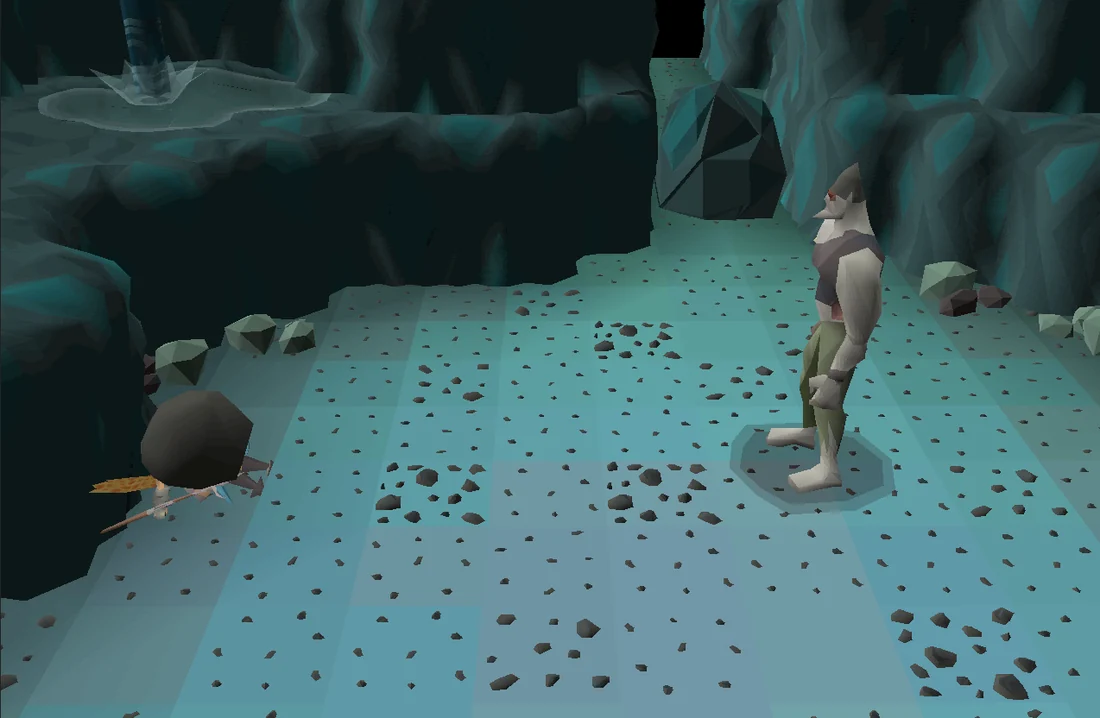
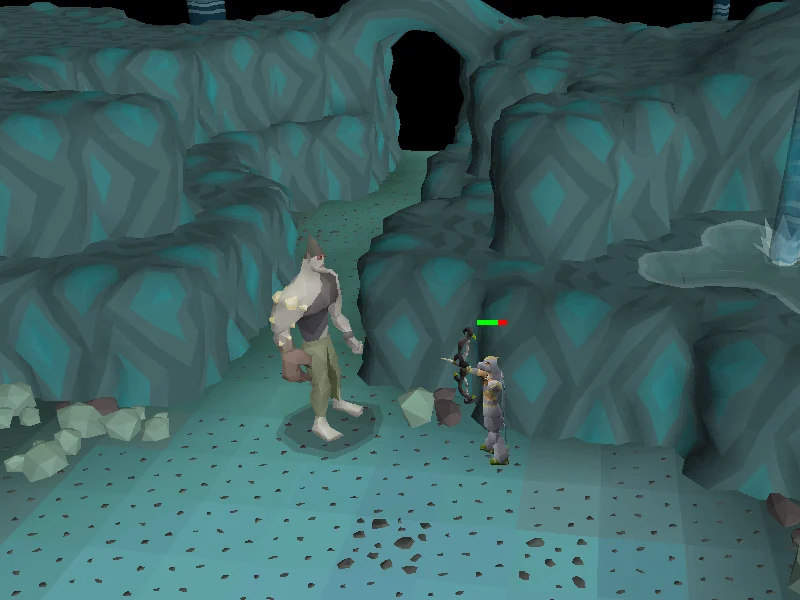
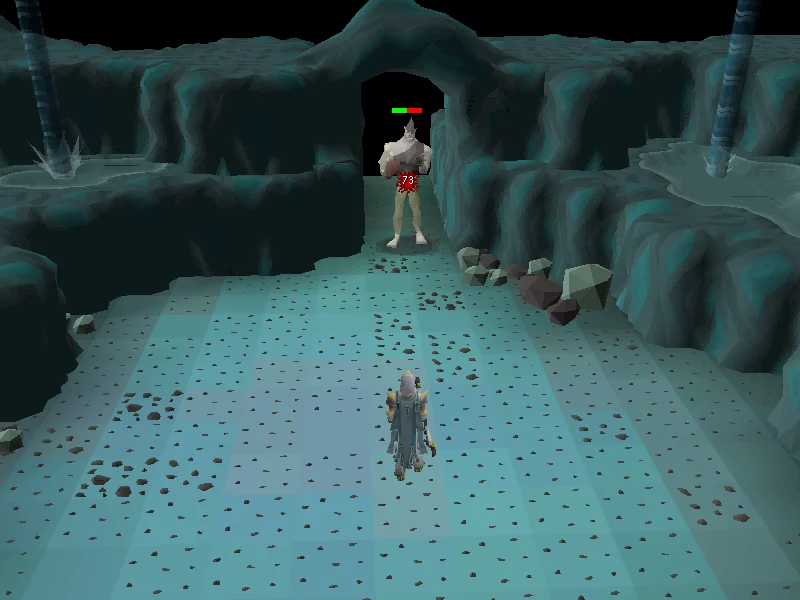
The dungeon is in an oval sort of shape, so it is pretty straightforward to navigate your way through it. The tunnels are all multi-combat. There are many aggressive monkeys, in addition to the odd scorpion or snake.
The monkeys can deal very high damage quickly, even with good tanking equipment. It is recommended to use Protect from Missiles as the monkey archers have a much longer range and deal just as much damage as the melee ones.
For your consumables if taking the tanking route, it is best to bring Saradomin brews to get as much healing as possible. Super restores are not needed unless you are planning to kill Kruk on the same run.
Runes for Blood Burst or Barrage are useful to heal off the maniacal monkeys if you need to.
To start the tanking route, head south from the entrance to the dungeon and head down some steps. Try to slash the web the east. If that doesn't work, slash the web to the south and head up the steps. Continue to make your way east through the dungeon slashing webs and mining rocks. After a while, you will be at a crossroads, one route heading north and another heading south-east. It is recommended players try the south-eastern route first. If you cannot slash this web, skip the next paragraph.
If you are able to slash through this web, search the two chests in this room that must be unlocked through their right-click option. Only one of the two chests will open, the other one will give a message indicating it can't be opened. Search this chest to receive a combat scratched key. Continue further east and then north until the path meets up with the alternate route. Continue reading after the next paragraph, where the two routes meet back up.
If you were unable to slash through the webs in the southern room, head into the northern (inner) route. This will lead you to a room containing two chests, of which only one can be unlocked using its right-click option; the other one will indicate it can't be opened through a message in the chat box. Search the opened chest to receive a combat damaged key. Slash the web to the east and meet up with the other route.
After meeting back up with the other route, continue north and pass through another big room. The route for the next section will be entirely determined by the key you obtained earlier. If you obtained a "combat scratched key", take the eastern route. If you obtained a "combat damaged key", take the western route.
There are some traps in this section that can be completely ignored if taking the correct route based on the key, by quickly running past them on the route. These traps are present in this section:
The dart traps can be disarmed for 28 Thieving experience, but do not seem to shoot players on the correct route unless the player stands still in their line of sight for multiple seconds. If shot, the darts will deal fairly rapid damage and may inflict poison starting at 8 damage.
The floor blade traps will occasionally raise up, dealing fairly low damage and pushing the player out. These deal less damage than the maniacal monkeys around it, so it is highly recommended to just run past them instead of waiting for the right timing.
The spinning blade trap can also be disarmed for 28 Thieving experience. Disarm the trap, or run past it to take a small amount of damage (up to 6, based on current hitpoints).
After this section, open the door with your key. It is also possible (but highly discouraged) to pick the lock on the door to get 50 Thieving experience, however this has a chance of inflicting poison dealing 6 damage. After the door, there will be several more of the same traps. Simply keep running north and then west until you meet up with the agility route from here.
Warning! There is currently a glitch that makes it possible to get stuck between the spinning blade trap and the eastern (combat scratched) door, without the ability to go back past the spinning blade trap, if attempting to take the north-easternmost route despite not having the proper key for that route. Players who have the Combat damaged key should make sure to take the western route. If you happen to get stuck, you cannot progress and need to teleport out and reset. The lock on the door can be picked to find a safespot if needed for a home teleport.
Reaching Kruk
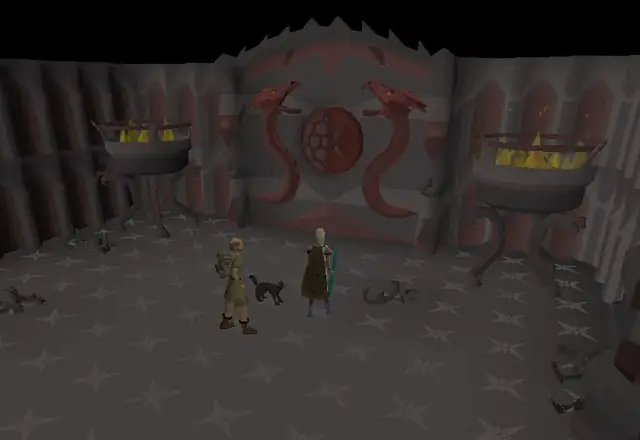
The two paths converge at the north end of the dungeon. Continue west, where there is another vine serving as the final "checkpoint". There are three maniacal monkeys near it, so pray melee until they cannot reach you. The path will then divide into a western and eastern route which both end in a separate final wave of dodgy ground. After the last obstacle (vine or wall support) and before stepping onto the dodgy ground before Kruk's lair, investigate the nearby wall as indicated on the map to unlock a shortcut back to the entrance.
After searching the wall, move on past the dodgy ground, or go to the bank to re-stock for the battle against Kruk. Use the shortcut when you return to skip to the end of the cave. The cavern entrance just south of the dodgy ground will lead to Kruk's chamber.
Killing Kruk
Items needed: Combat equipment to kill Kruk. Items recommended:Food, prayer potions, and an emergency teleport.
On death, all unprotected items will be moved to a grave outside the instance. Any items left on the ground will be lost.
Warning:Kruk can be very difficult to kill, even for the well-prepared.
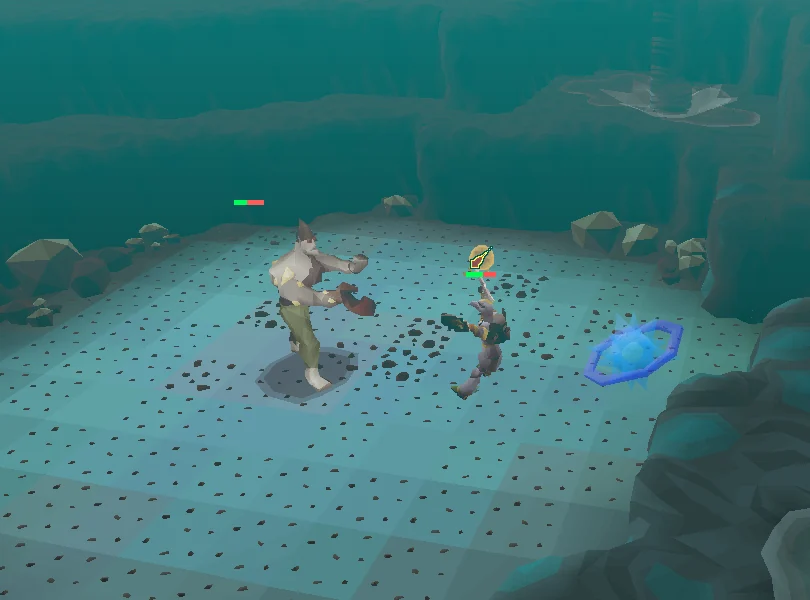
When you enter the room with Kruk, there will be some short dialogue, after which Kruk will attack. Kruk uses a combination of melee and ranged attacks. His ranged attack is stronger, with a max hit of 37, so turn on Protect from Missiles when you attack him. Keep your health above 40 at all times, as Kruk can still hit up to 33 with melee. Kruk has no particular weakness to any attack style. When attacking Kruk, the best method is to attack with range using stamina potions. This is similar to fighting Commander Zilyana. Attack and run away, staying out of melee range. This method reduces the amount of high hits from Kruk. Keep in mind you will still be hit by certain ranged attacks. It may be optimal to pray Eagle Eye and Steel Skin (or Rigour if possible) in addition to Protect from Missiles. Given high enough combat, Kruk can be easily meleed without flinching with Protect from Melee and Piety, while only using a few sharks to be safe. However, lower levelled players are recommended to flinch Kruk. To trap him, stand next to a cave wall in such a manner that there is a cave wall directly north or south of you, with Kruk standing diagonally from you. Attack Kruk every time his health bar disappears and directly step back to the original square in order to prevent him from damaging you back.
Note: Wearing a greegree will prevent you from being attacked by the undead monkeys and spiders inside (an anti-poison or similar will make you immune to spike damage), but falling rocks will still damage you. It is highly advised to bring a stamina potion, super energy potions, and food when going to Zooknock.
Speak to Zooknock, and talk to him about the quest you are on - he will create the Kruk monkey greegree for you. He will warn you that he cannot be certain how taking his form will affect you, as Kruk was quite powerful before his death. Teleport out of the dungeon once you get the greegree, equip it, and return to Awowogei. He will reveal that the monkeys are planning another attack with the help of the Gu'Tanothogres and the generals of the Troll Stronghold. With this information, talk with Garkor to finish Chapter II.
Head to the Troll Stronghold. Run to the south-westernmost room on the main level and challenge Kob to a deathmatch. It is highly recommended to use the Protect from Melee prayer before speaking to him and accepting his challenge, as he can hit up to 57. However, Kob can still hit through Protect from Melee with a max hit of 28. Players should either pray melee or safespot Kob by running out to the door and using Ranged, Magic, or a halberd, as he will not be able to reach you. When he is defeated, Kob will beg for mercy and agree to not help the monkeys.
You will need to go to Gu'Tanoth and find Keef, who can be found near the other city guards past all the bridges (where you solved the riddle a guard gave you in the Watchtower Quest). Bring 20 coins to pass the bridges again. Players with level 71 Agility (boostable) can use the shortcut near Keef to save time.
Challenge Keef to a deathmatch; Keef attacks with Crush, has a high max hit of 47 and can hit through Protect from Melee, albeit at a reduced output. Be sure to activate Protect from Melee before you enter the dialogue with him. As Keef is a large NPC, you can use the nearby tree as a safespot by positioning Keef north of the tree (west of the shortcut) and yourself south-west of the tree. When Keef nears death, he will beg for mercy and agree not to help the monkeys.
Return to Garkor to tell him that the ogres and trolls have agreed not to help the monkeys.
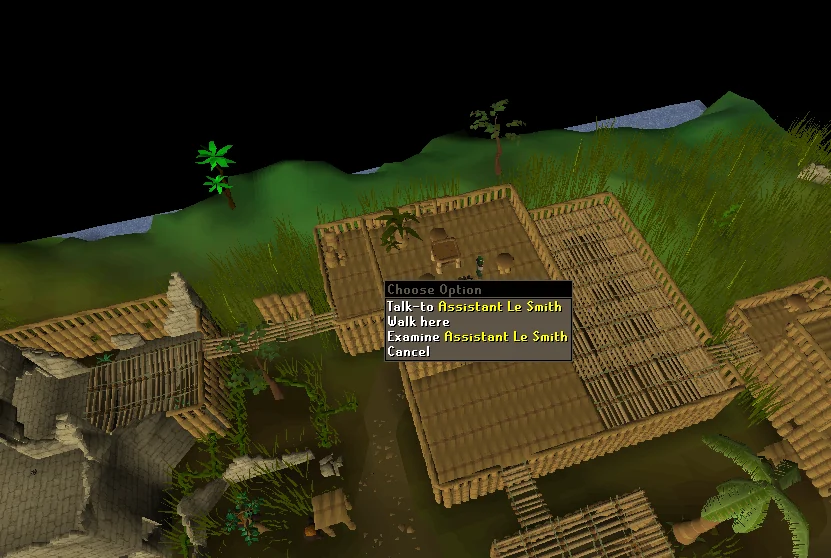
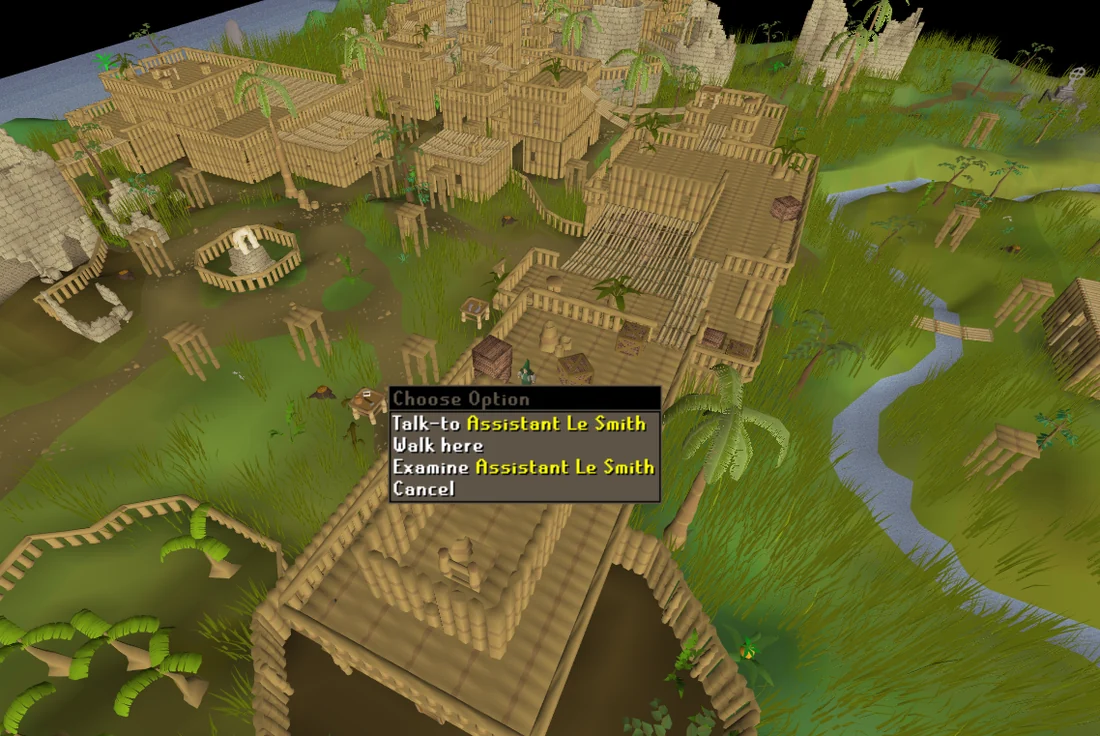
A possible location of Assistant Le Smith. Image credits →Le Smith's magic top location is a bit more convoluted to reach. Image credits →
He will tell you to go and look for Assistant Le Smith, who can be found somewhere on Ape Atoll on the rooftops or other high places within the city. There are four possible locations:
On top of the bridge that connects the two watchtowers of the main gate.
Top floor of the jail. To access the top floor, climb the ladder by Solihib's Food Stall, then walk northwards and climb the ladder on the back of the wall of the room with the bamboo bed (this ladder is not marked on the mini map).
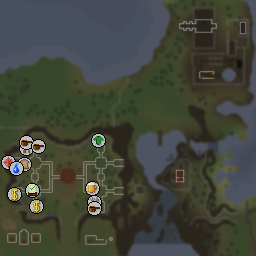
Top floor of the building west of the Magic Stall. To reach him here, first make your way towards the building marked with a bank icon (($)) on the map. Climb up two ladders to the top floor, pick-lock the jail door, and then simply run south-west across the bamboo bridges. To access this building, climb the ladder at the southern end of the Temple of Marimbo. Then, climb the ladder on the north-west corner of the building, then run all the way south-west to reach the aforementioned building.
Speak with Le Smith by telling him that you were going to ask him the same question followed by asking him why and about the ships, and he will inform you that the monkeys are constructing a fleet of ships on the west coast of Ape Atoll.
Talk to Garkor before heading west to the north-western coast of Ape Atoll. While wielding Kruk's greegree, speak with the monkey by the rowboat located on the north-western corner of Ape Atoll. He will take you to the Airship Platform.
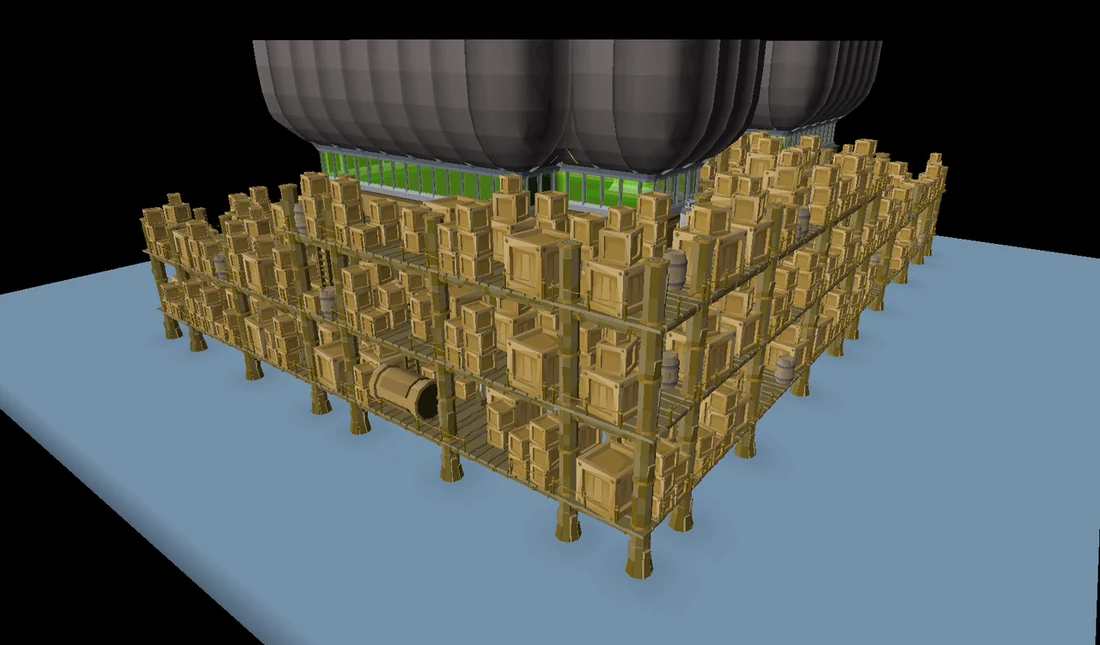
Now, on the platform, you will be transformed back into human form. You will have to collect six satchels, fill them with explosives, and then place the charges around the platform.
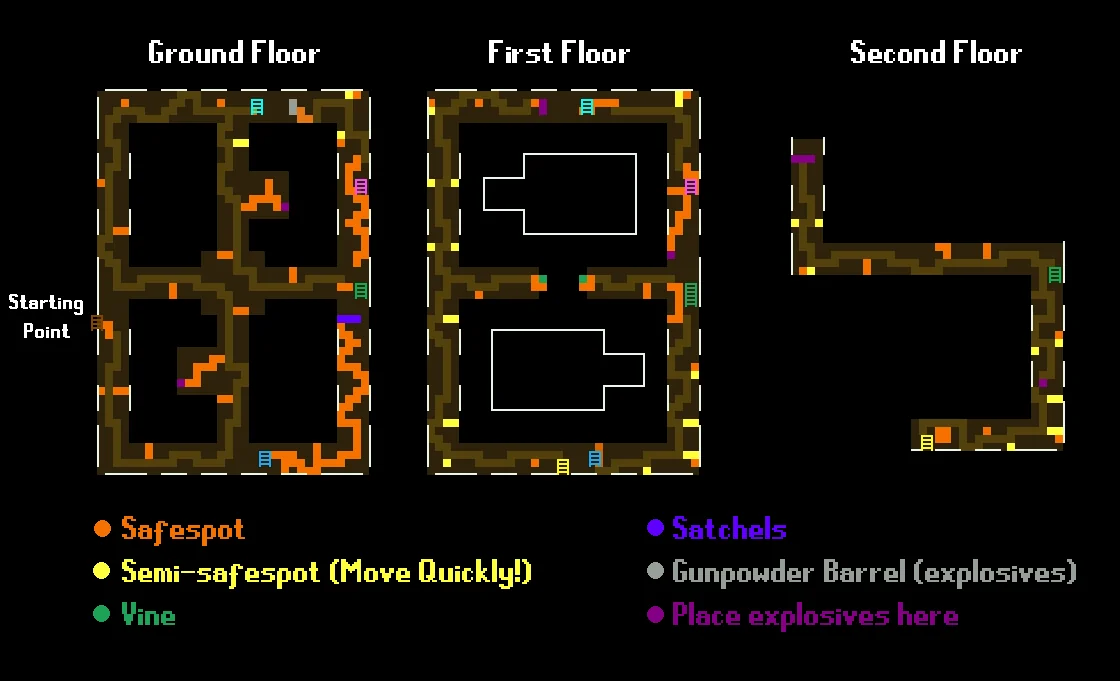
Guards are all over the platform, and if you get caught by one, you will be thrown out of the platform. Each guard's line of sight is 2-4 squares in front of them, including the square they stand on. Corner tricking the guards is highly advised as it can save time. You may want to memorise the patrol patterns of the guards so you do not accidentally bump into one.
Begin by following the main path, skipping the first ladder to the north. Continue until there is a ladder at a dead end. Go up the ladder (note that there is another ladder to go up to the 2nd floor (UK); ignore it for now), and continue south until you reach another ladder. Climb down this ladder and follow the path to find a crate filled with satchels. Make sure to collect six satchels before going back up the ladder you just climbed down, around the corner, and back down to the ground floor (UK).
Return to the first ladder you encountered, climb up, and follow the path around until you reach another ladder. Climb down this ladder and follow the path north, and you will eventually reach a barrel with the explosives. Fill up all of your satchels before making your way to each of the locations where charges must be placed.
A player stealthily navigating through the airship platform. Image credits →
Warning: If you are caught by the guards, the explosives will be soaked and become useless, forcing you to get more explosives again. However, you will keep the empty satchels and any charges you've already planted will stay on the rig, even if you log out. When you finish planting all the charges, if you teleport out; you will need to come back via the boat and then go down then leave via the same ladder you came in.
Show animation: Corner tricking a guardCorner tricking a guard Image credits →
Charges must be placed on two pillars on the ground floor (UK), two floorboards on the middle floor, and two gas cylinders on the top floor. One of the floorboards is immediately south of the ladder when you climb back up. One of the pillars is back towards the start. Planting a satchel on a pillar along the way, go back to the dead end ladder on the ground floor (UK) and climb up. Up again is to the two gas canisters (in each direction), while the last floorboard is to the west across a vine swing and to the north. Once you plant the last explosive, your character should acknowledge this. Now let a guard find and throw you out of the platform. Leave the platform via the ladder by which you arrived.
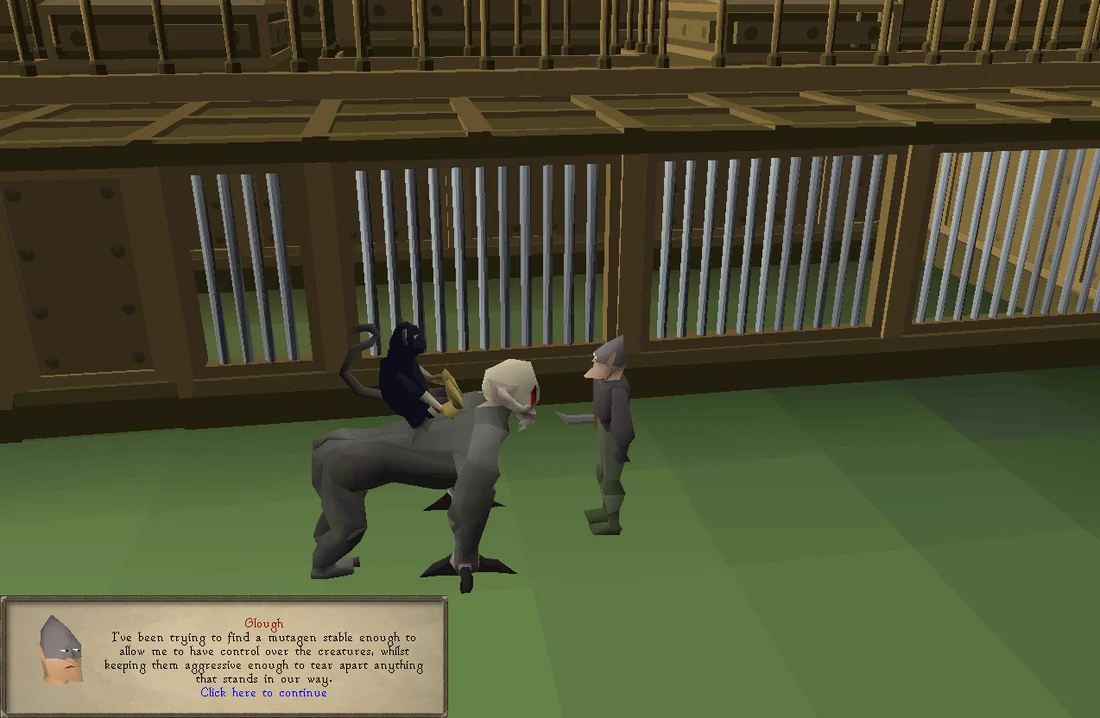
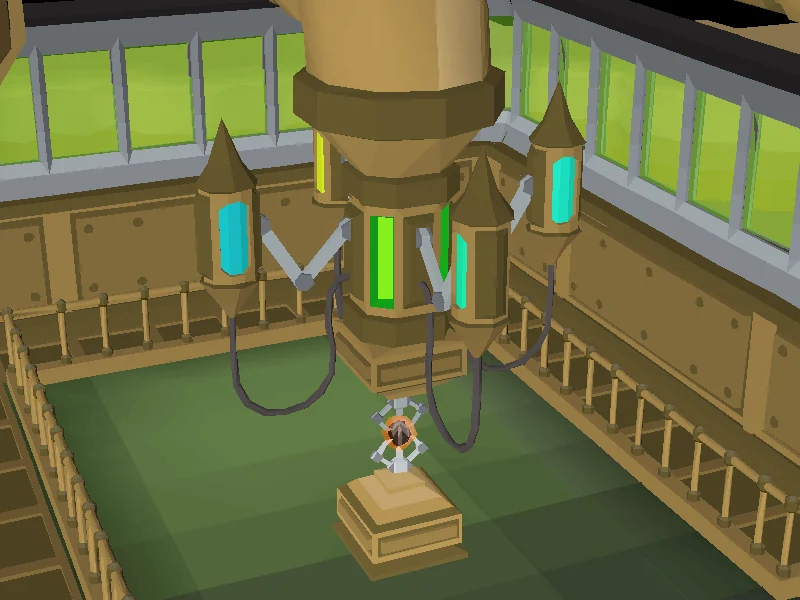
The player sat atop a mutated gorilla, discussing plans with Glough. Image credits →Glough's device, using charged onyx gems to infuse power for his mutagens. Image credits →
Back to Kruk's dungeon
Report back to Garkor and then head to Kruk's Dungeon where you defeated Kruk in the maze. You can skip traversing the maze by heading north and using the monkey bars with Kruk's greegree equipped. With Kruk's greegree still equipped, enter the passage to the north (don't head back to Kruk's room or go up the vine). Walk through the big doors straight ahead, climb onto the stunted demonic gorilla, and climb down the stairs where three tortured gorillas roam. If you did not bring a hammer and chisel, you can search the crates downstairs until you find one of each.
Glough will be in a cage, and orders you to send the three tormented gorillas back into their cage. Riding on your stunted demonic gorilla, attack all three tormented gorillas one at a time. Use Protect from Melee to negate the damage they deal to you. When they reach low health, the gorillas will go back into the cage.
Glough will now speak to you, claiming the last strain of mutagen was too unstable. You ask how large is this army of creatures he has prepared, and he tells you that he is currently only using the test subjects, but once he perfects the mutagen into an airborne form, he'll be able to unleash it across Ape Atoll. He then pulls a lever, activating a device that uses charged onyx gems to infuse power for his mutagens. He will then teleport out to find Le Smith.
Now that he's gone, go onto the nearby holding area to dismount from the demonic gorilla. Climb back up the stairs, unequip the greegree, and take the charged onyx out of the device at the north end of the room. Use the chisel and hammer to invert the flow of energy, creating a deconstructed onyx. Place it back in the device; then, investigate any one of the incubation chambers to confirm that energy has been drained from the incubator, successfully corrupting it.
Report back to Garkor; you can exit the caves quickly by using the rope just outside the dungeon doors. He will tell you to report to Awowogei that the trolls and ogres have backed out of the alliance, and that the secret weapon has had some complications and is too unstable to use on the battlefield. Frustrated, he cancels the assault on the mainland and strips Kruk of his rank and duties. Return to Garkor and inform him Awowogei has called off the attack. Suddenly, the screen will shake and a cutscene will play, showing Glough has proceeded with his attack plans anyway on his airship.
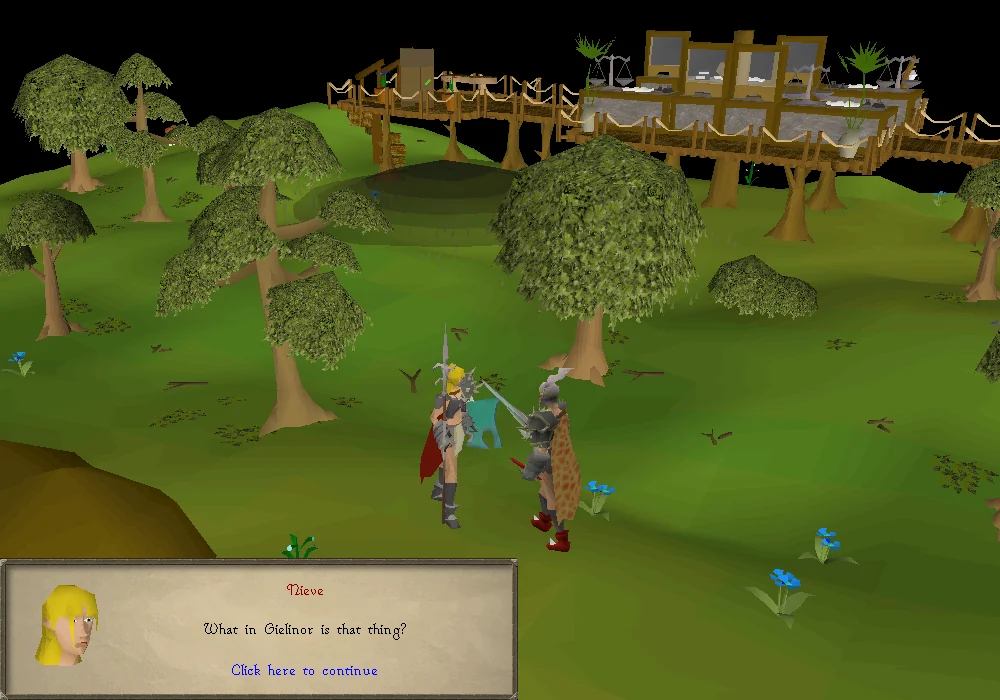
Report to King Narnode Shareen that the Gnome Stronghold will be attacked by the airship. He will recommend that you recruit Nieve, the highest-skilled warrior they have. Nieve can be found by the entrance to the Stronghold Slayer Cave. Ask for her help in defending the Stronghold, and she will agree, having her cousin Steve take her place.
By simply walking in the north-west quadrant of the Stronghold with Nieve, tortured gorillas will appear from four different spawns (killing multiple gorillas from the same spawn will not count towards the goal, however world hopping will respawn a killed gorilla). They will only use melee attacks, so they can be safespotted using various trees and scenery in the Stronghold. Kill them until Nieve recommends you return to the King, restocking at the bank if necessary. If Nieve disappears at any time, she will be outside the Grand Tree. If you cannot find her there, logging out and then logging back in will return her. You can also hit the "Call follower" button in the bottom of the Worn Equipment interface.
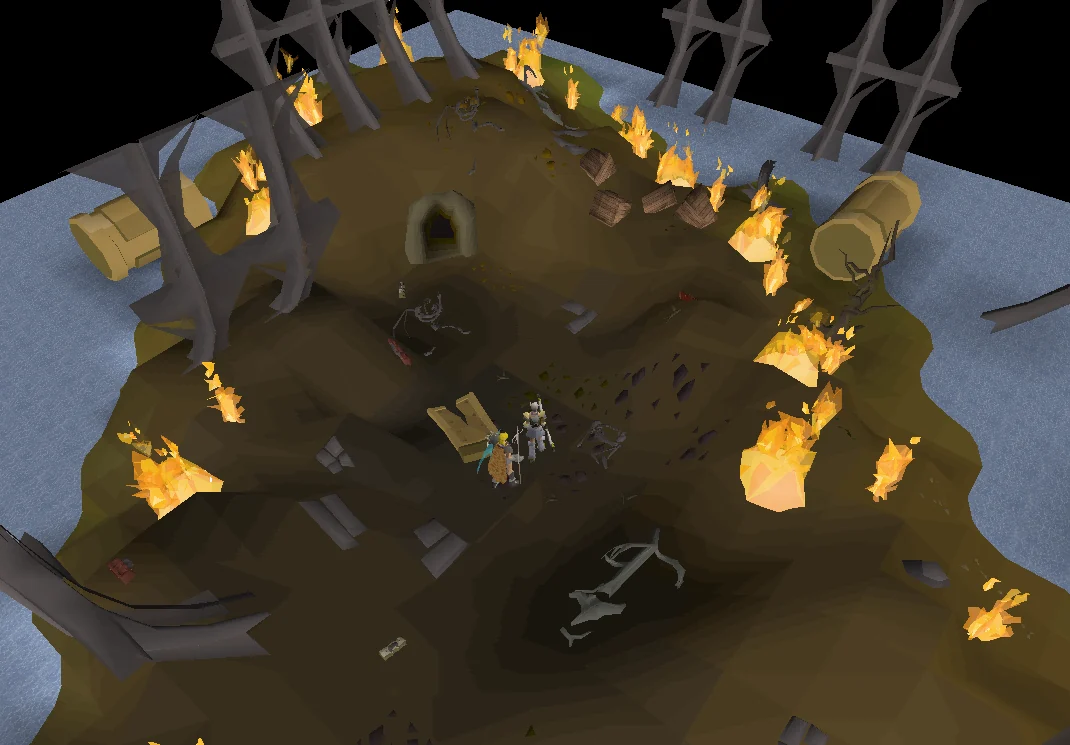
The remains of Glough's airship after it crash lands just north of the stronghold. Image credits →
Go back and talk to the King. He will have the 10th Squad take care of the rest while you and Nieve head to the crash site and confront Glough should he still be alive. Head north-west of the Grand Tree, and talk to Garkor. He is located by the swamp toad and king worm swamp and the tortoise enclosure. Go through the crash site and enter the Crash Site Cavern. There are four more tortured gorillas outside which can attack with Magic and Ranged. It is not necessary to kill them, so Protect from Magic or Ranged and run past them.
Prepare to fight two tortured and two demonic gorillas. After walking through the cavern you will see Glough has survived the crash, and has brought his best experiments with him.
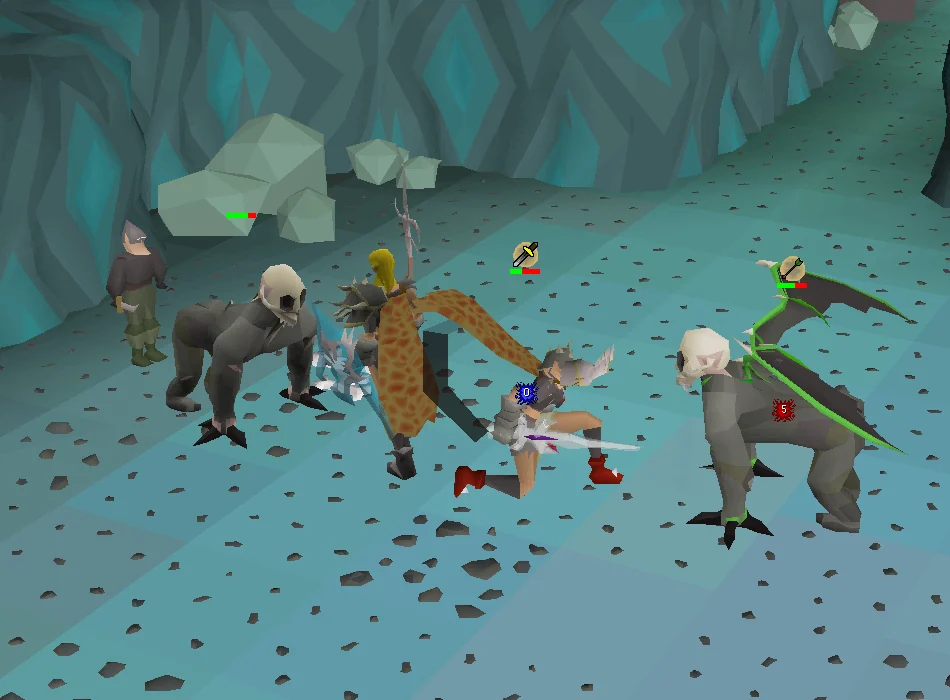
The player and Nieve fight side by side against Glough's experiments. Image credits →
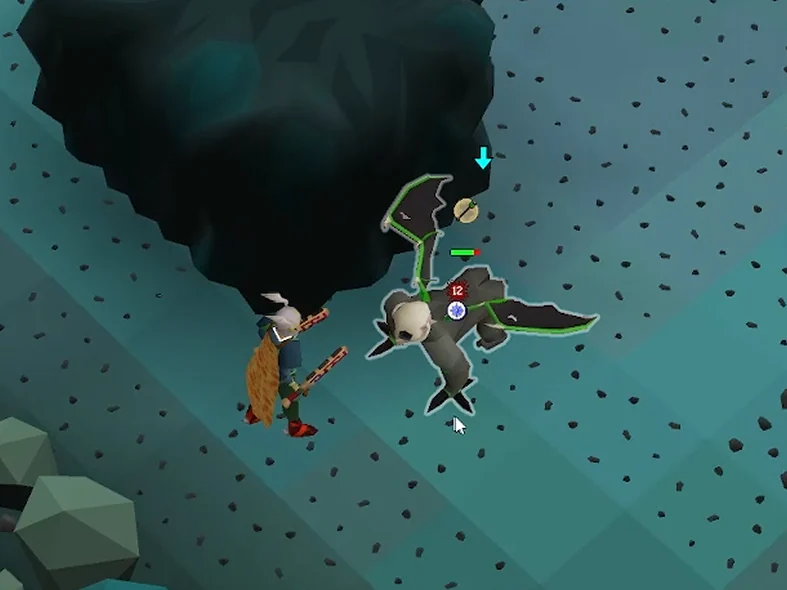
After the cutscene ends, the two tortured gorillas will move in and attack; these are stronger than the ones you fought outside and can use multiple combat styles. When you kill one of the tortured gorillas, a demonic gorilla will jump down into the fight. The demonic gorillas are far stronger, boasting more health and damage. Most notable is their ability to use protection prayers, which they will change after taking a certain amount of damage in that combat style. Their prayers completely block damage in that style, so you must bring two forms of combat to kill them normally.
The demonic gorillas have all three attack styles. Their white 'throwing' attack is Ranged, green is Magic, and a swipe with their claws is Melee. They will change combat styles after missing three hits in that attack style. Protect accordingly! They will also beat their chest, causing a boulder to fall on your position from the ceiling; this should be avoided by moving away. A good strategy is to kill the first demonic gorilla that jumps down before killing the second tortured gorilla, so that you don't have to fight two demonic gorillas at once. Try to keep up the correct prayers and focus down one demonic gorilla as quickly as possible, as the fight gets much easier when there is only one left.
It is also possible to let Nieve kill all four gorillas for you. Wait for her to start attacking one of the gorillas; then, run out of the room and hide behind the pile of rocks. For the demonic gorillas, ensure that they are not using Protect from Melee; if they are, keep attacking them with magic or ranged until they change prayers so Nieve can hit them. In order to do so you must attack the gorilla within the original room and then leave to the safespot, repeating the process for each gorilla.
A safespot for the demonic gorillas using the third listed method Image credits →
A third, faster method is to pull a single demonic gorilla into the east chamber while the others are stuck, and position yourself on the easternmost side of the room's central rock formation. Pray against the gorilla's attacks until it is attacking with melee, and then proceed to attack the gorilla. Combat styles will still need to change (melee still works with this strategy), but since the gorilla is unable to attack you, it will not switch back to ranged or magic. Provided the user is continuously attacking, aggression will not be lost and the gorilla will be effectively safespotted.
If you die or leave the caverns before killing all four gorillas, you will have to start over and kill all four gorillas from the beginning. Nieve will be waiting outside the Grand Tree upon your return to the Stronghold. Your gravestone will appear outside of the instanced area next to Garkor.
Note: Nieve will not attack the gorillas if you use "Call follower"; additionally, it may take Nieve some time to aggress the gorillas if you end the cutscene early. Additionally, she will not attack gorillas if they are not in the room they jumped down into. She will however follow and continue to attack gorillas outside of the room if she is already in combat with them.
If you are on a black demon Slayer task, the demonic gorillas count as on task kills, and a Slayer helmet may be used.
An easy place you can hide whilst allowing Nieve to defeat the gorillas for you Image credits →
For Struggling Players: If you are having difficulty killing all the gorillas, simply kill both the tortured gorillas that appear; then, leave the room and hide in such a way that the demonic gorillas get stuck behind the wall. You MUST tank a few hits from a gorilla in order for Nieve to attack as she will only attack the last monster you were in combat with. For example, after you've killed one or both of the tortured gorillas, tank a few hits from Demonic Gorilla 1 so that Nieve knows which one to attack; then, hide and let her finish off that specific gorilla. Repeat these exact steps for the second demonic gorilla. If they are praying Protect from Melee, use ranged or magical attacks until they switch to Protect from Missiles or Magic, and then hide again.
On death, all unprotected items will be moved to a grave outside the instance. Any items left on the ground will be lost.
Nieve is killed by a collapsing boulder after Glough's transformation. Image credits →
After defeating the demonic gorillas Glough will drink his own mutagen, transforming himself into an abomination, and then retreat. Nieve will attempt to stop him, but gets knocked back to the wall, causing a boulder to fall and crush her, killing her instantly. She will drop her Elysian spirit shield, but players will find it is not much use to them. Players will now have to defeat Glough; it is recommended to return to a bank and restock on supplies, as the fight will prove to be challenging even to the most experienced player.
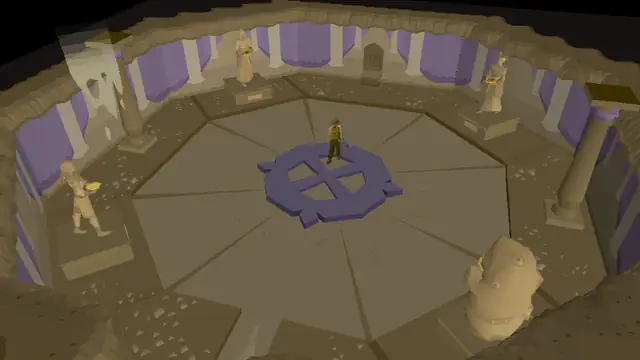
The player will need to fight Glough in three separate chambers, which he goes to when his health falls.
Note: If the player leaves the chamber through teleportation, death or through the exit at any point during the fight with Glough, all progress is reset back to the first phase. For this reason, it is suggested to read this entire section before proceeding.
Phase 1
A safespot available to use in the first phase. Image credits →
In the first room, Glough attacks using Melee and can be attacked safely from the hallway using Ranged or Magic. Once Glough falls to 75% health, he goes into the second room.
Phase 2
The safespot for Glough's second phase. The player here is standing in the centre of the room where they fight Glough in Phase 1. Image credits →
In the second room, Glough uses ranged attacks as well as melee, stomping the ground and dealing up to 30+ damage. It is possible, but difficult, to safespot him by using a weapon that has an attack range of 10 squares (in order of preference as they may be available: twisted bow, bow of Faerdhinen, dark bow, hunters' sunlight crossbow, crystal bow, magic comp bow, or magic longbow. Notably, the magic comp bow still has an attack range of 10 squares on 'Rapid' and can double-hit Glough on his third phase if you are attempting to safespot him.
To do this, you will have to lure him to one square east of the first black rock on the southern wall and when you have done that, then stand exactly one square out of his attack range, which is about halfway through the room where he went for the first phase. It is suggested to activate Protect from Missiles as this reduces his damage a bit; but he can still hit up to 21 damage with each attack. Lure Glough out of the second room and back into the first, hugging the northern parts of the wall. When you lure Glough far enough, he will not do anything, allowing you to easily hit him. Once he falls to 50% health, he will walk into the final room.
Phase 3 Strategy #1
Glough drags the player towards him during the final phase of the fight. Image credits →
In the third and final room, Glough will now be able to attack the player using both melee and magic attacks. Glough's melee attack can send you flying backwards and dealing up to 66 damage. For this reason, it is recommended that players keep their health at 80+ to avoid dying as a result of this attack. Protect from Melee is highly suggested if using melee equipment to attack him. Glough will only teleport you after he is damaged, or if the player is not directly adjacent to him. Rings of recoil are suggested, especially if attempting to partially safespot him as detailed below. Therefore, it is recommended to keep Auto-Retaliate disabled and only attack Glough when the player is not in danger of dying as you are unable to eat during, and shortly after being teleported.
Glough's magic attack drags the player within distance of his melee attack and deals a large amount of damage. However, it may be exploited to only allow for damage from his magic attack. To do this, use a strong ranged weapon such as the toxic blowpipe, stand one square west of Glough, and attack. Whenever he teleports you to him using his magic attack, quickly return to the square just west of him and continue attacking him. Protect from Magic is highly recommended if using ranged or magic to kill Glough, as his teleport deals very high magic-based damage. His damage seems to be roughly halved using the correct prayer. If using this strategy, it is advisable to bring combo foods (e.g. a 'main' food, sharks or tuna potatoes, with pineapple pizzas and/or brews/restores and/or karambwans) more one-click foods (e.g. tuna potatoes) over a brew/restore method, as the tick for you to move one square away and use your potions is not enough to counteract his damage. It is also possible, albeit difficult, to eat a karambwan, a high healing food, and a potion all in one tick.
Another technique to use is when Glough teleports you to him, Protect from Melee and use melee attacks. When Glough pushes you away, Protect from Magic and use ranged attacks. The toxic blowpipe and whip are great weapon choices. Also a dragon or crystal halberd works wonderfully to chunk Glough's health.
Phase 3 Strategy #2
It is possible, but requires skill, timing, and a good connection to kill him in his third phase without taking any damage at all with a 10 square-range weapon.
It is possible to partially safespotGlough on his final form, preferably with a dark bow because of its double attack. Interestingly, the bow of Faerdhinen, crystal bow, magic comp bow, and magic longbow will also shoot twice if using this method (#1 below); the second time immediately after being teleported, even while spam clicking away from Glough. Safespotting him, especially with method #2, requires great timing and experience with RuneScape's .6 tick system. Glough has an attack range of 11 squares and an aggression range seemingly between 14-18 squares (it is difficult to tell). There are two ways to go about doing this. Either way, set up quick prayers for Protect from Magic and either Eagle Eye or Rigour. Stamina potions will help with this phase as using this strategy will drain run energy quickly.
Turn on quick prayers and then attack him. He will pull you to him. If you want or need to conserve Prayer, switch it off mid-'flight.' After (or during, it doesn't make a difference) being pulled, very quickly (spam clicking on the minimap may be helpful if the tile is off-screen) run back at least 11 squares (1 square north of the small black boulder).
Similar to flinching, you can continuously run between the previous chamber and the hallway to cancel Glough's aggression. You will have to RUN from the square just north of the rocks, as shown on the animation. The first few times you do this before 'getting the hang of it,' you should use the quick prayer set up just in case he pulls you, or he could hit upwards of 60 damage. He can be killed very slowly but relatively safely using this method.
Running or walking back has little impact on this method. Using a blowpipe, you can land two hits on Glough and eat before he draws you back in with his magic attack. This allows you to do a constant barrage of attacks without having to worry about your health. Although it is recommended to use a blowpipe, a crossbow will work as well, only you will be able to: A) land one hit with a healing method, or B) land two hits without a healing method. If you are already at your maximum Hitpoints, you can revert to more damage dealing methods such as a dark bow in place of eating as well.
Phase 3 Strategy #3
Similar to Phase 3 Strategy #2, it is much easier to complete however takes much longer to kill Glough. It is recommended to use this strategy if you are running very low on supplies, health, or prayer, and do not wish to restart at the beginning of the fight.
If you struggle to kill Glough in his final phase, you can utilise a slower version of the Phase 3 Strategy #2 with the benefit of potentially not taking any damage if done correctly. This is also done in a similar manner to safespotting Kruk earlier. By staying out of range of all attacks and only attacking Glough when his health bar disappears, long range attacks can be made followed by an immediate retreat, repeating each time his health bar disappears. At this time, you can quick pray with Protect from Magic and either Eagle Eye or Rigour in the event that you make a mistake. If done correctly, Glough will not attack with any of his attack styles. Since this method relies on precise action and delivering one attack at a time, using the accurate attack style is recommended.
Players must wait out a 10-minute aggro timer before this method becomes available. Attack the boss once to get dragged, flee to the safespot, then wait out the timer before proceeding with the steps below.
An example:
Utilise a long range weapon, such as the Magic longbow with its special attack that guarantees a hit at the cost of 35% of your special attack energy, saving time in this strategy if you notice your attacks are rarely hitting as a lower level player. A Lightbearer ring can speed the process of regaining special attack energy up if you have access to one, making this strategy twice as fast.
Stand one tile in front of the rock archway (one tile before the lighter coloured rocks in the east wall). Activate your quick prayer as discussed prior and attack Glough and watch as you run towards him. The exact tick your long range weapon attacks and launches its projectile (or as soon as possible for the best chance of Glough to not attack) click to run back to your starting tile. This minimises the time spent in the area Note: Stand an even amount of tiles away from where you fire the bow, else you will walk 1 tile too far and get hit.
Once at a safe distance, you can disable your prayers and pause to recharge special attack energy and/or run energy as required.
Wait until Glough's health bar has disappeared. At this point it is safe to repeat.
Note: If you and Glough die at the same time, you will have to repeat the entire fight again.
06
Finishing up
Meeting with Awowogei and Narnode to negotiate peace. Image credits →
Once Glough is defeated, the cavern will begin to collapse. You will automatically be teleported outside the cavern in the nick of time by Zooknock, who decided to pull you out after detecting a very powerful presence within the cavern, but couldn't get a lock on Nieve. You will explain that Glough has been defeated and that Nieve perished in the battle. You will then be instructed to report back to King Narnode, and he will offer to teleport you directly to the King.
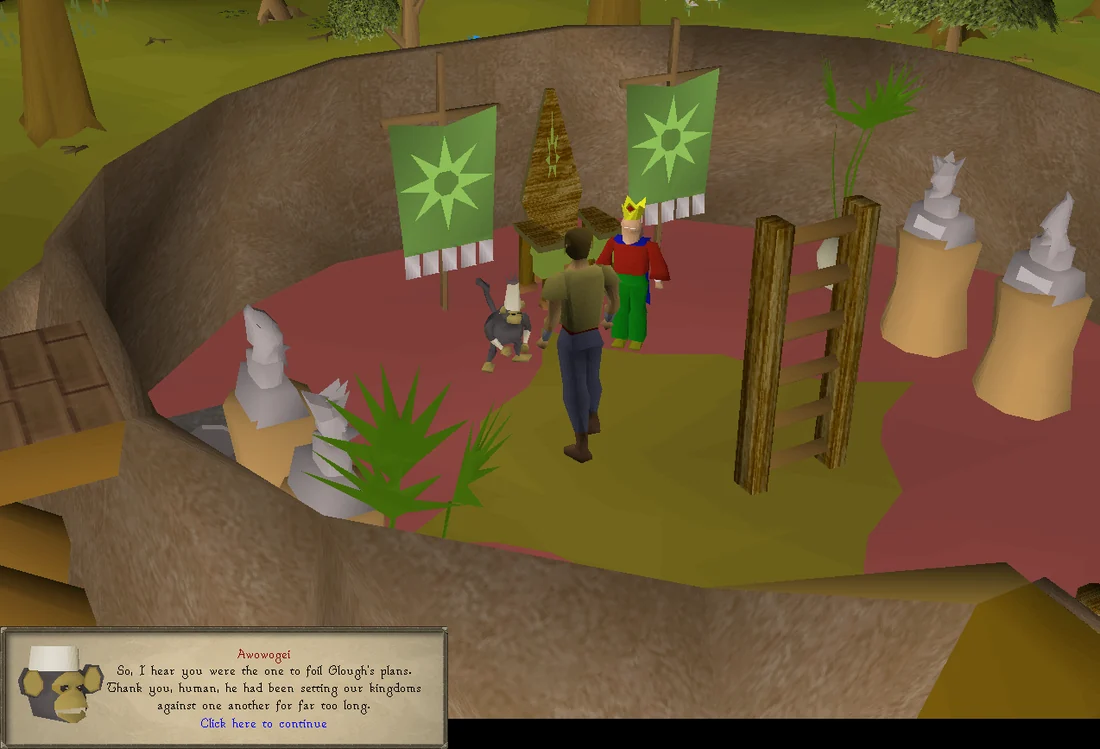
Report to King Narnode, telling him that Glough has been defeated and that his demonic creations have been trapped deep within the caverns. He will then tell the player that he received a message that Awowogei himself wishes to visit the Stronghold and set up a peace treaty between Ape Atoll and the mainland. He decides to accept this offer, and a cutscene will ensue where Awowogei will negotiate a peace treaty with King Narnode Shareen with you as witness to this moment of historic importance, opening up the gates to Marim to the mainland for all.
Congratulations, quest complete!
Quick checklist 138 instructions
Use this when you already know the route. The full walkthrough above includes explanations and diagrams.
Getting Started
Talk to King Narnode Shareen, located in the Gnome Stronghold's Grand tree.
Say: I'll help you look for Glough.
Chapter I
Go to Glough's house south-east of the Grand Tree and go upstairs, then climb the eastern tree.
Right click and investigate the tree to receive a handkerchief.
Talk to Anita in her house north of the Gnome Ball Field (use north-western-most staircase to get into house).
Say: What's wrong? → He might be in trouble, I could help.
Go to Glough's house again, go up the tree to the second floor, then climb again to reach the third floor. (to reach the third floor you must click the northern branch)
Investigate the gnome statue and turn it to unlock the cupboard.
Search the cupboard for book of spyology, the gnome crates for a brush, and fire remains for mysterious note.
Use pestle and mortar on the lemon
Use notes on the candles
Use pestle and mortar on grapes
Use juice-coated brush on mysterious note.
Read the scrawled note.
Talk to King Narnode. Read the translation book he gives you. (You may already have the translation book from a prerequisite quest: The Grand Tree, if this is the case King Narnode will not hand you a second copy.)
Use translation book on the note, and talk to King Narnode again.
Talk to Anita again.
Say: Could you translate these notes?
Read the translated note.
Talk to the King again.
Talk to Assistant Lori next to the hot air balloon beside Glough's house.
Say: Who are you?
Fly to Entrana via balloon and talk to Auguste.
Say: Talk about Assistant Le Smith. → Thanks for the information.
Return to the Gnome stronghold and talk to King Narnode again.
Chapter II
Go to Ape Atoll (CLR, one of the two Ape Atoll Teleports or via the gliders used in the first quest).
Equip your monkey/gorilla greegree and use the agility shortcuts as a monkey to climb the vine down to the village.
If you don't already have a monkey talisman, purchase one from Tutab in the Ape Atoll Magic shop.
Talk to Garkor located outside Awowogei's house.
Say: King Narnode has sent me. → It's worth a shot.
Talk to Awowogei.
Say: I'm here to discuss military strategies. → Of course, my king.
Talk to Garkor again.
Go all the way to the West side of the island and go up the hill to the Monkey Archers.
Talk to a Monkey Archer about Kruk.
Follow the tracks (foot prints) that start at the foot of the hill until you reach a trapdoor ("Jungle Grass") at the foot of a palm tree just north-west of the bamboo gate.
(Warning: If inventory is full, your greegree will be dropped to the floor upon entering the dungeon.) Go down the trapdoor and go south.
Navigate the maze via the agility path to the east or the tank pathway to the south. You will be able to create a shortcut after the maze, allowing for banking. It is very easy to die here if you are not careful and paying attention to which prayers you need to use. Prayer potions and good food are highly recommended for this.
It is recommended to consult the map to follow the right route towards the end.
On the agility path:
If you fail an obstacle and receive a message '...this route feels wrong', you have to take the other path instead.
You will come across areas throughout the agility path that contain Dodgy Ground, such as at the start of the path. The trick here is to only walk on the tiles that do NOT appear cracked, since otherwise you will fall down. These are fairly easily distinguishable as the "cracked ground" tiles look as if they have slightly darker cracks in the shape of an "X" on each tile, while the safer tiles look smooth and uncracked.
Throughout this path, as soon as you inevitably fall down, you will want to immediately pray either against melee or ranged, respectively, depending on how far you are through the path. Otherwise you can very easily and quickly die. Quickly make your way to whichever hanging vine is available to you, and click it in order to return to the surface of the maze.
Head all the way east until you reach a small cave with a chest. Pray melee when you fall down until passing through the metal door 3.
Enter the small cave and pick the lock on the chest. Search the chest and you will obtain a bronze key.
Move through the Bronze Door just north-west of this chest. If you must leave and return, you will need to obtain the bronze key again.
Move north until checkpoint 4, pray ranged when you fall down. Note: The cave below has many dead ends. Check the map to memorize the route towards the rope (checkpoint 3).
Move west to checkpoint 5.
Continue reading at the #Combined part section below.
On the tank path:
You will need a slash weapon in order to cut webs, as well as a pickaxe to mine rocks blocking your path. It is not possible to fail slashing a web if that web is on the correct path.
Pray ranged all the way until checkpoint 5. You will be attacked by both melee and ranged, but due to distance, melee attacks are less frequent.
There are several spots where you will stand between climbable rocks and a web. These can be treated as safespots if you ever need to take a rest.
If you run into a rock or a web which you're unable to break or cut through, and you get a game message in chat containing something like '...Maybe find another route.', you will have to try another route.
Make your way east until you find a crossroads going south or north.
It is recommended players try the southern route first. If the web cannot be slashed, the player must move to the northern path.
After successfully slashing the web and walking through, right-click to unlock one of the chests; if it opens, search it for a combat scratched key, and if it doesn't, unlock and search the other chest.
Continue east and then north until the two paths meet up again.
If the southern web is not slashable, go back up the rocks and head north. This path will lead to another room with similar chests.
Right-click to unlock one of the chests; if it opens, search it for a combat damaged key, and if it doesn't, unlock and search the other chest.
Continue through to the north-east to meet up with the other path.
After meeting up with the alternative route, continue further north and pass through the door matching the key you obtained (see the map for each door's location).
You will now pass some traps. The traps that are on the 'correct' route for the player (as indicated by their key) can be disarmed by the player, and will shoot darts significantly less. The traps on the wrong route will always fire when passing them.
The floor blade trap can be avoided with proper timing, but getting hit by them will hit relatively low damage compared to the damage done by the monkeys.
Do not bother disarming the dart traps, as these only seem to fire if the player takes the wrong route, or stands still in their line of sight for several seconds. If these do shoot you, they may inflict poison starting at 8 damage.
The spinning blade can be disarmed, or you can simply run past taking a small amount of damage. However, do NOT run past if you do not have the "combat scratched key", since that will cause you to get stuck, forcing you to teleport out.
Open the door for your key as indicated on the map, and continue west to meet up with the agility route.
Combined part
For this part, pray melee if you fall down, and keep your prayer on after climbing up the rope to protect from the three monkeys walking around above.
Follow the path that doesn't give a message that this route feels wrong.
Before you cross the dodgy ground into Kruk's room, investigate the wall that faces the path you did not take (i.e. the western wall if you take the eastern path).
Should you wish to restock, or should you wish to return after you die, you can use this shortcut by entering the hole just east of the very start of the dungeon.
After unlocking this shortcut, enter the large cave south of the dodgy ground, to encounter Kruk.
Kill Kruk.
Kruk can be flinched. To trap him, stand next to a cave wall in such a manner that there is a cave wall directly north or south of you, with Kruk standing diagonally from you.
Attack Kruk every time his health bar disappears and directly step back to the original square, in order to prevent him from damaging you back.
If not flinching, it is recommended to use stamina potions, range, and Protect from Missiles to kill Kruk. Use a hit-and-run method to stay out of his melee range.
Pick up Kruk's paw.
Talk to Zooknock
Say: Talk about your mission. at the end of the Ape Atoll Dungeon from Monkey Madness I, bringing the paw and a monkey talisman. He will give you a Kruk monkey greegree.
Use a monkey greegree to avoid taking damage from undead monkeys and spiders in the dungeon. This way, you will only need to bring food and anti-poison for the traps and falling rocks.
From this point on, use the Kruk greegree whenever on Ape Atoll.
Talk to Awowogei.
Talk to Garkor.
'Convincing' the leaders
Teleport to Trollheim using standard spellbook teleport or stony basalt and enter the Troll Stronghold.
Go south-west of the entrance into the room with Kob.
Activate Protect from Melee and talk to Kob.
Say: I know about your deal with the monkeys. → You won't be around to crush anyone when I'm done with you. → I accept your challenge.
Fight Kob until he gives up.
Kob can hit through prayer, and deals up to 58 damage if you do not use Protect from Melee!
Kob can be safespotted by standing in the doorway.
If the fight takes too long, the attackable Kob will despawn and his health will reset. Flinching him is generally not fast enough!
Talk to Kob again.
Make your way to Gu'Tanoth. Use the 71 Agility shortcut, or follow the western path to the end.
Activate Protect from Melee and talk to Keef.
Say: I know about your deal with the monkeys. → I offer to spare your life. → I accept your challenge. Fight him until he gives up.
Like Kob, Keef can hit through protection prayers, and Keef will also despawn if the fight takes too long.
There is a tree that can be used as a safespot, by trapping Keef to the north of the tree.
You may now want to bank your heavy armour and weapons and withdraw your graceful outfit and some stamina potions, as there is no more combat involved in the next section.
Go back to Ape Atoll and talk to Garkor near Awowogei.
Find Assistant Le Smith and talk to him
Say: I was going to ask you the same question. → Why is that? → Awowogei has already informed me about the battleships. → Where is the fleet, currently?, who is found somewhere on the rooftops of Marim. There are four possible locations:
Top floor (up two ladders) of the broken building next to the Monkey Child and The Monkey's Aunt.
Top floor of the jail. To access the top floor, climb the ladder by Solihib's Food Stall, then walk northwards and climb the ladder north of the bamboo bed.
Top floor of the building west of the Magic Stall. To access this building, climb the ladder at the southern end of the Temple of Marimbo. Then, climb the ladder on the north-west corner of the building, then run all the way south-west to reach the aforementioned building.
Alternatively, go to the building east of the magic stall and search the south-east crate to enter a cave. Go to the west end of the cave and climb up the rope. Warning: You will take heavy damage (30+) from falling in to the dungeon, which can kill you if your Hitpoints are low.
On top of the bridge that connects the two watchtowers of the main gate.
Talk to Garkor.
Go to the west side of the island and talk to the monkey guard
Say: What's going on here? → Construction platform? → Can I visit the platform? next to a boat to go to the airship platform.
The airship platforms
Navigate your way through the maze without being caught by the ninja monkeys. You will need to pick up 6 satchels, fill them with explosives, then use them in 6 different locations. Any explosives that have already been placed will remain even if caught.
Make your way to the east wall of the ground floor. Move past the (cyan) ladder on the north side and climb the (green) ladder in the east.
Go south then west and climb down the (blue) ladder. Navigate to the end and pick up 6 satchels from the crates.
Go back to the first (cyan) ladder of the ground floor on the north wall and climb it.
Climb down the next (magenta) ladder you find. Follow the path north to reach the explosives.
Click the barrel to fill all 6 satchels. If you get caught from this point on, you will need to come back here to fill your satchels again.
Climb back up the (magenta) ladder and go south. Use a satchel on the weakened floorboards.
Go back to the ground floor using the (cyan) ladder on the north wall.
Go south and place a satchel on the support beams to the east.
Take the (green) ladder on the east side of the ground floor.
Take the west path, cross the vines, then take the north route at the fork to the end. Place a satchel on the weakened floorboards there.
Go back to the (green) ladder on the middle floor and climb up to the top floor. Go south and place a satchel on the gas cylinder.
Go north and place another satchel on the gas cylinder there.
Make your way to the ground floor and go back towards the boat. Place a satchel on the support beams found in the west fork near the entrance.
Go back to the boat, you can get caught to make it faster.
Talk to Garkor.
Enter the trapdoor to the dungeon you fought Kruk in.
Go north to find monkey bars. Equip your Kruk greegree and use the monkey bars.
Enter the passage into Glough's laboratory.
Climb on the stunted demonic gorilla and go down the stairs.
Fight the three gorillas until they return to their cages. Use Protect from Melee if necessary.
Use Holding area to dismount the stunted demonic gorilla.
Search the crates for a chisel and hammer if needed.
Go upstairs and tamper with the device to the north.
Use the chisel on the charged onyx, then use the deconstructed onyx on the device.
Investigate an incubation chamber.
Talk to Garkor.
Talk to Awowogei.
Talk to Garkor again.
Chapter IV
Talk to King Narnode in the Grand Tree.
Talk to Nieve. If you ever lose Nieve, she will be at the front doors of the Grand Tree.
Say: Talk about Monkey Madness II. → Yes.
Walk around the Gnome Stronghold, and kill 4 tortured gorillas until Nieve notifies you to find Garkor. (They will only attack with melee and can be safespotted behind various objects)
Gear up with 2 attack (combat) styles and go north-west of the Grand Tree to Garkor. (near the swamp toad and king worm swamp and the tortoise enclosure)
Leave the gnome stronghold and go north-east, past the tortured gorillas, to enter the cave.
Follow the path to Glough.
Kill the 2 tortured gorillas and 2 demonic gorillas. It's recommended to kill one tortured gorilla, then the Demonic gorilla that jumps down. Then proceed to kill the other tortured gorilla and demonic gorilla.
At this point you can safely teleport out and restock. Glough can hit 66 with his melee attack and 40+ with his ranged attack.
Chapter V
Go to the next room and attack Glough until he moves on to the next room. He can be safespotted in this first room.
In this second room, lure Glough back to the first room and hug the north wall two squares past the divot to safespot him with ranged/magic (because praying ranged does not protect you) until he moves on to the next room.
In the final room, kill Glough. It is recommended to use protect from melee if you're close to Glough and protect from magic if you're at a distance. He will try to push/pull you depending on your location. (Can be flinched with a bow with an attack range of ten or more. This requires a 10-minute de-aggro.)
Talk to Zooknock and ask him to teleport you to the Grand Tree.
Talk to King Narnode.
Congratulations, quest complete!
QUEST COMPLETE
Rewards
80,000 Slayer Slayer experience
60,000 Agility Agility experience
50,000 Thieving Thieving experience
50,000 Hunter Hunter experience
2x 50,000 experience rewards from Duke in your choice of Magic, Ranged, Attack, Defence, Strength, or Hitpoints. Found on the hill east of main gate of Ape Atoll. (Walk up west hill, and climb the ladder to reach the east hill). You cannot be trained if you have not yet been trained by Daero after completing Monkey Madness I. This effectively prevents certain account builds from receiving the training. Players must also accept both Duke's and Daero's training in order to make use of the Heavy Ballista.
A Royal seed pod, which provides unlimited teleports to the Grand Tree (up to level 30 Wilderness).
Access to the Crash Site Cavern containing demonic gorillas.
Access to a new maniacal monkey hunting area where Glough's laboratory used to be in Kruk's Dungeon.
Access to Ape Atoll bank and Oobapohk's Javelin Store.
Access to new glider spot directly to Ape Atoll.
The ability to communicate with monkeys without the monkeyspeak amulet.
All NPCs on the surface of Ape Atoll will be non-aggressive without requiring the use of Monkey greegrees.
Ability to wield the heavy ballista.
Various dragons will now drop dragon javelin tips.
The ability to reclaim lost Greegrees from Zooknock in his Gnome Stronghold house (no supplies required).
A Monkey can be found in one of the crates at the Crash Site. It is purely cosmetic and can be equipped in the cape slot.
Bobawu will now track your laps of the Ape Atoll Agility Course, with you being able to transform your monkey into other variants upon completing a number of laps.
The ability to re-fight Glough by gazing into the Burning brazier in Zooknock's house.
 4
4