3
3Requirements
- Completion of the following quests:
- The ability to defeat a level 195 Jungle Demon
QUEST 65 · MEMBERS
The King of the northern Gnomes, Narnode Shareen, is once again in need of your help. He recently decided to send an envoy of his Royal Guard, the 10th squad, to oversee the decommissioning of the Gnome owned ship-building facilities on the eastern coast of Karamja. It has been quite some time since the 10th squad were dispatched and they have been deemed missing in action. It will be up to you, should you decide to help, to find out what fate befell the 10th squad and if possible, track them do
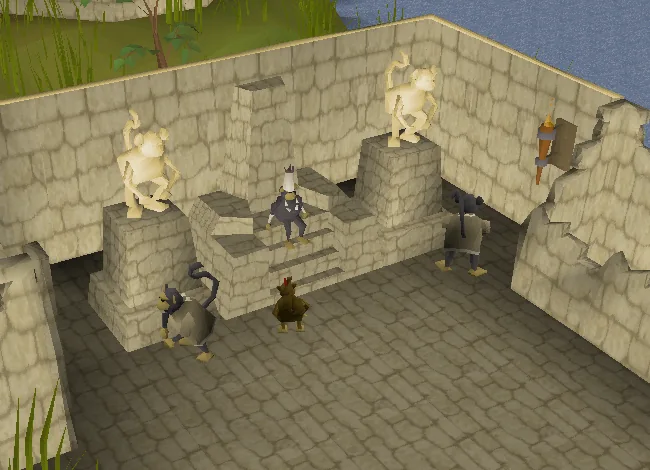
Talk to King Narnode Shareen in the Grand Tree.
STEP BY STEP
Follow the chapters below. Click any screenshot or diagram to view it at full size.
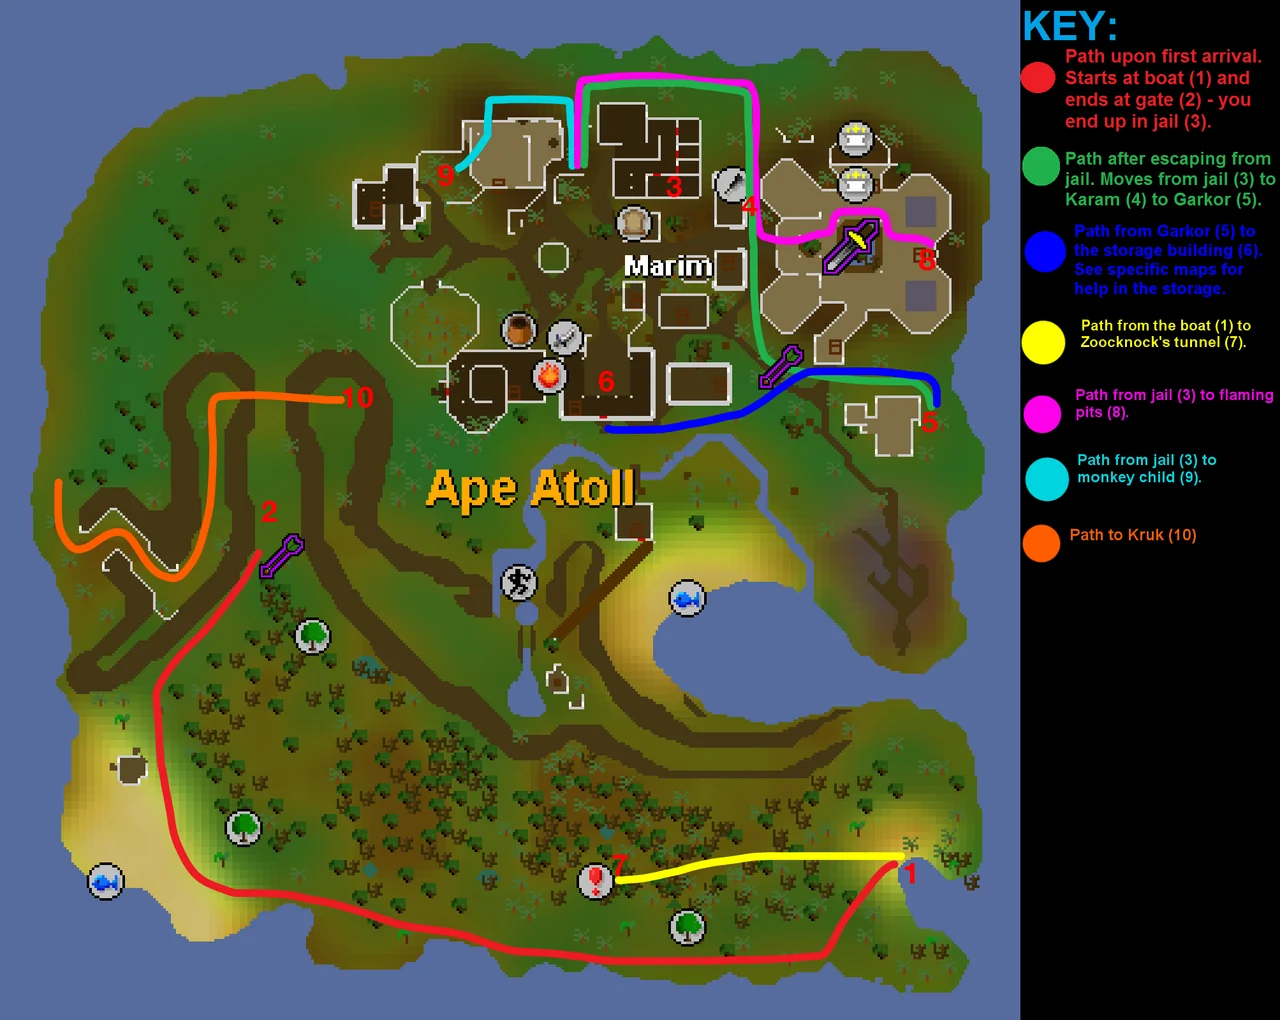
Ape Atoll is one of the most dangerous areas in the game. All native creatures other than the level 5 birds will be aggressive towards you, regardless of your combat level, whenever you're not wearing the monkey greegree (made later in the quest). Players can hug the coasts of Ape Atoll when moving to avoid the poisonous snakes and spiders; some snakes may still be encountered this way, but players can simply wait for them to move.
When going to the island, make sure to bring plenty of food, antipoison potions, and an emergency teleport, in addition to any other required items. Switching off auto retaliate and utilising protection prayers will greatly improve your chances of survival.
At any point, you can teleport or flee from Ape Atoll to restock items without losing your progress. To leave the island by boat, simply talk to Lumdo in the landing area to go from Ape Atoll back to Crash Island, and then talk to Waydar on Crash Island to go back to the Tree Gnome Stronghold. To resume the quest, talk to Daero on the 1st floor (UK) of the Grand Tree to go back to the hangar, talk to Waydar in the hangar to go back to Crash Island, and finally, talk to Lumdo on Crash Island to return to Ape Atoll.
| New Chapter | |
| The jingle that plays upon starting a new chapter of the quest. | |
"In which our hero/heroine finds himself/herself/themself drawn back into Glough's web of deception and deceit."
Talk to King Narnode Shareen in the Tree Gnome Stronghold. He will tell you to investigate Glough's old shipyard for any trace of the missing 10th Squad, and will give you the gnome royal seal. Bring this to Karamja (the "Gandius" option on the glider at the top of the Grand Tree will bring you nearby). If you do not have monkey bones (or a monkey corpse), kill a monkey while on Karamja to obtain some.
Note: If you leave the quest to do something else, you will need the gnome royal seal to get into the shipyard
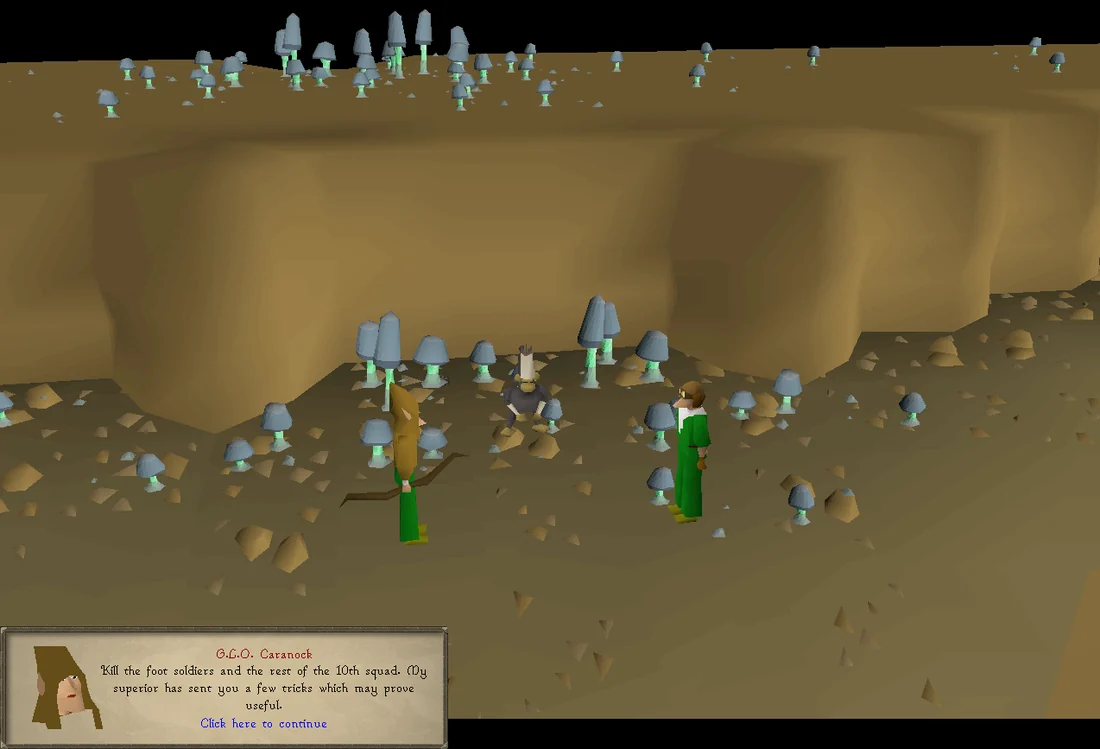
After arriving, enter the shipyard north of the glider landing site and speak with G.L.O. Caranock, a gnome officer for the shipyard. He can be found in the building in the southern area, near the fence. He will act very suspiciously when spoken to, and advise you to return to the king.
Return to King Narnode, and he will give you Narnode's orders and tell you to speak to Daero, the new head tree guardian. Daero can be found on the 1st floor (UK) of the Grand Tree, near Blurberry Bar. Go through all the chat options with Daero, and ensure you're ready for surviving Ape Atoll; when you're ready, tell him you're prepared to leave. He will then blindfold you and take you to an underground hangar.
Talk to Daero in the hangar and he will introduce you to Waydar, a gnome pilot. Waydar will task you with solving a "reinitialisation" puzzle, which is similar to the puzzle boxes from Treasure Trails. If you have done these puzzles before, the sliding puzzle will be easy to complete; if not, see below for the solution, or bring 200,000 coins and go to Glough, who resides in the same area he did during the Grand Tree quest.
Begin solving the puzzle by clicking on the panel to the south-east by the southern glider. Players can take some spare controls from the nearby crate to view the solution, or simply consult the image below.
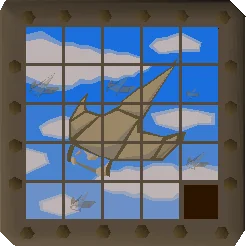
Solve the sliding puzzle as follows (with the piece numbers counting from the top left corner, moving left to right):
After completing the puzzle, talk to Daero, and then Waydar. The two of you will depart and then land on the aptly named Crash Island, where the 10th Squad also crashed earlier. Ask the nearby sailor Lumdo to bring you to Ape Atoll, and he will refuse due to conflicting orders from his sergeant, Garkor; since Lumdo says he will not take orders from you, talk to Waydar again instead (watch out for poisonous scorpions just to his left, and do not click "Travel", as this will bring you back to the Grand Tree). After speaking with Waydar, speak with Lumdo once more, and he will now agree to take you to Ape Atoll.
Do not click the 'X' to close the story tablet that shows up after this conversation or it will cancel the subsequent cut-scene and you'll have to go through the chat option again.
| Meanwhile. | |
| The jingle that plays upon a cutscene plays. | |
"In which our hero/heroine finds themselves engaging in severe quantities of monkey business."
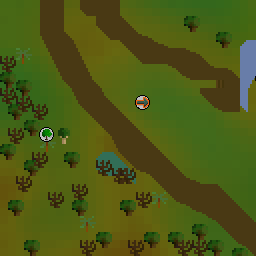
Once on the Atoll, start going west, sticking to the southern coastline until you reach a mahogany tree. From here, run north, avoiding the poisonous snakes, scorpions, and jungle spiders. If you have the level to use it, activate Protect from Missiles as you travel north, as a volley of poisoned arrows will start pelting you as you come closer to the Ape Atoll gate. Once you get close enough to the entrance, you will be knocked out and placed in a prison.
After waking up, you will find yourself in a cell guarded by Trefaji and Aberab, two gorilla guards. Speak to Lumo, one of the captured 10th Squad members, and then prepare to make your escape.
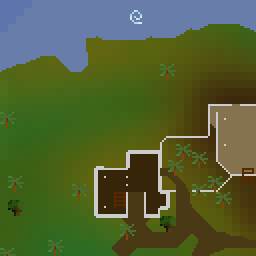
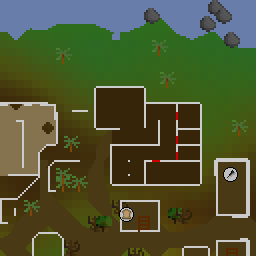
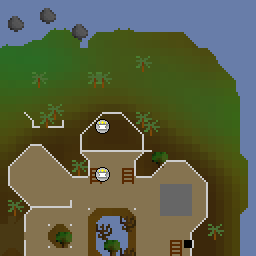
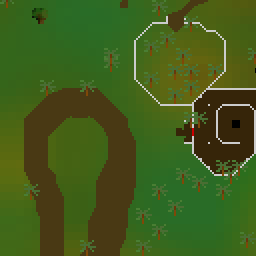
 1234567891011121314151617181920212223242526272829303132333435363738394041424344
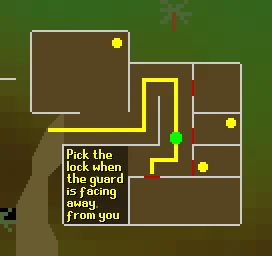
Throughout this section and any time you are re-jailed, you will need to stay one square away from the northern cell wall (near the patrolling guards' path) if the guards are in front of it. If you're in their range, they will punch you for 10-20 damage. The guards follow a path, which is as follows: one of the guards will patrol the area twice, walking the length of the prison each time, and then leave to rotate shifts. Use the time that the guard moves away from your jail door to pick the lock. Once out, as the patrolling guard is walking out to switch with the one on standby, walk behind him to reach the exit. Be prepared to make several attempts.
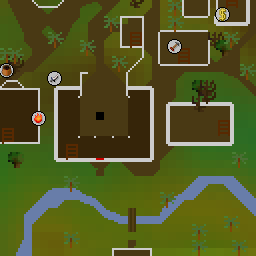
After successfully making it out of the building, travel north of the jail and then east to find Karam, an assassin and member of the 10th Squad. Karam can be found in the bushes near the crafting shop (); he is mostly translucent and he can be difficult to spot, so look carefully. After finding him, speak with him to learn about the gnome mage Zooknock.
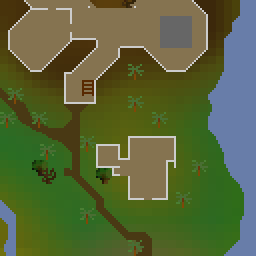
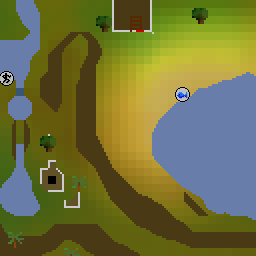
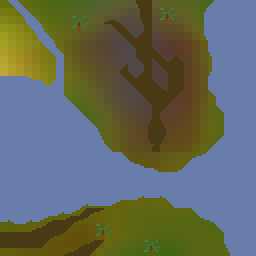
Refer to the map to the right for relevant locations during the quest. Be wary of all yellow dots, as they represent poisonous enemies (scorpions, snakes, and spiders), as well as aggressive monkey archers. When you are in the grass, the monkey archers do not fire, but it's still a good idea to activate Protect from Missiles as a precaution.
Once you're ready, travel south, past the large door, while staying in the tall jungle grass. Past the door, go around the castle counter-clockwise until you're at the southern end, and from here, run south-east, until you are between a white building and the castle. To the east of that building is Garkor, the Sergeant of the 10th Squad. Speak with him, and make sure to get all the way through the dialogue to the point where he tells you to go meet Zooknock in person.
Sprint west through the grass with Protect from Missiles on. Continue west (south of the buildings) in the grass until you reach the doorway to your north, marked on the map image above. Walk through the door to enter an enclosed area with a sleeping monkey guard, a banana crate, and a dentures crate.
When inside this house, stay on the dark brown ground along the walls, or you'll risk being sent back to jail. The spiders inside are poisonous, but their poison only hits 1 damage, so it might be helpful to save your anti-poisons for later in the quest. There are bananas in the south-western crates next to the ladder if the player needs a source of food.
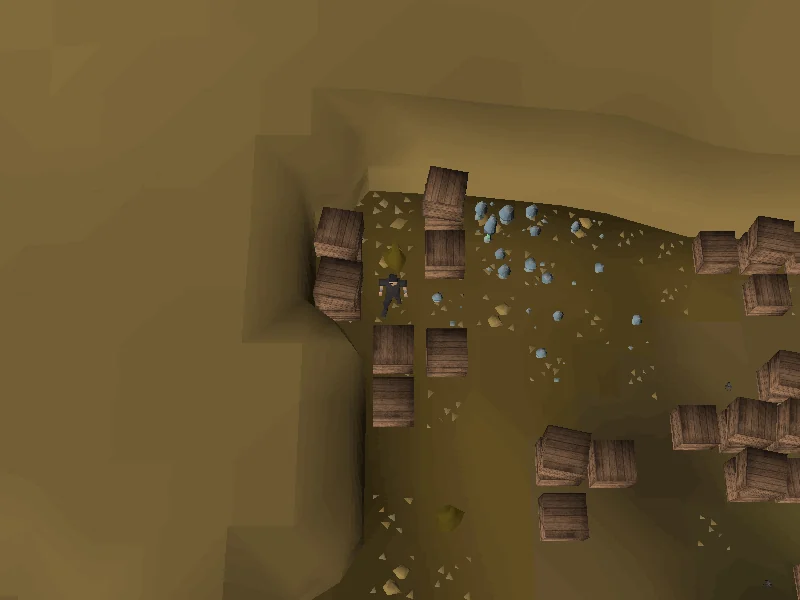
From the entrance, head east and then north, and search the stacked crates towards the middle of the room to acquire monkey dentures. The sleeping guard is a non-threat so long as you don't talk to him; otherwise, he will call for guards.
After you have the dentures, search the south-easternmost crate and a prompt will appear, asking if you're ready to enter the area below. You will take 32.9% of your current hitpoints as fall damage if you drop down into the cavern when entering, so heal up if necessary before attempting it to avoid dying to the poisonous spiders. Your Agility level has a chance to negate this damage, so a summer pie or other Agility boost may help avoid fall damage during this section.
Once inside the cavern, travel to the north-west part of the area and search the crates to acquire the m'amulet mould. At this point, if you need to resupply, you can exit the city by going to the south-east corner of Marim, running past the guards and the gravedigger, and climbing up the ladder. After climbing up, jump off the bridge, and go back to the boat to Crash Island. You can also teleport out.
Note: Strange fruit are handy for this section as they also cure poison. You will spend about 220% total run energy to traverse to the end of the tunnel at minimum weight, with no energy conserving mechanics; bring enough energy restore to accommodate.
It is highly recommended to teleport out and bank at this point. This section involves running past dozens of accurate monkey zombies and gorilla skeletons which can hit up to 7 and 12 respectively, all while inside a long and tight multicombat tunnel. Ironmen or other accounts who don't have access to energy or prayer potions are advised to use other prayer-boosting items, in order to reduce prayer drain. Refer to the table below for the various threats faced throughout the dungeon.
Open the location map on the Wiki ↗
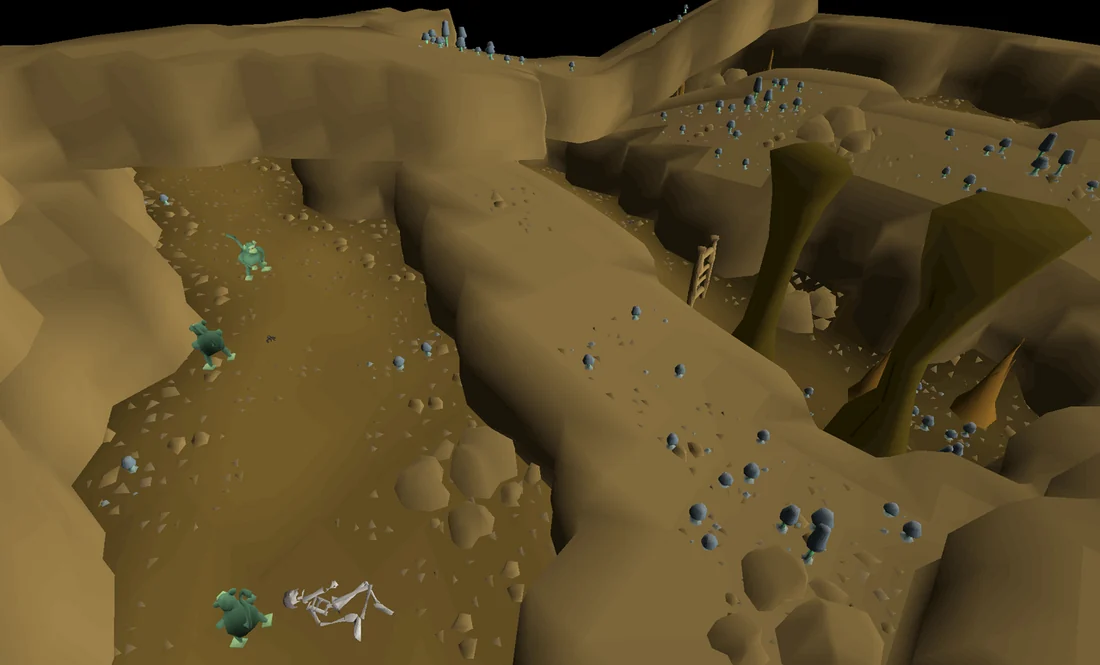
When you're ready, travel back to the southern part of Ape Atoll from the Gnome Hangar by speaking to Daero in the Grand Tree. Once you arrive, head west of Lumdo, and enter the tunnel () below.
As soon as you enter, you'll see the screen will start to shake. Rumbling noises will play, and rocks will begin to fall; until you reach the tunnel, you are at constant risk of taking damage. Use the map to the right to navigate the dungeon.
| Image | Name | Description | Action | Number |
|---|---|---|---|---|
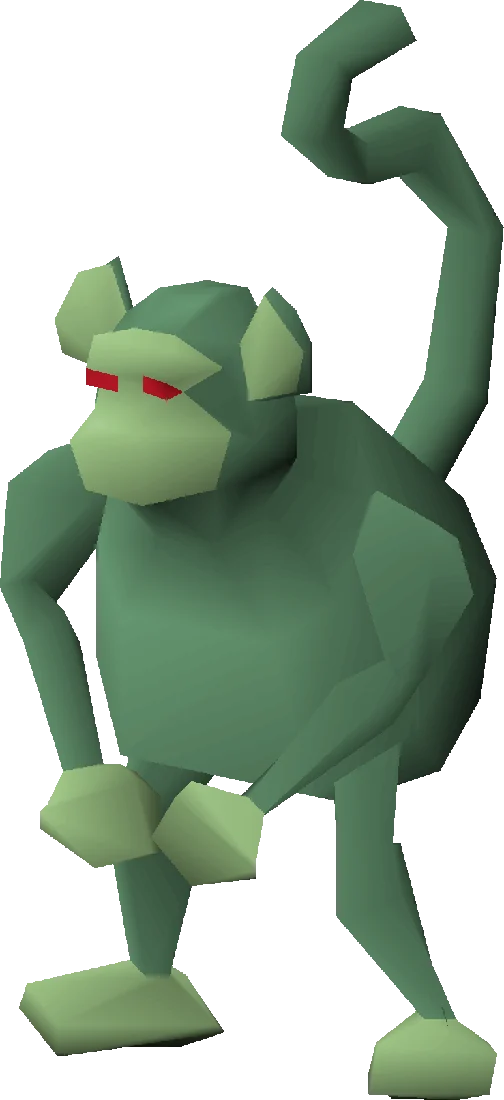 |
Monkey Zombie | Slow-moving zombie monkeys will attack you and hit up to 7 melee damage. | Protect from Melee | 30 |
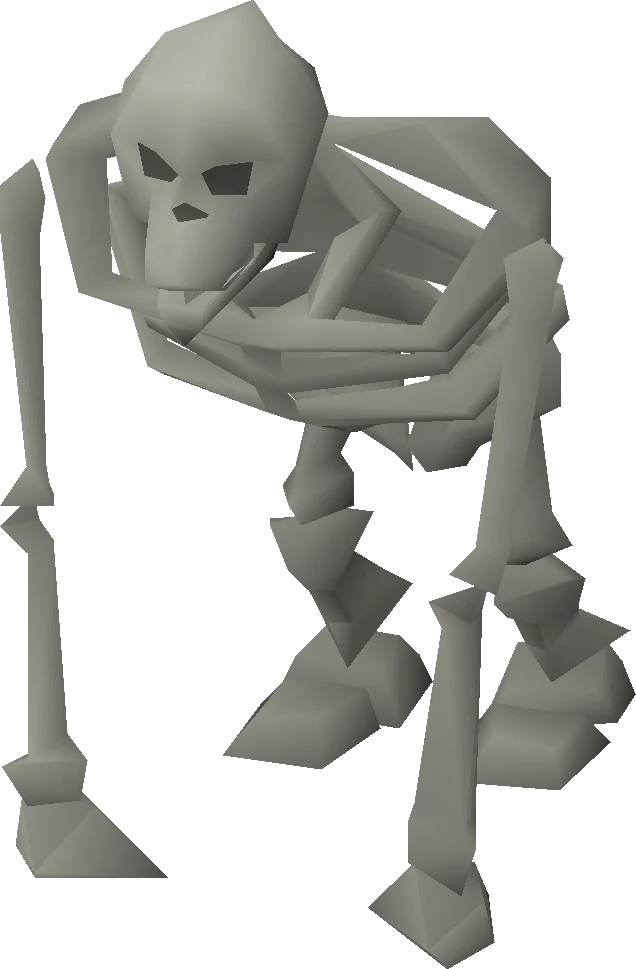 |
Monkey Skeleton | Accurate skeleton monkeys will attack you and hit up to 12 melee damage. | Protect from Melee | 17 |
|
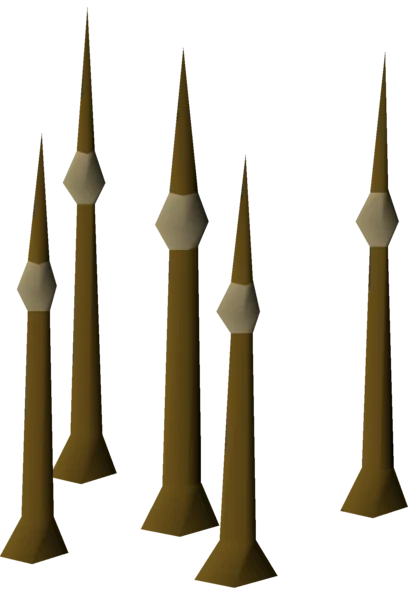
Floor spikes | Spikes will launch from the ground and deal rapid damage if stood on, equal to 7.5% of your current health rounded up. | Avoid the dot clusters on the ground | 30+ |
|
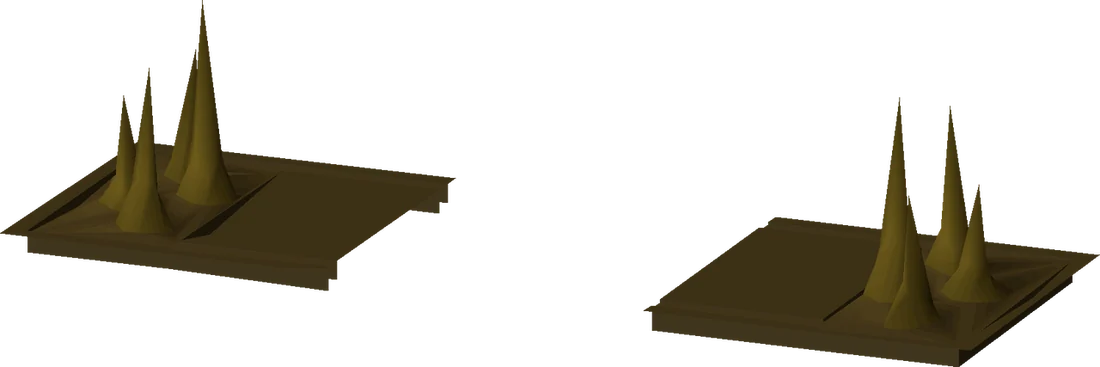
Rock trap | Two stalagmites will crash into you and deal rapid damage if you stand on the rock in the middle, equal to 20% of your current health rounded up. | Step on the square in front of the rock, and then run through by clicking the other side, to avoid all damage. A plank can also be placed on the flat rock to pass the trap. | 2 |
|
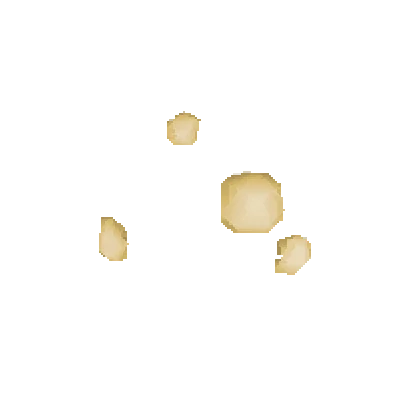
Falling rocks | Every 15 seconds, a pile of rocks will fall from the ceiling, dealing damage equal to 4% of your current health, rounded up. | You can stand under the overhangs to avoid the falling rocks if you are low on food. | N/A |
Even with consistent running, it will take at least three minutes of running to navigate the dungeon. Be prepared to drink your prayer and energy restoring potions, as well as food, when necessary.
At the end of the tunnel, you will find the gnomes Zooknock, Waymottin and Bunkwicket. Talk to Zooknock, and then use your m'amulet mould, gold bar, and monkey dentures on him and speak to him again. Make sure he gives you an enchanted bar before leaving the tunnel. Additionally, do not to use the m'amulet mould on Zooknock when you already have the enchanted bar, as he will keep the mould and you will have to obtain another. Teleport out, and bank if necessary. If you have not gone through all the dialogue with Garkor you will not be able to use the items on him.
Note: If you are going to do Recipe for Disaster, bring a ranged or magic weapon to kill a monkey guard and archer to save time later. Low level Ironmen can use rune spear (kp) from Tai Bwo Wannai Trio if the healing is too much to handle.
After restocking, return to Ape Atoll and continue north-west until you are placed in the jail cell again. Escape the cell as before, then travel east towards the temple.
You must now descend through the trapdoor to the east in the temple (see map). Activate Protect from Melee before entering the temple to block attacks from the powerful monkey guards.
Most of the guards can simply be run through, but the ones with beards near the trapdoor will act as walls, trapping you if they surround you. The easiest method to get past the bearded gorillas is to go upstairs, and then climb down the ladder on the east side to get close to the trapdoor. If you choose to walk to the ladder directly, make sure to wait until the guards walk away; players can hide in the north-east corner of the temple until there is enough room to descend. If you're surrounded by guards and can't move, teleport out immediately; if you're trapped near the ladder, go up the stairs and hop worlds. Note that the ladder near the trap door can only be climbed up from the EAST side.
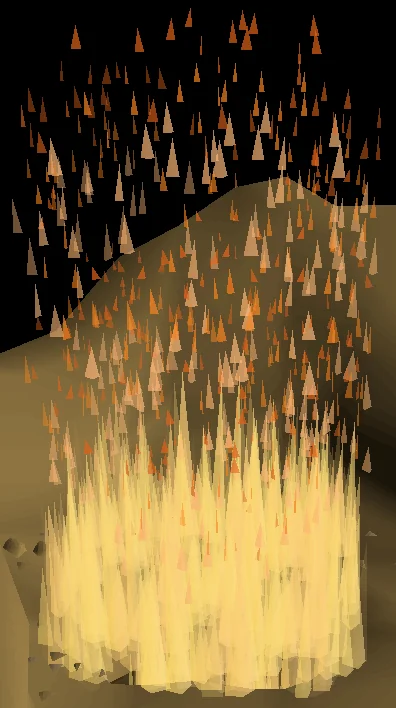
Go down the trapdoor while still praying against melee. Ignore the monkey zombies (or kill one and pick up the bones if you want to do Recipe for Disaster later), and swiftly use the enchanted bar on the nearby wall of flames to make an unstrung monkey amulet. Either travel back up the ladder or find a safespot to get away from the foes, and use the ball of wool with the unstrung amulet to create the full m'speak amulet. Be aware that if you ascend the ladder, you will be attacked and can be trapped as before, so ensure Protect from Melee is active.
Head to the building west of the jail, making sure to sneak through the grass. You'll see a banana garden that has a Monkey Child in it, which is being patrolled by The Monkey's Aunt. The aunt follows a predetermined path, which loops around the wooden house by the garden; do not enter the garden when the monkey's aunt is present, or she will call for guards to arrest you. Note that if you're caught, you can sometimes escape without being arrested by quickly climbing up the ladder in the building nearby before the monkeys reach you. Do not speak to The Monkey's Uncle upstairs, as he will also call the guards. You can use the abandoned building next to the banana garden to quickly access the garden, as it has a connecting corridor out of sight.
Wait for the aunt to walk away, then speak to the monkey child, and tell him that you are his uncle. After he reveals that he is supposed to collect 20 bananas, search and pick five bananas from the nearby trees. The monkey cannot count, so you do not necessarily need 20, as long as you give him at least 5. Give him the bananas, then wait for a few moments in the corridor, and return to the monkey child when the aunt is away. Ask the child to lend you his monkey talisman.
You can obtain more than one talisman without dropping your current ones, so be sure to get an additional talisman for each greegree you want (four in total are needed for all quests; see below). You will need to speak to the monkey child again for each one, telling him you have lost the talisman, which will cause him to cry. Waiting for the aunt to pass by the child again will make the monkey child have another talisman available; Alternatively, you can switch worlds to potentially make the process go faster. If you talk to the child again before the aunt has passed by, you will get the message "The monkey child is too busy crying..."
Note that after you make your first greegree, talismans can be purchased from Tutab's Magical Market for 1000 coins. Tutab will not open his shop unless you are in monkey form.
Note: This section is optional and not required for completing the quest, but it is required for future quests and it is convenient to do it now to save a future trip through the tunnels.
For the Recipe for Disaster quest, you will need an additional three greegrees (four in total). Each of these requires one talisman, for a total of four talismans plus their respective monkey bones if making all talismans in one go. You will save yourself several trips if you obtain all of these materials before going to Zooknock in the next section. You must kill one of each of the following:
| Type | Bones/corpse from | Quest |
|---|---|---|
| Karamjan monkey | 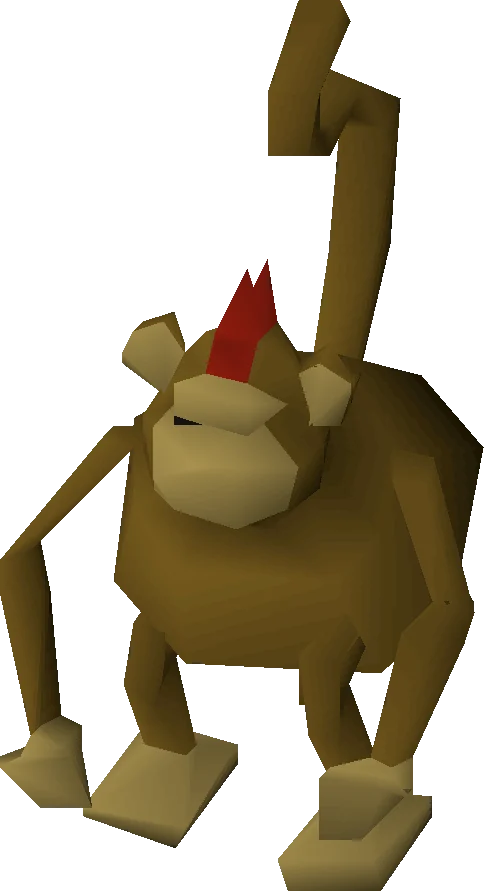
|
Monkey Madness I |
| Ninja monkey | 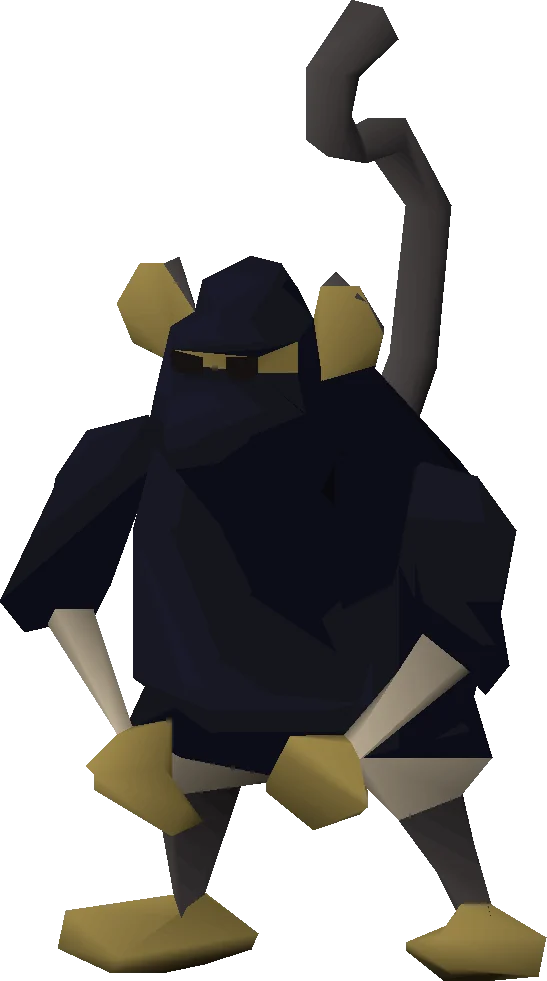
|
Freeing King Awowogei |
| Gorilla | 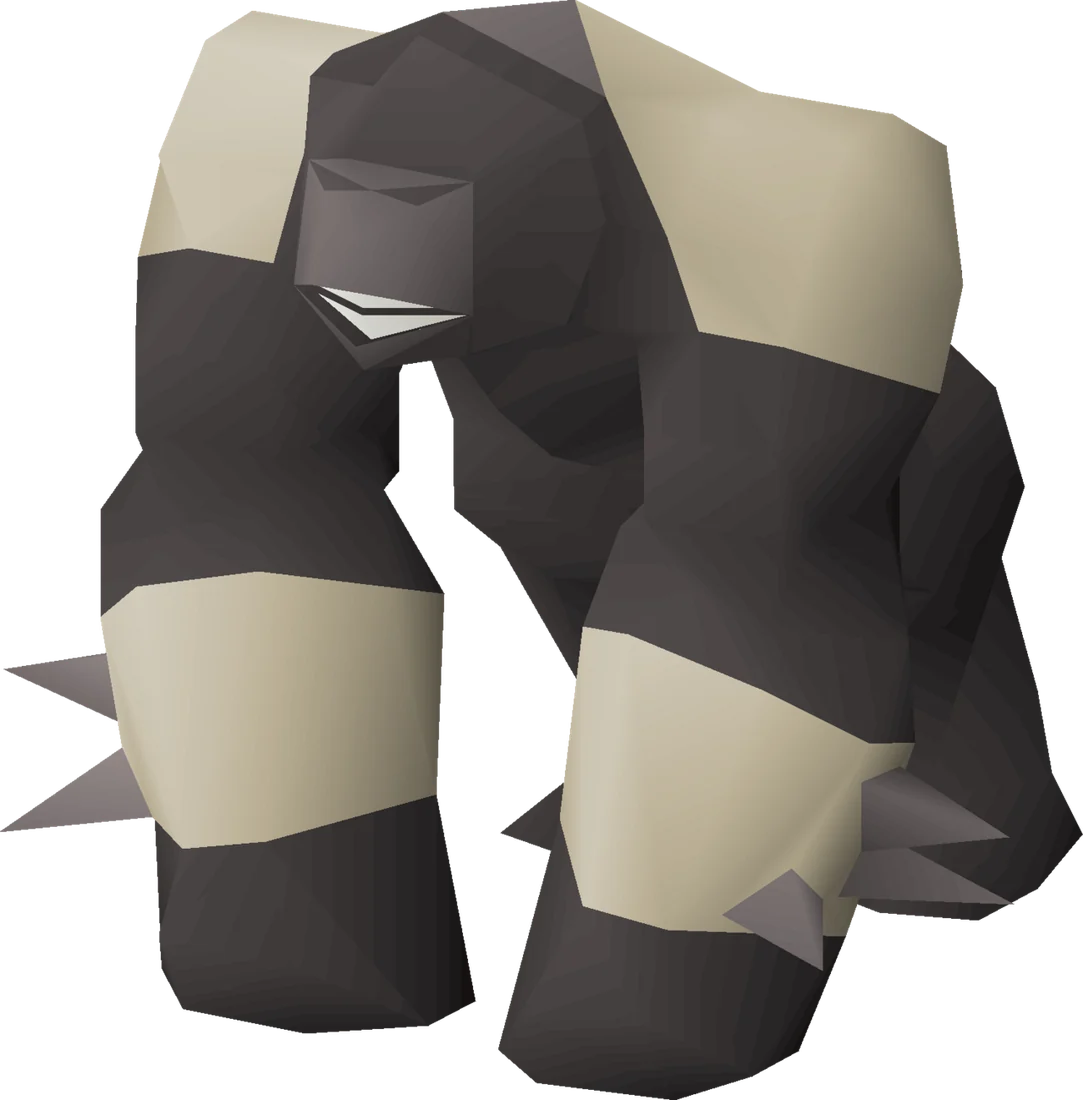
|
Freeing King Awowogei. Using melee is not recommended to fight the Monkey Guards, as they will indefinitely heal for 25 hitpoints when low health and in melee range. If using melee, you may get the guard to 26hp and then use poison or ranged to finish it off from a distance. |
| Zombie monkey | 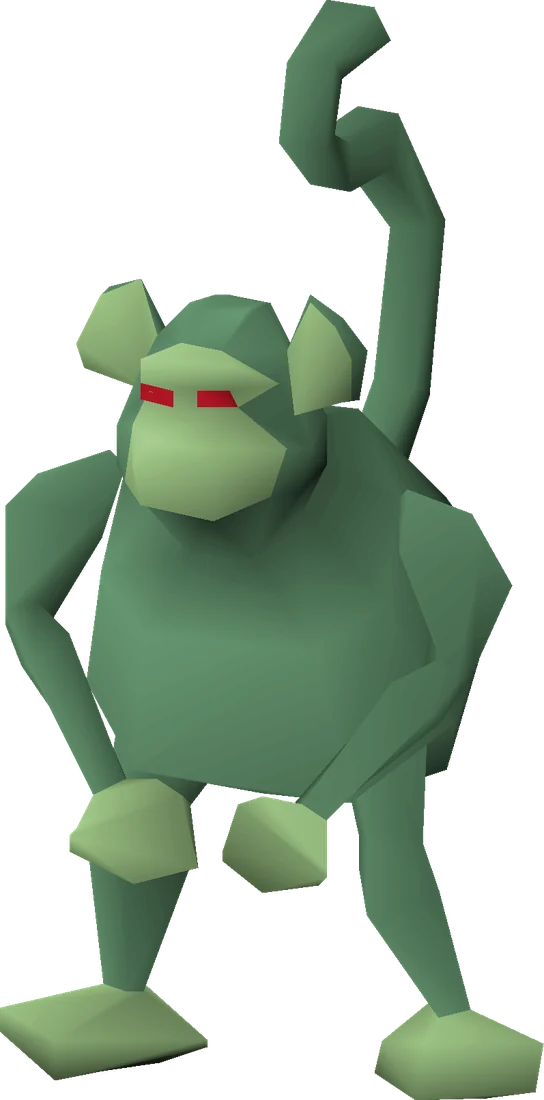
|
Freeing King Awowogei |
Note: Some monkeys will have large and small variants; both will work for the quests, and merely change the size of your monkey form.
Once you have all of the required bones (or monkey corpse) and talismans, you must run through the tunnels again, bringing your items to Zooknock. Travel through the tunnel for a second time, and when you reach the end, use the monkey talisman and all monkey bones (or corpses) on Zooknock.
After a brief delay and conversation, you will get a greegree corresponding to the bones you used on him. To make another greegree, you have to first talk to him again and ask him if he can make another. If you cancel the conversation accidentally, ask how to make the monkey talisman and it will resume. If for some reason this doesn't work, try the drop trick with your previous greegrees, and go through the dialogue again. After all desired greegrees are made, bank or stock up as needed, and return to Ape Atoll.
''In which our hero/heroine finds himself/herself contending with life as a monkey.''
In this chapter, you will be required to speak with King Awowogei and retrieve a monkey from the Ardougne Zoo. If you need to bank or in order to be more efficient, you can skip to retrieving the monkey in Ardougne (section "Monkey See, Monkey Zoo" below), and then speak with Awowogei when you return to Ape Atoll (steps 1-3).
1- Wield the monkey greegree to become a monkey. In this form, you will not be approached or attacked by any of the monkeys or wildlife on the island, and you cannot engage in combat. As a Karamjan monkey, return to Garkor and speak with him. If you are transformed into a different kind of monkey, he'll tell you to change and come back. After you finish talking, with the m'speak amulet equipped, talk to the Elder Guard near Garkor. The guard will tell you to speak with Kruk.
2- From the guard, run west until you pass the main gate into Marim and have reached the Western shore of Ape Atoll (do not exit the gate). Head slightly south and follow the ground path up the western hill, then climb up the bamboo ladder at the top and cross the bamboo bridge. Climb down the ladder on the east side and speak to Kruk. After the conversation ends, he will conveniently take you back to King Awowogei.
3- Speak to Awowogei and offer an alliance, and he will ask you to rescue a monkey from the Ardougne Zoo. Teleport out and make your way to Ardougne.
Once in Ardougne, ensure you have an empty inventory space and then head to the south-west corner and enter the zoo. Wield the greegree inside the zoo area to become a monkey, and then speak to the Monkey minder, who will place you in the cage. Speak with a monkey (the only one with a "Talk" option), and it'll hop into your inventory; then, unequip the greegree and speak to the Monkey minder again. He will be confused and let you out.
You will now need to travel by foot to the Gnome Stronghold. You cannot use any form of teleportation (including random events, spirit trees and fairy rings), as doing so will remove the monkey from your inventory, requiring you to re-obtain it from the zoo. The canoe system will work, however.
Once in the Gnome Stronghold, talk to Daero on the 1st floor (UK) to travel back to Ape Atoll as usual.
Once on Ape Atoll, equip your greegree and amulet to speak with Awowogei again. (If you have spoken before, simply speak to the Elder Guard to be let in; if not, refer to the section above). The monkey will automatically leave your backpack after speaking to Awowogei, and the king will consider an alliance.
Speak with Garkor to begin Chapter 4.
Speak with Garkor one more time (as a human or monkey) to receive a 10th squad sigil. Do not equip it until you are ready for the final battle. Make sure to hold onto the sigil, as if you lose it, Garkor will send you to Waymottin at the end of Zooknock's tunnel to reclaim it.
Bank in preparation for the Jungle Demon fight, and ensure you have full prayer points and health. When you are ready to fight, wear the sigil, and you will be promptly teleported to the Jungle Demon's arena.
note:
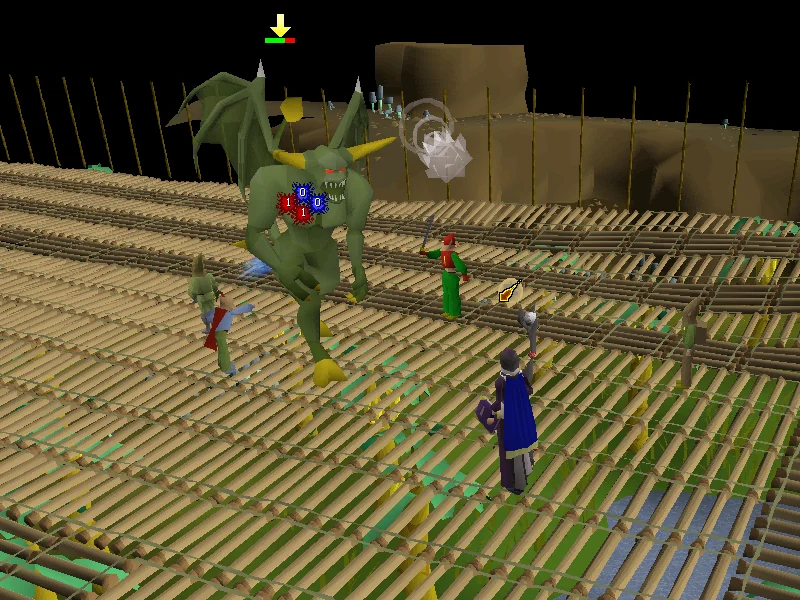
Upon landing in the arena, you'll be confronted by a level 195 Jungle Demon which can hit up to 32 with both magic and melee. Protection prayers reduce all damage to zero; as such, if the player stands out of melee range, the fight can be completed by simply leaving on Protect from Magic and attacking the demon with Magic or Ranged. Note that the demon's melee attack can hit you even if you're two squares away, similar to a halberd; ensure you're three or more squares away to avoid it. Additionally, standing still once you are teleported to the arena will keep a distance between you and the Demon, who will not move until you do, although it will still attack you with Magic.
The 10th Squad gnomes will be nearby to assist with the fight, but you must deal the final blow to the demon yourself. If the gnomes deal the final strike, he will heal around 20 percent of his health (anywhere from 12%-25%); when the demon reaches 1 hitpoint, there will be a period where the gnomes stop attacking, so use this window to deal the final blow yourself.
The demon is weakest to Ranged, although Magic is fairly effective. Players should focus on their combat style with the highest damage. Note that the dwarf multicannon is effective against the demon, allowing pure accounts to kill him without gaining any Hitpoints experience; additionally, despite being from the jungle, he is not immune to poison. Melee is not recommended, but players looking to use melee combat will benefit from using rings of recoil, as the demon's melee attacks hit very accurately. There is a safespot in the arena, across a bridge on the outside edge. When you run to the safespot, he will make his way to the bridge, but won't be able to fit over it. You may run further down the outside edge to stop him from attacking at all, allowing you to wait for the 10th Squad to weaken him, then returning to the bridge to deal the final blow.
If you die during the fight, the sigil can be reclaimed from Death's Office. No need to run through the Ape Atoll Dungeon.
| Mission Over | |
| The jingle that plays upon defeating the jungle demon. | |
Once the Jungle Demon is slain, speak to Garkor, who is indicated by an arrow. He will tell you to speak to Zooknock; speak to Zooknock nearby to get the option to be teleported back to Ape Atoll. If players decline the offer and stay, they are free to explore the banana plantation, but Zooknock will leave, requiring players to speak to Bonzara instead if they want to be teleported. He can be found in the crack at the base of the statue.
Escape the island however you like, either through the main gates as a monkey, with any form of teleport, or by jumping off the bridge in the south-east part of the city, and go back to the Gnome Stronghold.
Speak with King Narnode in the Grand Tree to finish the quest.
Congratulations, quest complete!
The king will then redirect you to Daero for your training as a new 10th squad member, so go have a chat with Daero for some optional experience rewards.
Use this when you already know the route. The full walkthrough above includes explanations and diagrams.
Speak to King Narnode Shareen at the Grand Tree.
Say: Yes
Without an open inventory space, the gnome royal seal will be dropped on the ground.
Climb up the tree and take the glider to Gandius.
If you don't have the monkey bones yet, you can kill a monkey nearby for some. (If you have started Tai Bwo Wannai Trio, only a monkey corpse will drop. That will work as well)
Enter the Shipyard gate to the north. Make sure you have the Royal Seal with you.
Speak with G.L.O. Caranock in the building south of the gate.
Return to King Narnode and speak to him. (Make sure you have 1 inventory space free as he will drop Narnode's orders to the floor otherwise).
Talk to Daero in the bar on the first floor (east side) of the Grand Tree.
Say: Talk about the journey... → Return to previous menu → Talk about the 1-th squad... → Return to previous menu → Talk about Caranock... → Return to previous menu → Leave... → Who is it? Make sure to go through all of the Chat Options to be teleported to a new location.
Talk (not "travel") to Daero again inside the hangar.
Click the panel in the south-eastern region of the hangar and solve the sliding puzzle. (guide here)
Alternatively, pay Glough (back in the Stronghold) 200000 coins to solve it for you.
Watch the cutscene. Talk to Daero, then Waydar to fly to Crash Island.
Say: Yes
Talk to Lumdo.
Talk (not "travel") to Waydar twice, who will convince Lumdo to follow orders.
Say: I cannot convince Lumdo to take us to the island.
Talk to Lumdo again to travel west to Ape Atoll.
You may wish to keep Protect from Melee prayer on at all times, switching to Protect from Missiles prayer when you get near the gate (where indicated).
If at any point in the island you have the guards called on you, it is recommended to log out or hop worlds to avoid going back to jail.
On the island, follow the red path on the map into the valley. You will be shot and arrested.
Watch the guards' pattern, pick the lock on your cell door and escape the prison.
Stay at least 2 squares away from the guards even while in the cell.
Follow the green path and talk to Garkor (Complete dialogue or Zooknock will not give you the m'speak amulet).
Follow the blue path to the U-shaped building and enter through the southern door.
Stay on the dark brown floor or you will alert the guards.
Search the stacked crates on the light brown floor for Monkey dentures. (Complete the dialogue)
Search the south-eastern crate to fall into a cave.
Say: Yes, I'm sure.
Heal up before you do, you can take fall damage.
Search the crates in the north-west for a M'amulet mould.
You may now teleport away.
Now is an ideal time to resupply at a bank before heading into the Ape Atoll Dungeon.
Return to Ape Atoll by talking to Daero, Waydar, and Lumdo.
Follow the yellow path west and climb down the ladder into the Ape Atoll Dungeon.
Run to the end of the dungeon.
Use Protect from Melee prayer and ignore all the hazards, eating food and drinking potions as needed.
Talk to Zooknock.
Use your Monkey dentures, M'amulet mould, and Gold bar on Zooknock.
Talk to Zooknock to get an Enchanted bar and your M'amulet mould back.
Do not use the m'amulet mould on Zooknock when you already have the enchanted bar, otherwise he will keep it and you will have to obtain another.
Teleport away, then return by talking to Daero, Waydar, and Lumdo.
Follow the red path, get arrested, escape, then follow the pink path to the temple.
(Note: bearded guards cannot be walked through!) Enter the trapdoor. You may need to climb up the ladder to the south then down in the east to avoid the gorillas.
With a M'amulet mould in your inventory, use the Enchanted bar with a wall of flames, then string it with your Ball of wool to create the M'speak amulet.
Optional: If you plan on doing the Freeing King Awowogei section of Recipe for Disaster:
Kill one of the Monkey Zombies and pick up the zombie monkey bones.
Climb back up the rope, kill one of the Monkey Guards and pick up the gorilla bones.
If you're having trouble with the guard, stay out of melee range so it doesn't heal.
Follow the pink path back to the jail, then the cyan path to the Monkey child's house.
Keep an eye on The Monkey's Aunt, it's only safe to be in the garden while she isn't near it.
Equip your M'speak amulet and talk to the monkey child.
Talk to the monkey child twice more.
Say: Well I'll be a monkey's uncle! → How many bananas did Aunty want?
Pick 5 Bananas from the trees in the garden.
Talk to the monkey child to give him the bananas.
Leave the garden and wait for the aunt to pass through.
Talk to the monkey child to get a Monkey talisman.
Optional: If you plan on doing the Freeing King Awowogei section of Recipe for Disaster:
Talk to the monkey child again.
Say: I've lost that toy you gave me...
Leave the garden, hop worlds or wait for the monkey child to stop crying.
Talk to the monkey child again.
Say: Wow - can I borrow it? → Ok, I promise!
Repeat the above steps until you have four Monkey talisman in total.
If doing Freeing King Awowogei section, climb the ladder in the east building from Child, cross bridge east and there will be Monkey Archers you can kill and pick up one set of ninja monkey bones
Teleport away, then return by talking to Daero, Waydar, and Lumdo.
Now is an ideal time to resupply at a bank for the Ape Atoll dungeon.
Bring good Food, as well as Prayer, Antipoison, and Stamina/Energy potions.
Follow the yellow path west and climb down the ladder.
Run to the end of the dungeon.
Use Protect from Melee prayer and ignore all the hazards, eating food and drinking potions as needed.
Give Zooknock your Monkey talisman and Monkey bones (make sure these are bones from the regular monkeys; examine Text: These are small monkey bones.). After a moment he will give you a Greegree.
Do not accidentally bury the bones! Right click them and carefully select "use".
Do not leave the dialogue with Zooknock prematurely. Should the player exit the cutscene before it has finished, talking to Zooknock again will restart the cutscene, and no items will be lost.
Optional: If you plan on doing the Freeing King Awowogei section of Recipe for Disaster:
Talk to Zooknock again.
Say:
Use another talisman and bone on him. The type of bones you give him will determine the Greegree you receive. After a moment he will give you another Greegree.
Repeat the above steps until you have four Greegrees in total. (Karamjan, Ninja, Zombie, and Gorilla)
Note: Teleporting while wielding the Greegree will force it into your inventory. If your inventory is full then it will be dropped. If unnoticed, the Greegree can be lost.
Head to the Ardougne Zoo and equip your Karamjan monkey greegree, then talk to the Monkey minder. If you haven't talked to him before, click through his dialogue (ask any question), then equip the Karamjan monkey greegree.
Equip your M'speak amulet and talk to a monkey, it will jump in your bag.
Remove your greegree and talk to the minder again.
Travel by foot (walk or run) back to the Grand Tree, then return to Ape Atoll by talking to Daero, Waydar, and Lumdo. Do not use any means of teleportation.
Equip your M'speak amulet and Karamjan monkey greegree. Ape Atoll is no longer your enemy when wearing a greegree!
If you want to skip going to talk to Kruk and you brought mithril seeds or tinderbox and logs you can stand on the east side of the Elder Guard and plant the mithril seeds or light a fire to be force moved one tile west and thus bypass needing to talk to Kruk or to Garkor.
Follow the red path, go through the gates, then walk east to the coast and talk to Garkor.
Talk to the nearby Elder Guard.
Head to the west coast of the island (orange path), then climb up the hill to the south.
Climb the ladder, walk across the bridge, climb down, and talk to Kruk.
Talk to Awowogei.
Talk to Awowogei again. Then talk to the Elder Guard again to be let out.
Talk to Garkor and watch the cutscene.
Talk to Garkor again to get the 10th squad sigil.
Prepare for final battle.
Equip the 10th squad sigil when you are ready to fight the Jungle Demon.
Tip: Use Protect from Magic prayer and stay out of melee range to avoid taking damage.
Kill the Jungle Demon.
Return to the Grand Tree and talk to King Narnode Shareen.
Congratulations, quest complete!
QUEST COMPLETE
OSRS WIKI CONTRIBUTORS
Walkthrough text and preparation lists are adapted from Old School RuneScape Wiki contributors under CC BY-NC-SA 3.0. Game imagery © Jagex Ltd; individual image credits are available from their captions. This page is fan-made and not affiliated with Jagex.
KEEP QUESTING
Game icons © Jagex Ltd, via the OSRS Wiki. Interface icons by Lucide.