| Lightbearer | |||||||||||||||||||
|---|---|---|---|---|---|---|---|---|---|---|---|---|---|---|---|---|---|---|---|
 | |||||||||||||||||||
| Released | 24 August 2022 (Update) | ||||||||||||||||||
| Members | Yes | ||||||||||||||||||
| Properties | |||||||||||||||||||
| Tradeable | Yes | ||||||||||||||||||
| Equipable | Yes | ||||||||||||||||||
| Stackable | No | ||||||||||||||||||
| Noteable | Yes | ||||||||||||||||||
| Options | Wear, Drop | ||||||||||||||||||
| Examine | A heavy ring that glimmers with a strange power. | ||||||||||||||||||
| Values | |||||||||||||||||||
| Value | 1,000,000 coins | ||||||||||||||||||
| High alch | 600,000 coins | ||||||||||||||||||
| Low alch | 400,000 coins | ||||||||||||||||||
| Weight | 0.05 kg | ||||||||||||||||||
| Grand Exchange | |||||||||||||||||||
| Exchange | 4,438,817 coins (info) | ||||||||||||||||||
| Buy limit | 8 | ||||||||||||||||||
| Daily volume | 929 | ||||||||||||||||||
View real-time prices | |||||||||||||||||||
| Advanced data | |||||||||||||||||||
| Item ID | 25975 | ||||||||||||||||||
| Link | MOID | ||||||||||||||||||

The Lightbearer is a ring obtained as a rare reward from the Tombs of Amascut. The ring was crafted by the warrior Ahmek from the unstable energy left behind from Tumeken's sacrifice that ended the Kharidian–Zarosian War.[1]
The ring has no requirements to wear. It regenerates the player's special attack energy twice as fast at 15 seconds per 10%, or 2 minutes and 30 seconds for 100%. Equipping the ring will cause the special attack energy restoration timer to reset only if natural regeneration is below half. Unequipping the ring will always cause the special attack energy restoration timer to reset.
Combat stats
 Attack bonuses Attack bonuses | ||||
|---|---|---|---|---|
 |  |  |  |  |
| +0 | +0 | +0 | +0 | +0 |
 Defence bonuses Defence bonuses | ||||
| | | | |
| +0 | +0 | +0 | +0 | +0 |
 Other bonuses Other bonuses | Slot | |||
 |  |  |  |  |
| +0 | +0 | +0% | +0 | List |
Utility
Because of the unique way Lightbearer interacts with the existing energy and special attack system, it creates many opportunities for new strategies.
Skilling
When using dragon tools (harpoon, axe, pickaxe) or their upgraded variants that share the bonus special attack, Lightbearer doubles the frequency of the skilling bonus granted, making it viable to consistently gather resources 1 level (100% uptime) or 2 levels (80% uptime or 100% with Preserve) above a player's base.
Because Preserve increases the time before a skill boost decreases by a level from 60 to 90 seconds, and Lightbearer reduces the special attack recharge time to 150 seconds, mistiming the special attack when skilling can lead to a period of up to 70 seconds where the boost is only +1 level before the special attack is available again. In order to use Preserve and Lightbearer to constantly remain boosted by at least 2 levels, the player cannot use their special attack as soon as it becomes available. Instead, to maintain a +2 level skilling boost with 100% uptime, the special attack should be used immediately after the skill bonus decreases from +2 to +1.
Similarly, when using Lightbearer alone (without Preserve) to maintain a persistent +1 boost, mis-timing the tool's special attack can lead to a period of up to 30 seconds with no boost before the special attack fully recharges. To eliminate this period, the player should use their special attack immediately after the boost falls from +1 to 0 (no boost), which works out to be every 180 seconds.
Resource conservation
When used alongside special attacks that restore prayer points - particularly the Saradomin godsword or Eldritch Nightmare staff - the Lightbearer can allow the endless use of protection or damage boosting prayers without the need for consumables, while health restoring specials like the Toxic blowpipe and Saradomin godsword can reduce or eliminate the need for food entirely.
These combinations may be very useful for lowering the number of banking trips during any outing, or increasing the number of bosses killed before a bank is necessary.
Bossing
In general, Lightbearer competes with damage-boosting rings when using a strong special attack weapon (such as Voidwaker, Zaryte crossbow or Bandos godsword), especially for prolonged encounters. However, it is more situational.
Whether the Lightbearer is more efficient than other rings depends on a number of factors:
- the amount of downtime – when not attacking anything where a damage bonus would be useful, special attack can regenerate faster without sacrifice
- the effectiveness of the special attack versus main weapon – if the special attack is only slightly more powerful or useful in comparison, sacrificing damage for more specials is not worthwhile
- the main weapon itself – some weapons benefit from strength upgrades more than others due to their damage calculation, notably the scythe of Vitur and emberlight
- combat style(s) used – with melee, the ultor ring (or its downgrades) provides a substantial boost to overall damage, making Lightbearer less useful in comparison; conversely with ranged, the venator ring provides only a minor boost; and with magic, there are few especially powerful special attacks
For example, at Theatre of Blood there is usually little downtime (except between rooms, where special attack energy refills automatically) and the main weapon of choice is a scythe of Vitur; as such, the ultor ring provides higher damage output than the extra special attacks provided by Lightbearer would (unless not using the scythe). In contrast, at Tombs of Amascut special attacks play a more pivotal role (for damage, defence reduction and healing with Keris partisan of the sun) while damage-boosting rings give less substantial bonuses to Tumeken's shadow and Osmumten's fang, making the Lightbearer better overall.
PvP
Popular PvP strategies rely heavily on special attacks from various weapons to finish or gain advantages in a fight. Because of this, the lightbearer can be used to trick or surprise players who otherwise believe they are safe from a special attack and may have spent time memorising the default special attack timings.
Because the time to regenerate 10% of your special attack energy is reduced as well, new combinations of weapon special attacks may become more viable. For example, a dark bow special (55% energy) followed by dragon claws (50%) combination would usually take 30 seconds but can now be executed in 15.
Item sources
| Source | Level | Quantity | Rarity |
|---|---|---|---|
| Chest (Tombs of Amascut) | N/A  | 1 | 7/24 |
Used in recommended equipment
| Rank | Method |
|---|---|
| 1 | Slayer training (Melee) |
| 1 | K'ril Tsutsaroth/Strategies (Ranged) |
| 1 | K'ril Tsutsaroth/Strategies (Solo Melee) |
| 2 | Commander Zilyana/Strategies (Magic) |
| 1 | Dagannoth Kings/Strategies (Tribrid (All Kings)) |
| 1 | TzHaar Fight Cave/Strategies (Ranged) |
| 1 | TzHaar Fight Cave/Strategies (Melee) |
| 1 | TzHaar Fight Cave/Strategies (Ranged (Atlatl)) |
| 3 | Mithril dragon/Strategies (Melee) |
| 1 | Kalphite Queen/Strategies (High level melee) |
| 1 | Kalphite Queen/Strategies (High level ranged) |
| 1 | Kalphite Queen/Strategies (Max Mage (0 switches)) |
| 1 | Kree'arra/Strategies (Magic) |
| 1 | Kree'arra/Strategies (Chinchompas) |
| 2 | Kree'arra/Strategies (Tbow / Bowfa) |
| 1 | Kree'arra/Strategies (Melee (soulflame horn)) |
| 1 | General Graardor/Strategies (Melee (Solo)) |
| 1 | General Graardor/Strategies (Advanced Tank) |
| 1 | General Graardor/Strategies (Ranged Tank) |
| 1 | General Graardor/Strategies (Melee Attacker) |
| 3 | Zulrah/Strategies (Melee) |
| 3 | Metal dragons/Strategies (Melee) |
| 3 | Sandstone rocks (Mining) |
| 3 | Kraken/Strategies (Magic) |
| 3 | Cerberus/Strategies (Melee) |
| 1 | Cerberus/Strategies (Ranged) |
| 3 | Slayer task/Dark beast (Melee) |
| 5 | Slayer task/Dark beast (Melee (Prayer bonus)) |
| 3 | Demonic gorilla/Strategies (Melee) |
| 2 | Demonic gorilla/Strategies (Ranged) |
| 1 | Abyssal Sire/Strategies (Phase 1 Melee) |
| 3 | Abyssal Sire/Strategies (Phase 1 Melee) |
| 1 | Abyssal Sire/Strategies (Phase 2 Melee - DPS) |
| 3 | Abyssal Sire/Strategies (Phase 2 Other Melee Weapons) |
| 1 | Abyssal Sire/Strategies (Phase 2 Magic) |
| 5 | Thermonuclear smoke devil/Strategies (Melee) |
| 5 | Thermonuclear smoke devil/Strategies (Melee) |
| 3 | Lizardman shaman/Strategies (Ranged) |
| 3 | Lizardman shaman/Strategies (Melee) |
| 1 | Chambers of Xeric/Strategies (Melee) |
| 3 | Maniacal monkey/Strategies (Melee with Hallowfell) |
| 4 | Sulliuscep/Strategies |
| 4 | Sulliuscep/Strategies |
| 2 | Grotesque Guardians/Strategies (Melee) |
| 2 | One-defence pure (Melee) |
| 2 | One-defence pure (Ranged) |
| 2 | One-defence pure (Magic) |
| 2 | Giant Mole/Strategies (Ranged) |
| 2 | Giant Mole/Strategies (Melee) |
| 2 | Giant Mole/Strategies (Dharok's) |
| 1 | Vorkath/Strategies (Ranged (crossbow)) |
| 2 | Vorkath/Strategies (Melee) |
| 3 | Rune dragon/Strategies (Melee) |
| 2 | Aviansie/Strategies (Ranged) |
| 1 | Alchemical Hydra/Strategies (Ranged) |
| 1 | Alchemical Hydra/Strategies (Melee) |
| 2 | Inferno/Strategies (First cape) |
| 2 | Inferno/Strategies (On task) |
| 1 | Ultimate Ironman Guide/Equipment |
| 1 | Ultimate Ironman Guide/Equipment |
| 1 | Ultimate Ironman Guide/Equipment |
| 2 | The Nightmare/Strategies (Mage) |
| 2 | Basilisk Knight/Strategies (Ranged) |
| 3 | Basilisk Knight/Strategies (Melee) |
| 3 | Slayer task/Gargoyles (Melee) |
| 2 | Slayer task/Gargoyles (Ranged) |
| 1 | Slayer task/Dust devils (Melee) |
| 4 | Slayer task/Drakes (Melee) |
| 1 | Chambers of Xeric/Challenge Mode/Strategies (Melee) |
| 1 | Slayer task/Abyssal demons (Magic) |
| 4 | Slayer task/Jellies (Melee) |
| 1 | Slayer task/Jellies (Magic) |
| 3 | Slayer task/Trolls (Melee (Ice trolls)) |
| 3 | Slayer task/Trolls (Melee (Mountain trolls)) |
| 2 | Shooting Stars (Shooting Stars) |
| 3 | Adamant dragon/Strategies (Melee) |
| 1 | Tempoross/Strategies (Standard) |
| 1 | Tempoross/Strategies (Solo Cooking + Firefighting (Max Permits)) |
| 1 | Phosani's Nightmare/Strategies (Melee) |
| 1 | Phosani's Nightmare/Strategies (Mage) |
| 1 | Fight Caves Speed-Runner (Ranged) |
| 1 | Nex/Strategies (Ranged) |
| 1 | Nex/Strategies (Hybrid) |
| 3 | Guardians of the Rift/Strategies (Runecrafting) |
| 3 | Slayer task/Wyrms (Ranged) |
| 4 | Slayer task/Waterfiends (Melee) |
| 2 | Slayer task/Waterfiends (Magic) |
| 1 | Tombs of Amascut/Strategies (Melee switch) |
| 1 | Tombs of Amascut/Strategies (Ranged switch) |
| 1 | Tombs of Amascut/Strategies (Magic switch) |
| 1 | Down Do Specs (Melee) |
| 1 | Chompington (Melee) |
| 1 | Phantom Muspah/Strategies (Magic) |
| 1 | Phantom Muspah/Strategies (Ranged) |
| 4 | Phantom Muspah/Strategies (Melee) |
| 3 | Slayer task/Suqah (Melee (South)) |
| 2 | The Whisperer/Strategies (Magic) |
| 1 | The Leviathan/Strategies (Ranged) |
| 2 | The Leviathan/Strategies (Magic) |
| 1 | Duke Sucellus/Strategies (Melee) |
| 4 | Vardorvis/Strategies (Melee) |
| 2 | Scurrius/Strategies (Melee (mid level)) |
| 4 | Scurrius/Strategies (Melee (high level)) |
| 3 | Scurrius/Strategies (Ranged (high level)) |
| 1 | Fortis Colosseum/Strategies (Ranged) |
| 2 | Fortis Colosseum/Strategies (Mage) |
| 1 | Fortis Colosseum/Strategies (Budget) |
| 1 | Fortis Colosseum/Strategies (Melee) |
| 4 | Moons of Peril/Strategies (Moons of Peril armour) |
| 3 | Tormented Demon/Strategies (Melee switch) |
| 2 | Slayer task/Nechryael (Magic) |
| 1 | Araxxor/Strategies (Ranged) |
| 3 | The Hueycoatl/Strategies (Melee) |
| 3 | Amoxliatl/Strategies (Melee) |
| 2 | Royal Titans/Strategies (Melee) |
| 2 | Royal Titans/Strategies (Ranged) |
| 3 | Royal Titans/Strategies (Melee) |
| 3 | Yama/Strategies (Melee) |
| 2 | Yama/Strategies (Mage) |
| 1 | Doom of Mokhaiotl/Strategies (Ranged) |
| 1 | Forestry/Strategies (Forestry) |
| 2 | Slayer task/Custodian stalker (Ranged) |
| 2 | Slayer task/Custodian stalker (Magic) |
| 3 | Gemstone Crab/Strategies (Melee (Low level)) |
| 5 | Gemstone Crab/Strategies (Melee (Obsidian)) |
| 5 | Gemstone Crab/Strategies (Melee (Blood Moon)) |
| 5 | Gemstone Crab/Strategies (Melee (Dharok's)) |
| 1 | Gemstone Crab/Strategies (Ranged (high level)) |
| 2 | Duel of Mokhaiotl (Melee) |
| 3 | Slayer task/Kurasks (Melee) |
| 2 | Slayer task/Kurasks (Ranged) |
| 3 | Frost dragon/Strategies (Melee) |
| 1 | Frost dragon/Strategies (Ranged) |
| 3 | Demonic Brutus/Strategies (Melee) |
| 2 | Mad Angel/Strategies (Melee) |
| 1 | Mad Angel/Strategies (Melee (Low level)) |
| 2 | Mad Angel/Strategies (Melee (1 Defence Pure)) |
Gallery
-
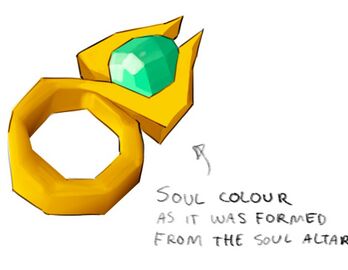 Concept art of the Lightbearer by Mod Jerv.
Changes
| Date | Changes | |
|---|---|---|
| 3 April 2024 (Update) |
Equipping the Lightbearer shortly before your special attack energy was due to restore will no longer delay the energy restoration. | |
| 11 January 2023 (Update) |
The item has been added to the Grand Exchange's item sink list. | |
| Pre-release history: Lightbearer (beta) | ||
| 12 - 17 August 2021 (beta) |
First present in the Tombs of Amascut: Rewards Beta. | |
References
- ^ "Tombs of Amascut". Old School RuneScape News. Jagex. 24 August 2022. Archived from the original. "Ahmek was a formidable warrior who sought to capitalise on the political instability at the end of the war. He crafted a powerful ring, imbued with the unstable energy from Tumeken’s sacrifice. With it, he sought to bend mercenaries and thieves across the desert to his will, and overthrow Osmumten. His scheming proved fruitless, however, when the ring was stolen and Ahmek was murdered in his sleep. In a twist of fate, the thief was almost immediately caught and executed by the Menaphite Guards, who dutifully presented the ring to their pharaoh."