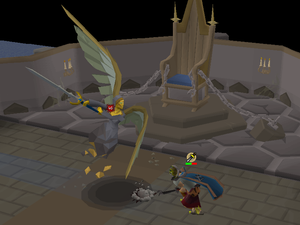
After completion of Fallen From Grace, a stronger version of the Mad Angel can be awoken and fought again in Ardeaglais.
Requirements
- Completion of
 Fallen From Grace
Recommendations
 60 Attack
 60 Strength
 43 Prayer minimum for Protect from Melee / Protect from Magic

Transportation
- The fastest route to the cathedral in which the Mad Angel resides is via Ardeaglais teleport.
- Alternatively, use a Slayer ring to teleport to the cave underneath the boss. Then either interact with the golem to the north and climb the stairs to the boss, or exit the cave to the west and run to the boss.
- You may also use a necklace of passage, then run west and climb the rocks to reach the front door to the cathedral. This requires you to have mined the rocks at the top of the shortcut, as well as 54 Agility.
Fight overview
Auto-retaliate should be disabled or you risk being dragged during the blast attack, which can result in failing the mechanic.
The Mad Angel attacks primarily with melee, and is weak to golembane weapons.
Protect from Melee will reduce the max hit of its standard attacks from 31 to 5. After three standard attacks, it will perform a special attack.
Upon reaching 350 Hitpoints (~45%), the Mad Angel will enter the enrage phase at the next available opportunity, denoted by a ...! overhead message. During this phase, its special attacks are performed quicker, requiring quicker reaction times to counter them. Additionally, it will use all three of its specials consecutively at the start of this phase.
Since the blast attack damage mechanic always deals a fixed 18-22 damage, players with high damage setups can intentionally fail this mechanic for the next sweep/smite attack punish to occur sooner. When done strategically, this leads to faster kill times but possibly lowers kills per trip if supplies are an issue.
| Attack | Description | Demonstration |
|---|---|---|
| Sweep attack | The Mad Angel stands still, drawing its sword back to either the left or the right. After a few seconds, it will cleave the area towards the side where the player was, as well as the side it drew the sword back from. The boss will perform this cleave 4 times (6 times during the enrage phase). Protect from Melee will reduce the damage from being caught in this attack by ~50%.
In order to dodge the cleave, the player must run to the side of the boss opposite the sword or behind it. If an attack is successfully dodged to the side (not behind it), the player's next attack will be 100% accurate and damage rolls below 50% of their maximum hit will be raised to 50%. Players should be mindful to ensure that the boss's tiles are not against a wall, as when it performs a cleave the tiles to dodge may be unreachable. If the boss is against a wall, players can click inside of the boss's 3x3 area, on the middle tile toward the direction the dodge would be successful, to receive the buff and avoid damage. |
|
| Blast attack | The Mad Angel launches a ball of light towards a destination tile, indicated with a looming shadow on the floor. If it reaches this destination, it will explode and deal 30+ damage to the entire arena. This explosion's damage can be reduced by ~50% with Protect from Magic, however it is possible for a standard attack to land during the same tick.
Standing on the destination tile will instead bounce the ball of light back to boss, dealing 18-22 damage to it; if done correctly, the ball will be bounced three times every time it performs this attack. This is the only special attack sequence during which the boss will continue to perform its standard attack. |
|
| Smite attack | The Mad Angel brings the sword towards its chest, then begins charging a lightning attack that must be protected from with Protect from Magic. Simply having the prayer overhead will reduce the damage by ~75%, but activating the prayer at the same tick that the lightning strikes will fully negate the damage, as well as guarantee a maximum hit for the next attack.
The timing to perfectly negate the attack requires that the player click on Protect from Magic 4 ticks (2.4s) after the attack begins charging, when the blue crackling first becomes visible. Players may also react to a visual cue, by activating the prayer when the boss's wings flap slightly once fully extended. During the enrage phase, the boss will perform three strikes. The first attack can be countered normally, with the second strike occurring 4 ticks (2.4s) after the first, and the third occurring 2 ticks (1.2s) after the second. Another method of negating damage from this attack is to 1-tick prayer flick Protect from Magic for the duration of the animation. While this method is more click intensive, it does not require the player to time the flick on the exact tick of each attack. This approach works well for both the single attack and the enrage phase triple attack. |
Equipment
Melee is the simplest and most effective way to kill the Mad Angel. Due to its golembane weakness, a granite hammer is particularly effective, although many other crush weapons are viable.
Lower tier options still perform relatively well since accuracy is guaranteed after perfectly dodging the sweep attack and max hits are guaranteed on the first hitsplat after perfectly praying against the smite attack. Lower damage setups will find swapping weapons throughout the fight to be worthwhile. For example, using the dual macuahuitl when accuracy is guaranteed, but using a higher accuracy weapon during other parts of the fight.
Most other ranged and magic setups will not perform well due to the boss's defence; however, the twisted bow can take advantage of the opportunities to hit with guaranteed accuracy.
| Slot | Item (most effective → least effective) | ||||
|---|---|---|---|---|---|
 |  Inquisitor's great helm Inquisitor's great helm |  Torva full helm / Torva full helm /  Oathplate helm Oathplate helm |  Neitiznot faceguard Neitiznot faceguard |  Serpentine helm / Serpentine helm / Blood Moon helm Blood Moon helm |  Helm of Neitiznot / Helm of Neitiznot / Zombie helmet Zombie helmet |
 |  Amulet of rancour Amulet of rancour |  Amulet of torture Amulet of torture |  Amulet of strength Amulet of strength |  Amulet of fury Amulet of fury | N/A |
 |  Infernal cape Infernal cape |  Fire cape / Fire cape /  Mythical cape Mythical cape | N/A | N/A | N/A |
 |  Inquisitor's hauberk Inquisitor's hauberk |  Torva platebody / Torva platebody /  Oathplate chest Oathplate chest |  Bandos chestplate (or: Bandos chestplate (or:   ) ) | N/A | N/A |
 |  Inquisitor's plateskirt Inquisitor's plateskirt |  Torva platelegs / Torva platelegs /  Oathplate legs Oathplate legs |  Bandos tassets (or: Bandos tassets (or:  ) ) | N/A | N/A |
 |  Granite hammer Granite hammer |  Inquisitor's mace / Inquisitor's mace /  Scythe of Vitur[a] / Scythe of Vitur[a] /  Soulreaper axe[a] Soulreaper axe[a] |  Osmumten's fang / Osmumten's fang /  Noxious halberd / Noxious halberd /  Abyssal bludgeon Abyssal bludgeon |  Dual macuahuitl / Dual macuahuitl /  Zamorakian hasta[b] Zamorakian hasta[b] |  Glacial temotli / Glacial temotli /  Zombie axe[b] Zombie axe[b] |
 |  Avernic defender Avernic defender |  Dragon defender Dragon defender | N/A | N/A | N/A |
 |  Rada's blessing 4 Rada's blessing 4 |  God blessing God blessing | N/A | N/A | N/A |
 |  Ferocious gloves Ferocious gloves |  Barrows gloves Barrows gloves |  Dragon gloves Dragon gloves |  Rune gloves Rune gloves |  Adamant gloves Adamant gloves |
 |  Avernic treads (max) Avernic treads (max) |  Primordial boots Primordial boots |  Dragon boots / Dragon boots / Spiked manacles Spiked manacles |  Mixed hide boots / Mixed hide boots / Climbing boots Climbing boots | N/A |
 |  Ultor ring Ultor ring |  Berserker ring (i) / Berserker ring (i) /  Lightbearer Lightbearer |  Brimstone ring Brimstone ring |  Ring of shadows Ring of shadows |  Ring of the gods (i) / Ring of the gods (i) /  Ring of suffering (ri) / Ring of suffering (ri) /  Steel ring Steel ring |
 |  Voidwaker / Voidwaker /  Crimson kisten Crimson kisten |  Arkan blade[c] / Arkan blade[c] /  Dragon mace[c] Dragon mace[c] |  Elder maul / Elder maul /  Ancient godsword Ancient godsword |  Bandos godsword[d] > Bandos godsword[d] >  Dragon warhammer Dragon warhammer | N/A |
Inventory
|  | | |
| | | |
 |  | | |
| | | |
| | | |
| | |  |
 |  |  |  |
 |  |  |  |
- 1 divine super combat potion
- Food
- Prayer potions or super restores
- Crystal dust to convert dropped 1 dose super combat potions into their divine version (optional, requires 97 Herblore)
- Special attack weapon
- Ardeaglais teleports and a teleport for banking such as teleport to house tablets
- Divine rune pouch and Book of the Dead with runes for thralls and Death Charge
The Mad Angel can be killed effectively with lower tier weaponry when countering its mechanics correctly due to the guaranteed max hits and accuracy granted throughout the fight. Lower level players looking to take on the boss should prioritise using the best weapon they have available to them, and should consider using the full blood moon set where possible. Utilising special attacks after the smite attack is also particularly effective, although this requires good timing to execute.
| Slot | Item (most effective → least effective) | |||
|---|---|---|---|---|
| Blood Moon helm | Helm of Neitiznot | N/A | N/A |
| Amulet of strength | Amulet of fury |  Amulet of glory Amulet of glory | N/A |
| Fire cape / Mythical cape[a] |  Mixed hide cape Mixed hide cape | N/A | N/A |
| Blood Moon chestplate / Fighter torso |  Eclipse Moon chestplate > Eclipse Moon chestplate >  Blue Moon chestplate Blue Moon chestplate |  Best tank armour or Best tank armour or  Prayer amour Prayer amour | N/A |
| Blood Moon tassets |  Eclipse Moon tassets / Eclipse Moon tassets /  Blue Moon tassets Blue Moon tassets |  Best tank legs or Best tank legs or  Prayer armour Prayer armour | N/A |
| Granite hammer | Zombie axe[b] / Zamorakian hasta[b] | Dual macuahuitl[c] / Dragon mace / Glacial temotli |  Barronite mace Barronite mace |
| Dragon defender | N/A | N/A | N/A |
| Rada's blessing 4 | God blessing | N/A | N/A |
| Barrows gloves | Dragon gloves | Rune gloves | N/A |
| Dragon boots | Mixed hide boots /Climbing boots | N/A | N/A |
| Berserker ring (i) / Lightbearer | Brimstone ring >  Berserker ring Berserker ring | Ring of the gods (i) / Ring of suffering (ri) | Steel ring[d] |
| Bandos godsword[e] > Dragon warhammer | Dragon mace | Arkan blade | N/A |
Inventory
| | | |
| | | |
| | | |
| | | |
| | | |
| | |  |
 | | | |
| |  | |
- Special attack weapon, such as the dragon mace
- Combat boosting potions, such as divine super combat potion, or divine super strength potion
- Prayer potions
- Runes to cast thralls with Book of the Dead, and ideally also Death Charge
- Teleport to the boss such as necklace of passage or Slayer ring
- Emergency teleport/a way to restore stats and bank, such as teleport to house (tablet) or ring of dueling
- The rest food, such as karambwans or better
| Slot | Item (most effective → least effective) | |||
|---|---|---|---|---|
|  Mitre Mitre |  Halo Halo |  Ancient ceremonial mask Ancient ceremonial mask |  Zealot's helm Zealot's helm |
| Amulet of rancour | Amulet of torture | Amulet of fury / Amulet of strength | Amulet of glory |
| Infernal cape | Fire cape | N/A | N/A |
|  Zealot's robe top Zealot's robe top |  Vestment robe top / Vestment robe top /  Monk's robe top Monk's robe top | N/A | N/A |
|  Fremennik kilt[a] / Fremennik kilt[a] /  Zealot's robe bottom Zealot's robe bottom |  Vestment robe legs / Vestment robe legs /  Monk's robe Monk's robe | N/A | N/A |
| Granite hammer | Inquisitor's mace > Scythe of Vitur[b] > Soulreaper axe[b] / Osmumten's fang[c] |  Ghrazi rapier > Abyssal bludgeon / Elder maul > Noxious halberd[b] Ghrazi rapier > Abyssal bludgeon / Elder maul > Noxious halberd[b] | Zombie axe[d] >  Sarachnis cudgel > Sarachnis cudgel >  Barrelchest anchor Barrelchest anchor |
|  Antler guard Antler guard |  Book of War Book of War |  Mooleta Mooleta | N/A |
|  God blessing God blessing | N/A | N/A | N/A |
|  Regen bracelet Regen bracelet |  Combat bracelet / Combat bracelet /  Mithril gloves Mithril gloves | N/A | N/A |
|  Aranea boots Aranea boots | Spiked manacles | Climbing boots | N/A |
| Ultor ring /  Bellator ring[e] Bellator ring[e] | Berserker ring (i) / Lightbearer | Ring of the gods (i) / Ring of suffering (ri) | N/A |
| Crimson kisten | Elder maul > Bandos godsword / Dragon warhammer |  Saradomin godsword / Ancient godsword Saradomin godsword / Ancient godsword | Arkan blade |
Inventory
| | | |
| | | |
| | | |
| | | |
| | | |
| | | |
| | | |
| | | |