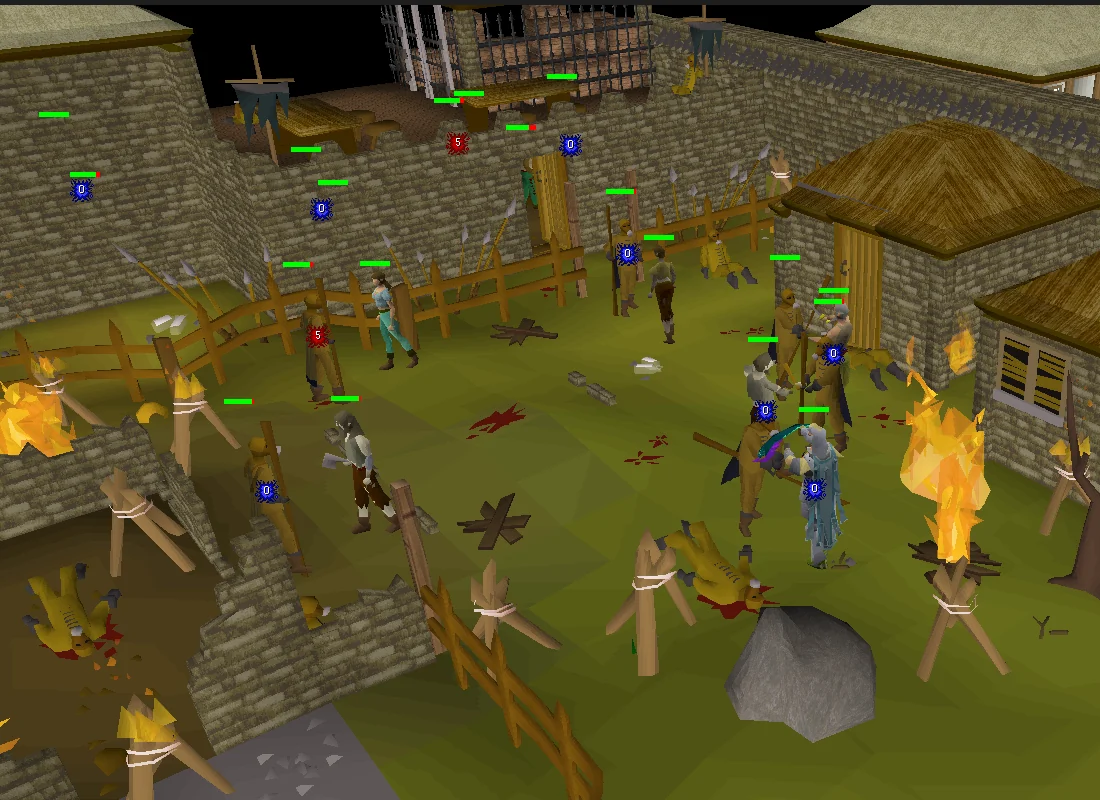
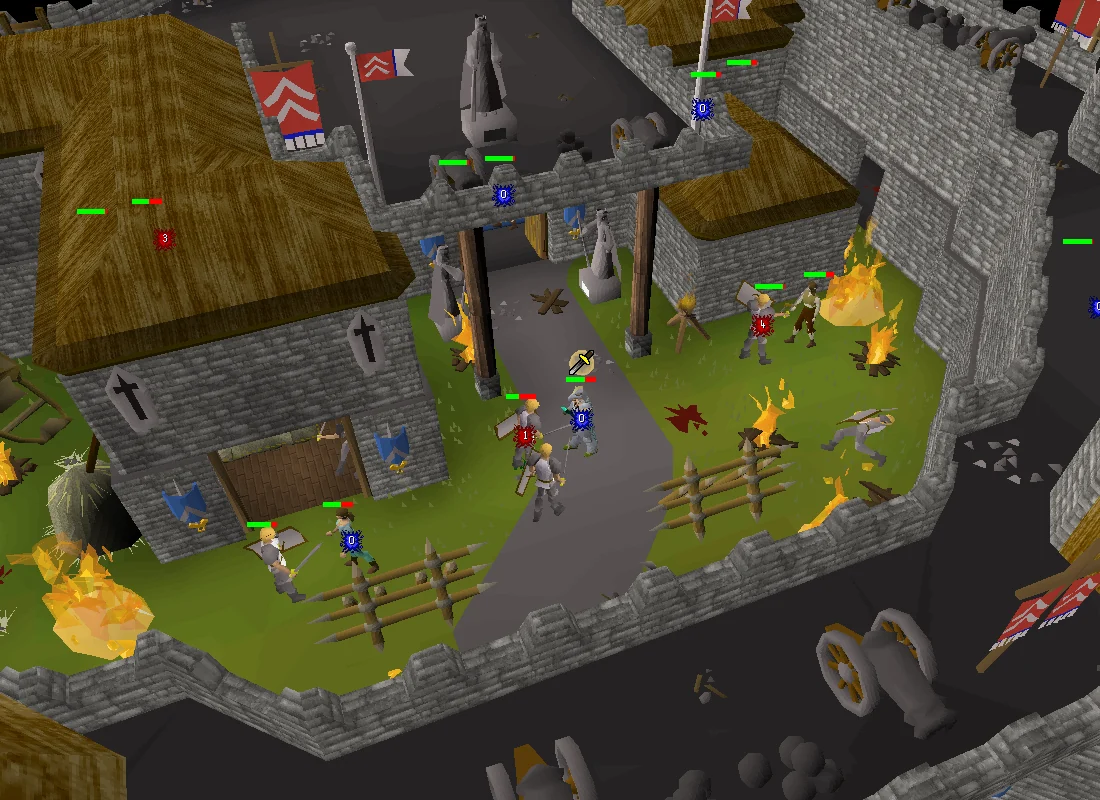
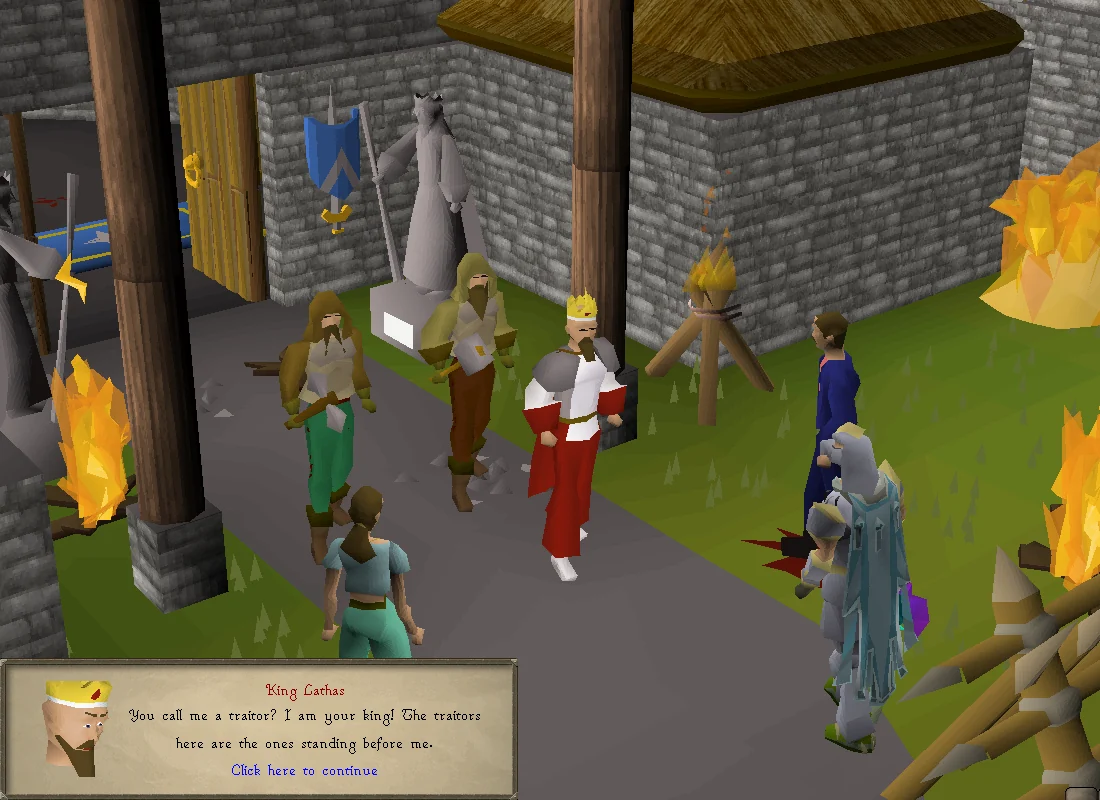
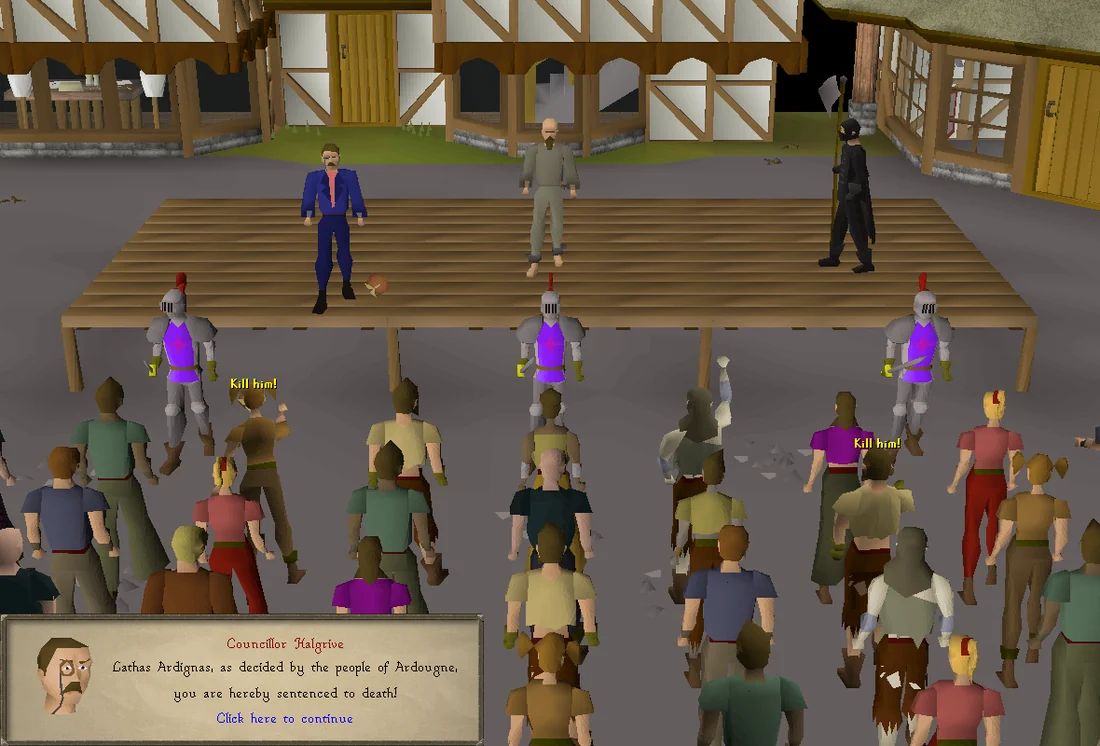
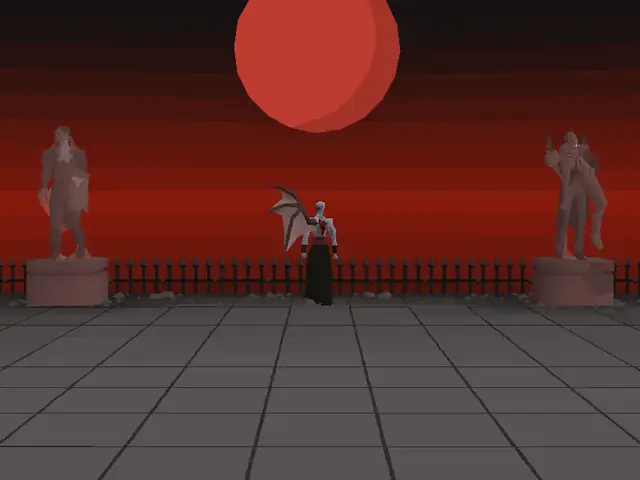
Our story begins with you, the hero, answering the call to adventure when Edmond, a resident of Ardougne, asks for your aid. By rescuing his daughter Elena from Plague City, the quarantined West Ardougne, you begin to unravel the mystery surrounding the disease. With her help, you discover the plague is a hoax - a plot by King Lathas to section off the West Ardougne. By confronting him, you find out this was done to protect the rest of Gielinor from the threat in the elven lands. The king sends
To begin the quest talk to Edmond, who can be found in the garden at his home in East Ardougne north of the Flying Horse Inn. (You can pick up a cabbage and spade in Edmond's garden if needed). He will tell you that Elena has been going around telling people that the plague isn't real, and has been taken by the Knights of Ardougne who claimed she was inciting rebellion against the king. Agree to help, and seek out King Lathas upstairs in his castle just south.
Speak to King Lathas while not wearing Mourner gear. He will tell you that Elena was imprisoned due to spreading news that the plague is fake and as he has explained before, the façade is a necessary evil and he simply can't risk Elena exposing the truth and risking everything, including the looming threat that is the Dark Lord, and thus must keep her imprisoned.
Return to Edmond. The player tells him about everything they've done since the events of the Plague City quest, summing up the entire questline. He will then tell you that Elena is imprisoned in the city prison beneath the castle, and asks you to go undercover as a Knight of Ardougne and find a way to free her.
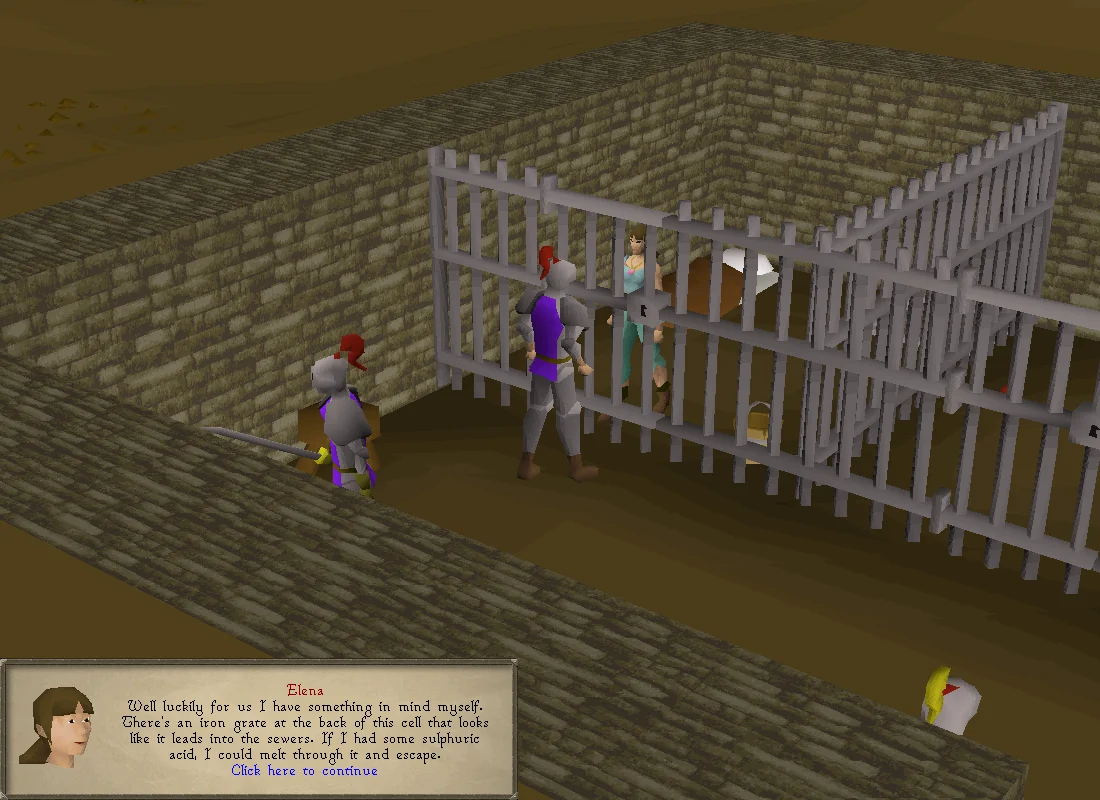
Go to the basement of the Ardougne Castle. Here, a guard will stop you. You will tell him your name is Tim, Sue, or Sam, and be allowed to continue. Talk to Elena in the prison; she will tell you she wants to escape through a grate into the Ardougne Sewers, and needs you to fetch her some sulphuric acid to dissolve the grate, which you can find in a cabinet in her home. Go to her house, which is found east of Edmond's house directly next to the log balance. Search the cabinet and select the thick clear liquid, and you'll receive a vial of clear liquid.
After you bring the sulphuric acid to Elena, go back and talk to Edmond while she escapes. He will tell you she already came by and is hiding to avoid being recaptured, but tells you that she is hiding in the Rehnison household in West Ardougne. The Rehnisons' house is located directly west of the Mourner's Headquarters. Talk to Ted Rehnison, or his wife Martha, who will tell you the resistance is waiting in the basement below. Search the eastern bed and climb down.
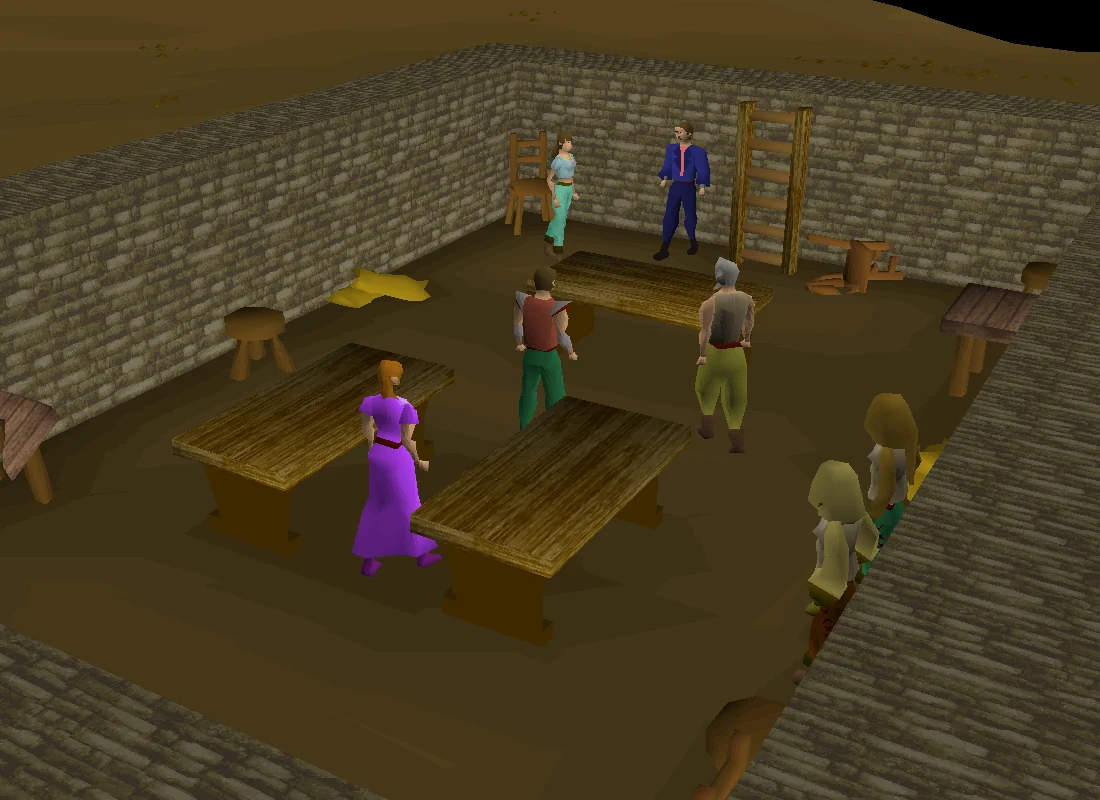
Elena will tell you about the Ardougne Resistance, which she founded after discovering the plague is a hoax in order to overthrow King Lathas, and you will tell her about what you've been up to while infiltrating the mourners. Councillor Halgrive will then speak to you. He will tell you that although the council serves the king and can't overrule his decisions, they can step in as interim ruler should the king be deemed unfit to rule. Councillor Halgrive tells you of his plan to have you (disguised as a Knight of Ardougne) upset the people of Ardougne in order to make it appear as if you're doing so under the king's orders.
You will need to go around West and East Ardougne doing certain actions to rile up the population. Each action will convert members to the Ardougne Resistance. Keep in mind you do not have to talk to every person on this list; you just need to convert a total of 80 members.
In West Ardougne, dress up as a mourner and do the following to make the population angry:
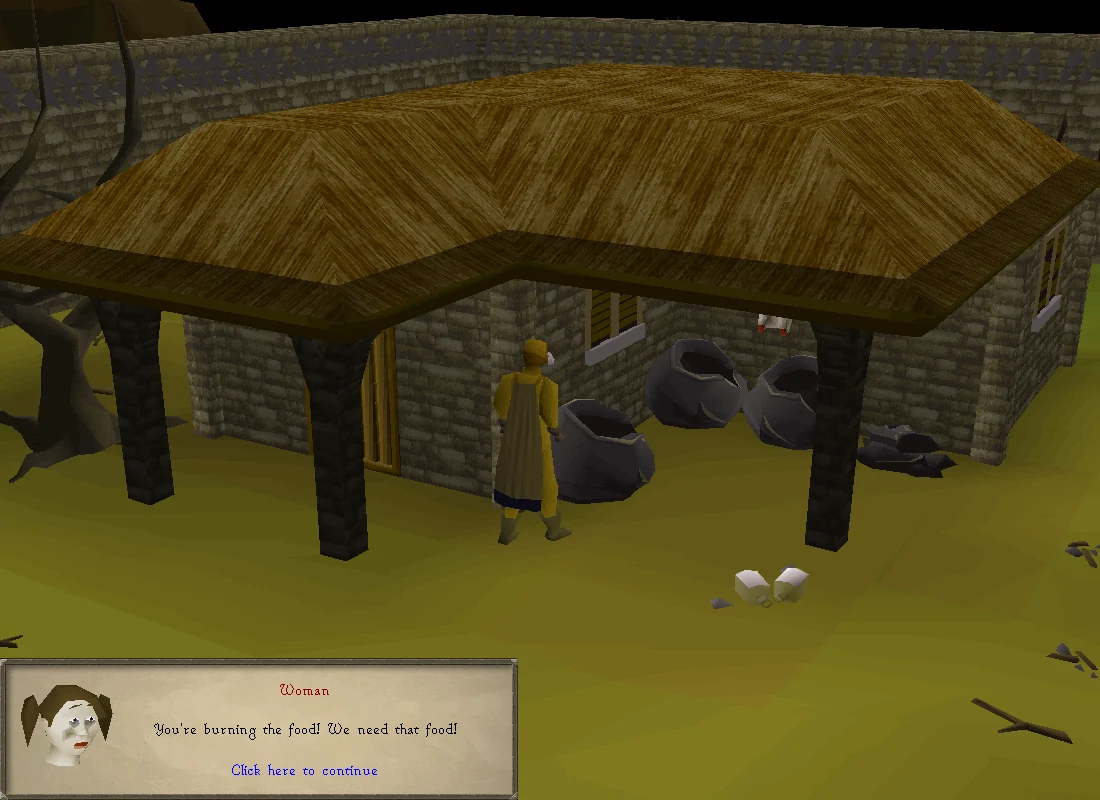
Setting food on fire to generate discord among the people. Image credits →
On death, all unprotected items will be moved to a grave outside the instance. Any items left on the ground will be lost.
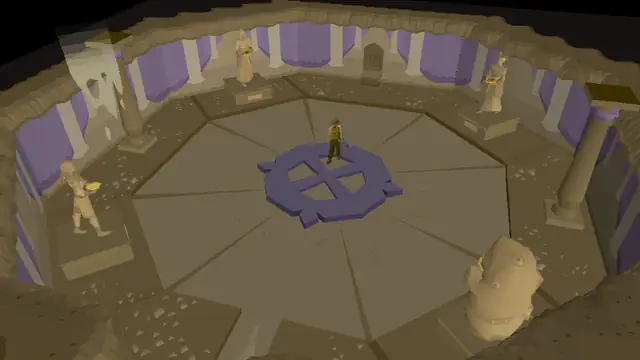
Once ready for the fight, return to the Rehnison Household in West Ardougne. Enter the basement under the bed and talk to Elena to begin the battle of West Ardougne.
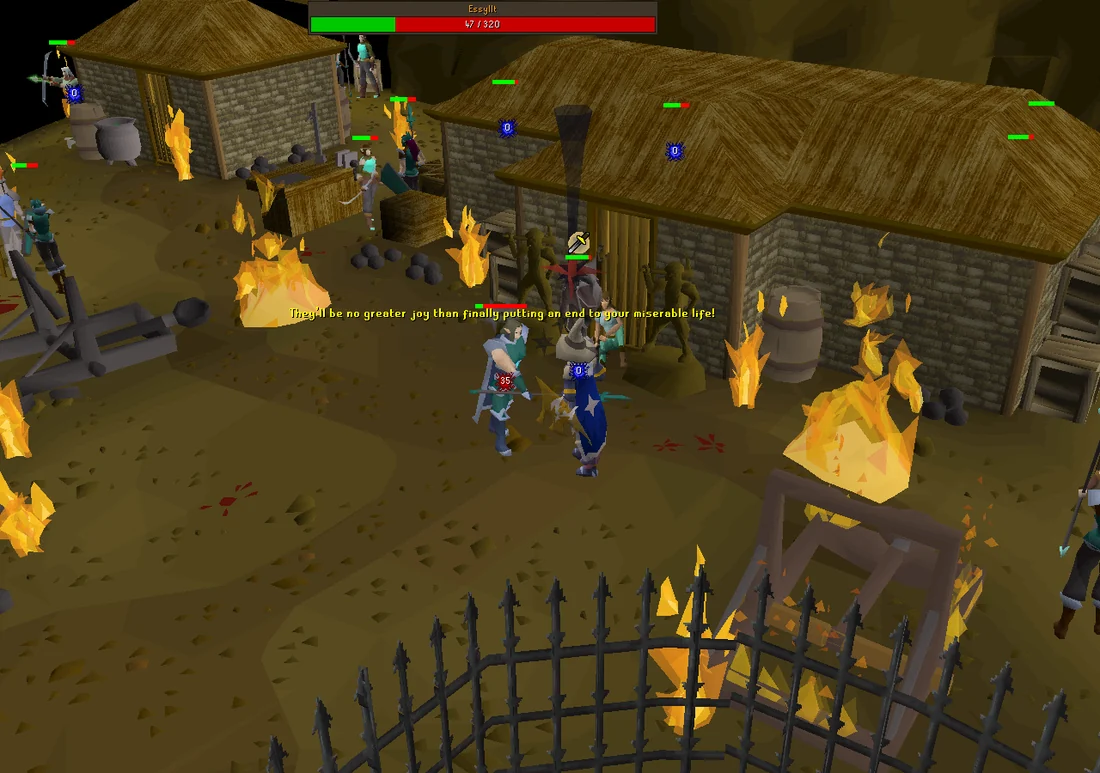
The resistance fight the mourners of West Ardougne. Image credits →
The fight has three parts. Each part has a kill counter in the chatbox. The player will enter a battlefield in which the resistance members are engaged in combat with the mourners. The resistance fighters include generic civilians and others that you've met during the quest series. The named NPCs will never die in battle against their target, as they will eat food when their health is low. It is not required to save the resistance fighters, and the enemies will focus on you when they are attacked, even if engaged with a resistance fighter.
Protect from Melee will protect you from all damage, but high-levelled players will find that decent armour will protect them from most damage. Alternatively, Guthan the Infested's equipment can be used, needing no food or prayer to complete. Mages can also use the cornering trick to stack the mobs and burst or barrage them for faster kills. Furthermore, despite some of the mourners wielding crystal halberds, they have an attack range of 1, so they can be safely trapped on corners and safespotted.
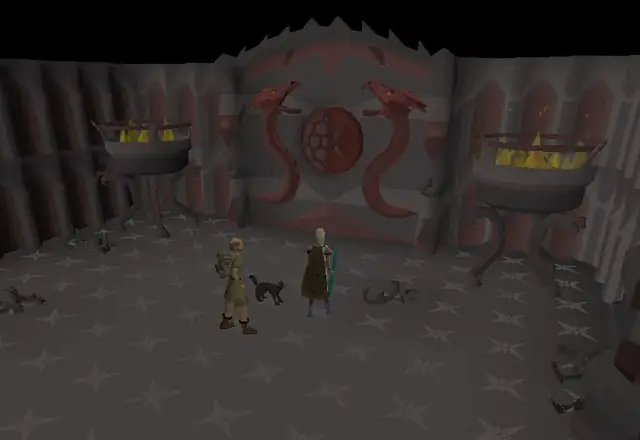
In the second part, head downstairs via the trapdoor and kill 11 Mourners:
Level 24 (3)
Level 51 (4)
Level 106 (4)
Note: if you leave the battle having reached the second part, when you return you will be downstairs and not have to kill the initial 10 Mourners.
After the second part, the fight pauses and you can bank and resupply if necessary. Talk to Elena or Councillor Halgrive to commence the battle of East Ardougne. Some of the NPCs are on the 1st floor (UK).
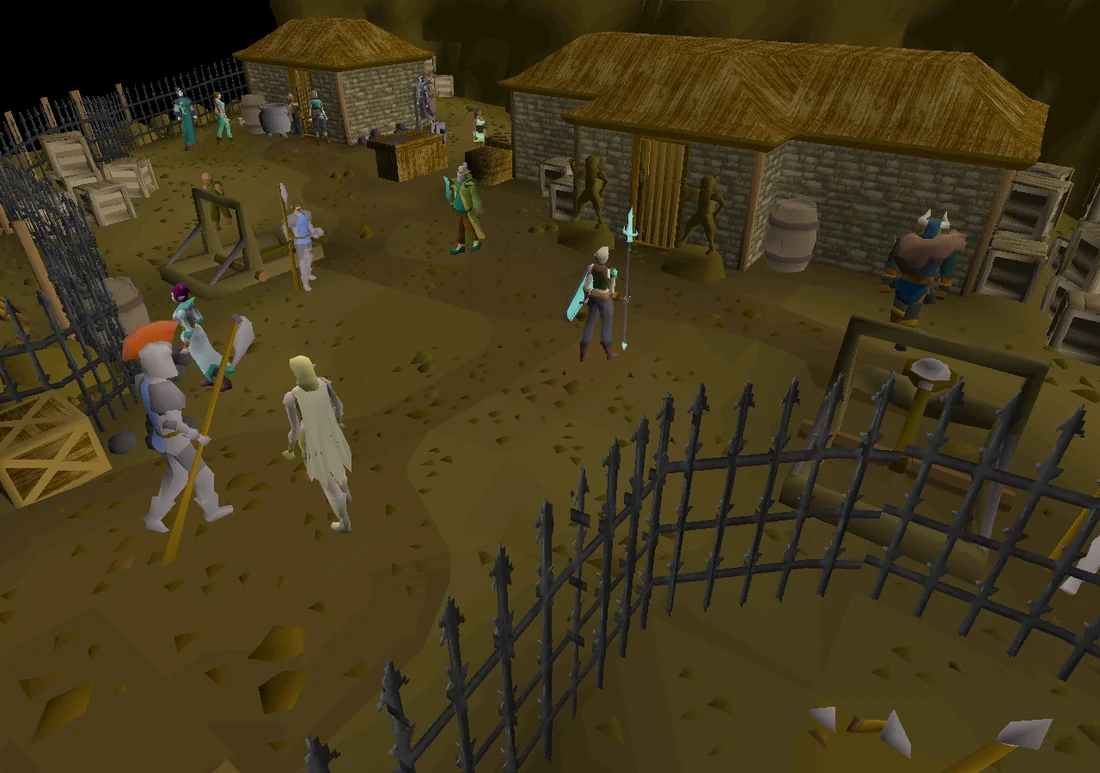
Upon starting this battle, the player will be confronted by two level 121 paladins, while the resistance fighters battle the others. The resistance fighters are the same as the first battle and it is not necessary to save all of them, though the named ones will not die.
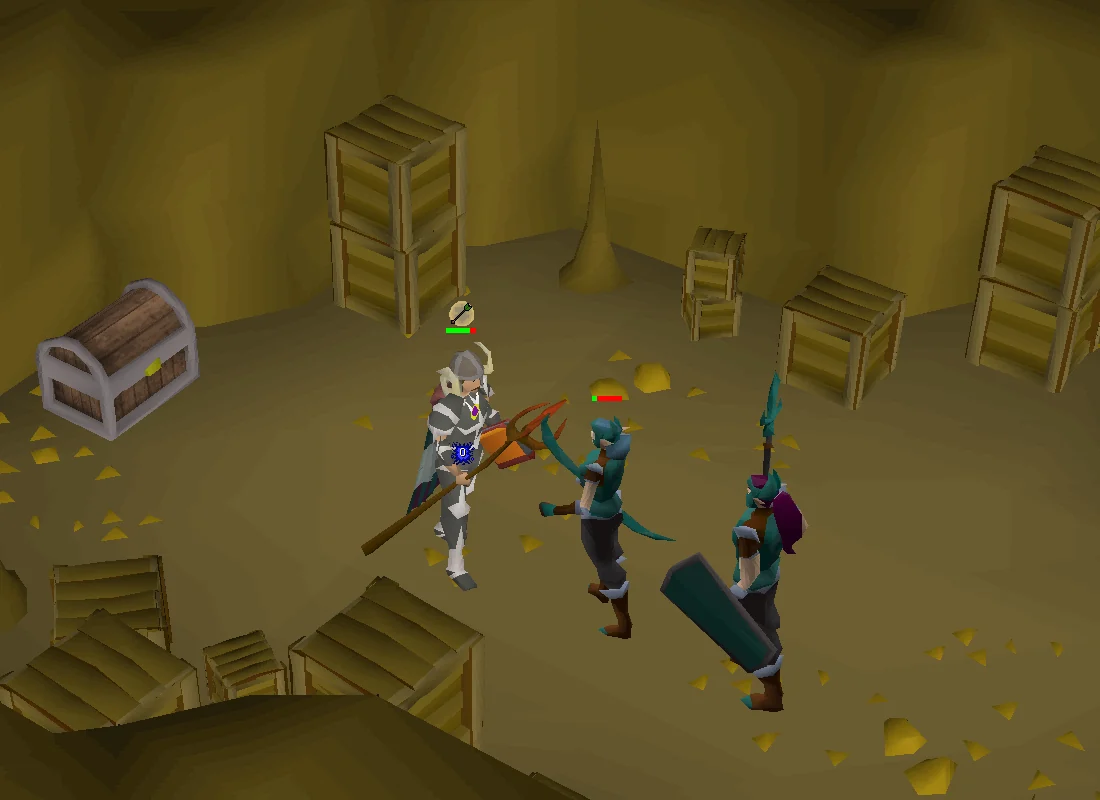
After you've killed all the guards, you will see a cut-scene, where the resistance fighters bring King Lathas out, who they find hidden in a wardrobe. Players can speak to the king and ask him the reasons for his actions over the course of the quest series. In the end, he is sentenced to death by the citizens of Ardougne and executed by the executioner. As you and Elena watch, two hooded figures sneak up behind the two of you from the alleyway and knock both of you out with blackjacks, taking you to the Iorwerth Camp.
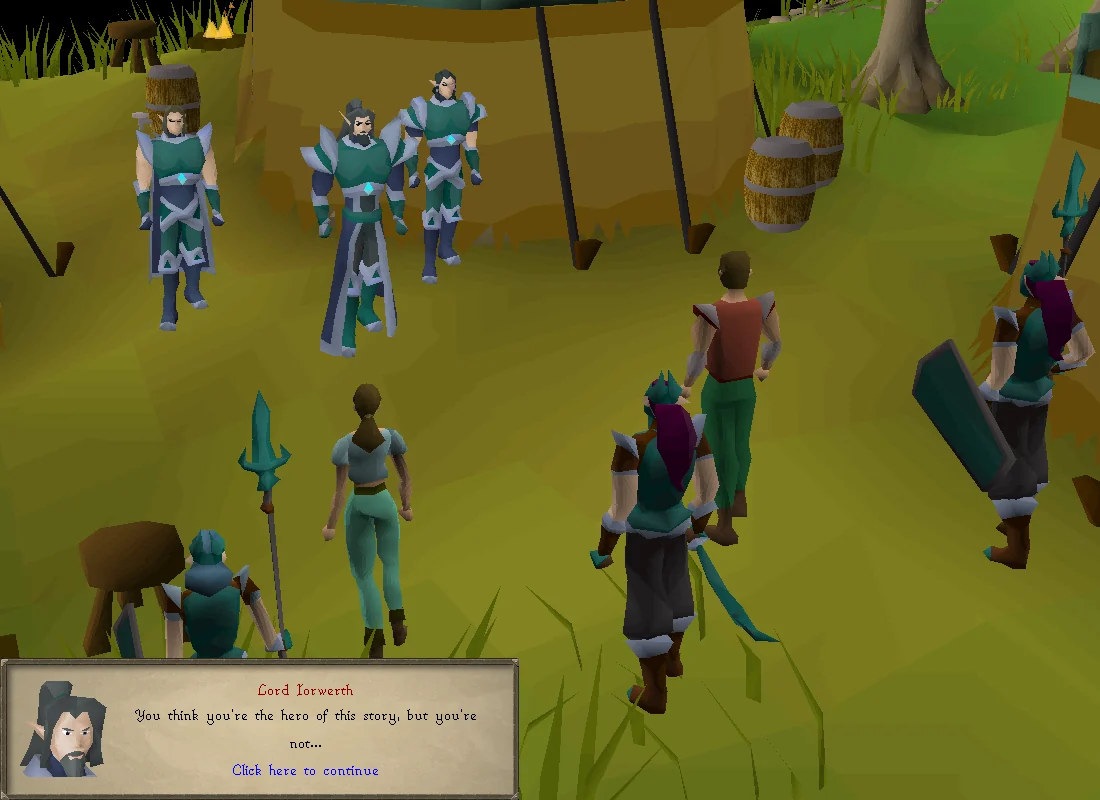
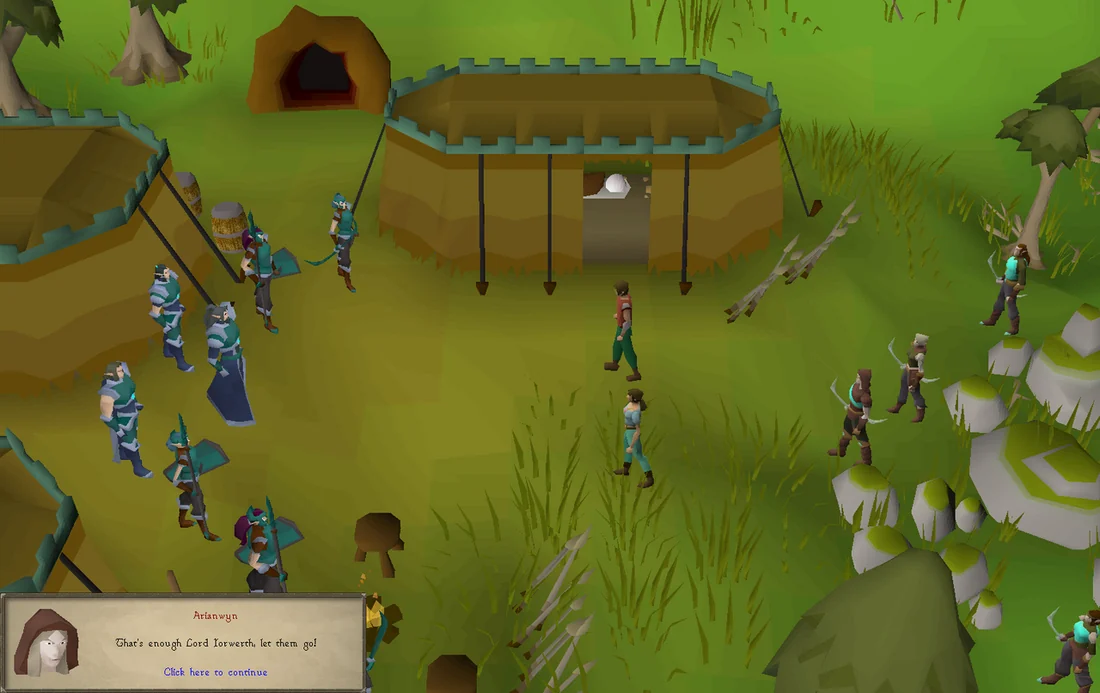
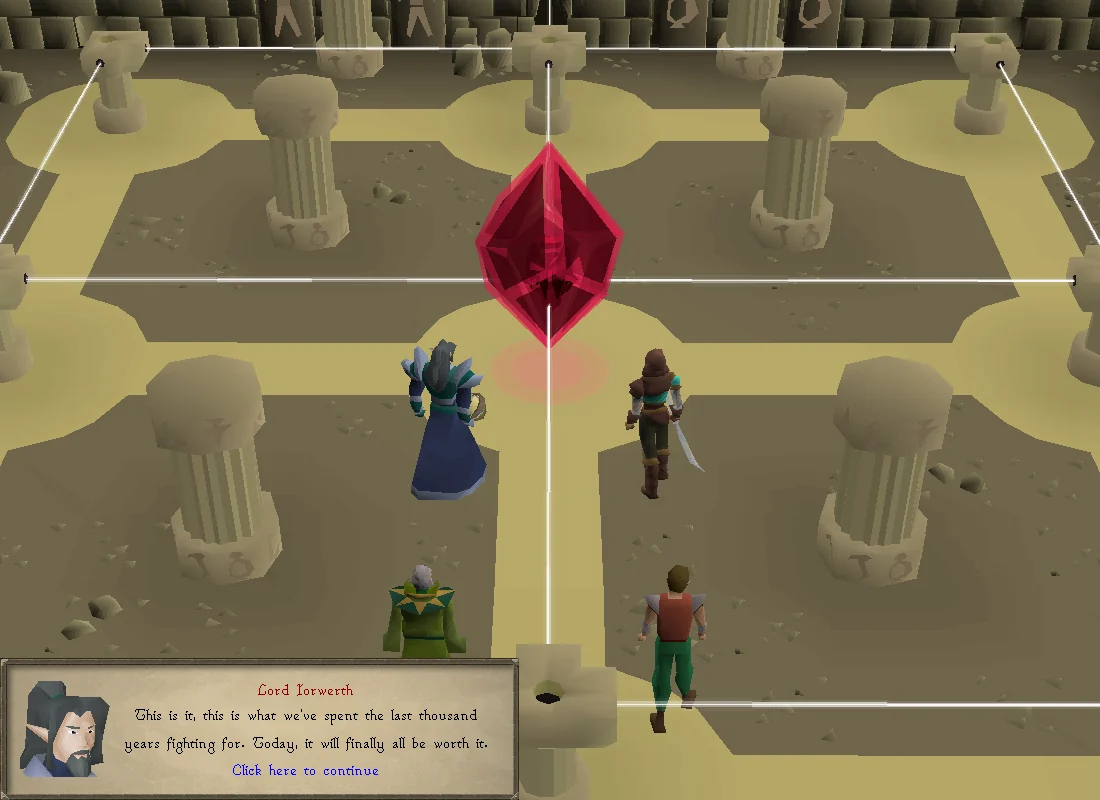
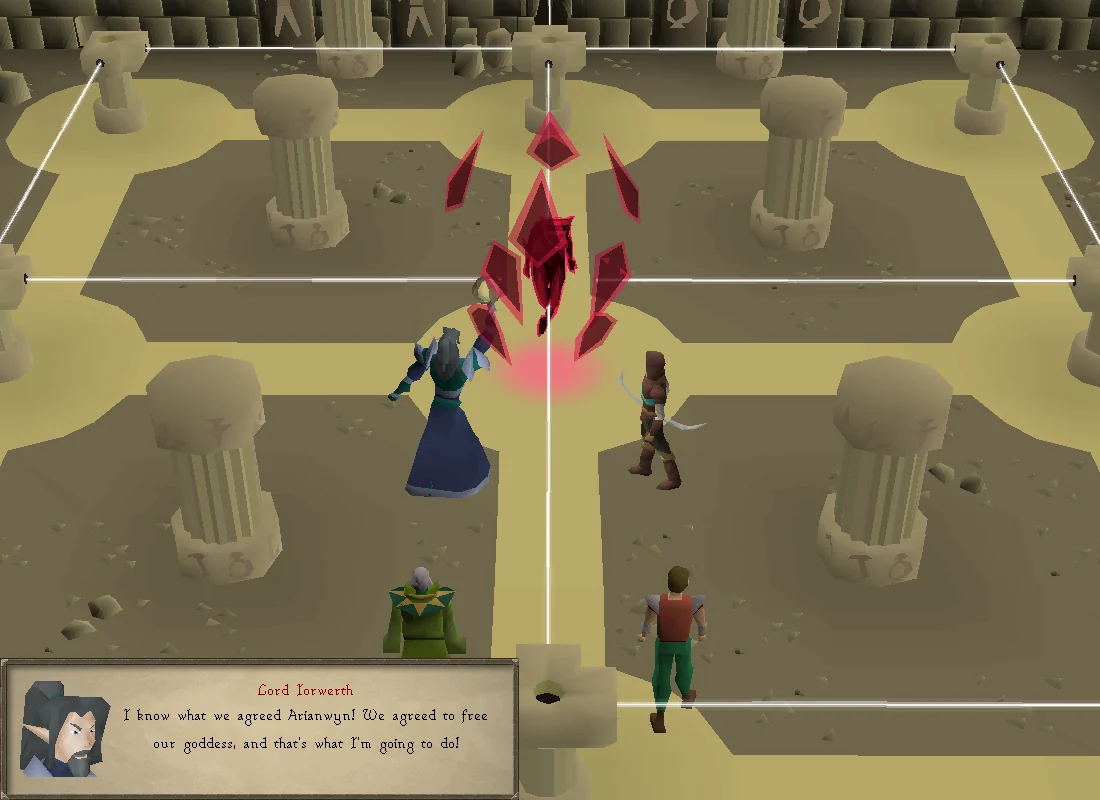
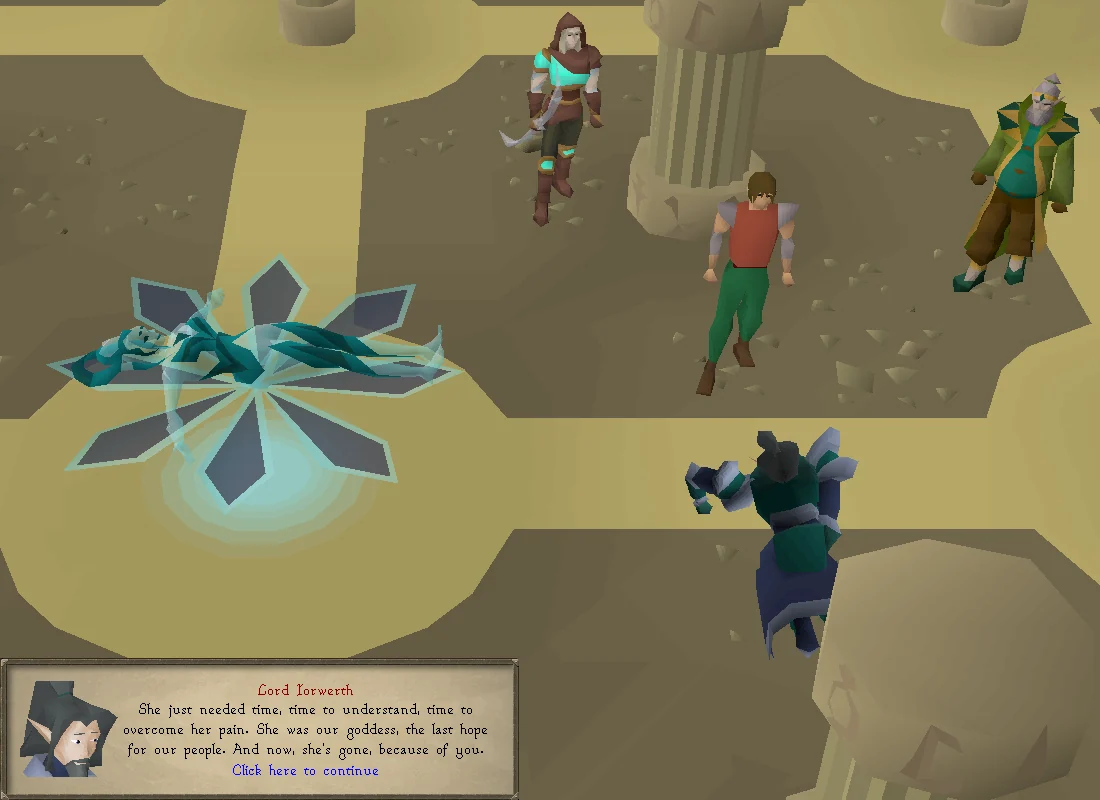
The player and Elena are brought before Lord Iorwerth. Image credits →Arianwyn comes to the player's rescue. Image credits →
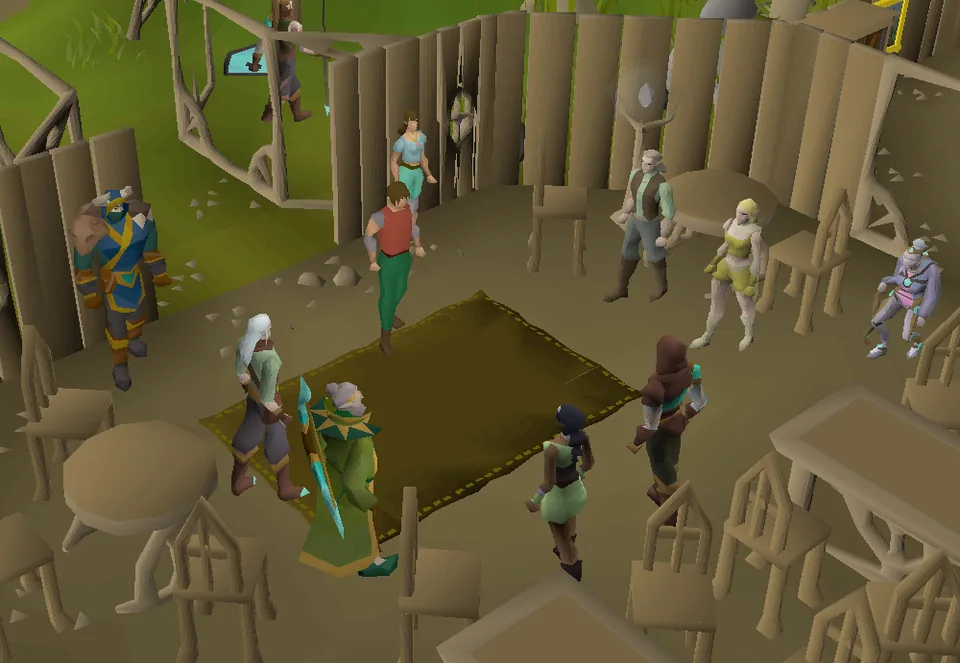
A long cutscene will play, where you and Elena are brought before Lord Iorwerth. Before you both are about to be taken prisoner, Arianwyn and the elf resistance will appear to rescue you. Lord Iorwerth will reveal that he lied to King Lathas in order to access West Ardougne and reach the Temple of Light to summon Seren. Arianwyn refutes this, believing Seren to be dead; Lord Iorwerth thought the same, until he managed to break one of the seals in the Grand Library, where he discovered a part of Seren remains trapped within the Temple. He will let the rebels go, believing they could be of use in their plans while they are none the wiser.
Returning to Lletya, Arianwyn calls a meeting, and asks you to notify Ysgawyn and Elena. You must talk to Ysgawyn first before Elena will appear. Ysgawyn can be found on the upper platform of Lletya; speak to him first. After you have done this Elena can be found in the south-west corner by the pond. After talking to Elena, return to Arianwyn and talk to him to begin the meeting.
The meeting will tell of the history of the elves from the end of the God Wars to the ongoing civil war, where the city of Prifddinas was reverted to a crystal seed, and the Grand Library along with it, which Lord Iorwerth claimed he accessed. It is decided that the player and Arianwyn will investigate the Waterfall Dungeon to see whether King Baxtorian left anything behind that would explain more about the fragment of Seren.
Be sure to speak to Arianwyn after the meeting, or he will not appear at Baxtorian Falls.
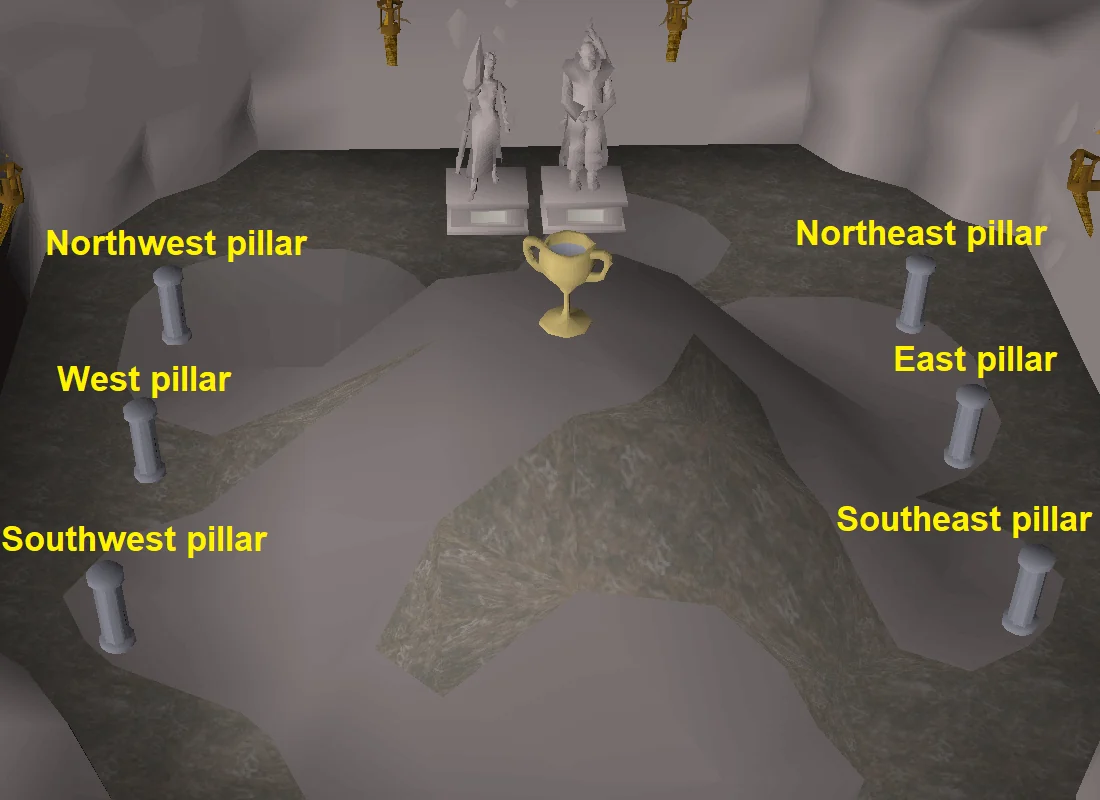
Travel to the Waterfall Dungeon (requires a rope). Go to the eastern room with the skeletons and skeleton mages and search the northern stacked crate for a key, and then go to the western room with fire giants and past the two single doors. Talk to Arianwyn, and he will hand you a book, Ode to eternity, with a riddle, that requires you to use items on the pillars around the tomb.
Warning: If you place the items on the incorrect pillars, you will have to buy/collect the items again, and each time you enter the room, the order of numbers will change! If you leave the room before finishing the puzzle, you may be able to continue it or replace the item on the pillar you did incorrectly.
The layout is random, and you will need to inspect the pillars to figure out the order. Make sure to read the book before placing any items.
The south-west pillar will say which number it is. Place the item corresponding to this number on the south-west pillar.
The west pillar will say it is not opposite of a number. Place the item corresponding to this number on the south-east pillar.
The north-west pillar will say the number it is next to. This number corresponds to the item to place on the west pillar.
The north-east pillar will say the number it is opposite to. This number corresponds to the item to place on the north-west pillar.
The east pillar will say what number it is not next to. This number corresponds to the item to place on the east pillar.
The south-east pillar will say what number isn't going on the pillar. This number corresponds to the item to place on the north-east pillar.
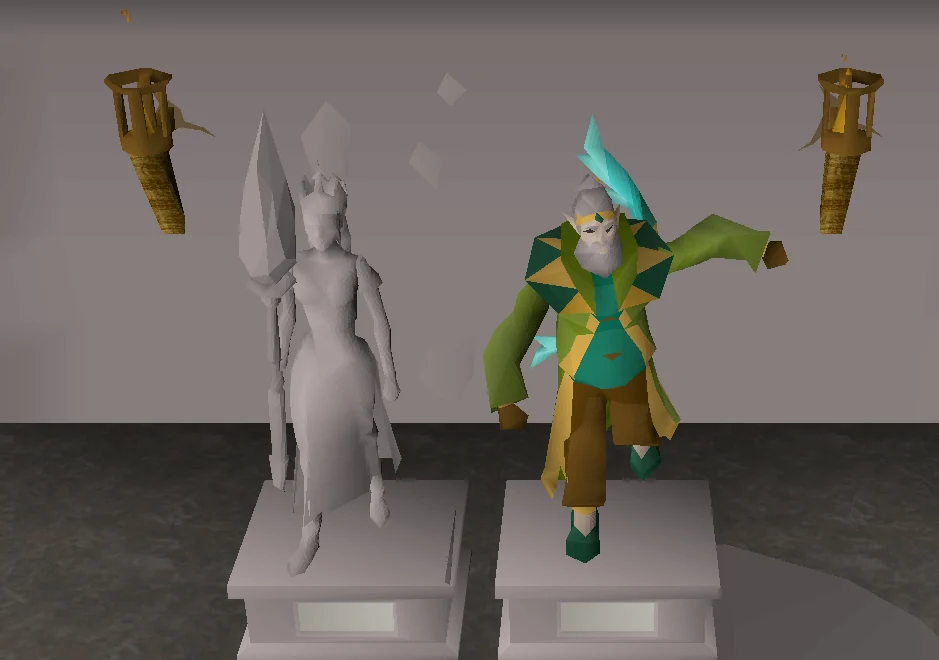
After placing all of the items in the right locations, the statue of Baxtorian will spring to life, as Baxtorian himself. Arianwyn will teleport Baxtorian back to Lletya. Bank to gather items for the next section and then teleport back to Lletya yourself.
Back in Lletya, talk to Baxtorian and Arianwyn. Baxtorian says there may be a way to enter the Grand Library of Prifddinas, to learn more about what Lord Iorwerth was planning, via the use of a specially made potion and bypassing the city walls, which have been enchanted so that only Iorwerth elves and their allies can enter; Baxtorian believes Lord Amlodd, an expert in magic, would be able to break the spell.
You will be asked to create the potion. Talk to Elena next to the pond, and plant a cadantine seed in the nearby farming patch, which is specially treated to yield elder cadantine. Elena will ask you to check if Arianwyn and Baxtorian have anything for you to do while you wait for the seed to grow.
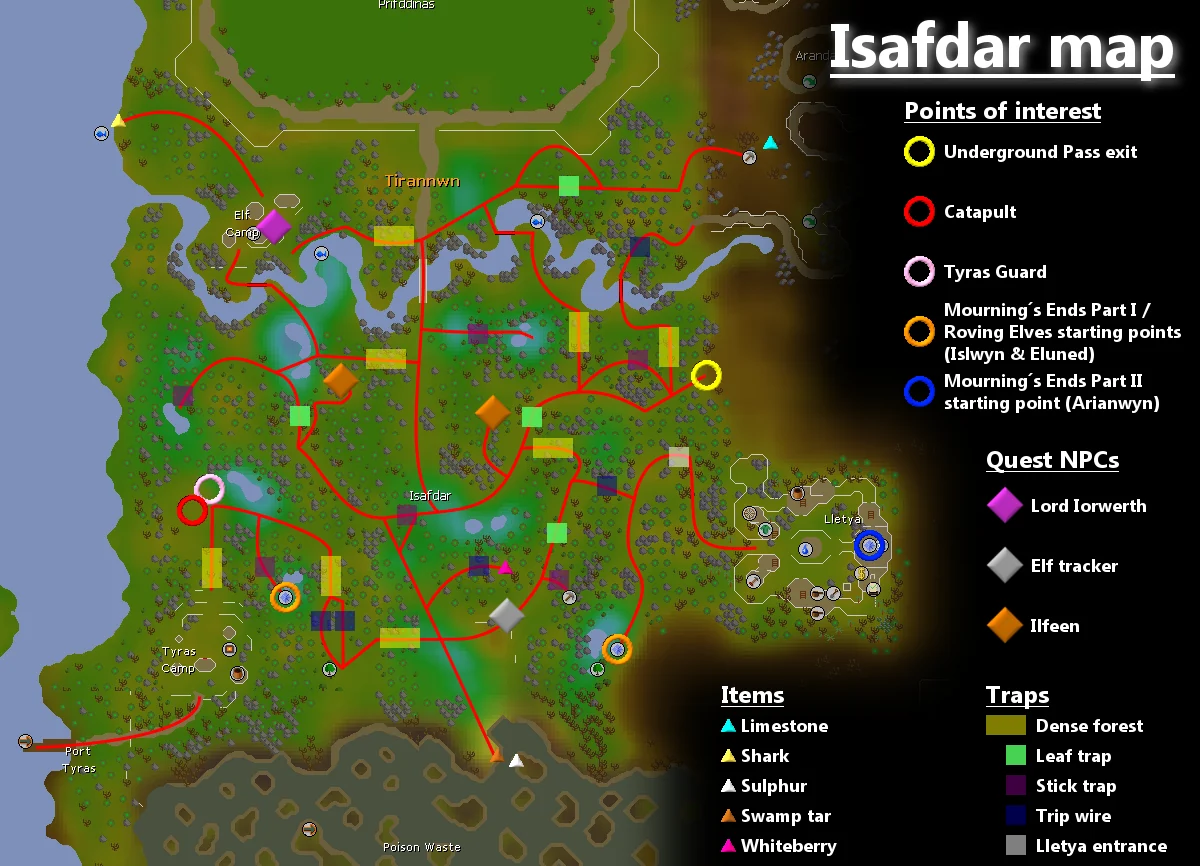
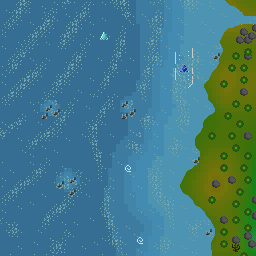
A map of the area, showing possible routes and the locations of the traps. Image credits →
Since much of the rest of the quest takes place in the elven lands with their many traps, it is recommended to have an anti-poison potion available, since tripwires if failed will poison the player.
Talk to Baxtorian and ask how to find Lord Amlodd and Lady Trahaearn. Ask how to find both elves before proceeding to save yourself time; the order in which the two are found does not matter. Lady Trahaearn gave the clue "I will journey south from the well" to Baxtorian before she left. Lord Amlodd gave Baxtorian a special crystal seed for safekeeping, which he gives to you.
Talk to Eluned (found in south-west Lletya, north of the patch where you planted the cadantine) to ask her to enchant the crystal seed before proceeding with the quest.
Note: If you choose to search for Lady Trahaearn before Lord Amlodd, you will not need to bring a teleport crystal with you, since Lord Amlodd will automatically teleport you back to Lletya after speaking to him.
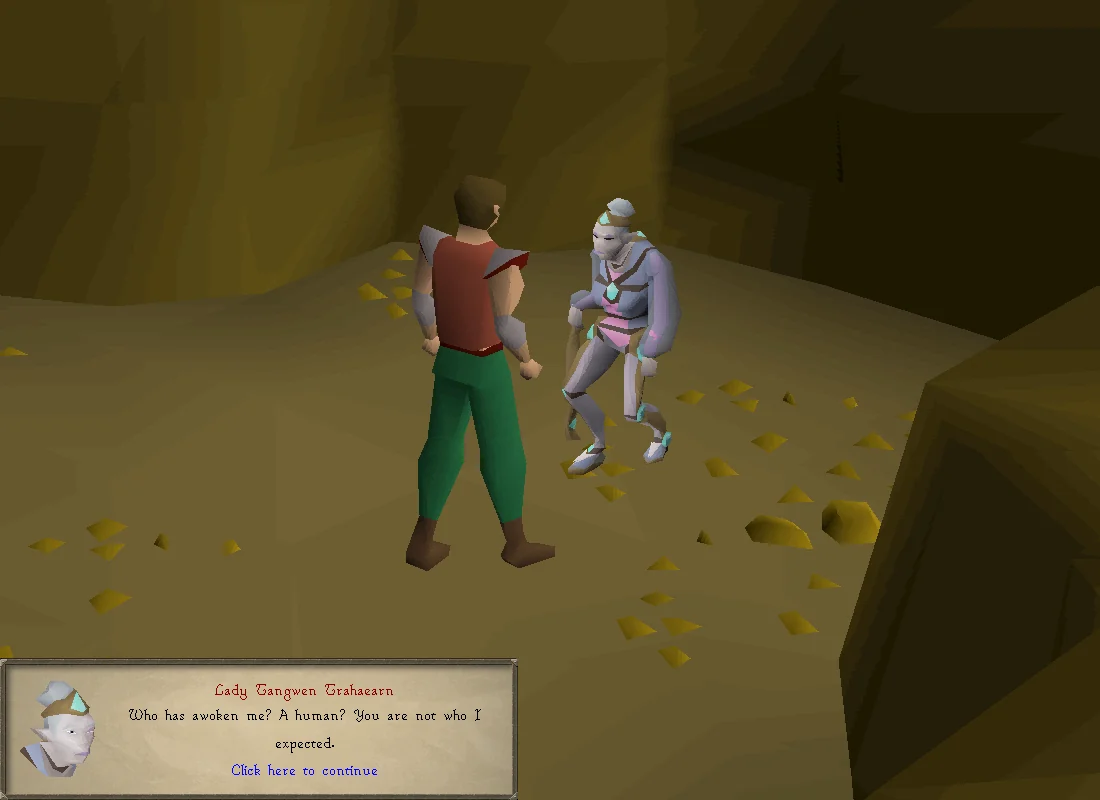
Travel west of Lletya and pass through the trees north of the dire wolves. Then run across the clearing, step over the tripwire, and head west through the 3 dense forests. Travel north through the leaf trap, and finally east to reach the cave entrance to the Underground Pass. Inside, walk south of the Well of Voyage to inspect the blocked crevice. Afterwards, use your pickaxe on the blocked crevice to clear it and go inside. Upon entering, you'll find an Elderly Elf wearing a damaged exoskeleton. Use a runite bar and hammer on her to fix the exoskeleton. She will then be revealed to be Lady Trahaearn, and will teleport back to Lletya.
Now, you should rub the crystal seed you received from Baxtorian and had enchanted by Eluned to find Lord Amlodd. However, if you chose to look for Lord Amlodd first, then return to Lletya, either on foot or with a teleport crystal (if you brought one), to make the potion.
Finding Lord Amlodd
After rubbing the crystal seed (make sure you had it enchanted first), you will be teleported to the Enchanted Valley where you find a Mysterious Figure, who will ask for your opinion on the state of the valley. Choose any of the available options and the Mysterious Figure will reveal that he is Lord Amlodd. He will then teleport you back to Lletya.
Talk to Arianwyn and give him the potion, and a meeting will begin in which it is decided who enters the Grand Library. The group will decide on sending you in, while Ysgawyn will disagree but is overruled. Talk to Lord Amlodd (located north from Arianwyn) once more to teleport to the Grand Library.
06
The Grand Library of Prifddinas
Items needed: Six free inventory spaces Items recommended: Stamina potions, food for players with low hitpoints
Before you enter the library, take note that any unlocked memories can teleport you to other unlocked seal locations if you ask it where else you can be teleported to. You must have already heard the memory in order to teleport to it, simply solving the light puzzle doesn't enable the teleport. This can help with saving some run energy as you travel around the library. Regardless, it is recommended to bring a lot of stamina potions as the library is incredibly huge and requires a lot of running.
Summer pies are helpful for this section as they restore some run energy and health. Two sections of the library require the player navigate a gap by holding onto books, similar to the notorious wall supports in Mourning's End Part II; failing this will deal light damage to the player.
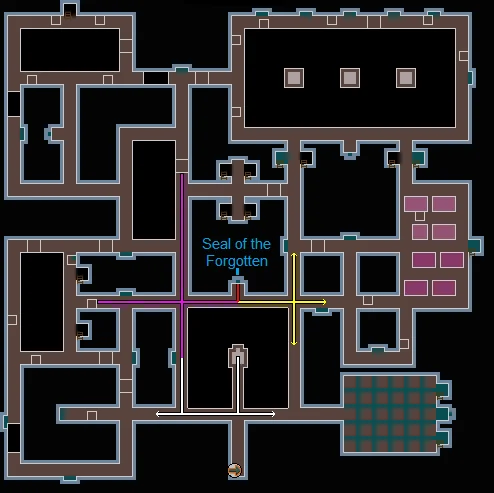
As this seal was already unlocked by Lord Iorwerth, one must simply walk to the Seal of the Forgotten in the centre and click on it. Walk to the seal indicated on the map to the right, and then touch the Seal of the Forgotten.
A memory of Seren will then reveal that her dark guilt is sealed away in the Temple of Light, but that an orb of light at the shrine at Gorlah exists to unlock this dark part of her.
The Seal of Ithell
Head to the south-east room directly east of the entrance.
Rotate the mirrors to reflect light to the end of the puzzle. Solution shown here:
Investigate the Seal of Ithell on the east side of the room.
The Memory of Seren will reveal that when she first encountered the elves on their homeworld of Tarddiad, the mystic elf Ceidwad documented Seren's teachings in a book called the Cerddi.
The Seal of Cadarn
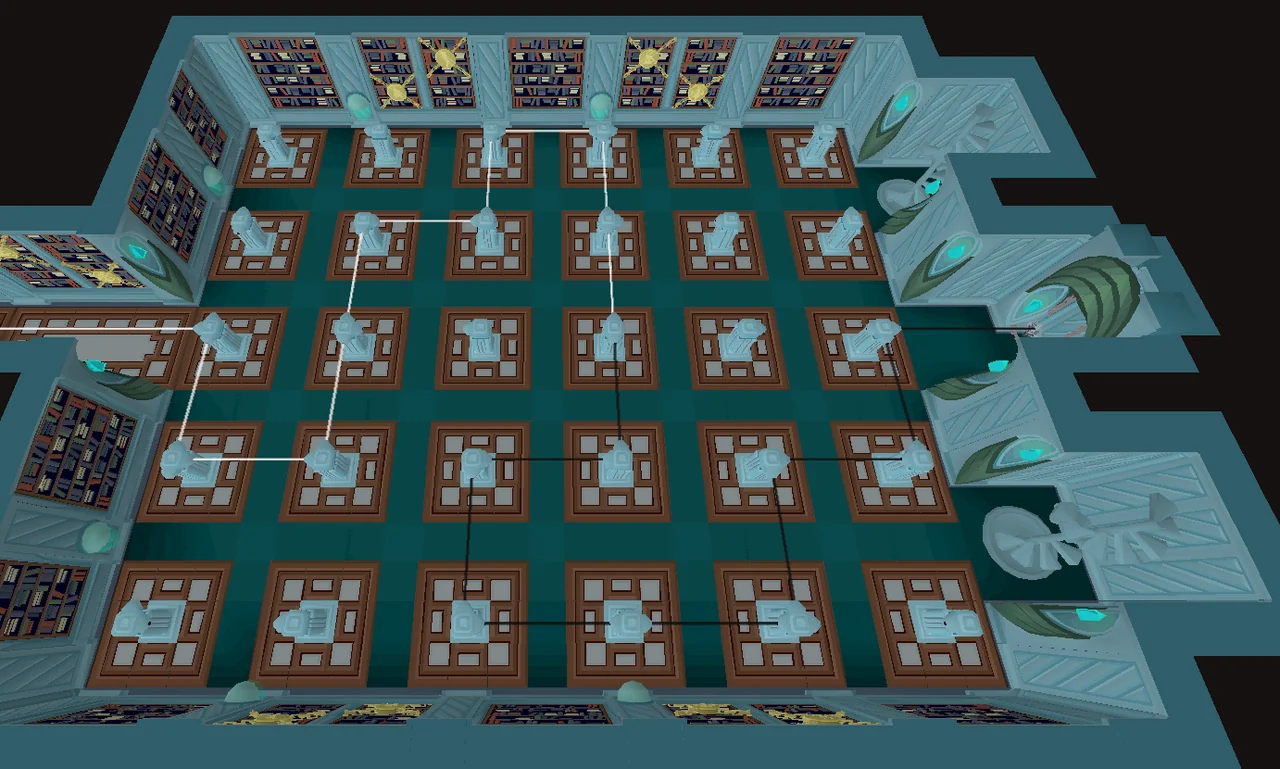
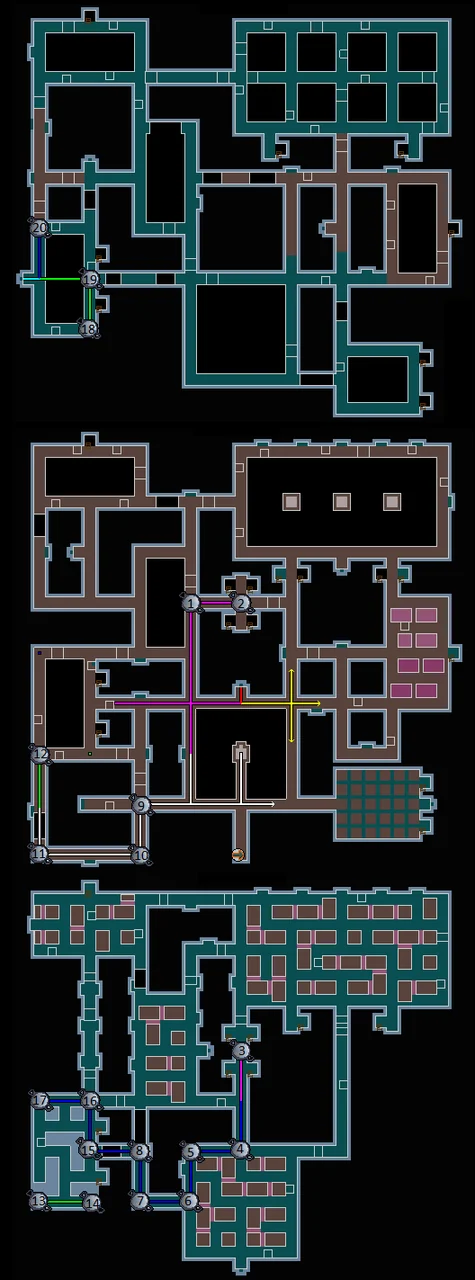
Song of the Elves - The Seal of Cadarn puzzle solution Image credits →
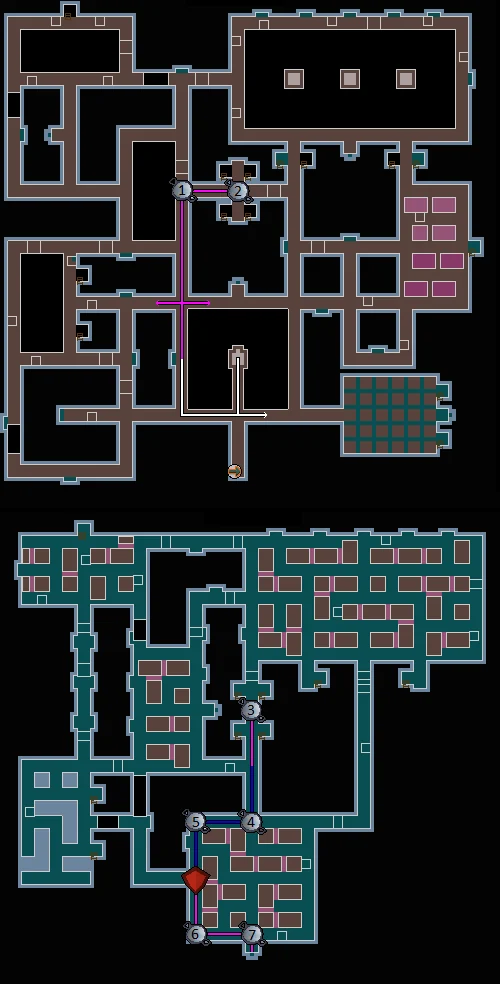
Walk north-west from the dispenser and follow the magenta light beam north. (Mirror #1 on the map)
At the last pillar before the light hits the books and stops, use Mirror #1 to reflect the light east.
Following the magenta light east, at the next pillar, use Mirror #2 to reflect the light down, indicated by the pillar's base glowing magenta.
Take some nearby stairs down to the bottom floor.
Use Mirror #3 on the pillar near the stairs, redirect the light south.
Follow the light as it turns blue and enters the southern room containing the Seal of Cadarn.
Use Mirror #4 on the first pillar in the room, redirecting the light west.
Use Mirror #5 on the north-west pillar in the room, redirecting the light south.
Use the red crystal on the west pillar in the room, turning the light magenta.
Use Mirror #6 the south-west pillar in the room, redirecting the light east.
Use Mirror #7 on the south pillar in the room, redirecting the light south into the Seal of Cadarn.
Interact with the Seal of Cadarn.
The Memory of Seren will reveal that while elves lived relatively long, they did not live long enough, and so Seren watched her friends die, which was a painful process for her.
The Seal of Crwys
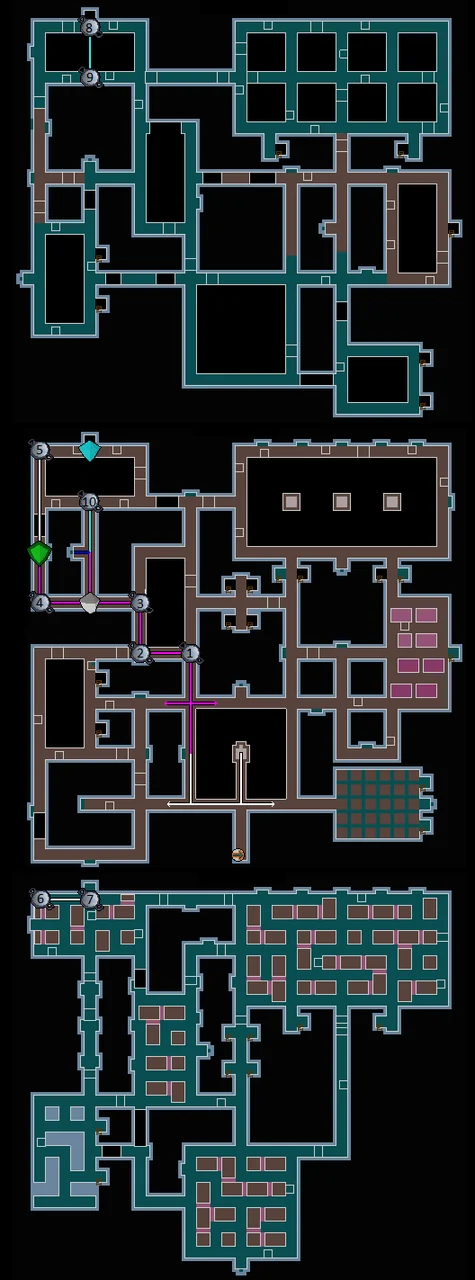
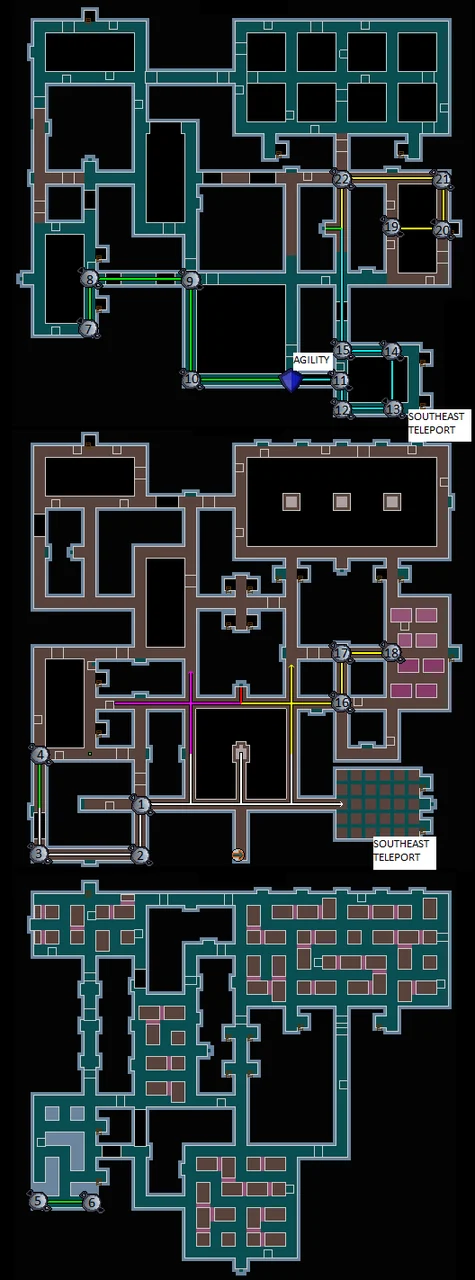
Song of the Elves - The Seal of Crwys puzzle solution Image credits →
Return to the centre room.
Pull the lever on the crystal dispenser.
Collect the ten hand mirrors and four crystals from the crystal dispenser.
Walk to the north-west corner of the centre room, and follow the magenta light beam north.
Following the light, at the first pillar you come to, use Mirror #1 to reflect the light west.
At the next pillar, use Mirror #2 to reflect the light north.
At the next pillar, use Mirror #3 to reflect the light west.
Following the light west, use Mirror #4 at the next pillar to reflect the light north.
Following the light, use the green crystal on the pillar, turning the magenta light into white light.
Head into the room north of the Seal of Crwys. The white light should be hitting the pillar in the north-west corner of the room.
At that north-west pillar, use Mirror #5 to reflect the light down into the bottom floor.
Use the nearby stairs to travel down to the bottom floor.
At the north-west pillar on the bottom floor, use Mirror #6 to reflect the light east.
Following the light, at the north pillar on the bottom floor, use Mirror #7 to reflect the light upwards.
Use the stairs to travel to the middle floor.
Place the cyan crystal in the north pillar on the middle floor. The cyan light will continue to travel upwards to the top floor.
Use the stairs to travel to the top floor.
Place Mirror #8 on the north pillar on the top floor, reflecting the light south.
Following the light, place Mirror #9 on the south pillar on the top floor, reflecting the light down to the middle floor.
Use the stairs to travel to the middle floor.
Place Mirror #10 in the south pillar on the middle floor, reflecting the light south towards the Seal of Crwys.
Interact with the Seal of Crwys.
The Memory of Seren will reveal that Seren shared a piece of her essence with the elves, lengthening their lifespans to thousands of years. This gift was given in the form of a song, called the song of creation.
The Seal of Amlodd
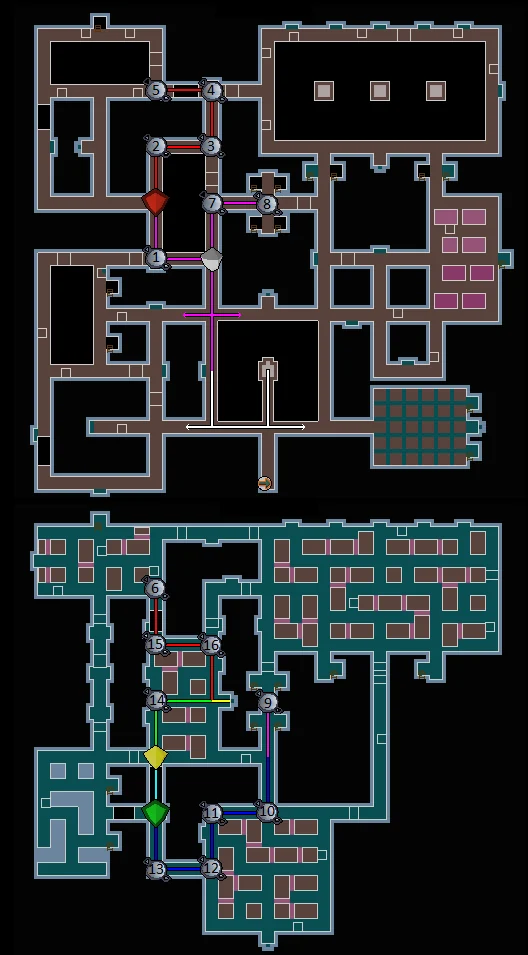
Song of the Elves - The Seal of Amlodd puzzle solution Image credits →
Return to the centre room.
Pull the lever on the crystal dispenser.
Collect the 16 hand mirrors and four crystals from the crystal dispenser.
Walk to the north-west corner of the centre room, and follow the magenta light beam north.
Following the light, at the first pillar you come to past the intersection, use the fractured crystal to split the light west and north.
Following the light west, at the next pillar use Mirror #1 to reflect the light north.
At the next pillar, use the red crystal to turn the light red.
Following the light north, at the next pillar use Mirror #2 to reflect the light east.
At the next pillar, use Mirror #3 to reflect the light north.
At the next pillar, use Mirror #4 to reflect the light west.
Run around the pit to get across to the west where the light goes.
The red light will be shining into the south-east pillar of the north-west room.
Use Mirror #5 to reflect the light down to the bottom floor.
Use the stairs to travel to the bottom floor.
Use Mirror #6 to reflect the light south across the gap into the room with the Seal of Amlodd.
Travel up the stairs, and go back to where you placed the fractured crystal (the first crystal).
Following the magenta light north, use Mirror #7 on the next pillar to reflect the light east.
At the next pillar, use a Mirror #8 to reflect the light down to the bottom floor.
Use stairs to get down to the bottom floor.
Use Mirror #9 on the pillar close to the stairs to reflect the light south.
Follow the light as it turns blue, and enters the room with the Seal of Cadarn.
At the next pillar, use Mirror #10 to reflect the light west.
At the next pillar, use Mirror #11 to reflect the light south.
At the next pillar, use Mirror #12 to reflect the light west.
At the next pillar, use Mirror #13 to reflect the light north.
At the next pillar, place the green crystal, turning the blue light into cyan light. (The cyan crystal does not fit.)
Go around via the centre of the map to cross the pit, entering the room containing the Seal of Amlodd. The cyan light should be entering on the south-west side of the room.
In the south-west pillar in this room, place the yellow crystal and turn the light green.
Following the light, reflect the light east using Mirror #14 into the pillar directly in front of the Seal of Amlodd.
Head to the pillar directly north of this mirror. The red light should be entering the north-west corner of this room.
Place Mirror #15 to reflect the light east.
Use a Mirror #16 on the next pillar to reflect the light south, to the pillar directly in front of the Seal of Amlodd.
The Seal of Amlodd should be unlocked. Click on the Seal of Amlodd.
The Memory of Seren will reveal that although the elves had increased longevity, they ended up being bound to her. If the elves strayed too far from Seren, they would suffer pain and even death.
The Seal of Meilyr
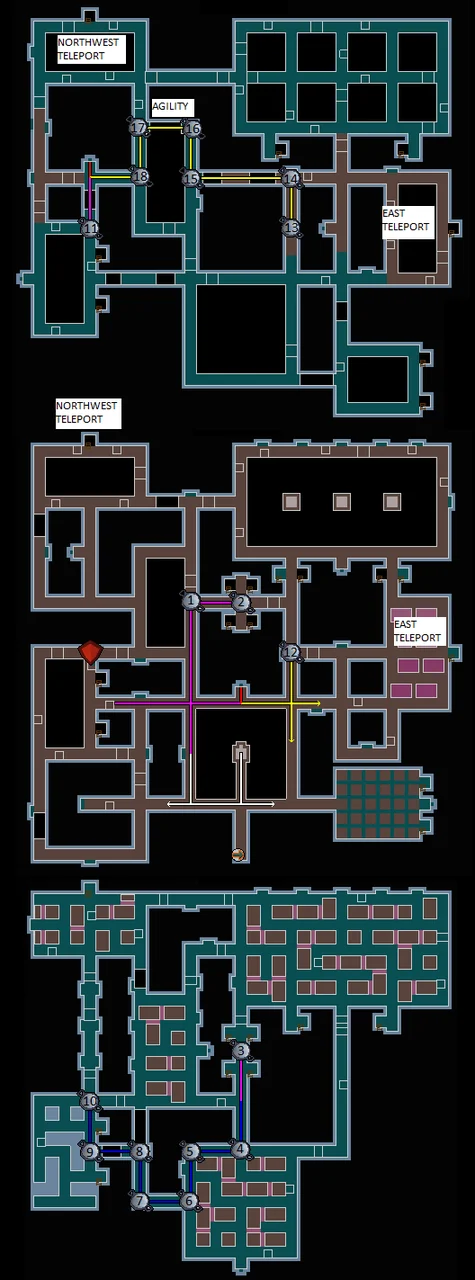
Song of the Elves - The Seal of Meilyr puzzle solution Image credits →
Return to the centre room.
Pull the lever on the crystal dispenser.
Collect the 18 hand mirrors and five crystals from the crystal dispenser.
Walk to the north-west corner of the centre room, and follow the magenta light beam north.
At the last pillar before the light hits the books and stops, use Mirror #1 to reflect the light east.
Following the magenta light east, at the next pillar, use Mirror #2 to reflect the light down.
Take the nearby stairs down to the bottom floor.
Use Mirror #3 on the pillar near the stairs to reflect the light south.
Follow the light as it turns blue and enters the southern room containing the Seal of Cadarn.
At the next pillar, use Mirror #4 to reflect the light west.
At the next pillar, use Mirror #5 to reflect the light south.
At the next pillar, use Mirror #6 to reflect the light west.
At the next pillar, use Mirror #7 to reflect the light north.
At the next pillar, use Mirror #8 to reflect the light west, across the gap.
To cross the gap and follow the light, you need to return to the middle floor using the stairs.
Then, run south-west, following the magenta light west to the south-west stairs and go to the bottom floor.
On the bottom floor, the blue light should be entering from the east side.
On the pillar the blue light is striking, use Mirror #9 to reflect the light north.
At the next pillar, use Mirror #10 to reflect the light upwards.
Use the stairs to return to the middle floor.
In the pillar the blue light is flowing through, place the red crystal, turning the light magenta as it travels to the top floor.
Use the stairs to travel to the top floor.
At the pillar with magenta light flowing into it, place Mirror #11 to reflect the light north, into the pillar next to the Seal of Meilyr.
Return to the middle floor to the intersection labelled "Mirror #12" in the picture. This intersection is directly north-east of the Seal of the Forgotten.
Place Mirror #12 and direct the light upwards.
Run due east and take the east stairs to the top floor, and run back to the pillar with yellow light around its base.
Use Mirror #13 to direct the yellow light north.
Use Mirror #14 to direct the yellow light west.
Use the east stairs to go back to the middle floor.
Take the north-west stairs to go to the top floor.
Slightly south of the south-east corner of this room, you will find a book handhold agility shortcut.
Cross the book handhold shortcut to the east side. You might fail this shortcut.
Go to where the yellow light is.
Place Mirror #15 in the pillar to direct the yellow light north.
Place Mirror #16 in the pillar to direct the yellow light west.
Cross the book handhold shortcut back west.
Place Mirror #17 in the pillar to direct the yellow light south.
Place Mirror #18 in the pillar to direct the yellow light west.
The Seal of Meilyr should now be open.
The Memory of Seren will reveal that she met a divine being that spoke of a different perfect world filled with power. As Seren wanted to save the elves, she sought this power. The elves had to accompany her or else they would die. She convinced the elves to go on this mission.
The Seal of Hefin
Song of the Elves - The Seal of Hefin puzzle solution Image credits →
Return to the centre room.
Pull the lever on the crystal dispenser.
Collect the 20 hand mirrors and five crystals from the crystal dispenser.
Follow the magenta light all the way to the north.
Where the magenta light hits the pile of books, use Mirror #1 to reflect the light east.
Use Mirror #2 to reflect the beam down.
Go down via the stairs.
Use Mirror #3 to reflect the light south.
The light will change to blue through the nearby pillar.
In the pillar just south of that, use Mirror #4 to reflect the light west.
Use Mirror #5 to reflect the light south.
Use Mirror #6 to reflect the light west.
Use Mirror #7 to reflect the light north.
Use Mirror #8 to reflect the light west across the gap. This light beam will be continued later.
Go back to the starting position on the central floor and head south-west until the white light disappears.
Here, use Mirror #9 to reflect the light south.
Then, use Mirror #10 to reflect the light west.
Use Mirror #11 to reflect the light north across the gap.
Across the gap, the light turns green.
To get to the other side of the gap, you need to run back to where the magenta light is and then head west.
On the other side of the gap, you should see the green light.
Use Mirror #12 to reflect that light down.
Use the nearby stairs just to the east to get to the bottom floor.
On the bottom floor, there should be both a green and blue light.
Go to the green light in the south-west corner.
Use Mirror #13 to reflect the green light east.
Use Mirror #14 to reflect the green light up.
Now, head to the blue light in the middle-eastern part of the room.
Use Mirror #15 to reflect the blue light north.
Use Mirror #16 to reflect the blue light west.
Use Mirror #17 to reflect the blue light up.
Use the stairs to go up TWO floors to the top floor.
Here, there should be a green and blue light.
Go to the green light in the south-east corner of this room.
Use Mirror #18 to reflect the green light north.
At the next light pillar, reflect the green light west with Mirror #19 to send it to the pillar in front of the Seal of Hefin.
Lastly, in the north-west corner of the room, you should see the blue light.
Use Mirror #20 to reflect the blue light south to the pillar in front of the Seal of Hefin.
Interact with the broken seal of Hefin.
The Memory of Seren will reveal that in this new world, they made a crystal city, but the curse remained.
The Seal of Trahaearn
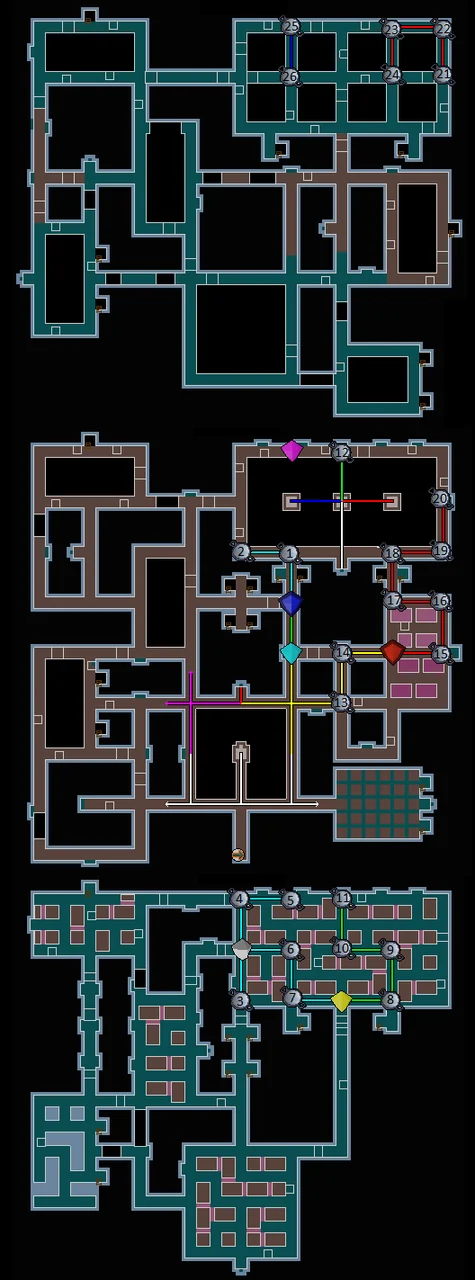
Song of the Elves - The Seal of Trahaearn puzzle solution Image credits →
Return to the centre room.
Pull the lever on the crystal dispenser.
Collect the 22 hand mirrors and six crystals from the crystal dispenser.
Follow the white beam at the south-west of the centre room.
Add Mirror #1 to the first pillar to reflect the light south.
Add Mirror #2 to the next pillar to reflect the light west.
Add Mirror #3 to the next pillar to reflect the light north across the gap.
Run back to the centre room and follow the magenta light west to find the green beam again after the gap.
Add Mirror #4 to the second pillar after the gap to reflect the light down.
Go down a level.
Add Mirror #5 to the pillar to reflect the light east.
Add Mirror #6 to the pillar to reflect the light up.
Go up TWO floors to the top floor.
Add Mirror #7 to reflect the light north.
Add Mirror #8 to reflect the light east.
Go back to the middle floor.
Go all the way to the south-east corner to the south-east stairs, where the Seal of Ithell is located.
Go up via the stairs to the top floor.
Go to the west side of the room, and cross the floating books Agility shortcut. If you fail, try again.
Run north-west until you see the green light.
Place Mirror #9 on the pillar to reflect the light south.
At the next pillar, use Mirror #10 to reflect the light east.
Place the blue crystal at the next pillar that is just to the west of the agility shortcut. The light should turn cyan as it crosses over the gap.
Cross the agility shortcut east.
Right across, use Mirror #11 to reflect the light south.
At the next pillar, use Mirror #12 to reflect the light east.
At the next pillar, use Mirror #13 to reflect the light north.
At the next pillar, use Mirror #14 to reflect the light west.
At the next pillar, use Mirror #15 to reflect the light north.
Head back to the middle floor and go to the yellow light in the east side of the floor.
At the east-most point of the yellow light (near a tower of books), place Mirror #16 to reflect the light north.
At the next pillar, use Mirror #17 to reflect the light east.
At the next pillar, use Mirror #18 to reflect the light up.
Use the stairs slightly east to go to the top floor.
At the pillar where the yellow comes up, use Mirror #19 to reflect the light east.
At the next pillar, use Mirror #20 to reflect the light north.
At the next pillar, use Mirror #21 to reflect the light west.
At the next pillar, use Mirror #22 to reflect the light south to the Seal of Trahaearn.
At the north pillar, use Mirror #4 to reflect the light east.
At the next pillar, use Mirror #5 to reflect the light up.
Go back to the pillar where the lights split (with the fractured crystal), and follow the light east.
At this east pillar, use Mirror #6 to reflect the light south.
At the next pillar, use Mirror #7 to reflect the light east.
At the next pillar, use the yellow crystal to colour the light green.
At the next pillar, use Mirror #8 to reflect the light north.
At the next pillar, use Mirror #9 to reflect the light west.
At the next pillar, use Mirror #10 to reflect the light north.
At the next pillar, use Mirror #11 to reflect the light up.
Use the stairs to go back to the middle floor.
Run to the north part of the room, via the north-west corner, and place the magenta crystal where the cyan light comes up, turning it blue.
At the pillar to the east, use Mirror #12 to reflect the green light south.
Go back to where the yellow light splits and head to the east side.
At the next pillar, use Mirror #13 to reflect the light north.
At the next pillar, use Mirror #14 to reflect the light east.
At the next pillar, use the red crystal to colour the light red.
At the eastern pillar, use Mirror #15 to reflect the light north.
At the next pillar, use Mirror #16 to reflect the light west.
At the next pillar, use Mirror #17 to reflect the light north.
At the next pillar, use Mirror #18 to reflect the light east.
At the next pillar, use Mirror #19 to reflect the light north.
At the next pillar, use Mirror #20 to reflect the light up.
Use the stairs to go to the top floor.
At the pillar where the red light comes up, use Mirror #21 to reflect the red light north.
At the next pillar, use Mirror #22 to reflect the red light west.
At the next pillar, use Mirror #23 to reflect the red light south.
At the next pillar, use Mirror #24 to reflect the red light down.
In the north-west corner of the same room, you should see the blue light.
Use Mirror #25 to reflect the blue light south.
At the south pillar, use Mirror #26 to reflect the blue light down.
Return to the middle floor and touch the Seal of Iorwerth.
The Memory of Seren reveals that she created a dark fragment of herself to try and counter the curse. Unfortunately, it did not work and the dark fragment tried to kill Seren. Seren locked the dark fragment away in the Temple of Light.
Return to Arianwyn in Lletya, who will call everyone to a meeting to hear your discoveries in the Grand Library. Everyone will be shocked by the revelations, except for Ysgawyn, who accuses you of lying and demands you to be taken away in chains. However, Baxtorian believes you and lets you continue reporting your discoveries. With Arianwyn still in shock, he will ask Baxtorian to temporarily lead. Ysgawyn will search for the orb of light on Gorlah. In the meanwhile, you will be told to search for Lord Crwys and Lady Hefin. As before, ask Baxtorian for the clue on how to find each of them.
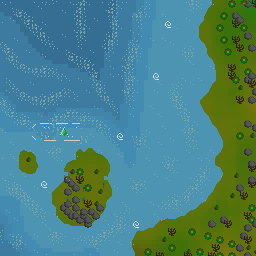
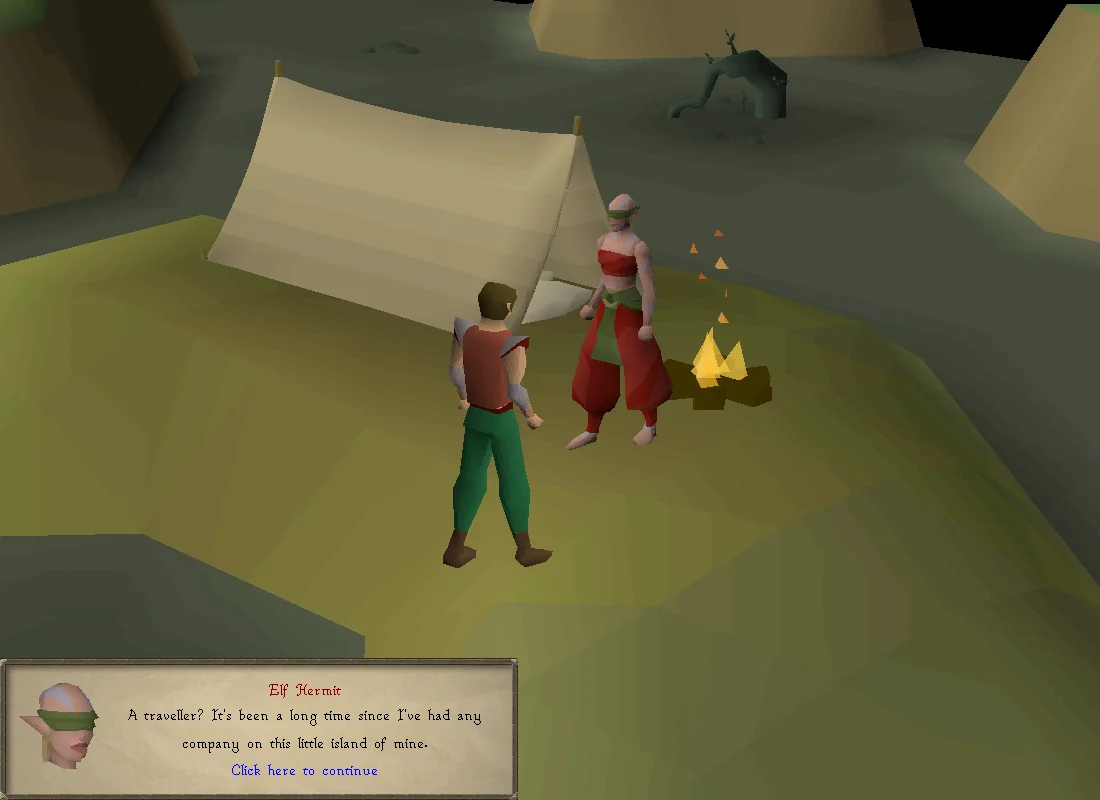
Lady Hefin gave Baxtorian the clue "I will walk across the water to the south" before her departure. Leave the village through the trees west, and then run south past where the magic trees are located; continue further south and jump across a trail of stepping stones over the tar lake until you reach a small island with an NPC and tent. Talk to the Elf Hermit, who is actually Lady Hefin. After a short conversation, Lady Hefin teleports away.
Finding Lord Crwys
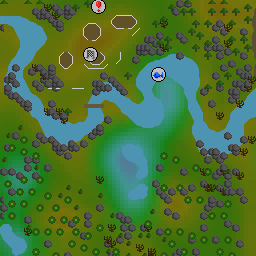
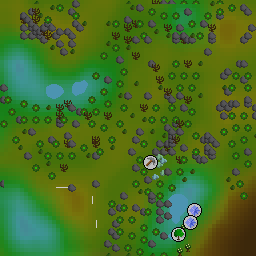
Lord Crwys gave Baxtorian the clue "The trees of my home will call to me" before his departure. Baxtorian also says, "The Crwys clan is a clan of woodcutters and farmers. The entire clan is close to nature, but none more than Lord Crwys." Chopping down trees in Isafdar will give a chat message that says, "The tree falls to the [compass direction]." Following these messages will lead you south of the Iorwerth Camp (refer to image above), on the western side of Isafdar.
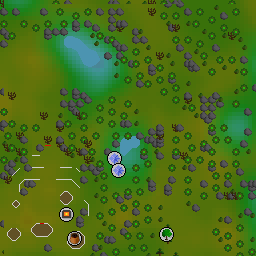
Make your way to the Elf Camp - using an Iorwerth camp teleport scroll is recommended. Note that the Iorwerth elves will attack you on sight. Cross the log balance and head south-west. You will pass a stick trap to enter the clearing, and then chop the dead tree north-west of the lake (or west of the trap) to free him. Note: You will not be able to cut the tree if you do not ask Baxtorian where to find him.
Now, return back to Lletya and speak to Baxtorian, and after a short cut scene and dialogue, the other NPC's will leave. Note: You will not be able to enter the cave in the next part if you do not talk to Baxtorian.
Head to the Iorwerth Camp. Be wary of the elves at the camp, as they'll attack you on sight, and enter the cave at the north end of the camp. Once inside, after a short dialogue, kill the Iorwerth Warrior and Archer. If possible, trap the warrior behind the archer; if that is not possible, then use Protect from Melee and kill the warrior first before focusing on the ranger. Alternatively, if you are confident in identifying when they are attacking, alternating between Protect from Melee and Protect from Missiles as each attacks will prevent all damage.
Items recommended:Food and Antipoison, gear and items for The attack on Lletya
Note: It is recommended to charge your teleport crystals now if you're running low, since the area becomes instanced later on and you cannot do this until much later.
Baxtorian asks you in private to find Ysgawyn, who has been acting unusually suspicious. He tells you Elena, who is by the pond and patch where you planted the cadantine seed earlier, was the last person who saw him, and advises you to speak to her. During the conversation, select the second option, and she will tell you that she doesn't know where he went, but tells you that might be possible to search for tracks by the entrance to Lletya. It's strongly recommended to bring some food and Anti-poison for the next part as you will be avoiding the traps through the forest.
The player accuses Ysgawyn of betraying the rebel elves. Image credits →
Head west out the village entrance, through the "pass tree" and inspect the mossy rock or mushroom (be careful of level-88 dire wolves). This will start the tracking sequence, similar to hunting kebbits.
Continue following the tracks and inspect the rocks just before the trip wire for the second set of tracks.
Hop over the trip wire and inspect the southern inspect rock option for the third set of tracks leading across the leaves trap.
Head south and inspect the elven lamp for the fourth set of tracks.
Follow the tracks south-west and inspect the mushrooms north of the large rock.
Follow the path and inspect the small rock north-east of where the tracks end for the fifth final set of tracks leading over the trip wire, where you will see Iestin and Ysgawyn.
Click on either NPC to continue the dialogue. (Note: If you do not have an inventory of very good food, such as sharks or higher, return back to a bank, as you will need it, and some prayer potions if low level.)
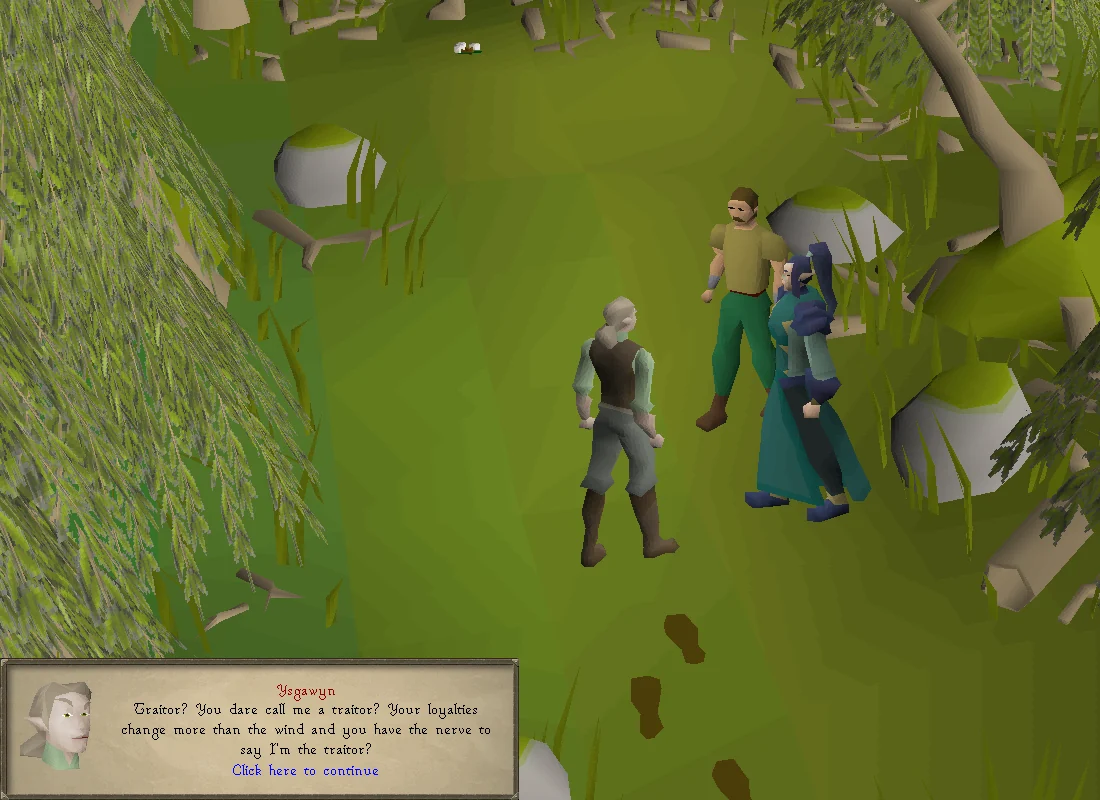
You will witness a conversation with Ysgawyn, and accuse him of being a traitor. However, he will angrily tell you that he is speaking to his informant within the Iorwerth clan, Iestin Edern, who provided Ysgawyn with the information about the orb of light, among other things. This was kept a secret from the other elves by Iestin's request, who feared that the other rebels may not be trusting of him; you will have two options to select before continuing the dialogue, before you are teleported into a cutscene, which will continue below.
Iestin will then inform both of you that earlier in the day, Lord Iorwerth has discovered Lletya via a traitor among the rebel elves, and told him how to find the village, and that Essyllt is preparing their forces as they speak. The three of you will quickly rush back to town.
10
The attack on Lletya
Items needed: Combat equipment Items recommended:Food and prayer potion (if low level), emergency teleport, charged teleport crystal to return quickly
On death, you can pay Rebel Scout 80,000 to retrieve lost items. Any unsafe death will delete all items left inside the deathbank. Any items left on the ground will be lost.
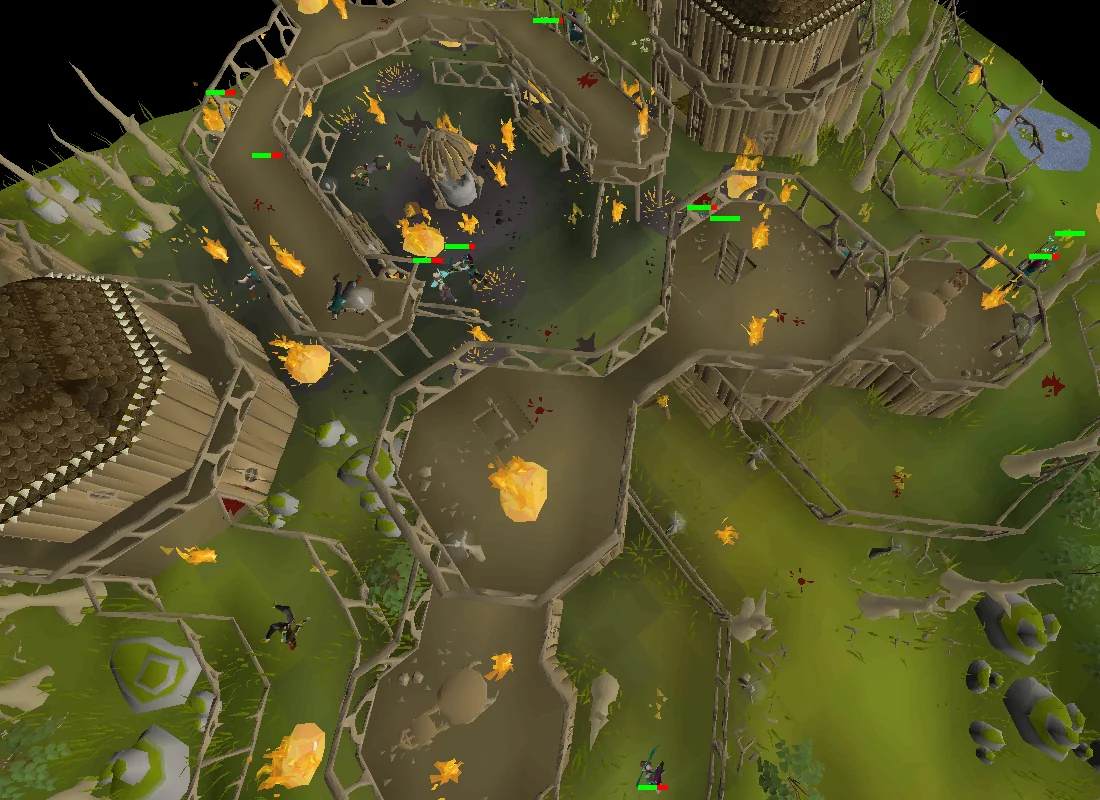
Lord Iorwerth has invaded the town of Lletya and is wreaking havoc. After a brief cutscene with Ysgawyn, Iestin and Elena, you are tasked with saving two children from one of the burning buildings. Head south into the building and search the various objects on the ground floor (UK) and 1st floor (UK) (locations vary from player to player) to find the two missing children (tables, sacks, benches, cooking pots etc.). The large flames will restrict locations you are not supposed to go through. Note: There is an escape barricade located west of the instance if you wish to restock food, as you will not be able to do this before the upcoming boss fight.
After saving the kids, a cut-scene will follow where Lord Iorwerth reveals that Arianwyn was the traitor, who turned once he discovered they truly wish to return Seren, and forces Baxtorian to hand over the Orb of Light in order to save one of the children. Ysgawyn will attempt to attack Iorwerth, but he fails to deal any damage and Essyllt will instantly kill him in retaliation. After a short dialogue and cut-scene, you will now have to fight Arianwyn in order to go after the orb once again.
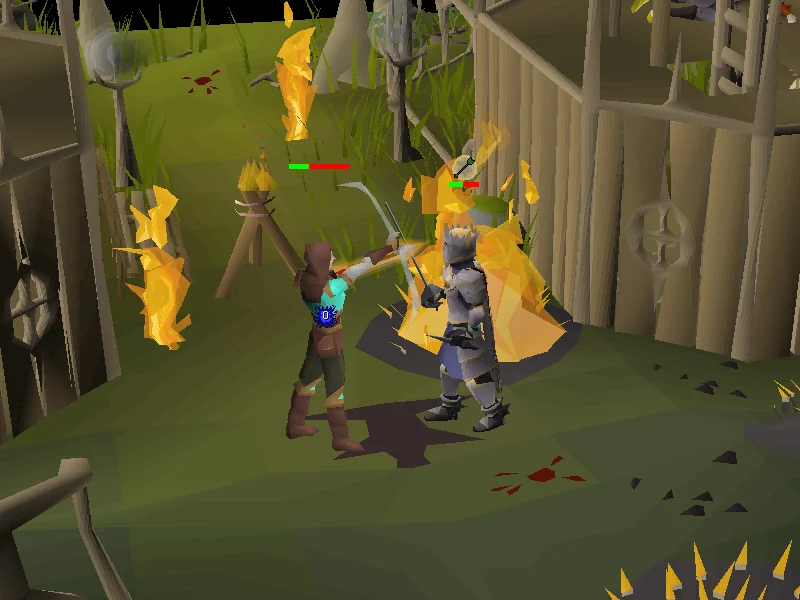
The moment you enter the instance, use Protect from Missiles prayer. Hit-and-run tactics work best with attacking Arianwyn with melee gear. Observe the colour of his arrows. His arrows consistently hit in the 30s, and have been observed to hit for 45.
A green arrow is a regular attack which can be negated with Protect from Missiles.
The orange arrow is a high damage explosive attack, but it is slow moving and can be avoided by moving one step away.
The purple arrow disables active prayers.
When Arianwyn reaches critical health, he will fire an orange arrow at you, knocking you out as he proceeds to escape. You will watch another cut-scene in which the surviving elves hold a funeral for Ysgawyn, and decide on what to do next. Islwyn will then ask Baxtorian about what Lord Iorwerth tried telling the rebel elves, and reveals the truth - when Baxtorian discovered where his wife was, he sent what little remained of his army to rescue her, knowing it was a trap but sending them to their deaths anyway due to his desperation to see his wife once more. Enraged, Islwyn leaves for the Underground Pass, intending to fight the Iorwerth on his own.
During the conversation, Baxtorian will reveal the two clues when you select the options for the last two elders - Lady Ithell and Lady Meilyr- and gives you a clue scroll; head to the bank to restock on the items required for the next part.
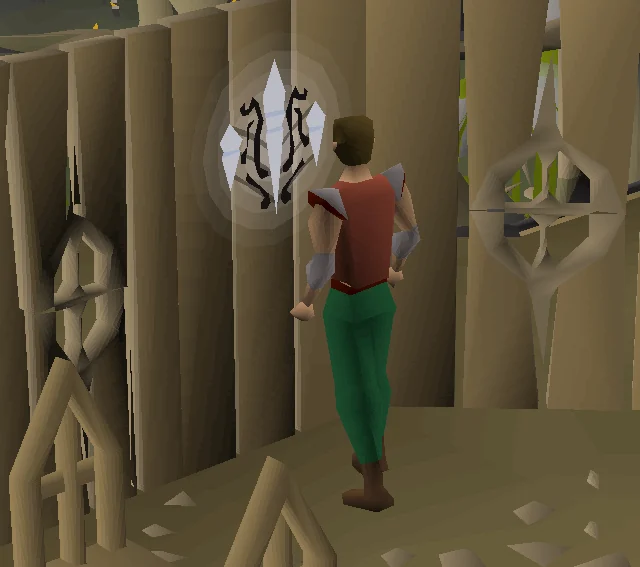
Ask how to find Lady Ithell. She gave the clue "I'll put my soul into my greatest work" before her death. You must walk around Lletya and locate the fivesymbols on the walls of the buildings. The symbols are white and glowing, and easy to spot. They are located both upstairs and downstairs:
The first symbol is up the northern ladder directly above where the group meetings have been taking place. Enter the room with the prayer altar. The symbol is on the wall as you enter the room on the left of the doorway.
Leaving that symbol, head north around the upper level to the ladder in the room (upper level of the general store). The second symbol is on the northern wall between two chairs.
Head down the ladder behind you into the general store. The third symbol is on the wall to the eastern side of the shop, south of the table and south-west of the exit.
Leave the general store and head south through the ruined town to the archery shop. The fourth symbol is on the wall in the corner north of the table.
The final fifth symbol is inside the bank in the east tucked away just to the right behind the bank deposit box.
Once all the symbols have been touched, you will gain some of Lady Ithell's knowledge, and you must build a statue on the statue space in the centre of the village (next to the water icon on the map) with a saw, hammer and eight limestone bricks (Flamtaer bag does not work). Upon building the statue and a short dialogue, Kelyn will gaze at the statue and gain all of Lady Ithell's knowledge, now becoming Lady Kelyn Ithell, before teleporting away. Return back to Baxtorian and ask for clues to Lady Meilyr in order to continue with the quest (if not already done).
Make sure you have enough inventory space to unequip all of your equipment before continuing. Ask how to find Lady Meilyr. She gave the clue "Follow the scrolls to find me" before her departure. Baxtorian will hand the player a clue scroll with a coordinate clue. It points to a location south-east of the Tyras Camp, near a yew tree; the quickest way is to teleport to Catherby and use the trader crewmember on the pier to head to the Tyras Camp Port for 800–3,200 coins (depending on Ring of Charos(a) and Cabin Fever). Once there, head through the camp and head north through the dense forest, then east and south through the next set of dense forest south of the grizzly bear/cub, and hop over either trip wire trap and south to the dig spot (4 tiles south of the triple mushroom cluster).
Note: if you have never done treasure trails before, you may fail to dig up the next clue scroll even if you are standing on the correct spot. If this happens try asking the Observatory professor about treasure trails to obtain a sextant, watch and chart. Destroy the Clue scroll that you have, get a new one from Baxtorian and try again.
The next clue step requires travelling to Zul-Andra. A Zul-Andra teleport will take you right there; another quick way to get there is using the fairy ringBJS, although you will need 76 Agility to use the stepping stone shortcut (can be boosted with summer pies). Otherwise, you may move onward to Port Tyras, go through the camp and head south from the docks, or use a trader crewmember to charter a ship to the Tyras Camp Port for 800–3,200 coins (depending on Ring of Charos(a) and Cabin Fever) and head south from there. Once there, venture to the south-east. On the east side of the northernmost hut, dig two steps north of the inconspicuous hole, or the STASH unit if players have built it, for the third clue scroll.
The third step is: "DEAD ROASTING UPSHIFTS", which is an anagram for "PRIFDDINAS SOUTH GATES". To progress, dig next to the southern city gate of Prifddinas; players can quickly reach it via an Iorwerth camp teleport then going east through dense forests then north towards the southern gate. Dig one square north of the north-eastern elven lamp for the last clue scroll.
The final step requires you to spin outside the entrance to the Underground Pass in eastern Isafdar with nothing equipped. Head south across the bridge and follow the route, after which, you head north across the northern leaves trap and then further east towards the cave entrance. Once players spin, Lady Ffion Meilyr will appear for a short dialogue before departing. Use your teleport crystal to head to Lletya to bank/restock.
On death, you can pay Rebel Scout 80,000 to retrieve lost items. Any unsafe death will delete all items left inside the deathbank. Any items left on the ground will be lost.
The rebel elves, ready to defend the entrance to the Temple of Light. Image credits →
Note: Upon conclusion of the following section, you will see a cutscene and then immediately fight the final boss of the quest. It is highly recommended to bring an emergency teleport to use once the multi-combat section has concluded, in order to bank and prepare for the final boss. You will not need to complete this section again.
Head for the dwarven camp in the Underground Pass. The fastest way to get there is by taking the Abyss, though players doing so should be wary of the potential of player killers near the Mage of Zamorak, and their prayer will be fully drained upon entering the Abyss. Take care that if you die fighting Essyllt you cannot re-enter from the Death Altar. You will be stopped by the game informing you that your items are being held by an allied elf. To traverse from the elven village, head north to the Underground Pass. Pass through the well, and make your way to the bottom level. You can reach the bottom level by either failing a bridge jump or reaching the 'Descend Cave' location south on the perimeter.
You will reach the dwarven camp. Speak with Baxtorian (middle), then Elena. She will give you seven explosive potions (they're stackable, so you will only need one free inventory space for these). Place them inside the holes north/outside of the camp's perimeter; then, speak to Baxtorian once again. He will tell you that Lord Iorwerth wishes to meet with him, and asks that you join him. Iorwerth will demand access to the Temple of Light, wishing to restore whatever was there. Arianwyn will be surprised, stating that it wasn't what they agreed on, but continues to side with him nonetheless. With no agreement, the siege on the camp begins.
Defend the camp for four minutes from several Elf Archers and Warriors, who will also try to destroy the gate defences. Failing will reset the attempt. The elf warriors will infinitely re-spawn. Even while under attack, enemies will not remain aggressive towards you, so you will have to keep attacking different enemies and draw their attention away from the barrier. It doesn't matter if any of them are killed, but the barricade has to hold for four (4) minutes in multi-combat.
Since it isn't needed to actually hit the enemies to change their attention away from the barrier to the player, any weapon will do. Newly spawned enemies always attack the barrier first, so it may be useful to use a low-damage weapon. Fast-hitting weapons also are preferable, for example darts, knives or the goblin paint cannon.
If using ancients, casting ice and blood burst/barrage can be useful in keeping the warriors off the gate and healing from any damage incurred.
After keeping the barrier intact, the elven warriors come storming through the defences anyway and Elena is injured by Essyllt, whom you must kill. Should you die, or leave the battle, you will not have to defend the barrier again.
Essyllt is level 236 and primarily attacks with melee. He also has two special attacks that he can use at random:
Essyllt may shove you backwards with his spear, stunning you briefly, and then launch a ranged attack that can deal significant damage; this can be completely blocked by switching to Protect from Missiles.
Essyllt throws a potion at you that drains all your combat stats by 5. This attack cannot be negated with protection prayers, but the stat drain can be offset by drinking a dose of Super restore. You can also ignore the stat drain if you have high enough combat stats, since the drains don't stack past 5, so your stats will only be drained to max-5.
Note: After the battle with Essyllt, if your prayer runs out during the following cutscene you will be removed from the cutscene and placed outside of the battle. You can go down the tunnel to the bottom level of the Underground Pass to immediately resume the cutscene.
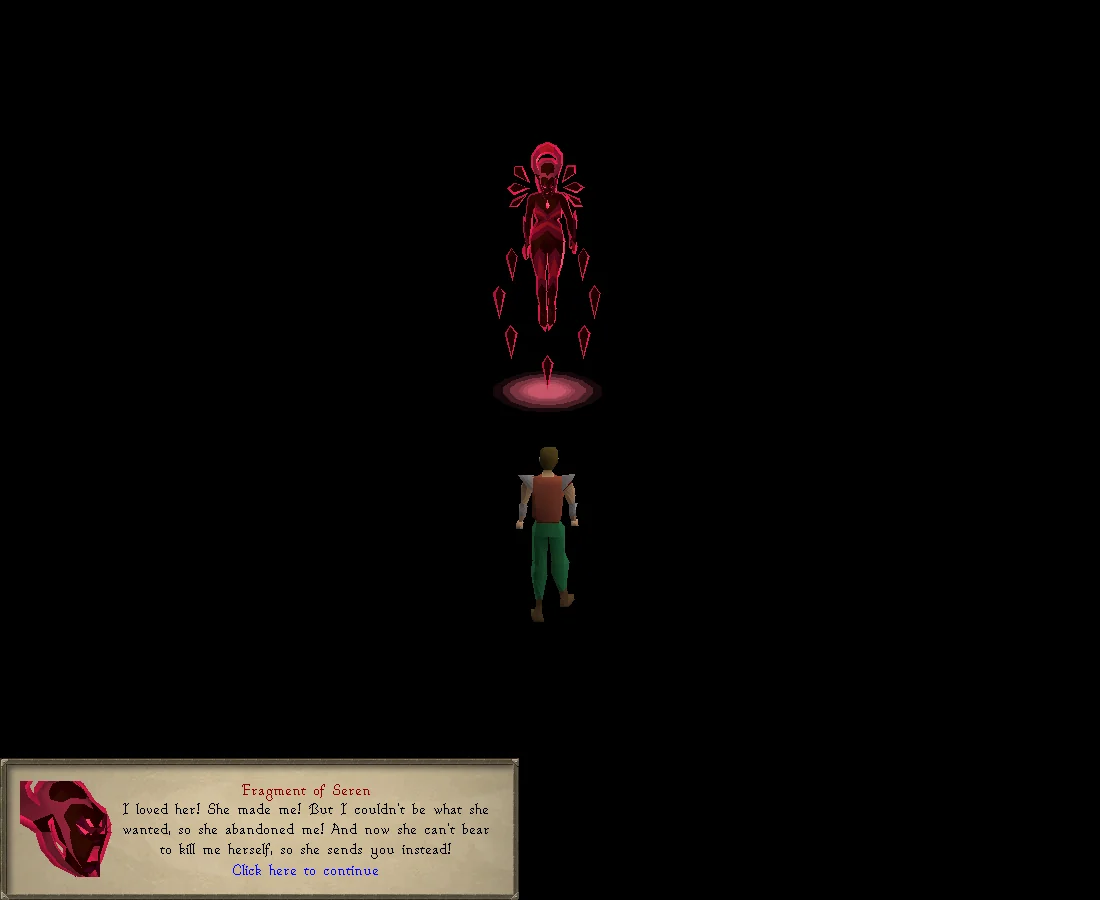
After you defeat him, a cutscene will play before the final boss fight. Lord Iorwerth manages to pass through the crevice into the Temple of Light; Arianwyn and Baxtorian follow after him. After you check that Elena is alright, you follow as well. Lord Iorwerth will then free the Fragment of Seren, despite Arianwyn's protests. Filled with newfound doubt and skepticism, he shoots Lord Iorwerth, mortally wounding him. The Fragment will then drag the player to her realm, believing the player is a servant of Seren sent to dispose of her once and for all.
On death, you can pay Rebel Scout 80,000 to retrieve lost items. Any unsafe death will delete all items left inside the deathbank. Any items left on the ground will be lost.
Mechanics
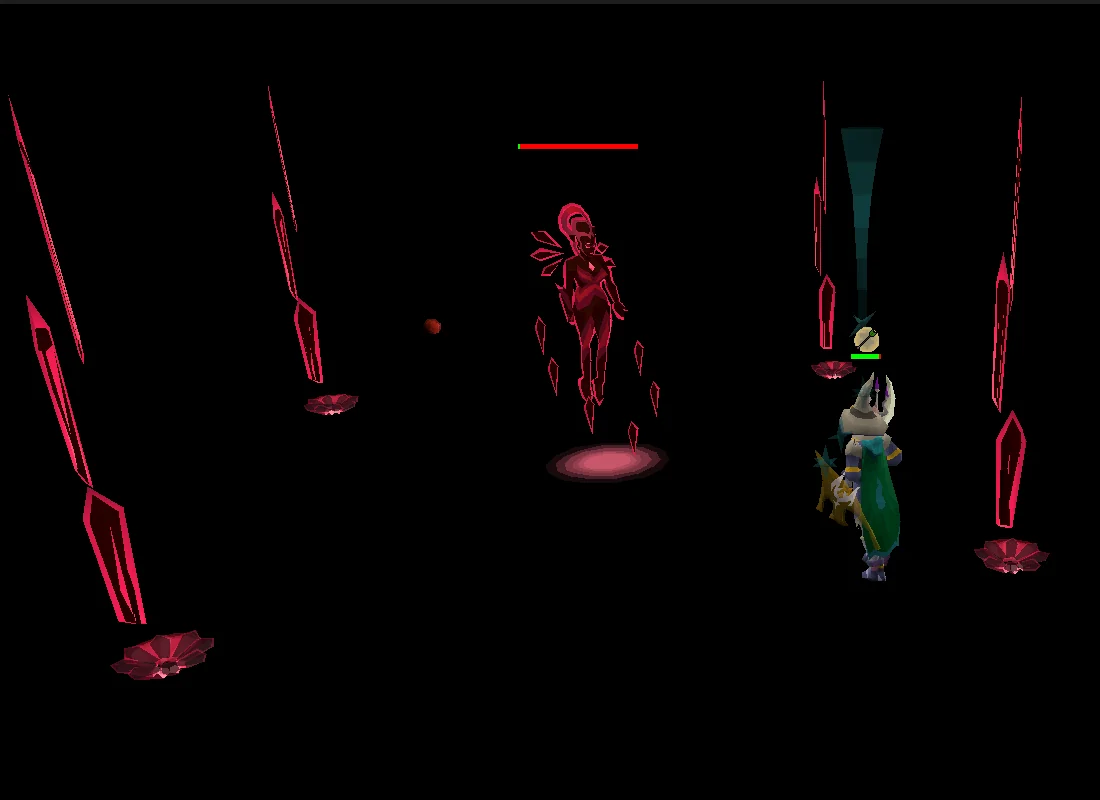
The final part of the quest is to defeat the Fragment of Seren, which may attack with either a Ranged attack with multiple hitsplats, or Melee depending on the proximity of the player. It is highly recommended to avoid her melee attack, which hits 5 times in 5 ticks, dealing up to 50 damage in total. By standing at range and using Protect from Ranged, her basic Ranged attack will be greatly reduced from a max hit of 12/12 to 3/3.
The Fragment of Seren has very high Melee and Ranged defence, but is weak to Magic. Using Magic for this fight is highly recommended. Rings of recoil do not work, and Thralls cannot be summoned.
During the fight, she will infinitely cycle between four special attacks in order, each separated by about 15 seconds and announced via some text (usually enough time for her to do 3 normal attacks). Upon reducing her health below 666 health and then below 333 health, these attacks will be strengthened.
The Fragment of Seren will throw a projectile, teleporting the player next to her. After a short delay, she will perform a melee attack. This is the only attack that is not strengthened in later phases.
Avoid the follow up attack by simply moving several squares away from her after being teleported.
Special attack 2
The Fragment of Seren will split into two, spawning a clone. Attacking the correct one (the lighter coloured shadow) will cause the clone to despawn. An additional clone will be spawned after 666 hitpoints, and another after 333 hitpoints.
The clones will deal additional damage to the player, so attack the correct one as soon as possible. After she reappears, ensure you continue to keep distance from her to avoid her melee attack.
Special attack 3
The Fragment of Seren will spawn two Crystal Whirlwinds around her, which will heal her over time for 4-8 hitpoints per beam. An additional Whirlwind will be spawned after 666 hitpoints, and another after 333 hitpoints.
As each Whirlwind is destroyed in one hit, any weapon may be used to deal with them. Taking a fast attack speed weapon such as darts or the toxic blowpipe will be helpful in destroying them quickly especially if the player has a lower damage output, though using your regular weapon of choice will also be fairly effective. Beware of walking into her melee range while pathing around her to destroy them. Using Blood spells on the beams will heal around 5-6 health per attack, despite them having only 1 health. If you do not destroy the whirlwinds, they will despawn when the final special attack is initiated.
Special attack 4
The Fragment of Seren will throw a projectile that immobilizes and teleports the player just outside of melee range. She will then charge up an unblockable attack based on the player's maximum hitpoints, dealing up to the player's maximum hit points minus 5. This is increased to minus 3 at 666 hitpoints and minus 1 at 333 hitpoints. There will be a short delay after this attack before the Fragment will attack again.
The strategy for this fight will revolve around this final special attack, as you will need a method to quickly heal afterwards, as well as a method of healing to or above maximum hitpoints just before it. See the strategy section below for more details.
Strategy
Saradomin brews combined with super restores are recommended as your main source of healing for this fight, as you will be repeatedly reduced to 1-5 hitpoints by her final special attack. Using brews saves on inventory space and allows you to heal quickly.
Blood spells
The lifesteal effect from Blood spells may be used in combination with brews to heal the player to full before her final special attack. 80 is recommended to use Blood Blitz which will make the fight significantly easier, though it is still possible to defeat her using a lower level spell. If below 80 Magic, 1-2 forgotten or ancient brews may be useful to reach the requirement to use Blood Blitz, though be aware you will need to reboost after each restore potion is used.
It may also be useful to bring one stack of purple sweets or strawberries with this strategy, as even if the lifesteal has healed the player to full, the player may be damaged by an attack just before she uses her final special attack. These stackable foods allow you to heal by just a few hitpoints without incurring the debuff penalty of brews.
Phoenix necklace
Eating belladonna or cave nightshade, drinking a dose of Zamorak brew, or dropping a vial of nitroglycerin to activate a phoenix necklace right before the Fragment attacks with her final special attack will nullify all of her damage for a few ticks. To trigger the phoenix necklace you have to use food; while frozen by the Fragment of Seren you can't lower your hp using a dwarven rock cake, or Locator orb from Dragon Slayer II for example. Blood spells may heal too much for the phoenix necklace to activate.
More information on this strategy can be found here.
A ranged weapon switch with a quick attack for the Crystal Whirlwind special attack to stop additional healing, such as Darts, Toxic blowpipe, or Magic shortbow. Chinchompas on the Medium Fuse attack style will keep you out of the Fragment's melee range while maintaining the same attack speed as darts or throwing knives on accurate/long range
Bloodbark armour if using Blood spells; each piece of bloodbark armour increases the amount that blood spells heal by 2% of the damage dealt. With the full set, blood spells will heal for 35%.
Prioritise dealing damage, UNTIL the Fragment summons her healing beams. Saradomin brew doses may be consumed between ranged attacks on healing beams, without impacting DPS. If doing this, ensure your magic level is high enough to resume casting your chosen Magic spell. Once you have destroyed all the healing beams (or when they despawn), you must heal yourself to full shortly afterwards.
The Fragment of Seren will now begin charging her final special attack. If you are missing just a few hitpoints from her last attack before charging, use your purple sweets or strawberries now if you brought them, otherwise sip another brew.
Once the damage is dealt, drink at least 3 sips of brew and 1 dose of super restore potion - if you drunk more brews before the attack, then use additional restores as necessary. With Blood spells you can now let the rest of your hitpoints regenerate automatically. Make sure your super restore has restored your stats by enough to use your chosen spell, and use a forgotten or ancient brew after restoring your stats if necessary.
Players with fast reflexes can use Redemption as it will always trigger with a minimum of 60 Hitpoints, then restore prayer and pray against ranged before she can attack.
Repeat steps 2-4 as the cycle repeats.
If you die during this part, you can pay 80,000 coins to collect your items from the rebel scout at the southern wall on the upper floor of the Underground Pass. Once collected, you can enter the crevice by the scout to resume the fight. Be sure to collect your items from the scout first! If you die before collecting your items, all your items will be permanently lost.
You can either return to Lletya and enter the Pass from there, or bring a crystal trinket and enter the Temple of Light via the Mourner's HQ in West Ardougne.
For the Temple of Light method, you can get there from West Ardougne under the Mourner's HQ or use a Slayer ring teleport to dark beasts. Once in Temple of Light, head up the stairs in front of you, on the next floor climb the Stairs to the south-west. Next, climb down the two sets of stairs to the north. After climbing down and passing through the light door, there should be a tunnel, "Enter Tunnel" on the northern wall. This entrance can only be accessed after you've encountered the boss.
While you could access the tunnel via the Abyss to the Death Altar, this is very dangerous as one death to a Player killer could result in the permanent loss of your stored items. Also watch out as your prayer will be drained to 0 upon entering the Abyss.
14
Prifddinas restored
After the fight, a short cutscene will be shown where Lord Iorwerth is horrified with the Fragment's defeat. He states that even though it was angry, hurt and confused, it was also innocent. He states that he hopes they're happy for what they've done to Seren before dying.
Following the defeat of Lord Iorwerth and the Dark Lord, the player is brought to the gates of Prifddinas.
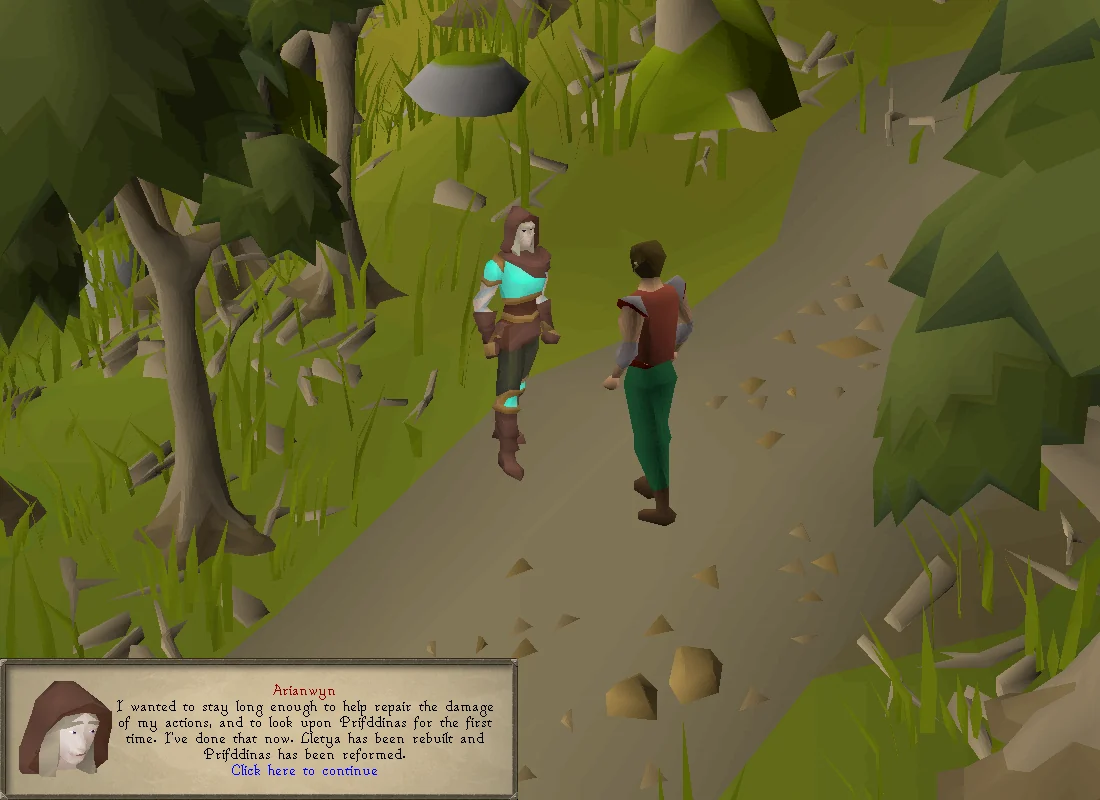
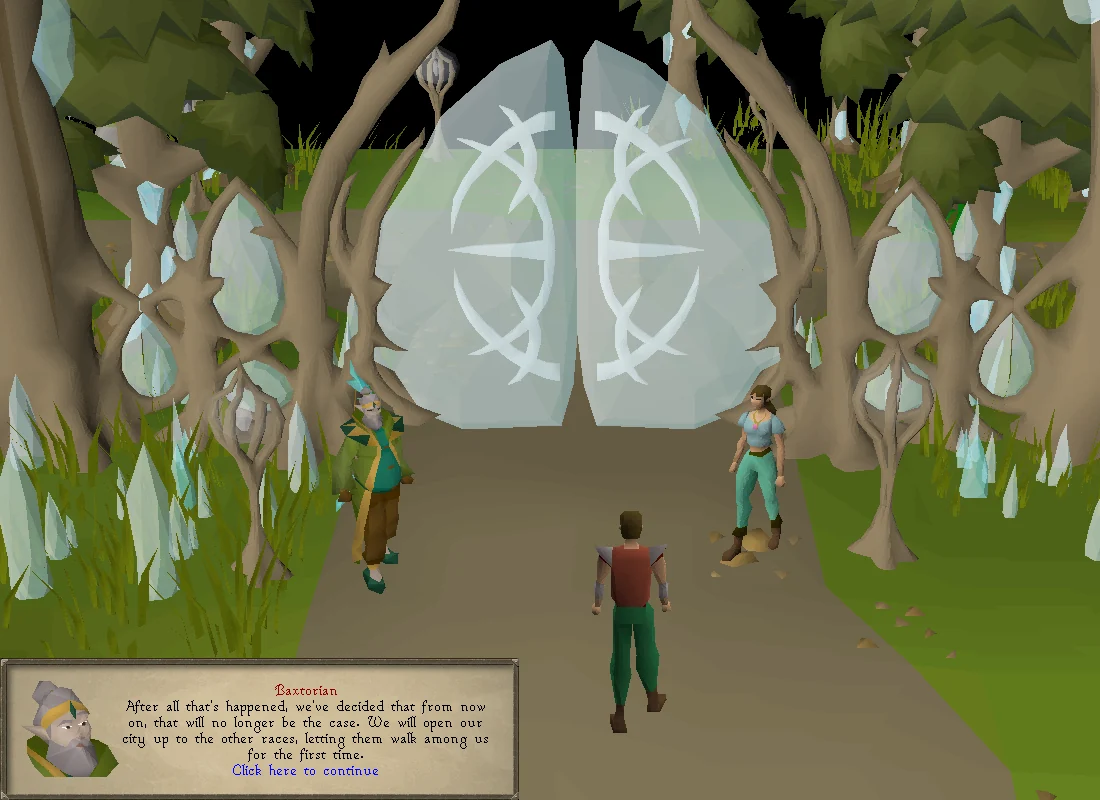
Outside the newly regrown crystal city, Arianwyn will meet with the player. The player thanks Arianwyn for stopping Iorwerth, but Arianwyn claims that he had to, and decides to leave the elven lands for good. Ridden with guilt for hurting his fellow kind, he decides to travel the world to reflect his own actions, and hopefully redeem himself in the process. He bids farewell to the player as they make their way to the gates, where Baxtorian and Elena wait for them. Baxtorian declares that Prifddinas will be open to all, seeing how one of their own caused so much destruction, welcoming both you and Elena as the first humans to the city.
Use this when you already know the route. The full walkthrough above includes explanations and diagrams.
The escape of Elena
Talk to Edmond, in the garden of the house north of the Flying Horse Inn in East Ardougne.
Say: Yes.
Talk to King Lathas in Ardougne Castle. (He will not talk to you if you are wearing full mourner gear.)
Talk to Edmond.
Say: How do I get this disguise?
Use the red dye on the steel full helm to create an Ardougne knight helm.
Speak to Alrena who is inside or just outside Edmond's house with purple dye and silk to get the Ardougne knight tabard.
Say: Yes.
Use the tabard on the steel platebody to create an Ardougne knight platebody.
Pures who do not have 5 Defence must talk to Edmond to polish the steel platelegs into Ardougne knight platelegs.
Go to Ardougne Castle, wear the 3 steel items (Ardougne knight armour) and go downstairs. (You can have other equipment in the rest of the armour slots.)
Talk to Elena through the cell door of the most northern cell.
Go to Elena's house in East Ardougne (the house where you start Biohazard, immediately west of the log balance).
Search the cabinet and take the thick clear liquid.
Say: The thick clear liquid.
Return to Ardougne Castle, talk to Elena.
Say: Yes.
Talk to Edmond.
Pick a cabbage for later if you don't already have one.
Causing an insurrection
Go to the Rehnison household in West Ardougne. It is on the north side of town, just west of the Mourner headquarters.
Search the bed.
Say: Climb through it.
Go through the dialogue with Elena and Councillor Halgrive.
Say: I am.
Equip the mourner gear. (To get a new set go downstairs in the mourner HQ, most top right building in west Ardougne. Kill a level 108 Mourner. You will need a Slayer ring to gain entry via the dark beasts teleport as the mourners won't allow entry without the set)
West Ardougne tasks:
Use a tinderbox on the grain sacks in the large building north of the church, near the Clerk.
Talk to the Priest in the West Ardougne church.
Use a Tinderbox on the grain sacks in the West Ardougne church.
Talk to Nurse Sarah, found in a building south-west of the church.
Use a Tinderbox on the grain sacks, far south-west corner, outside of the West Ardougne General Store.
Talk to Chadwell in the general store about new taxes.
Say: I'm here to tell you about some new taxes.
Equip the Ardougne knight helm, Ardougne knight platebody, and Ardougne knight platelegs/Steel platelegs. (You can have other equipment in the rest of the armour slots.)
East Ardougne tasks:
Go to Ardougne Market and talk to the:
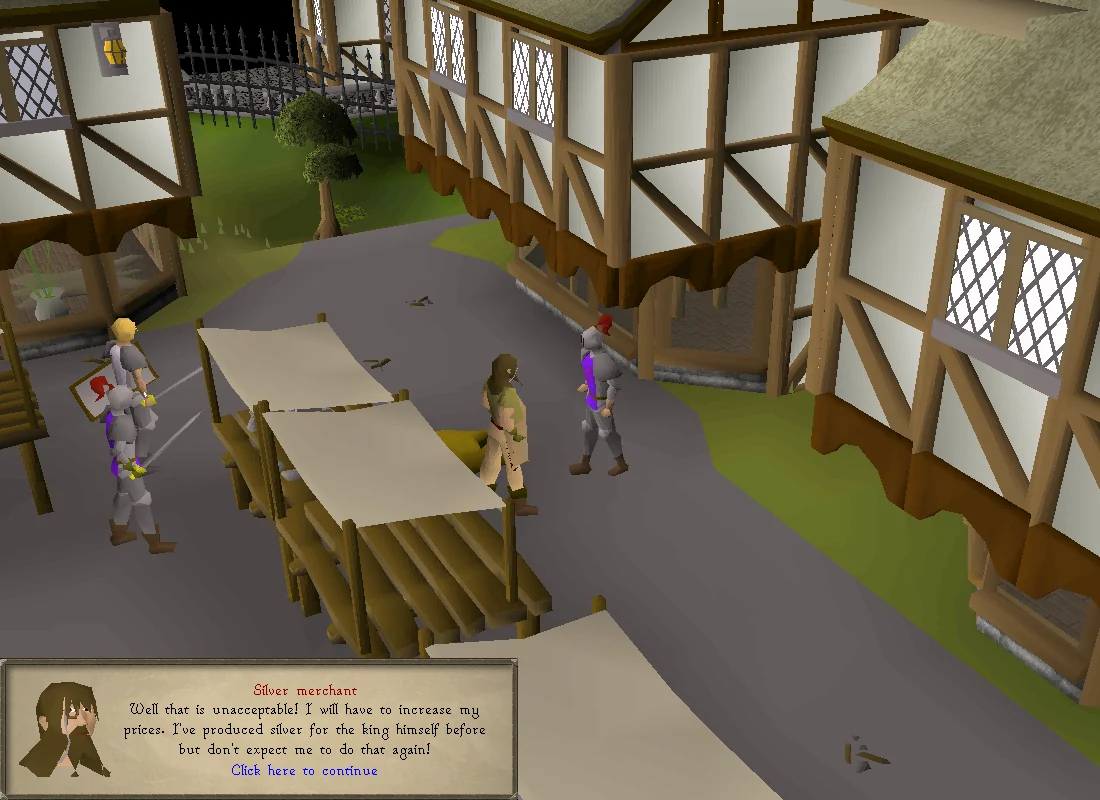
Silver merchant
Say: I'm here to tell you about some new taxes.
East Baker
Say: I'm here to tell you about some new taxes.
West Baker
Say: I'm here to tell you about some new taxes.
Gem merchant
Say: I'm here to tell you about some new taxes.
Fur trader
Say: I'm here to tell you about some new taxes.
Spice seller
Say: I'm here to tell you about some new taxes.
Silk merchant
Talk to the Town Crier.
Say: I'm here to tell you about some new taxes.
Talk to Zenesha in the platebody shop.
Say: I'm here to tell you about some new taxes.
Talk to the Estate agent located west of the market.
Say: I'm here to tell you about some new taxes.
Talk to Probita the pet insurer located west of the Estate Agent.
Say: I'm here to tell you about some new taxes.
Talk to Aemad or Kortan at Aemad's Adventuring Supplies. west of Probita.
Say: I'm here to tell you about some new taxes.
Talk to the Priest in the East Ardougne church.
Say: I'm here to tell you about some new taxes.
If you have not yet converted enough people, you may talk to Doctor Orbon in the East Ardougne church and the Bartender at the Flying Horse Inn south of Edmond's house.
Speak with Elena in the Rehnison household basement hideout to start The Battle of West Ardougne.
Say: Are you sure you're okay with this Elenva? → I'm ready.
Defeat the 10 Mourners at the Mourner headquarters.
Go through the trapdoor in the north building.
Defeat the 11 Mourners in the Mourner headquarters basement.
Speak with Elena to start The Battle of East Ardougne.
Say: I'm ready.
Defeat the 15 Knights of Ardougne and Paladins in the castle. (some are upstairs)
Speak to King Lathas.
Say: We're done here, take him away.
Watch the cutscene to its completion
Arianwyn's plan
Speak to Arianwyn after being transported to Lletya.
Speak to Ysgawyn on the upper middle platform in Lletya.
Speak to Elena in the south-west corner in Lletya, near the pond.
Say: Go ahead. → I don't know
Speak to Arianwyn located at the quest icon just north of the bank in Lletya.
Speak to Arianwyn once the meeting has finished.
Visiting Baxtorian Falls
Go to the Waterfall Dungeon by boarding the log raft, using rope on the rock to the south, and finally using rope on the dead tree near the waterfall's edge to get to its entrance. [use games necklace to teleport to barbarian outpost for quick access to the waterfalls.]
Go to the eastern room and search the northernmost crates for the key.
Go to the western room and past the two doors.
Talk to Arianwyn
Say: Let's just crack on..
Read the "Ode to eternity" book
Inspect each pillar and then use the items in order on the pillars, the number of each pillar is different for everyone.
SW will say its number.
W will say what number it isn't opposite. This is the item to place on the SE pillar.
NW will say the number it is next to. This is the item to place on the W pillar.
NE will say what it is opposite. This is the item to place on the NW pillar.
E will say what number it isn't next to. This is the item to place on the E pillar itself.
SE will say what it isn't. This is the item to place on the NE pillar.
1 - Nature rune
2 - Flowers/Irit leaf
3 - Black knife/dagger
4 - Wine of Zamorak/Zamorak brew
5 - Adamant chainbody
6 - Cabbage (be careful not to eat the cabbage!)
Preparing to enter Prifddinas
Return to Lletya.
Talk to Arianwyn.
Talk to Elena near the pond.
Say: Now's not the time for stories.
Plant the Cadantine seed in the nearby farming patch. (Note: if you have unlocked Barbarian Farming, you do not need a Seed dibber.)
Speak with Baxtorian in the central building, north of the bank, and ask how to find Lord Amlodd to get a crystal seed.
Say: How do I find Lord Amlodd? → How do I find Lady Trahaearn? → I'll be back later.
Ask how to find Lady Trahaearn to receive her clue.
Say: How do I find Lady Trahaearn? → I'll be back later.
Bring the crystal seed to Eluned, found just south of Lletya Archery Shop, north of the pond.
Say: I have a seed from Baxtorian that I think needs enchanting.
Travel north of Lletya to the cave entrance of the Underground Pass, accessible from the east side of Tirannwn, and go inside.
Walk south of the Well of Voyage and inspect the blocked crevice.
Use a pickaxe to break through the crevice and enter.
Use the hammer and runite bar to fix the exoskeleton of the Elderly Elf.
Talk to Lady Tangwen Trahaearn.
Rub the crystal seed, taking you to the Enchanted Valley.
Speak to the Mysterious Figure and choose any option to return with Lord Ieuan Amlodd to Lletya.
Talk to Elena and get the elder cadantine.
Talk to Arianwyn to get the old crystal.
Use the pestle and mortar on the crystal to get crystal dust.
Use the elder cadantine on a vial of water to create the elder cadantine potion (unf).
Use the crystal dust on the unfinished potion to create the inversion potion.
Speak to Arianwyn.
Finding Lord Crwys and Lady Hefin
Return to Lletya, and speak with Arianwyn.
Speak with Baxtorian. Be sure you ask about how to find BOTH Lord Crwys and Lady Hefin or else the option to chop the tree and jump on the skipping stones will not appear.
Say: Lady Hefin → Lord Crwys
Exit Lletya and run south past the magic trees and continue until you reach the Poison Waste. Cross stepping stones until you reach Lady Hefin (initially Elf Hermit). Talk to her.
Go to the western side of Isafdar, south of the Iorwerth Camp, use the Iorwerth camp teleport to get there quickly. Be cautious as Iorwerth elves will attack you now. Pass the log balance and the stick trap south-west of it to get to the clearing. Then chop the dead tree north of the pond, directly west of the stick trap. Lord Crwys will appear, you'll automatically speak with him.
Return to Lletya and speak with Baxtorian.
Recovering the orb
Equip yourself with combat gear and go to the Iorwerth Camp.
Enter the cave on the north side of camp, and slay the two guards within. You can trap the warrior behind the archer and kill them one at a time, taking no damage as long as you use the correct protection prayers.
Kill the Iorwerth Archer (level 90).
Kill the Iorwerth Warrior (level 108).
Search the chest and receive the orb of light.
Return to Lletya and speak with Baxtorian.
Say: I'll get going then.
Tracking down Ysgawyn
Speak with Elena near the pond.
Say: That's fair. Anyway, I wanted to ask you about Ysgawyn.
Exit out of Lletya's entrance north-west.
Inspect the mushrooms near the entrance.
Follow the footsteps, inspecting rocks, mushrooms and lamps along the way. They should lead you to a spot near the whiteberry spawn in the centre of Isafdar.
Speak with Ysgawyn.
Say: So what have you been discussing?
The attack on Lletya
Enter the house to the south and search the east table to find Eoin.
Go up the ladder and search the Cooking Pots by the South Cooking Range to find Iona.
You will now have to fight Arianwyn.
Range or melee are suggested, as magic is inaccurate against him
Protect from Range will completely nullify his normal attacks
Purple arrows will turn off any prayers, so make sure to turn them back on.
Orange arrows are 1x1 bombs, and will hit high amounts of damage even through prayer. Move to a different tile after the arrow starts flying to avoid them.
Finding Lady Ithell and Lady Meilyr
Talk to Baxtorian to receive a clue scroll.
Say: What's Lady Ithell's clue? → What's Lady Meilyr's clue?
Search Lletya for the five glowing symbols on the walls:
First symbol is inside the bank on west wall, glowing white.
Second symbol is inside the building north of Elena in the south-west section.
Third symbol is on the south wall of the general store to the north.
Fourth symbol is in the upper floor of the general store, on the north wall.
Fifth and final symbol is on the west wall of the upper floor prayer altar room.
Take the limestone bricks, hammer, and saw, and build the statue in the centre of the village. (Make sure to finish the dialogue or you won't be able to continue the next part)
Speak with Lady Ithell at her statue on Lletya.
Bank the hammer/saw and get the rest of your supplies now. (You will still need your spade!)
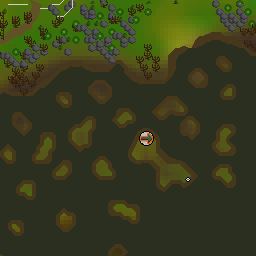
Go to the south of Isafdar, near the swamp, and dig there. (see picture)
Dig two steps north of the STASH unit near Zul-Andra (BJS and run east, 76 Agility OR Zul-andra teleport OR charter a ship to Port Tyras and run South East)
Dig outside the south gates of Prifddinas (Iorwerth camp teleport)
Spin outside the western entry to the Underground Pass with nothing equipped (Teleport Crystal to Lletya).
Bank now if you did not bring combat gear
Sealing the Underground Pass
Enter the Underground Pass from the Isafdar side, and enter the Well of voyage. Proceed south along the winding path (see dungeon map for path from Iban chamber to stairs, eventually travelling through a cave to dwarf camp at the ground level.
Speak with Baxtorian.
Speak with Elena.
Say: Baxtorian said you had an idea to help our defence.
Fill the seven holes outside of the camp with the Explosive potions.
Speak with Baxtorian.
Say: I'm ready.
Defend the Dwarf camp for four minutes.
You do not need to kill every attacker, simply keep them from destroying the barricade. A new archer/melee spawns randomly after killing one.
Attack any elf that is attacking the barricade, to draw their attention towards you instead. Alternatively you can kill off all the rangers until there's only melee attackers left and block the path to the gate.
Protect from Melee is recommended, to protect from the higher levelled Elf warriors, switch to Protect from Missiles once the warriors pile up and stop attacking you.
Defeat Essyllt.
Protect from Melee will nullify most of his damage. Can quickly change to Protect from Range after his stun attack to avoid all damage.
After his potion attack, drink a restore to counteract the stat drain.
Fighting The Fragment
After a cutscene, you will automatically enter the Temple of Light. If you are not equipped for this fight immediately teleport out, you can re-enter the Temple of Light through the Underground Pass, through the same crack that you entered the Dwarven camp with.
Defeat the Fragment of Seren.
Magic is the only form of combat that is effective against the Fragment.
Protect from Range reduces most of its damage from normal attacks.
Equipment lost on death while in the instance can be reclaimed from an elf NPC standing outside of the cave entrance for the cost of 80,000 coins. If the player dies elsewhere before reclaiming their items, their unclaimed items will be permanently lost.
Magic attack and damage bonus should be prioritised. High-level magic equipment such as Ancestral robes, Ahrim's robes, or void knight equipment along with the trident of the swamp and Ancient Magicks blood spells are an effective combination.
The Fragment has four special attacks that always occur in the following order, repeating until The Fragment is defeated:
1. An orb that teleports you to The Fragment. Simply run away after being teleported to maintain a safe distance from a melee attack.
2. The Fragment will split into multiple parts, and you must attack the correct one. The real Fragment will have crystals underneath it, and a lighter shade of aura.
3. The Fragment will summon healing spells. Simply attack the spells once with any attack to defeat them. Fast-hitting weapons such as throwing knives or darts are excellent here. Chinchompas are a great choice as their long range makes it easier to stay out of melee range while only being 1 tick slower than knives/darts.
4. The Fragment will teleport you to one place and freeze you there while she winds up an attack. Then, she will unleash a heavy attack that hits for 99% of your max hp. If your hitpoints are at or below 99% of your max hp, you will be killed in 1 shot. It is highly recommended to bring Saradomin brews or anglerfish to heal above 100% health prior to the attack landing to avoid being killed.
After defeating the Fragment of Seren, Baxtorian will invite you into Prifddinas.
Congratulations, quest complete!
QUEST COMPLETE
Rewards
40,000 Agility experience
40,000 Construction experience
40,000 Farming experience
40,000 Herblore experience
40,000 Hunter experience
40,000 Mining experience
40,000 Smithing experience
40,000 Woodcutting experience
Access to Prifddinas
Ability to fight Zalcano
Access to The Gauntlet
Access to Trahaearn Mine
Access to Iorwerth Dungeon
Ability to change respawn point to Prifddinas
Ability to move Player-owned house to Prifddinas
Ability to teleport to Prifddinas with a teleport crystal
Access to a new spirit tree destination in Prifddinas
Ability to make divine potions
Ability to make crystal tools, armour and weaponry
Arianwyn (as Elven Traitor) and Essyllt accessible in the Nightmare Zone.
The ability to dock at Prifddinas and utilise its port services
 4
4