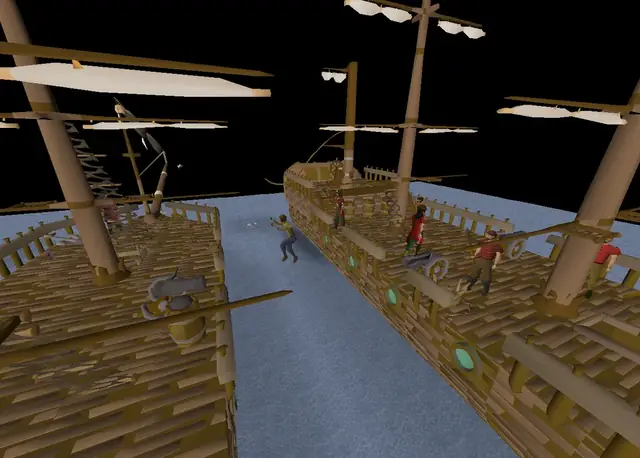
QUEST 110 · MEMBERS

Darkness of Hallowvale

Fighting tooth and nail against the vampyre overlord, Drakan, the Myreque have moved their secret base camp to Burgh de Rott. Now the fight starts in earnest! Veliaf needs someone to make their way into the Sanguinesti region, the eastern side of Morytania cut off from the west behind an impenetrably huge wall. Will the fight be supported by Myreque resistance inside the vampyres' domain? What grim discoveries are to be found behind that dread wall? And what of the Vyrewatch - deadly sky-bound p

Darkness of Hallowvale — OSRS Wiki quest image
OSRS Wiki image for Darkness of Hallowvale. OSRS WikiGame image © Jagex Ltd
Difficulty
Experienced
Length
Long
Quest points
2
Released
4 September 2006
Jump to a chapter

Before you start

Where to start

Talk to Veliaf Hurtz in the basement of the Burgh de Rott inn.

Requirements

Recommended

Enemies to defeat

None - however, Vanstrom Klause (level 169) needs to be fought until he has attacked you 5 times (whether he hits or misses), and it is very possible to die. However, death can be avoided if you pray protect from melee right after you draw the third sketch.

STEP BY STEP

Walkthrough

Follow the chapters below. Click any screenshot or diagram to view it at full size.

Before you begin

  1. ^ The level 22 Thieving requirement to begin the quest is boostable, but unhooking the latch in Meiyerditch has an unboostable requirement of 22 Thieving.
  2. ^ The level 26 Agility requirement to begin the quest is boostable, but the obstacles within Meiyerditch have an unboostable requirement of 25 Agility.

Introduction

Throughout the quest, you're expected to run around parts of Morytania, which can take quite some time, even with the proper teleports. To avoid having to retrace steps, be sure to read each section carefully! If you're unsure if a step is finished, check your quest log to see if it matches what's next in the walkthrough. Rushing to finish the quest can end up causing parts to be skipped and require going through all of Meiyerditch over again.

Starting out

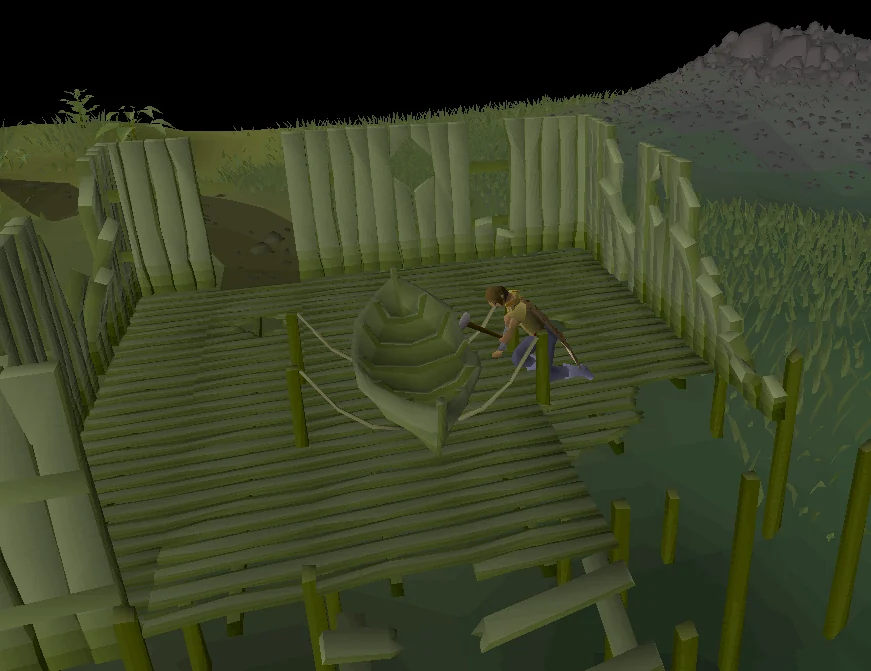
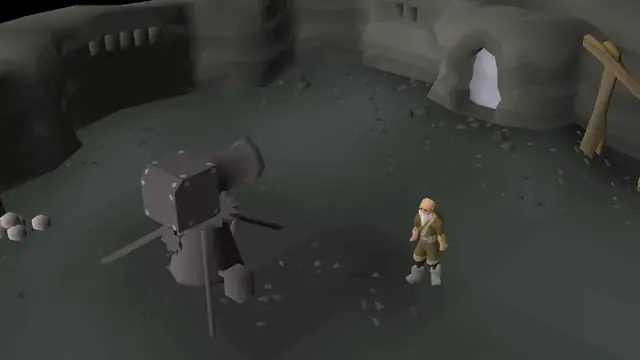
Repairing the boat in Burgh de Rott.
Repairing the boat in Burgh de Rott. Image source ↗
Items needed: 2 planks, 8 nails and a hammer
Items recommended: Vyrewatch outfit or 1,950gp to purchase one once you get to the city (only if your Thieving or Hitpoints is low)

Speak to Veliaf Hurtz in the basement of the pub in Burgh de Rott. Ask if there is something you can do to help out, and he will request assistance in scouting a route into the Sanguinesti region. He wants you to make contact with the Myreque in Meiyerditch.

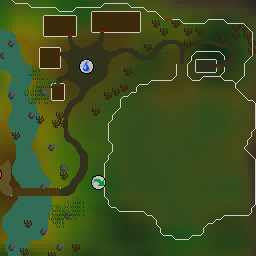
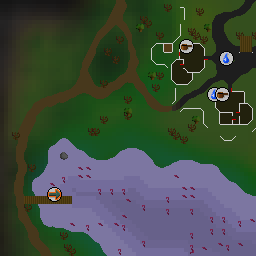
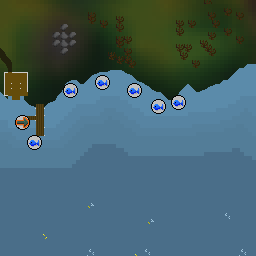
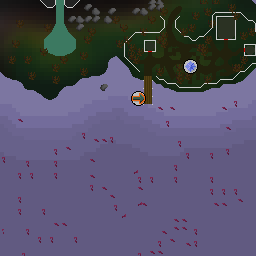
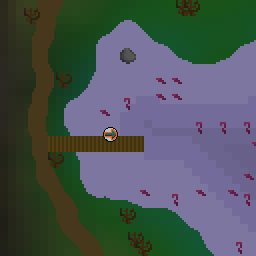
Go south-east to the docks where you'll find a hut with a boat in it. Inspect the boat to repair it using a plank and four nails. Inspect the boat chute going down into the water to repair it, also using a plank and four nails. You can now bank or drop your hammer. Push the boat down the chute into the water and board it to travel to Meiyerditch.

Welcome to Meiyerditch

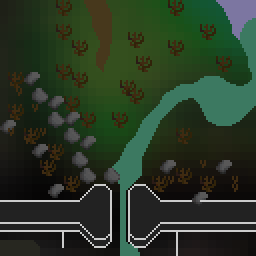
Arriving in Meiyerditch.
Arriving in Meiyerditch. Image source ↗

Note: While in Meiyerditch, the Vyrewatch will occasionally stop you, and you will be presented by several options. You may choose to logout and login during the conversation to avoid this.

  • "Pay a blood tithe" - The Vyrewatch will damage you for 6 Hitpoints. Chosen by default if you don't select an option.
  • "Bring it on" - The Vyrewatch will attack you, allowing you to run away. The Vyrewatch are invulnerable to all sources of damage available to you at this stage.
  • "Distract him" - Success rate depends on your Thieving level, if you fail you will be damaged for 6 Hitpoints.
  • "Send me to the mines!" - (this option appears after you've found the Myreque hideout). You will not lose health, instead you will need to mine 15 Daeyalt ores, place them in a minecart and then talk to a guard to leave. You'll then appear in the north-east part of the city. If you have no pickaxe, a miner will supply one.

After boarding the boat, you will arrive at the very southern, damaged end of the southern wall of Meiyerditch. Climb onto the rocks and then climb up. Follow the winding wall until it runs straight north, then search (right click) the very first set of floorboards. Kick them in, then climb down into the passage below.

Climb over the wall rubble to enter the town, and talk to any nearby Meiyerditch citizen. Ask them in a whisper if they know about the Myreque, then whisper that you really need to meet them. They will tell you to speak to Old Man Ral. Ask if they can introduce you to him. They will tell you to say a friend recommended him.

Old Man Ral is north of where you climbed over the rubble - follow the wall until it turns inwards, and he is in the second building to the east (and one building north of Trader Sven). Tell him someone said you could help me, then when he asks you what they called him, tell him it was the "Sage of Sanguinesti". He should now tell you that you need to get to Sector 3 of the city by following sickle symbols on the walls.

Optional: Just to the south, Trader Sven sells the Vyrewatch outfit for 1,950 GP. The vyrewatch will stop you less often while wearing this outfit, which may save you time throughout the quest.

The sickle logo agility course

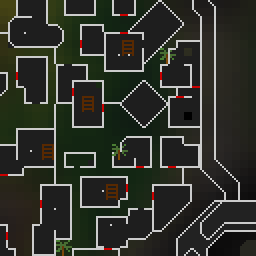
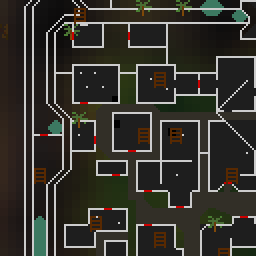
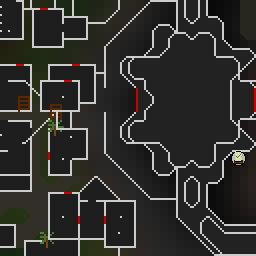
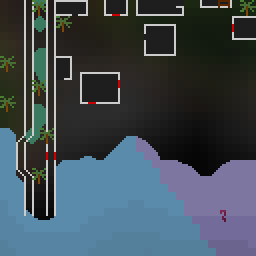
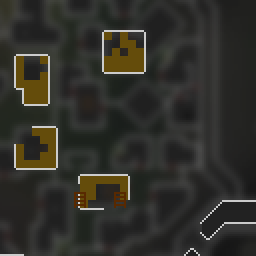
Loading...MeiyerditchGround floor1st floor2nd floor3rd floor
  1. 1 Mine
  2. 2 Myreque Hideout
  3. 3 Laboratory
  4. 4 Location
  5. 5 Location
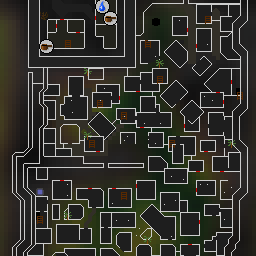
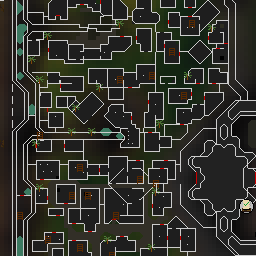
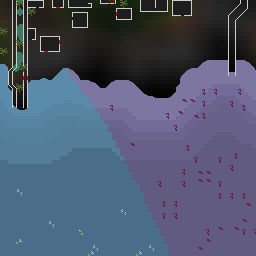
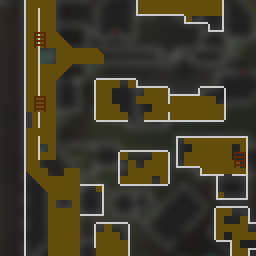
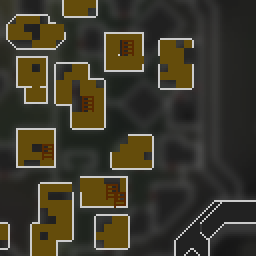
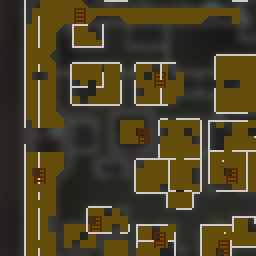
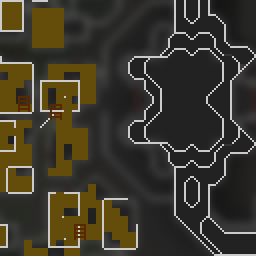
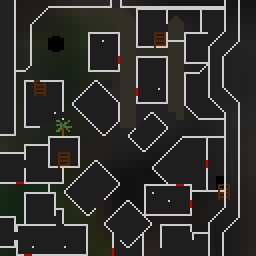
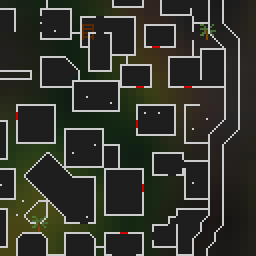
Routes Agility course Laboratory Myreque Hideout Meiyerditch Mine Locations The slums Laboratory Myreque Hideout Meiyerditch Mine NPCs Old Man Ral Trader Sven Open interactive map ↗Map data and tiles: OSRS Wiki · Game imagery © Jagex Ltd
Path Ground floor 1st floor 2nd floor 3rd floor Terrain Ladder Floorboard/Floor Wall/Shelf Tunnel/Washing line Open interactive map ↗Map data and tiles: OSRS Wiki · Game imagery © Jagex Ltd
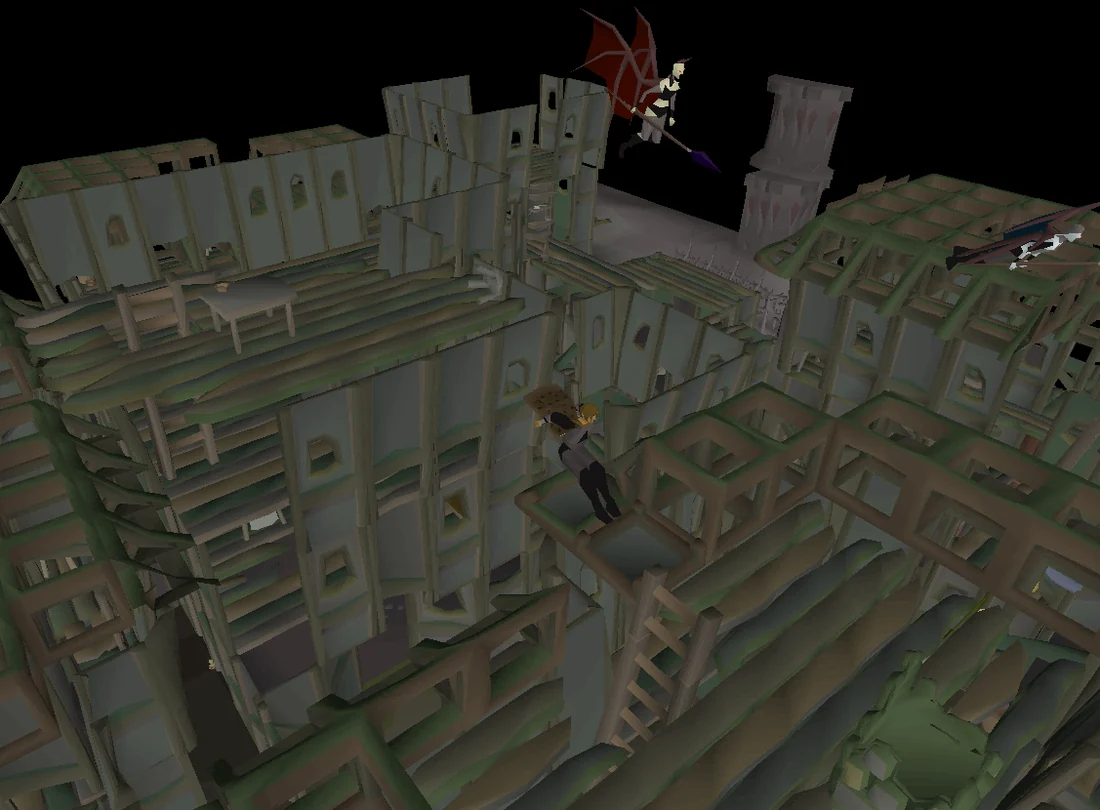
The rooftops of Meiyerditch.
The rooftops of Meiyerditch. Image source ↗
Items needed: A knife or a sickle (a knife can be acquired on the way, in sector 3 of the agility course)

You now need to make a complex journey across the city - watch for the sickle marks or simply follow the instructions below. Make sure to have a knife or a sickle on you.

Note: The sickle marks may be more difficult to see when using RuneLite graphics enhancers like 117 HD.

You may click each of the steps below as you do it to track your progress.

Sector 1 directions
Go to the house south-west of Old Man Ral with the door facing north (with a sickle symbol next to the door)
Climb up the ladder there.
Jump south to the floorboards.
Jump east to the floorboards.
Go to the north-east corner of the room, push the wall and walk across the gap.
Crawl under the wall to the north.
Go north to the second room, look on the west side, push the wall and go across.
Go down the ladder.
Search the table next to the west wall, open the trapdoor, and go through the resulting tunnel.
Climb up the shelf next to the sickle in the north west corner.
Crawl under the wall to the east side.
Jump to the floorboards to the east.
Go down the ladder.
Search the pots near the eastern door to get a door key.
Use the key to open the door in that room. You are now in sector two.
Sector 2 directions
Go up the ladder in the room to the east, by the sickle.
Jump south to the floorboards.
Go east around the wall then climb up the shelves to the south.
Go up the ladder to the west.
Jump south again to the floorboards.
Go down the ladder to your immediate west.
Go east and walk across the washing line.
Climb down the ladder.
Push the wall to the north and walk across the floor.
Climb up the shelf to the north.
Climb down the shelf in the north-eastern corner.
Jump to the floorboards to the north.
Jump to the floorboards to the north again.
Go to the north end of the building and jump to the floorboards to the east.
Climb up the ladder (not down using the broken one).
Search the wall to the west to get a ladder top.
Climb down again and repair the broken ladder (going down) with the ladder top.
Climb down the fixed ladder. You are now in sector three.
Sector 3 directions
Exit through the door, and go past the building to the north.
Enter the only house with an intact door to the north.

If you don't have a knife yet, climb the ladder in this room to take one. Climb back down after.

Go west through the door into the next room, then north out of the house.
Head north until you reach a sickle symbol, then follow the path east and enter the house to the south with a ladder inside.
Go up the ladder.
Jump to the floorboards to the east.
Climb down the stairs. Go around the east side of the stairs, and use your knife or sickle on the wall to the south. Push open the wall.
Press the decorated wall with a hanging sickle, then open the lumpy rug from the south-east square.

If you take too long, you will have to push the wall again as the system will quickly reset.

Climb down trapdoor to enter the hideout.

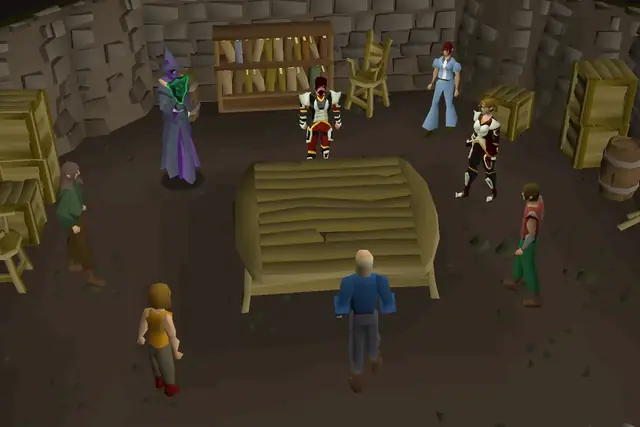
Speak to Vertida Sefalatis in the northern room of the hideout. Tell him you've come to investigate and make contact with the Myreque, and he will give you a message to take to Veliaf Hurtz back in Burgh de Rott.

Urgent business

Items needed: Message (from Vertida)
Items recommended: Fast travel method to Burgh de Rott, Paterdomus Temple and Varrock

Return to Burgh de Rott and talk to Veliaf Hurtz in the basement of the pub again. He will tell you that he has received word from Drezel that something strange has been happening in the Temple of the Salve in Paterdomus, and he wants you to check it out.

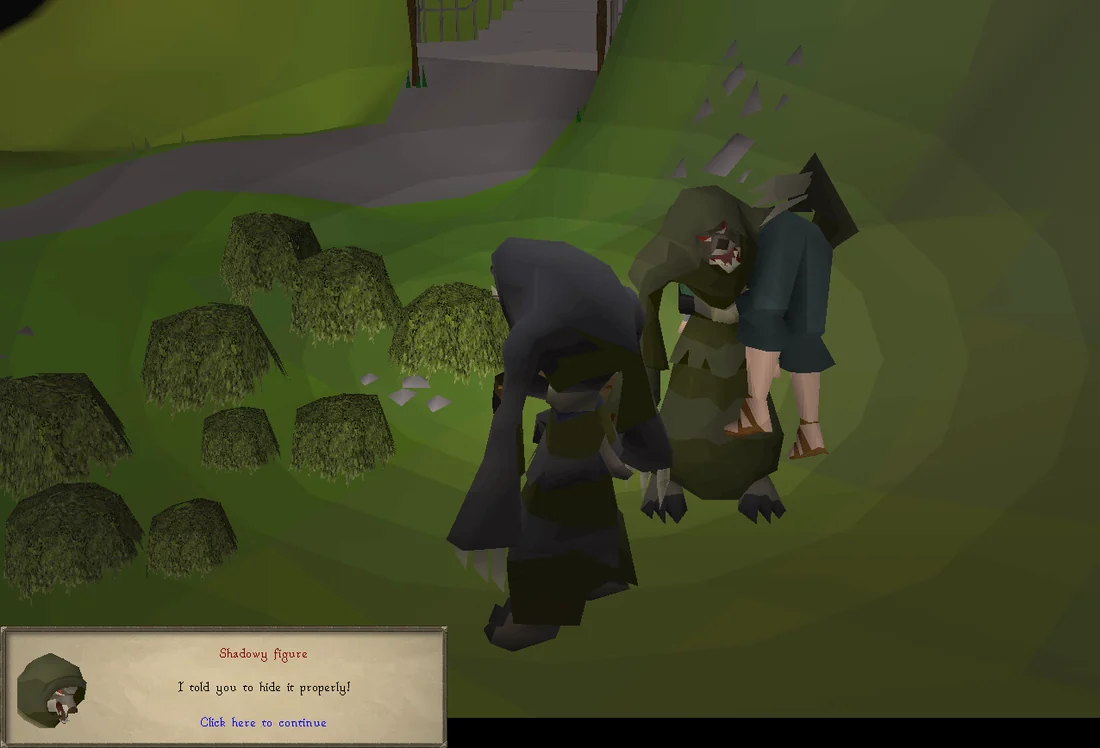
The player is knocked unconscious by shadowy figures.
The player is knocked unconscious by shadowy figures. Image source ↗

Go to Drezel in Paterdomus (fairy code CKS) and talk with him. He will say that strange noises have been heard outside the temple and asks you to investigate. Exit the temple via the west ladder towards Varrock. Past the stairs to the temple, look for a bush that is searchable. A short cut-scene will follow where you will be knocked out. You will see werewolves that seem to have managed to get across the River Salve.

Return to Drezel, and tell him what you have just seen. He tells you to speak with King Roald and gives you runes for a Varrock Teleport.

Go to Varrock Castle, and speak with King Roald located in the south-easternmost room near the main entrance. After a long, fruitless conversation, ask him what you should do now. Afterwards, a free teleport back to Paterdomus is offered by Aeonisig Raispher. Accepting the teleport is optional, as you will need to then return to Burgh de Rott instead.

Speak to Veliaf Hurtz again, who will send you onwards to warn the Myreque's Sanguinesti order.

Scoping Castle Drakan

Items needed: A knife or sickle and 4 free inventory spaces.
Items recommended: Any pickaxe (the strongest you can wield), armour and food if you cannot use Protect from Melee.

Travel once more with the boat you fixed to Meiyerditch. Head towards Vertida Sefalatis again, using the rooftop route described above or with the faster alternative method described below.

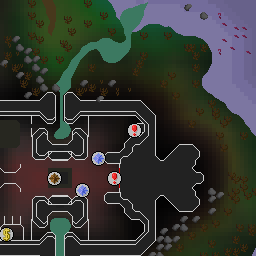
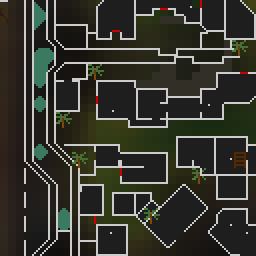
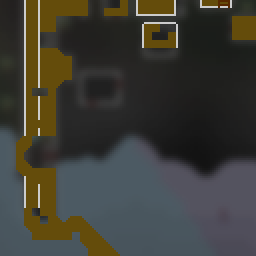
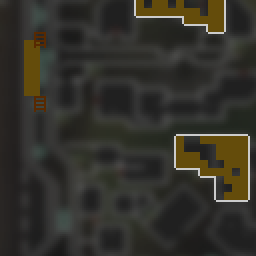
Laboratory Myreque Hideout Open interactive map ↗Map data and tiles: OSRS Wiki · Game imagery © Jagex Ltd
Alternative route to Vertida Sefalatis
Speak to any Vyrewatch and ask to be sent to the mines.
Mine 15 Daeyalt ores and place them in the minecart. If you have no pickaxe, talk to a miner to obtain a bronze one.
Once the mine cart is full, talk to a guard to leave. You will appear up on the surface, north-east of the slums.
See the map to the right and follow the green path. This involves zigzagging through a southern path between the houses. You will have reached the correct house to enter once you can no longer head any further south along the path. Travel through this house and enter the next one to the south.
From there, follow the old route; climb up the ladder, jump east to the floorboards, climb down the stairs, and go south-east through the hidden door.
Push the wall to the north and enter the trapdoor underneath the rug (south-east corner).

Once you're down the trapdoor, talk to Vertida Sefalatis. He will urge you to talk to their leader Safalaan Hallow, who is out on a mission to sketch Castle Drakan. Ask Vertida to lead the way, and he will take you to the south of Meiyerditch.

Starting from the south of Meiyerditch, reach Safalaan Hallow with the following steps;

Route to Safalaan Hallow
Climb down the ladder.
Head south and climb over the wall rubble where you first came into the city.
Head south climb up the floor to get on top of the wall. Then, travel as far north on the wall as you can, until you reach a ladder you can go down.
Proceed down the ladder.
Search the rocky surface (east wall) to unlock the false wall to the north (labelled as "barricade").
Open the barricade; then go north, and climb the ladder.
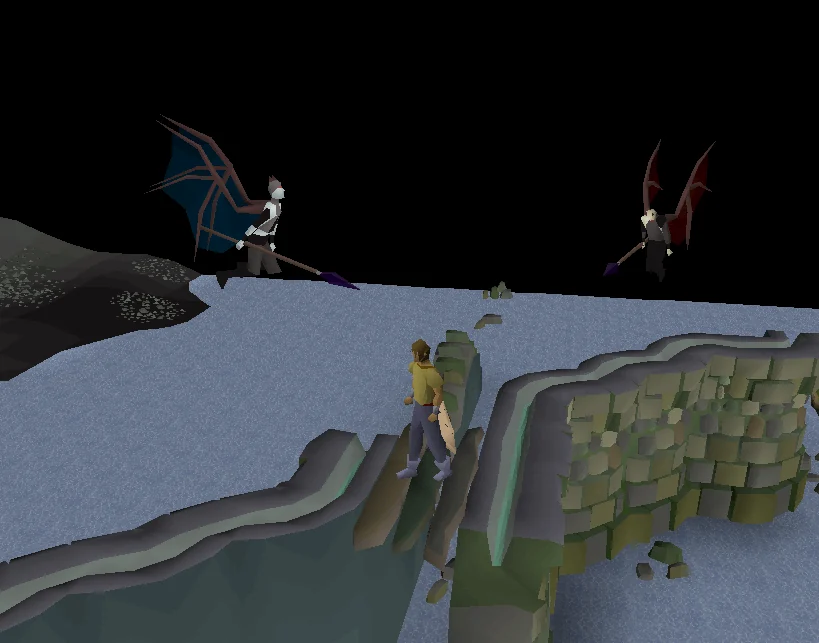
Go north along the wall, up a ladder and down one to cross a gap, and keep going north until you reach the Darkmeyer south wall.
Climb the wall and go north until you see Safalaan.
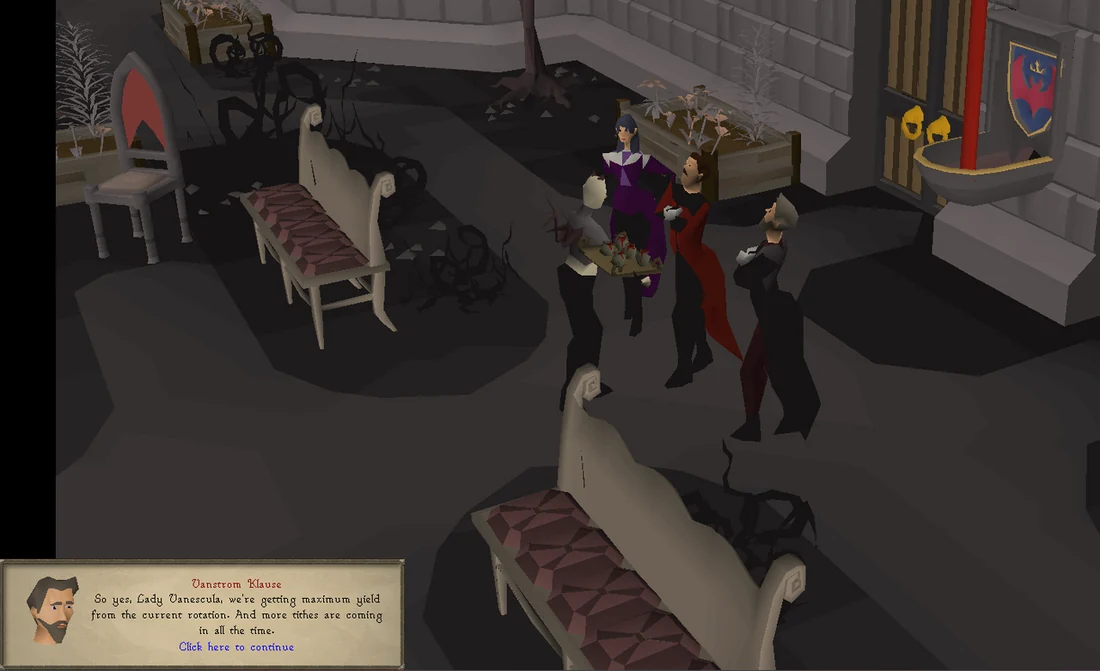
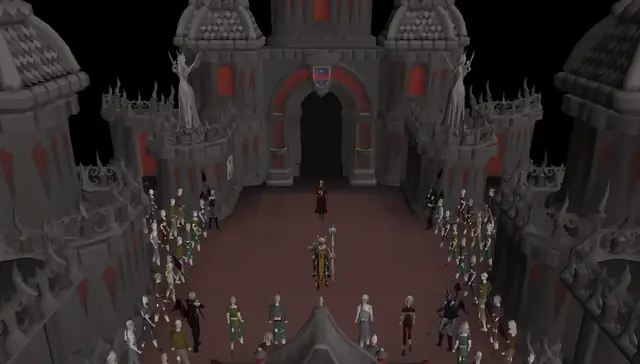
Vanstrom meets with the Drakans.
Vanstrom meets with the Drakans. Image source ↗

Talk to Safalaan and the player will inform him of all the developments so far. Safalaan wants to return to the Myreque base, and asks you to take over his mission to sketch Castle Drakan. He asks you to sketch three sides of the castle in order -- north, west and south, and gives you some papyrus and charcoal to draw with. There are sickle symbols on the ground to tell you where to sketch. Follow the wall west towards the back of the castle. Walk past the first sickle symbol, heading instead to the north towards the second one. Standing on the sickle symbol to the north, use charcoal on a piece of papyrus to make a drawing of the castle. Head back to the sickle symbol you passed by earlier, and make a second sketch. You will see a short cutscene, of Vanstrom Klause talking to Vanescula Drakan and Ranis Drakan. They will drink some fresh blood and then fly away.

Ambush!

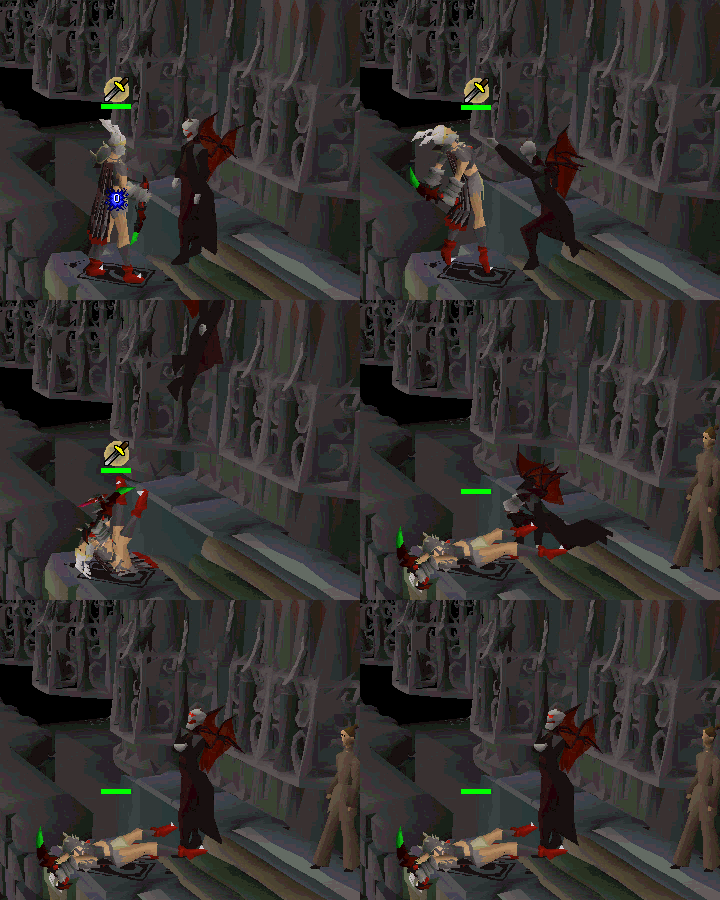
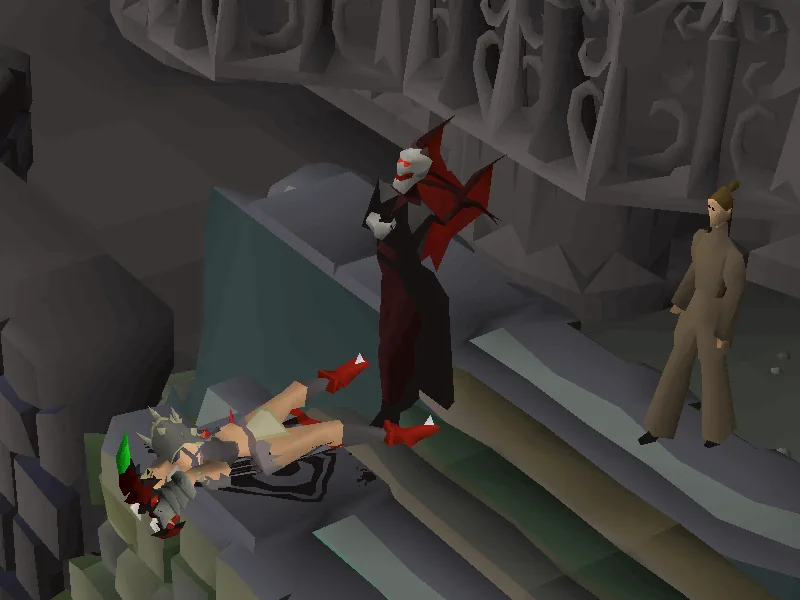
Show animation: Vanstrom Klause knocks you out.Vanstrom Klause knocks you out.
Vanstrom Klause knocks you out. Image source ↗

Go to the south-eastern side of the castle (where you spoke to Safalaan), and attempt to make another drawing on the sickle symbol there. After a short cutscene, Vanstrom Klause will interrupt your drawing and attack you. You cannot damage him in any way, and it is possible to die here. Vanstrom only uses melee, so Protect from Melee will stop all damage - activate it after the cutscene has concluded.

After five attacks, Vanstrom will knock you out. When you awake, remember to finish your final drawing. Speak to Vanescula's servant, Sarius Guile. She gives you a long-winded hint about where to find a secret laboratory. Your quest log should then read "I have all three sketches of the castle. I need to take them to Safalaan".

Note: If you die on the fifth attack from Vanstrom, you will be teleported back to your grave and the cutscene will continue.[confirmation needed]

The secret laboratory

Items needed: Be on the normal spellbook. A knife
Items recommended: Any pickaxe (the strongest you can wield) and three free spaces for mining Daeyalt ores
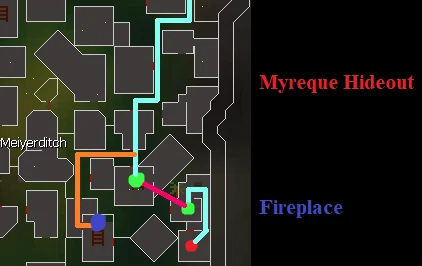
The route to the fireplace.
The route to the fireplace. Image source ↗
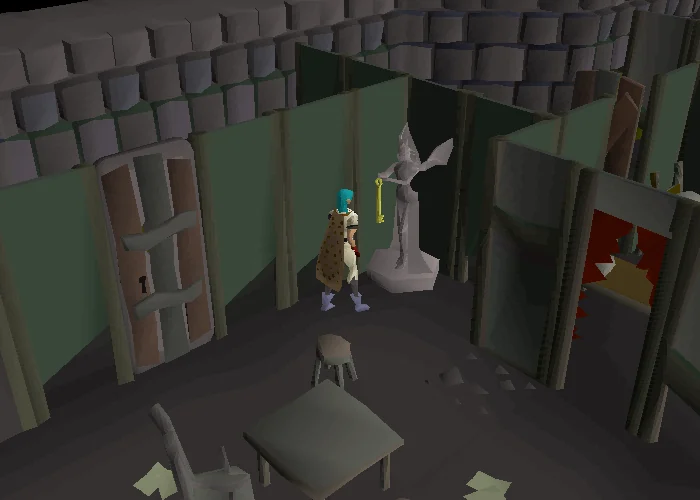
A key vampyre statue.
A key vampyre statue. Image source ↗

Return to the Myreque base in Meiyerditch via your preferred route; having a vyrewatch send you to the mine is the fastest. Just before you enter the base, head to the building with the fireplace and portrait just west of the rug entrance. If you lack a knife, climb the ladder in the building with the fireplace and grab one off the table.

Use the knife on the fireplace to discover a hidden message about a laboratory. Using a sickle will cause it to say it's the wrong shape. Then, use the knife on the southern portrait in the same room. Search the slashed portrait to get a large ornate key. Return to Vertida, who is now accompanied by Safalaan. Give Safalaan the message you got from the fireplace and the three drawings of the castle.

After filling in Safalaan, you need to locate the hidden laboratory that Sarius mentioned. Leave the hideout, go up the stairs, jump west, go down the ladder, and exit the house on the northern side. Walk through the house north. Continue north-east staying near the eastern wall. You will find the house with a clearly visible large tapestry in one of the rooms, coloured red and yellow. Enter the house and use your knife on the tapestry, then walk through it.

Note: If you see the message you see no reason to destroy this tapestry, then you did not deliver the message from the fireplace to Safalaan.

Use the large ornate key with the vampyre statue to open the secret laboratory entrance. Do NOT try to open the door by using the key on the door as this will inflict 10 damage.

Open the door, and go down the stairs. You may search the broken rune case to the west of the staircase for some runes (including Telekinetic Grab runes). Use Telekinetic Grab on the book Haemalchemy volume 1 in the room.

Finishing up

Leave the room and take the book back to Safalaan. He will tell you to return to Veliaf Hurtz with a sealed message. You will now be able to use the shortcut doors on the path to the Myreque Hideout. However, this is not recommended due to this method being slower than being teleported to the mine.

Get back to Burgh de Rott via any method, and talk to Veliaf Hurtz in the basement of the pub to finish the quest.

Congratulations, quest complete!

Quick checklist 108 instructions

Use this when you already know the route. The full walkthrough above includes explanations and diagrams.

Starting out

  1. Travel to Burgh de Rott.

  2. Talk to Veliaf Hurtz in the pub basement.

    Say: Is there something I can do to help out? → Yes, please tell me more. → What is the Sanguinesti region? → How can I search for the Sanguinesti order of the Myreque? → Can you tell me about the Sanguinesti Myreque? → How should I get into the Sanguinesti region? → Okay, thanks.

  3. Go south-east to the docks where there's a hut with a boat in it.

  4. Use a plank on the boat.

  5. Use a plank on the boat chute.

  6. Push the boat down the chute.

  7. Board the boat.

Welcome to Meiyerditch

  1. Go north-west a short distance (still on the pier), search the floor then kick it down and climb down.

  2. Climb over the wall rubble and talk to any Meiyerditch citizen.

    Say: (whisper) Do you know about the Myreque? → (whisper) I really need to meet the Myreque. → How can Old Man Ral help me?

  3. Talk to Old Man Ral to the north.

    Say: Someone said you could help me. → Old Man Ral, the sage of Sanguinesti.

  4. Climb up the ladder in the building south-west of Old Man Ral.

The sickle logo agility course

  1. Jump south to the floorboards.

  2. Jump east to the floorboards.

  3. Go to the north-east corner of the room, push the wall and go across the gap.

  4. Crawl under the wall to the north.

  5. Go north to the second room, look on the west side, push the wall and walk across it.

  6. Climb down the ladder.

  7. Search the table next to the wall, open the trapdoor table, and climb into it.

  8. Climb up the shelf.

  9. Crawl under the wall to the east side.

  10. Jump to the floorboards to the east.

  11. Climb down the ladder.

  12. Search the pots near the eastern door to get a door key and use it to open the door.

  13. Climb up the ladder in the room to the east.

  14. Jump south to the floorboards.

  15. Go east, south, west and climb up the shelf.

  16. Climb up the ladder.

  17. Jump south again to the floorboards.

  18. Climb down the ladder.

  19. Go east through the rooms and walk across the washing line.

  20. Climb down the ladder.

  21. Push the wall to the north and walk across the floor.

  22. Climb up the shelf to the north.

  23. Climb down the shelf on the north-eastern side, below the floor.

  24. Jump to the floorboards to the north-west.

  25. Jump to the floorboards to the north.

  26. Go north-west and then east (around a gap in the floor) and jump to the floorboards.

  27. Climb up the ladder.

  28. Search the western wall to find a ladder top.

  29. Climb down the ladder you came up, then repair the nearby broken ladder using the ladder top. Then climb down the fixed ladder. You are now in sector three.

  30. Open the door and go north and slightly west, then north to a house with a fireplace in it. (go up the ladder if you need a knife)

  31. Go west through the door into the next room, then north out of the house until you see a barricade.

  32. Go east past the sickle logo and the house directly south should have a ladder inside. Climb up the ladder.

  33. Jump to the floorboards to the east.

  34. Climb down the stairs.

  35. Go south along the eastern side of the stairs. Search the wall. Use your knife on the wall, then push it.

  36. Press the decorated wall on the northern side.

  37. Open the lumpy rug (south-east square of the green rug).

  38. Climb down the trapdoor to enter the hideout.

Myreque meetings

  1. Run north and talk to Vertida Sefalatis.

    • Note: you may have to select chat option

      Say: in order to receive the note from Vertida. Double check your quest log to make sure it's updated, or else you'll have to re-run the entire course again!

  2. Travel back to Burgh de Rott.

  3. Talk to Veliaf Hurtz in the pub basement.

Urgent business

  1. Travel to the Paterdomus Temple (fairy ring CKS).

  2. Talk to Drezel in Paterdomus, underneath the temple.

  3. Take the west exit, past the monuments.

    • Optionally, with 65 Agility, instead exit toward Canifis and take the shortcut up the side of the temple.

  4. Search the bush slightly south-west of the steps leading to the temple.

  5. Wait for the cutscene to finish.

  6. Return to speak with Drezel. He will give you runes to use Varrock Teleport.

  7. Teleport or travel to Varrock and talk to King Roald in the palace.

    Say: Talk to the King about Morytania. → What should I do now? The king will teleport you back to Paterdomus if you ask the right question.

  8. Travel back to Burgh de Rott.

  9. Talk to Veliaf Hurtz in the pub basement.

Back to Meiyerditch

  1. Return to Meiyerditch and speak to a Vyrewatch.

    Say: Send me to the mines!

  2. Talk to a Meiyerditch miner to get a pickaxe if you don't have one.

    Say: How do you get out of here?

  3. Mine the daeyalt rocks on the walls until you get 15 daeyalt ore.

  4. Use all 15 ores on the mine cart, then talk to a Vampyre Juvinate.

  5. Run to the Myreque Hideout, marked on the map to the right. Follow the blue path from north to south.

  6. Go south through 3 doors and up the ladder.

  7. Jump to the floorboards to the east, climb down the stairs and enter the hideout.

  8. Talk to Vertida.

    Say: Okay, lead the way.

  9. Climb down the ladder, out the door, run south and climb over the wall rubble where you came in to Meiyerditch.

  10. Run south and climb up the floor.

  11. Run north up the slope and climb down the ladder.

  12. Search the rocky surface.

  13. Go north through the barricade.

  14. Climb up the ladder.

  15. Run north along the wall and climb up the ladder.

  16. Climb down the next ladder.

  17. Climb the castle wall to the north.

  18. Run west along the wall clockwise and talk to Safalaan. Make sure you have 4 free inventory spaces.

  19. Run west along the wall clockwise until you see a sickle logo on the floor of the wall you're walking on, on the north side of the castle.

  20. Use the papyrus on the charcoal for the first sketch.

  21. Run west counter-clockwise and do the same for the west sickle for the second sketch.

  22. Wait for the cutscene to finish.

  23. Run west counter-clockwise and do the same for the south sickle.

    • Note: use Protect from Melee when the cutscene begins to avoid taking damage from Vanstrom Klause. Prayers activated before the cutscene will be deactivate when you are attacked.

  24. Let Vanstrom attack you five times, which will knock you out.

  25. Go back and finish your final sketch.

  26. Talk to Sarius Guile if she didn't automatically talk to you when Vanstrom knocked you out.

  27. Speak to a nearby Vyrewatch and use the mine technique to get back to the base.

  28. Walk to the house directly south-west of the house with the ladder leading to the Myreque Hideout. It contains a fireplace and a portrait on its south wall.

  29. Use your knife on the fireplace for a message.

    • Note: if needed, there is a knife spawn upstairs.

  30. Use your knife on the portrait for a large ornate key.

    • Note: if you don't automatically obtain the key, inspect the portrait.

  31. Return to the Myreque Hideout.

  32. Talk to Safalaan.

    Say: I have a message for you Safalaan - it may be important.. Afterwards, give him the message.
Locating the laboratory

  1. Exit the base, climb up the stairs, jump the gap, then climb down the ladder

  2. Travel north towards the mine until you find a bright, red and yellow tapestry inside a building adjacent to the Eastern city wall.

  3. Slash the tapestry with your knife.

  4. Walk through it and use the large ornate key on the statue.

  5. Open the door, climb-down the staircase and use Telekinetic Grab on Haemalchemy volume 1.

    • Note: If needed, runes for Telekinetic Grab can be found in the Broken rune case.

  6. Return to the base and talk to Safalaan one final time and give him Haemalchemy volume 1.

Finishing up

  1. Travel back to Burgh de Rott.

  2. Talk to Veliaf Hurtz in the pub basement.

    Say: I have a message for you from Safalaan.

  3. Congratulations, quest complete!

QUEST COMPLETE

Rewards

  • 7,000 Agility Agility experience
  • 6,000 Thieving Thieving experience
  • 2,000 Construction Construction experience
  • Tome of experience, granting 2,000 experience to any three skills of the player's choosing (level 30 or over). Can be the same skill.
  • Access to passage through two shortcut doors within Meiyerditch
  • Lore-related in-game Membership of the Myreque

OSRS WIKI CONTRIBUTORS

Sources & credits

Walkthrough text and preparation lists are adapted from Old School RuneScape Wiki contributors under CC BY-NC-SA 3.0. Game imagery © Jagex Ltd; individual image sources are linked in their captions. This page is fan-made and not affiliated with Jagex.

Game icons © Jagex Ltd, via the OSRS Wiki. Interface icons by Lucide.