 |
This is a safe activity. If you die here, you will not lose any of your items, including those stored inside an Item Retrieval Service (deathbank). Warning: It is still dangerous for Hardcore group iron players. |
|
This article has a strategy guide. All information on mechanics and strategy will be on this page.
|
| TzHaar Fight Cave | |||||||||||||||||||
|---|---|---|---|---|---|---|---|---|---|---|---|---|---|---|---|---|---|---|---|
 | |||||||||||||||||||
| Released | 4 October 2005 (Update) | ||||||||||||||||||
| Type | Minigame | ||||||||||||||||||
| Members | Yes | ||||||||||||||||||
| Location | Mor Ul Rek | ||||||||||||||||||
| Participants | 1 | ||||||||||||||||||
| Reward currency | Tokkul | ||||||||||||||||||
| Tutorial | No | ||||||||||||||||||
| Music | TzHaar! | ||||||||||||||||||
| Map | |||||||||||||||||||
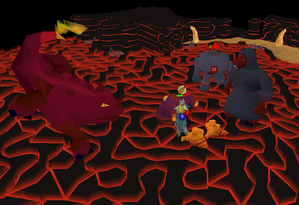
The TzHaar Fight Cave, commonly referred to as the Fight Caves, is a combat minigame in the outer area of Mor Ul Rek, located within the Karamja volcano. Fully completing it is considered an early major challenge players will take on in Old School RuneScape.
It involves single-handedly fighting off 63 waves of volcanic creatures, including a boss fight against the strongest of the creatures: TzTok-Jad. Players will be rewarded with Tokkul for playing this minigame, and if they manage to defeat TzTok-Jad, they will be rewarded with the fire cape.
The Fight Cave was created by the TzHaar-Xil, who use it for practice.[1]
 |
The Fight Continues |
|
The jingle that plays upon starting a wave of the Fight Cave.
| |
Transportation
- Using the "TzHaar Fight Pit" Minigame Teleport.
- Using the BLP fairy ring and running north.
Monsters
The TzHaar Fight Cave pits adventurers against a succession of monsters, each harder than the last. The final boss is the powerful level-702 TzTok-Jad, but to get to him, players must battle past 6 other types of monsters ranging from level-22 up to level-360.
The monsters are in order of appearance:
| Lvl | Image | Name | HP |  |
 |
Attack(s) | Max Hit | Notes |
|---|---|---|---|---|---|---|---|---|
| 22 |  |
Tz-Kih | 10 | 15 | 15 | Melee | 4 | Drains Prayer while Melee'ing; use Ranged or hit-and-run tactic to kill. |
| 45 | 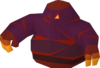 |
Tz-Kek | 20 | 30 | 30 | Melee | 7 | Recoils damage of 1 when attacked with Melee. |
| 22 |  |
Tz-Kek | 10 | 15 | 30 | Melee | 4 | 2 appear after a 45 is killed. |
| 90 | 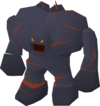 |
Tok-Xil | 40 | 60 | 60 | Ranged, Melee | 13 | See the wave breakdown for when to use Prayer. |
| 180 | 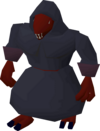 |
Yt-MejKot | 80 | 120 | 120 | Melee | 25 | Can heal itself and other monsters that are below half their maximum hp |
| 360 | 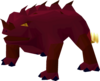 |
Ket-Zek | 160 | 240 | 240 | Magic, Melee | 54 | Range with Protect from Magic on, and stay out of its Melee range. |
| 702 | 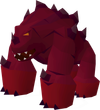 |
TzTok-Jad | 250 | 480 | 480 | Magic, Ranged, Melee | 97 | See below. |
| 108 | 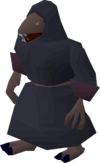 |
Yt-HurKot | 60 | 60 | 120 | Melee | 14 |
4 will spawn when TzTok-Jad falls below half HP. They will heal Jad if they are within melee range of it, or if they are in combat with the player and are within 4 tiles of Jad. Will sometimes heal themselves or adjacent Yt-HurKot that are below half hp if they cannot reach Jad. See the Monsters wiki page for techniques. |
TzTok-Jad
At the final wave (wave 63), TzTok-Jad will emerge from where the orange Ket-Zek spawned and engage the player.
Despite Jad's fairly low health, it is not to be underestimated - its attacks are immensely accurate and often deals massive damage, having a max hit of 95 for its magic attack and 97 for both melee and ranged, which can easily kill lower-leveled players in a single hit.
Upon reaching 150 health points, Jad will summon four Yt-HurKot into the arena, who will make their way to it in order to heal it back to full health. If they successfully restore all of Jad's health before being killed, another set of healers will spawn when Jad reaches 150 hp or less health.
Tactical analysis
Rewards
If one is successful in defeating TzTok-Jad, they will receive 8,032 Tokkul and the untradeable fire cape — one of the best melee capes in Old School RuneScape. It provides much better protection than the Cape of Legends and the obsidian cape, as well as slight offensive bonuses. The only strictly better melee cape is the infernal cape, which is acquired from the Inferno, a much harder version of the Fight Caves that requires sacrificing a fire cape to enter.
Defeating TzTok-Jad has a 1/200 chance of awarding a pet TzRek-jad. This chance is boosted to 1/100 if TzTok-Jad is defeated while on a Slayer task. In addition, players may exchange a fire cape by speaking to TzHaar-Mej-Jal for an additional 1/200 chance of obtaining the pet.
Tokkul is rewarded based on how many waves are completed, with each wave giving two more tokkul than the last. The total can be calculated as 2+4+6+..., or more simply N⋅(N+1), where N is the number of waves completed. An additional 4,000 Tokkul are rewarded for killing TzTok-Jad.[2][3]
Rewards for completing the Elite Karamja Diary include doubled Tokkul from the Fight Caves and one resurrection per day inside the Fight Caves.
Slayer
Killing TzTok-Jad can be unlocked as a slayer task for 100 slayer points at Duradel, Nieve or Chaeldar. Defeating waves 1-62 of the fight caves gives 11,520 slayer experience. Jad gives another 25,250 experience. Although optional, the four Yt-HurKot spawns can be killed on wave 63 for 60 slayer experience each. This totals out to 36,770 (up to 37,010) experience for all of the fight caves.
Map & wave breakdown
Map breakdown
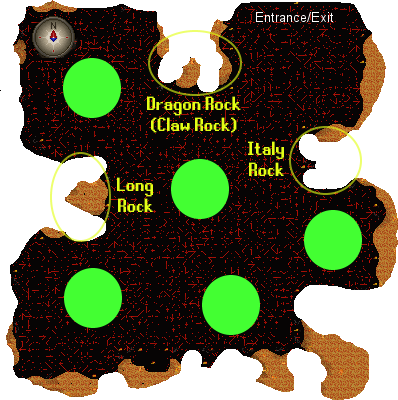
The TzHaar Fight Cave is mapped out on the right.
Monsters spawn in waves, with each wave getting progressively more difficult. You can look below, under Wave breakdown, to see what monsters spawn in each wave. If you want to know exactly where the spawns are for the monsters on each wave, you can determine them based on the first two waves using the Rotations guide.
One of the main safespots is the Italy Rock (nicknamed after its shape) which is located on the eastern side of the arena. Standing directly on the western or southern wall of the Italy Rock will make the level 45 Tz-Kek and level 180 Yt-MejKot stuck on the corners. The Italy Rock is a great location to camp during waves where you encounter those monsters.
The other two locations, Long Rock and Dragon Rock, are also useful for safespots. Standing on the south side of the long rock or the west side of the dragon rock will lure all spawns to get stuck on them, except for the one that is immediately next to them.
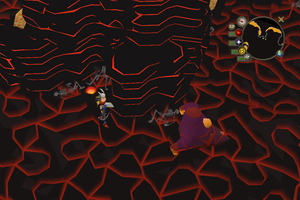
The Fight Cave does not have a single set of static enemy spawns. Instead, it has 15 Rotations, each with their own pattern of spawns. The current rotation can be determined based on the time of day or from the spawn locations in the first four waves.
Spawn locations within a rotation do follow a cycle, though it is complex. Each rotation begins with a spawn at a particular point, then spawns future waves according to the following cycle (repeating indefinitely): SE, SW, C, NW, SW, SE, S, NW, C, SE, SW, S, NW, C, S. At the start of each wave, the highest-level monster will spawn at the next location in the cycle, with lower-levelled monsters spawning at subsequent locations in the cycle, going from highest-level to lowest.
For example, in rotation 12 in wave 7, a ranger spawns at south-east, in wave 8 the ranger will spawn at south-west while the bat spawns at centre (the next spot in the cycle). In wave 9, the ranger will spawn at centre (the spot in the cycle after its last spawn location) while the two bats spawn at north-west and south-west. In wave 10, the ranger spawns in north-west, while the blob spawns in south-west, and so on.
For TzTok-Jad specifically, he will always spawn in the same location as the first Tz-Kek (in wave 3) and the off-coloured Ket-Zek (on wave 62).
For a complete breakdown of spawn points per rotation, see Rotations.
Wave breakdown
The following table displays each wave the monsters will spawn.
| Wave | Monsters | Notes |
|---|---|---|
| 1 |
Tz-Kih
 (level 22)
|
Kill using a hit-and-run tactic to prevent its Prayer drain. |
| 2 |
Tz-Kih
(level 22) Tz-Kih
(level 22)
|
Again, hit and run! |
| 3 |
Tz-Kek
 (level 45)
|
This spawn will be the same as the orange 360 on wave 62 and the same spawn as Jad. |
| 4 |
Tz-Kek
(level 45) Tz-Kih
(level 22)
|
Always kill the fiery, bat-like, level-22 Tz-Kih first using a hit-and-run tactic to prevent its Prayer drain![4] |
| 5 |
Tz-Kek
(level 45) Tz-Kih
(level 22) Tz-Kih
(level 22)
|
[4] |
| 6 |
Tz-Kek
(level 45) Tz-Kek
(level 45)
|
|
| 7 |
Tok-Xil
 (level 90)
|
Activate Protect from Missiles against Tok-Xil if needed as its Ranged attack will be strong against a low level or mage.[5] |
| 8 |
Tok-Xil
(level 90) Tz-Kih
(level 22)
|
[4] |
| 9 |
Tok-Xil
(level 90) Tz-Kih
(level 22) Tz-Kih
(level 22)
|
[4] |
| 10 |
Tok-Xil
(level 90) Tz-Kek
(level 45)
|
|
| 11 |
Tok-Xil
(level 90) Tz-Kek
(level 45) Tz-Kih
(level 22)
|
[4] |
| 12 |
Tok-Xil
(level 90) Tz-Kek
(level 45) Tz-Kih
(level 22) Tz-Kih
(level 22)
|
|
| 13 |
Tok-Xil
(level 90) Tz-Kek
(level 45) Tz-Kek
(level 45)
|
|
| 14 |
Tok-Xil
(level 90) Tok-Xil
 (level 90)
|
[5] |
| Use smaller monsters, Italy Rock, or Dragon Rock to block the Yt-MejKots (180s). See this map![6] | ||
| 15 |
Yt-MejKot
 (level 180)
|
Again, block the Yt-MejKot, or heal off it with Guthan's using Protect from Melee if necessary. |
| 16 |
Yt-MejKot
(level 180) Tz-Kih
(level 22)
|
[4] |
| 17 |
Yt-MejKot
(level 180) Tz-Kih
(level 22) Tz-Kih
(level 22)
|
|
| 18 |
Yt-MejKot
(level 180) Tz-Kek
(level 45)
|
[6] |
| 19 |
Yt-MejKot
(level 180) Tz-Kek
(level 45) Tz-Kih
(level 22)
|
[4] |
| 20 |
Yt-MejKot
(level 180) Tz-Kek
(level 45) Tz-Kih
(level 22) Tz-Kih
(level 22)
|
|
| 21 |
Yt-MejKot
(level 180) Tz-Kek
(level 45) Tz-Kek
(level 45)
|
[6] |
| 22 |
Yt-MejKot
(level 180) Tok-Xil
(level 90)
|
[5] |
| 23 |
Yt-MejKot
(level 180) Tok-Xil
(level 90) Tz-Kih
(level 22)
|
[4] |
| 24 |
Yt-MejKot
(level 180) Tok-Xil
(level 90) Tz-Kih
(level 22) Tz-Kih
(level 22)
|
|
| 25 |
Yt-MejKot
(level 180) Tok-Xil
(level 90) Tz-Kek
(level 45)
|
|
| 26 |
Yt-MejKot
(level 180) Tok-Xil
(level 90) Tz-Kek
(level 45) Tz-Kih
(level 22)
|
[4] |
| 27 |
Yt-MejKot
(level 180) Tok-Xil
(level 90) Tz-Kek
(level 45) Tz-Kih
(level 22) Tz-Kih
(level 22)
|
[4] |
| 28 |
Yt-MejKot
(level 180) Tok-Xil
(level 90) Tz-Kek
(level 45) Tz-Kek
(level 45)
|
[6] |
| 29 |
Yt-MejKot
(level 180) Tok-Xil
(level 90) Tok-Xil
(level 90)
|
[5] |
| 30 |
Yt-MejKot
(level 180) Yt-MejKot
 (level 180)
|
As soon as you finish off the last 180, immediately activate Protect from Magic. |
| From this point onwards, use Protect from Magic against the Ket-Zeks (360s) and disable Auto Retaliate.[7] | ||
| 31 |
Ket-Zek
 (level 360)
|
Keep your distance as its Melee attack can deal devastating damage to a player within its range. The Hit-and-Run could work, but it's not advised for the inexperienced. |
| 32 |
Ket-Zek
(level 360) Tz-Kih
(level 22)
|
[4] |
| 33 |
Ket-Zek
(level 360) Tz-Kih
(level 22) Tz-Kih
(level 22)
|
|
| 34 |
Ket-Zek
(level 360) Tz-Kek
(level 45)
|
|
| 35 |
Ket-Zek
(level 360) Tz-Kek
(level 45) Tz-Kih
(level 22)
|
[4] |
| 36 |
Ket-Zek
(level 360) Tz-Kek
(level 45) Tz-Kih
(level 22) Tz-Kih
(level 22)
|
|
| 37 |
Ket-Zek
(level 360) Tz-Kek
(level 45) Tz-Kek
(level 45)
|
|
| 38 |
Ket-Zek
(level 360) Tok-Xil
(level 90)
|
Now that there is a mage present, it's advised to tank the range hits unless the mage is safespotted. |
| 39 |
Ket-Zek
(level 360) Tok-Xil
(level 90) Tz-Kih
(level 22)
|
[4] |
| 40 |
Ket-Zek
(level 360) Tok-Xil
(level 90) Tz-Kih
(level 22) Tz-Kih
(level 22)
|
|
| 41 |
Ket-Zek
(level 360) Tok-Xil
(level 90) Tz-Kek
(level 45)
|
|
| 42 |
Ket-Zek
(level 360) Tok-Xil
(level 90) Tz-Kek
(level 45) Tz-Kih
(level 22)
|
[4] |
| 43 |
Ket-Zek
(level 360) Tok-Xil
(level 90) Tz-Kek
(level 45) Tz-Kih
(level 22) Tz-Kih
(level 22)
|
Wave 43 represents the halfway point of total damage dealt from waves 1-62. |
| 44 |
Ket-Zek
(level 360) Tok-Xil
(level 90) Tz-Kek
(level 45) Tz-Kek
(level 45)
|
|
| 45 |
Ket-Zek
(level 360) Tok-Xil
(level 90) Tok-Xil
(level 90)
|
Take out the rangers first. |
| 46 |
Ket-Zek
(level 360) Yt-MejKot
(level 180)
|
Block the 180 with the 360, Italy Rock, or Dragon Rock, or other monsters when they spawn.[6][7] |
| 47 |
Ket-Zek
(level 360) Yt-MejKot
(level 180) Tz-Kih
(level 22)
|
[4] |
| 48 |
Ket-Zek
(level 360) Yt-MejKot
(level 180) Tz-Kih
(level 22) Tz-Kih
(level 22)
|
|
| 49 |
Ket-Zek
(level 360) Yt-MejKot
(level 180) Tz-Kek
(level 45)
|
[7] |
| 50 |
Ket-Zek
(level 360) Yt-MejKot
(level 180) Tz-Kek
(level 45) Tz-Kih
(level 22)
|
[4] |
| 51 |
Ket-Zek
(level 360) Yt-MejKot
(level 180) Tz-Kek
(level 45) Tz-Kih
(level 22) Tz-Kih
(level 22)
|
|
| 52 |
Ket-Zek
(level 360) Yt-MejKot
(level 180) Tz-Kek
(level 45) Tz-Kek
(level 45)
|
[7] |
| Remember the 'Bat (22) > Ranger (90) > Mager (360) > Meleer (180) > Blob (45)' killing order! | ||
| 53 |
Ket-Zek
(level 360) Yt-MejKot
(level 180) Tok-Xil
(level 90)
|
The ranger can be used to block the meleer if needed[7] |
| 54 |
Ket-Zek
(level 360) Yt-MejKot
(level 180) Tok-Xil
(level 90) Tz-Kih
(level 22)
|
[4] |
| 55 |
Ket-Zek
(level 360) Yt-MejKot
(level 180) Tok-Xil
(level 90) Tz-Kih
(level 22) Tz-Kih
(level 22)
|
|
| 56 |
Ket-Zek
(level 360) Yt-MejKot
(level 180) Tok-Xil
(level 90) Tz-Kek
(level 45)
|
[7] |
| 57 |
Ket-Zek
(level 360) Yt-MejKot
(level 180) Tok-Xil
(level 90) Tz-Kek
(level 45) Tz-Kih
(level 22)
|
[4] |
| 58 |
Ket-Zek
(level 360) Yt-MejKot
(level 180) Tok-Xil
(level 90) Tz-Kek
(level 45) Tz-Kih
(level 22) Tz-Kih
(level 22)
|
|
| 59 |
Ket-Zek
(level 360) Yt-MejKot
(level 180) Tok-Xil
(level 90) Tz-Kek
(level 45) Tz-Kek
(level 45)
|
[7] |
| 60 |
Ket-Zek
(level 360) Yt-MejKot
(level 180) Tok-Xil
(level 90) Tok-Xil
(level 90)
|
Kill the rangers first! |
| 61 |
Ket-Zek
(level 360) Yt-MejKot
(level 180) Yt-MejKot
(level 180)
|
This is the last wave to heal using Guthan's, or passively regen health in a safespot after killing the level 360. Activate Protect from Magic for the next wave. Pay attention to where the orange Ket-Zek spawns next round. |
| 62 |
Ket-Zek
(level 360) Ket-Zek
 (level 360)
|
Once the wave starts, find the orange Ket-Zek as fast as you can. Tz-Tok-Jad will spawn exactly where the orange Ket-Zek spawns in the next round. Using distance or obstacles, force the last Ket-Zek behind cover or near the orange's spawn. If standing near the spawn, stay out of melee range from Tz-Tok-Jad's melee attack. Before killing the last Ket-Zek, restore your HP and Prayer. Start the next wave with Protect from Missiles active, and have the prayer interface open and be ready to switch Protection Prayers if neccesary. This is because there is no initial range sound prior to Jad hitting you whereas Jad's magic attack sounds like activating a Retribution prayer. |
| 63 |
Yt-HurKot
 (level 108) Yt-HurKot
(level 108) Yt-HurKot
(level 108)
|
Tz-Tok-Jad uses Ranged by stomping his feet to the ground emitting cracks in an earthquake-like manner. He also attacks with Magic by growling, rearing up, and dangling his forelegs before discharging a fireball as shown in the video below. Once the wave starts, he will do either of the two. Prayer switches must occur in between Tz-Tok-Jad's footwork animation. If you switch while the projectile has already been unleashed, it will be too late, even if the projectile has not hit you yet.
Four level 108 healers will appear when Tz-Tok-Jad is at half health, so attack each one from long range and drag them away from Jad while staying focused on Tz-Tok-Jad's footwork and attacks. If they've healed TzTok-Jad back to full health and are then killed, they will respawn; otherwise, not. They don't have to be killed to complete the Fight Cave. Be careful luring the healers as being too close to Tz-Tok-Jad will give him a chance to do a melee attack which hits instantly thus will not give you room to react and switch. |
Tips
- Going into wave three, wherever the Tz-Kek spawns is where Jad will spawn later on. Pay attention to this spawn point, and exit/restart to ensure that the Tz-Kek spawn point is on the south side of the "Italy" rock. This allows you to have protection to pot up before beginning the fight with TzTok-Jad. Alternatively, you can guarantee a beneficial rotation by waiting to enter the fight caves until a time that corresponds to the desired rotation, as the rotation is determined by the exact time when the player enters the caves and cycles every hour or so. A full list of the times and rotations as well as the current time can be found here TzHaar Fight Cave/Rotations
- Getting the 2+ Prayer boost at Edgeville Monastery or the Nature Grotto may be a help in the caves.
- Alternatively, the ancient mace may be used before entering, preferably on a POH dummy with strength-boosting Prayers, equipment and potions for 20 or more additional Prayer at entry. It can be used on the Tz-Kek's at the end of waves as well.
- Especially in later waves (38+), you should stand in the north-eastern corner as 3 of 5 spawns get stuck that way behind Italy Rock and the other rock to the west.
- Whenever killing a safespotted monster behind another one, kill the un-safespotted ones first, then immediately attack the safespotted one, as the death animation of the un-safespotted one will allow you to get a free hit on the safespotted one.
- An exception to this is when using the level 45/22 Tz-Keks as a pseudo-safespot for Yt-MejKot.
- You can REQUEST to log out of the game at anytime by clicking "Log Out" before you end your current round (when enemy NPCs are still alive). After you complete the wave, the wave will pause, you will log out safely, and the next wave will begin once you log back in. Upon logging back in, you will spawn in the middle of the room and will have 1 or 2 seconds to swap your prayer and run to where you want to be. This wave pause mechanic is useful for letting your Hitpoints regenerate in-between rounds. You can find a safespot, request a log out, let your Hitpoints regenerate and finish the wave knowing you will start the next wave after logging back in.
- Note: if you fully log out before completing the wave (such as by clicking the logout button twice during the same wave), the wave you logged out during will restart when you log out and back in again rather than the next wave starting.
- Prayer flicking Eagle Eye, Hawk Eye or Rigour on the Ket-Zeks is useful for saving prayer. It is also advised to disable Auto Retaliate during the caves as the Tok-Xils and Ket-Zeks can lure you out of safespots, thus allowing the Yt-MejKots to melee you.
- Do not drink any Saradomin brews unless you have to: if possible, wait until your Prayer is low, so you don't waste any prayer points from your super restore potions. Only a single dose of super restore is needed to restore combat stats after 3 doses of Saradomin brew.
- If possible, the Saradomin godsword is highly useful for completing the Fight Caves, as it restores both Hitpoints and Prayer, corresponding with the damage dealt. You can even safespot monsters while waiting for special energy to regenerate. If using the Saradomin godsword special attack on the level 180 Yt-MejKots, it is advisable to get them down to half hp (39 or less to be safe) before using the special attack: this way they will use their own attack to heal, rather than to hit you. If using Void Knight equipment, it may be useful to bring a melee helmet as well as ranged if you are using a Saradomin godsword as a special attack weapon.
- The ancient mace can be used as a much cheaper, but less effective, alternative.
- Using the regen bracelet allows you to heal 2 Hitpoints per minute versus one. Useful when safespotting or have monsters stuck behind rocks.
- Using the Toxic Blowpipe has a chance to cause venom damage which will increase to 20 hit points. Useful for safe spotting the meleer or mager during the later rounds.
Collection log
The Tzhaar Fight Cave has 2 collection log items. The fire cape is guaranteed upon successful completion.
| Item | Collections | Comp% |
|---|---|---|
| Fire cape | The Fight Caves | 63.5% |
| TzRek-Jad | The Fight Caves, All Pets | 3.4% |
Combat Achievements
Switching worlds during any wave will render most of these combat achievements impossible to complete. Look at the individual achievement pages for more information.
There are 10 Combat Achievement tasks (totalling 50 points) available for TzTok-Jad and the Fight Caves.
| Name | Description | Type | Tier | Comp% |
|---|---|---|---|---|
| Facing Jad Head-on | Complete the Fight Caves with only melee. | Restriction |  Elite (4 pts) Elite (4 pts) | 13.1% |
| A Near Miss! | Complete the Fight Caves after surviving a hit from TzTok-Jad without praying. | Mechanical | Elite (4 pts) | 38.8% |
| Fight Caves Veteran | Complete the Fight Caves once. | Kill Count | Elite (4 pts) | 71.1% |
| Denying the Healers | Complete the Fight caves without letting any of the Yt-MejKot heal. | Mechanical |  Master (5 pts) Master (5 pts) | 21% |
| You Didn't Say Anything About a Bat | Complete the Fight Caves without being attacked by a Tz-Kih. | Mechanical | Master (5 pts) | 12.4% |
| Fight Caves Master | Complete the Fight Caves 5 times. | Kill Count | Master (5 pts) | 23.1% |
| Fight Caves Speed-Chaser | Complete the Fight Caves in less than 30 minutes. | Speed | Master (5 pts) | 6% |
| Fight Caves Speed-Runner | Complete the Fight Caves in less than 26 minutes and 30 seconds. | Speed |  Grandmaster (6 pts) Grandmaster (6 pts) | 3% |
| No Time for a Drink | Complete the Fight Caves without losing any prayer points. | Restriction | Grandmaster (6 pts) | 2% |
| Denying the Healers II | Complete the Fight Caves without TzTok-Jad being healed by a Yt-HurKot. | Mechanical | Grandmaster (6 pts) | 8.2% |
Changes
| Date | Changes |
|---|---|
| 12 August 2026 (Update) |
You can now re-enter the Fight Caves immediately after leaving, with no cooldown. |
| 18 May 2022 (Update | poll) |
NPCs in the Fight Caves are now visible at further distances. |
| 28 April 2021 (Update) |
The Fight Cave leave timer has been reduced to three minutes. |
| 23 May 2019 (Update) |
Players who reached zero hitpoints as they won no longer die when they are taken outside of the Fight Cave. |
| 20 August 2015 (Update) |
The Tzhaar Fight Cave monster spawns have been updated to fix a bug where two positions were almost never used. |
| 13 August 2015 (Update) |
|
| 6 August 2015 (Update) |
|
| 5 March 2015 (Update | poll) |
|
| 22 January 2015 (Update | poll) |
A timer has been added to the fight cave that times how long it takes you to get from wave 1 to killing TzTok-Jad. |
| 1 May 2014 (Update) |
The fight cave now displays a notification showing the current wave in the chatbox. |
| 2 August 2013 (Update | poll) |
You can now win fire capes even if you have one already. These can be exchanged with the Fight Cave attendant for Tokkul should you want that instead. |
| 16 May 2013 (Update) |
The Fight Cave will no longer let you run back in immediately after leaving. |
| 9 May 2013 (Update | poll) |
If you log out or disconnect in the TzHaar Fight Cave during a wave, you will now automatically restart that wave when you log back in. |
| Date unknown |
Players can now have multiple fire capes, with a Fight Cave completion always rewarding one. Previously only 16,064 Tokkul would be rewarded. |
References
- ^ TzHaar-Mej-Jal. Old School RuneScape. "This is the fight cave, TzHaar-Xil made it for practice, but many JalYt come here to fight too."
- ^ Jagex. Mod Kieren's Twitter account. 29 March 2017. Archived from the original on 6 November 2022. Mod Kieren: "Simple maths proofs: This formula is used for calculating your winnings from the Fight Caves :) Sum of n consecutive numbers"
- ^ Jagex. Mod Kieren's Twitter account. 30 March 2017. Archived from the original on 6 November 2022. Mod Kieren: "Defeating jad gives you an extra 4000 on top of the normal reward too"
- ^ 4.00 4.01 4.02 4.03 4.04 4.05 4.06 4.07 4.08 4.09 4.10 4.11 4.12 4.13 4.14 4.15 4.16 4.17 Always kill the fiery, bat-like, level-22 Tz-Kih first using a hit-and-run tactic to prevent its Prayer drain!
- ^ 5.0 5.1 5.2 5.3 Activate Protect from Missiles against Tok-Xil if needed as its Ranged attack will be strong against a low level or mage.
- ^ 6.0 6.1 6.2 6.3 6.4 Use smaller monsters, Italy Rock, or Dragon Rock to block the Yt-MejKot. See this map!
- ^ 7.0 7.1 7.2 7.3 7.4 7.5 7.6 When the Yt-MejKot appears, use the Ket-Zek and other monsters to block it.