2
2Requirements
- 69 Agility [not boostable] [required to start]
- 64 Thieving [not boostable] [required to start]
- 56 Hunter [not boostable] [required to start]
- Completion of the following quests:
QUEST 156 · MEMBERS
Our story begins - as all good murder mysteries do - with a mysterious murder, and there's no shortage of suspects - in fact, you're one of them! Be prepared to form an uneasy alliance, dig up secrets best left buried deep, and walk away with more questions than answers...
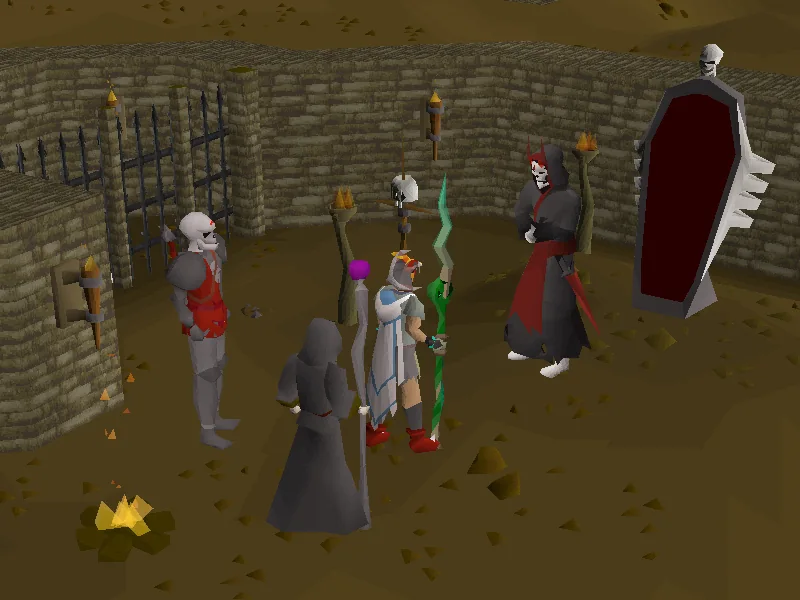
Talk to the guard outside of the Carnillean Mansion in the south-western corner of East Ardougne.
STEP BY STEP
Follow the chapters below. Click any screenshot or diagram to view it at full size.
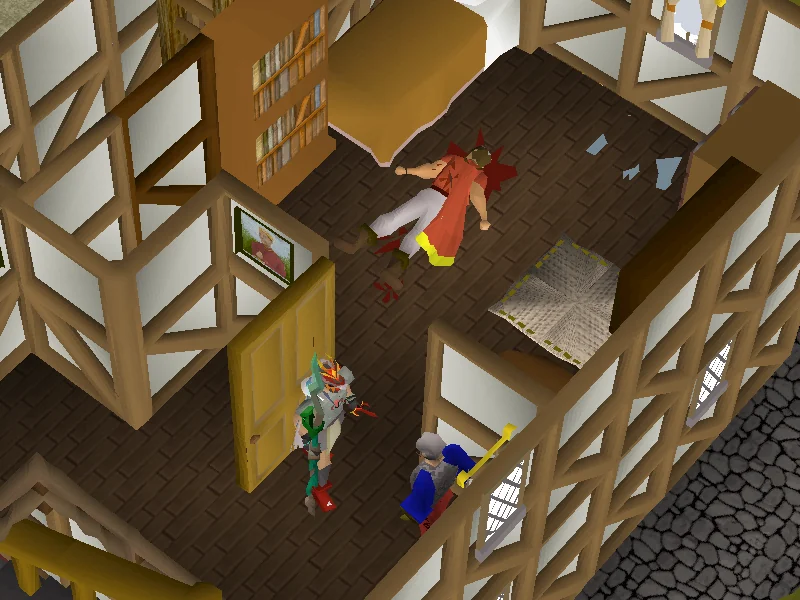
To start the quest, talk to the guard outside of the Carnillean Mansion in East Ardougne; the fastest way to reach it is to teleport to the Battlefield by way of spirit tree. The guard will ask for your help in solving a crime.
(Note that the guard will not ask for your help if you have just completed Hazeel Cult. Logging out and in will allow you to begin this quest.)
Follow the guard upstairs and finish the conversation to learn about the murder of Ceril Carnillean. Inspect Ceril's corpse to discover that Ceril was stabbed in the back with an "unusually thin blade". Inspect the eastern window to learn that it was broken from the outside. Finally, knock-at the northern wall to reveal a hidden room. Climb up the ladder, and inspect the chest to find that it has been broken into and emptied.
Return to the guard and tell him about these findings, and he will then show you an amulet that was found by the window. The amulet bears the symbol of the Khazard Army, with 'Evelot' engraved into the back. He suggests you search for more information at the Fight Arena bar, as he can't investigate the Khazard Army himself, because the army operates with approval from the monarchy.
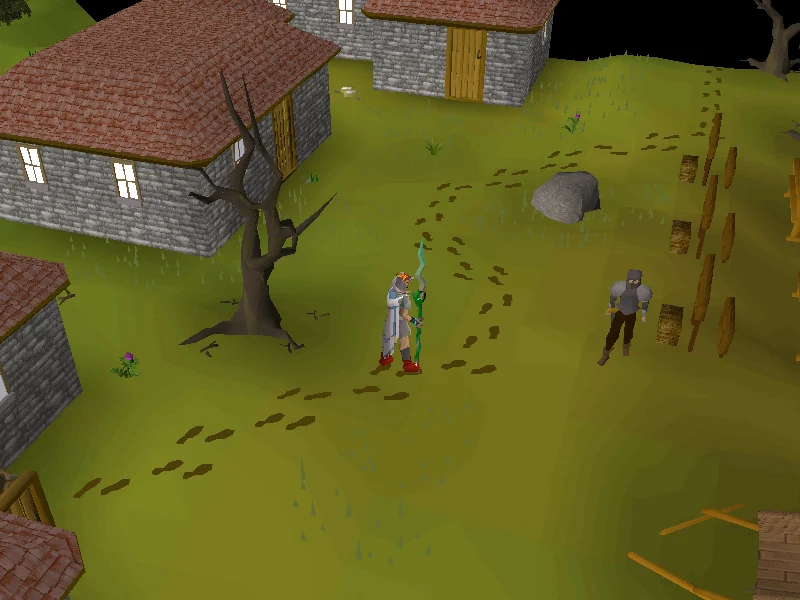
Make your way south to the bar in the south-west corner of the Fight Arena. Players can reach the area quickly by use of the Watchtower or Yanille teleports, or the Ardougne Cloak. Upon arrival, ask the Khazard Barman if he knows anyone named 'Evelot', and give him 100 coins as a bribe.
He says that she recently left in a hurry, and suggests looking around outside. Inspect the barrels just outside the bar entrance to begin tracking Evelot. Next, search the north-west boulders at the end of the trail, then the north-east bush, the tree stump, another set of boulders, and finally another bush (east of you). The trail will lead you clockwise around the periphery of the arena to a rowboat just south of the Tower of Life, where Evelot will be standing. Upon approaching her, you will enter an instance; she will engage in a short dialogue, after which you will have to fight her.
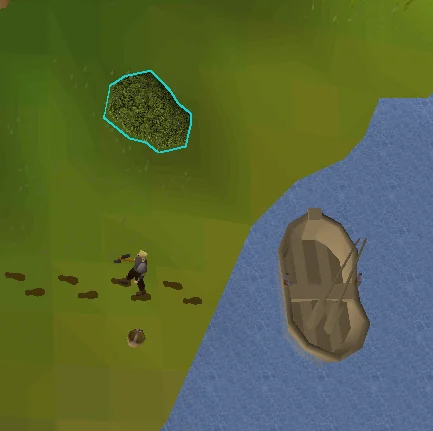
Evelot attacks with melee, which can be completely blocked with the Protect from Melee prayer. However, every few attacks, she will use a special attack that disables protection prayers and drains prayer points, so be ready to turn them on and drink a restoration potion if needed. Be warned that even with good armour, Evelot can still hit up to 35 without protection, and she is moderately accurate.
Evelot is weakest to magic attacks, and has decent melee defence. However, moderately high level players should have no problem dispatching her with melee anyway, especially with a crush weapon. Note that she uses routefinding and therefore cannot be safespotted, and she is also immune to binds and freeze spells. If you run too far away, the fight will end and you must restart. However, the searchable plant right next to her rowboat can be shot over, and since she only moves at walking speed it is possible to kite her around it while staying within the instance. If done properly, this method functions as a slightly more effort-intensive safespot and makes it possible to easily beat her without ever being exposed to any damage. If you die during this fight, your gravestone will appear south of the Tower of Life, outside the fight instance.
When defeated, she will tell you about her role in the crime; she was hired to break in and steal a certain scroll from the Carnillean mansion, but insists that she was not Ceril's killer. She then delivered the scroll to the Hazeel cultists, only to discover that they did not hire her to retrieve it.
Make your way to the Hazeel Cult, by the cave entrance to the Ardougne Sewers slightly north-west of the Ardougne Monastery and east of the Clock Tower. Players can reach the area quickly by teleporting to the monastery via an Ardougne cloak. Board the raft upon entry (if the raft is not moving, make sure all sewer valves are in the correct position), and talk to Alomone who will summon Hazeel or go directly to Clivet and Hazeel if you killed Alomone previously (Hazeel has been awakened regardless of the player's actions during the quest Hazeel Cult). Suspicious of the mysterious third party's intentions, Clivet is instructed to summon Khazard to the cult dungeon, where the two Mahjarrat discuss the third party still at large. Hazeel suggests that you return to the mansion and question the Carnillean family to find more information.
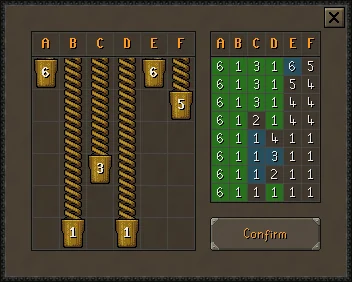
Return to the Carnillean mansion, and update the guard with your progress; you must talk to the guard before questioning the family, who will otherwise refuse to talk to you. Philipe and Henryeta will not provide much of use, but Claus the Chef in the basement reveals that he felt a sudden feeling of cold around the time of the murder, and saw a shadow. Searching the south-west shelves reveals a small button that unlocks a wall on the north side of the room, next to the noticeboard. Inspect the wall to enter the passage behind this wall and picklock the chest in the room.
To pick the lock, move the pins along to specific positions. They will appear blue if the number is correct but in the wrong position, and green if that pin is at the correct position. Multiple pins can have the same number. The ordering does not change attempt to attempt. Players who have difficulty picking the lock can use a Mastermind solver to decode the pins. Fastest method is to guess all 1, anything not green change to 2s and confirm again. anything not green moves to 3, and so forth. You will solve in max 6 guesses.
Inside the chest you will find a dusty scroll. Inspect the scroll to see a faded symbol, then take the scroll back to Hazeel and Khazard, who become mysteriously concerned and decide that it's time to return to the North. As Hazeel does not wish to attract any attention from the other Mahjarrat, and since you are on friendly terms with the ice trolls of Weiss, he asks that you accompany them there.
Head to the northern entrance of Weiss. The fastest way to reach the entrance is to use the icy basalt teleport, cross the little boulder immediately to the east, squeeze through the nearby broken fence, and run slightly north-east. Just outside the central area, you will find Dead Wolf and Big Fish, who are shapeshifted manifestations of General Khazard and Hazeel. They will have you speak to Snowflake and My Arm and see if they have seen anything odd recently; My Arm will tell you that there was recently a cave-in down in the mine and that Goat Poo saw a strange shadow whilst investigating it.
Return to Big Fish, who reveals that the area used to be Ghorrock, a settlement of the Zarosian Empire during the Second Age, and that the missing crest half was used to seal the prison below. You then tell them of what Snowflake and My Arm told you, and they tell will ask you to meet them in the Salt Mine.
Important: Be fully prepared for combat before entering the cave. Make sure to bring antipoisons.
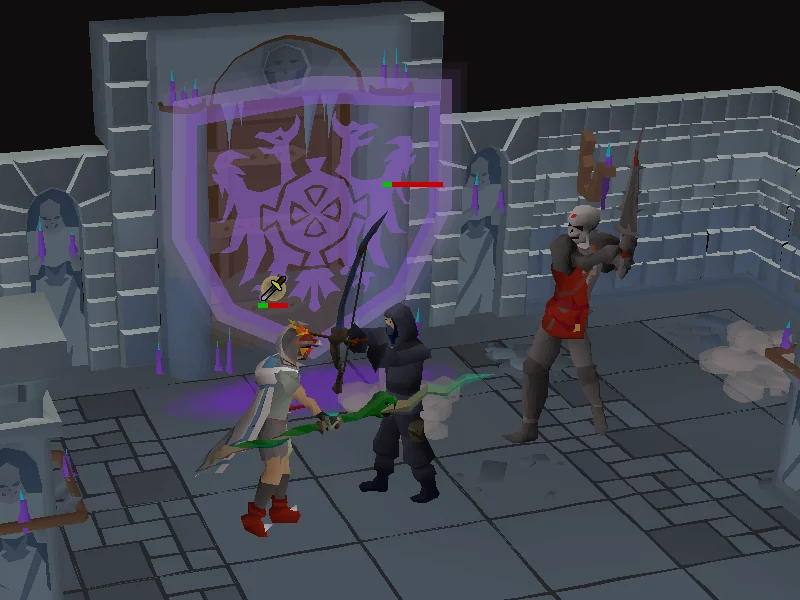
Head down the stairs in the main building, and go through the southern cave entrance that's opened up into the prison. This will begin a cutscene where you and Khazard come across an assassin that you've met during the events of Devious Minds. He will attack you.
The assassin, still retaining the bow-sword that you made for him before, will attack with both ranged and melee; he will react accordingly to protection prayers, so pray against what you're weakest against. General Khazard will assist you in the fight, but don't expect him to handle the assassin completely.
The assassin cannot be damaged in normal combat, as he is too fast; should you attack him, your chat will read: The assassin easily dodges your attack. You'll need to obscure his vision somehow. To damage him, wait until he throws smoke bombs around the room; once one lands, he can be lured into it, obscuring his vision and allowing him to be hurt.
The assassin will also throw green vials, which will deal up to 30 damage and inflict poison starting at 6 damage; they're similar in appearance to super combat potions and can be avoided by simply running one tile away when you see the animation begin.
Note: If you die during this fight, your gravestone will appear inside the Salt Mine, outside the cave entrance to Ghorrock Dungeon.
After the fight, the assassin will seemingly vanish; Khazard demands an explanation as to how you knew them. After learning of the events, he tells you to talk to Hazeel while he guards the door leading to the prison. Hazeel deduces that a third Mahjarrat may still be hiding nearby with the other half of the crest required to unseal the prison, as two of his Zarosian kin had sealed away a dangerous abomination in there and rumours began to swirl that a powerful artefact was also sealed with it. While he guards the exit to the dungeon, he tasks you with investigating the area for him.
Begin searching various accessible objects in the area and acquire the required items:
Read Tullia's letter and make note of the purple letters: "S, p, c, d, l". By using the ancient map and moving from Senntisten, Paddewwa, Carrallanger, Dareeyak, and Lassar, the direction moved would be left, up, left, and down. Input these into the northern gate's lock then press "Confirm" to open it.
Next, search the chest inside for a strange list. Then, use the handle on the lever mechanism, and pull it. Head to the room where you fought the assassin, and inspect the south-western pillar to find a jewel shard and a strange cipher.
Use the strange list to fill in the blank letters in the Duke note (for example, the first name in the Duke note is Picus), and then match the symbols with the letters in the strange cipher. For example, the symbol for Orcus is >, which the strange cipher displays as the letter L.
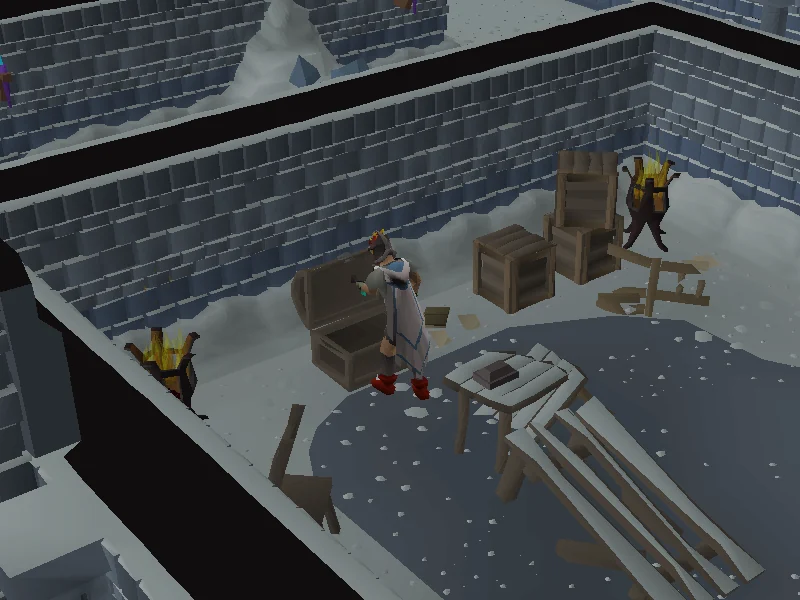
Correctly filling in the Duke note, combined with the symbols from the strange list and cipher, will uncover the hidden message "BOUND BY BLOOD". BLOOD is the passcode to the gate in the centre of the dungeon; input the letters into the lock and enter the gate.
Search the damaged table in the southern part of the room to receive a numbers note, and the crate in the western part for a tinderbox. Reading it shows the player the number 3241, with "4: NE" on the top left. Each number corresponds to the location of a brazier, and certain texts you've acquired have this indicator; the strange cipher contains "1: SW", the ancient map contains "2: SE", and the strange list contains "3: NW". Using the numbers note, you must light the braziers in this order: north-west, south-east, north-east, and lastly south-west. This unlocks the western chest. Be aware that the NW and SW are written on the right-hand-side and the NE and SE are written on the left-hand-side, this is mirrored compared to a map where east is right and west is left.
Search the chest to receive a settlements note and another jewel shard. Use one shard on the other to create the ancient jewel; this will be used shortly. Read the settlements note, showing an arrangement of old Zarosian settlements. Using the ancient map, connect each settlement as instructed in the settlements note. For example, connecting "Kharid-et - Kharyrll - Senntisten" on the ancient map gives the player the shape of the number 7. Performing this for the other three lines on the note in order will give the player the number 7402, which is the passcode for the northern chest. Input the passcode to receive an icy chest.
Use the ancient jewel on the icy chest to open it, giving the icy key; use it to unlock the gate south-west of the centre room. A crevice can be found beyond the gate; before entering, it is recommended to resupply and re-gear for both magic and ranged.
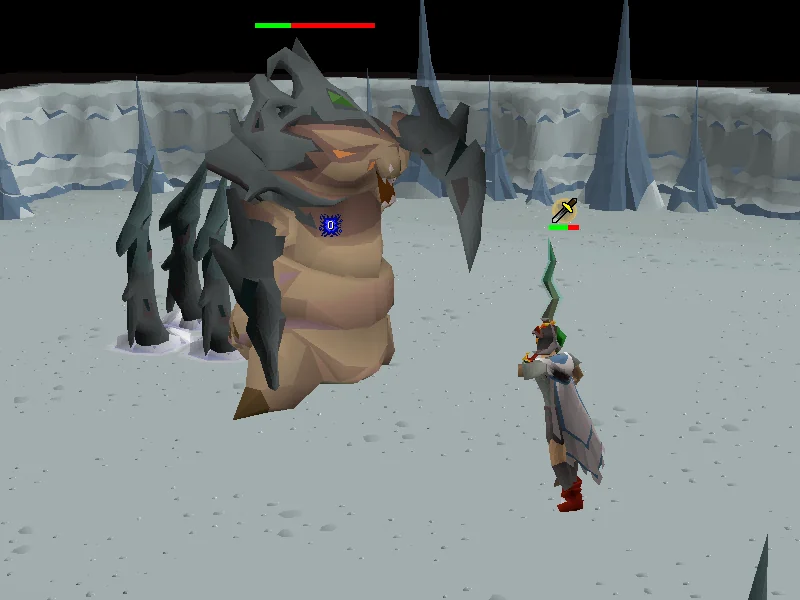
Enter the crevice, where a Strange Creature will appear and attack. While the boss is among the more challenging quest monsters, players who familiarise themselves with its mechanics will find it to be a reasonable fight; with practice, a player of 85+ combat should be able to defeat the creature with decent gear such as blessed dragonhide armour and enchanted onyx jewellery. Stamina potions and a form of prayer restore are both strongly recommended.
Be sure to read the descriptions of its attacks in order to prepare yourself for the fight.
Following the quest, the strange creature's residual energy remains in the form of a stronger variant, the Phantom Muspah, which can be fought repeatedly as a boss.
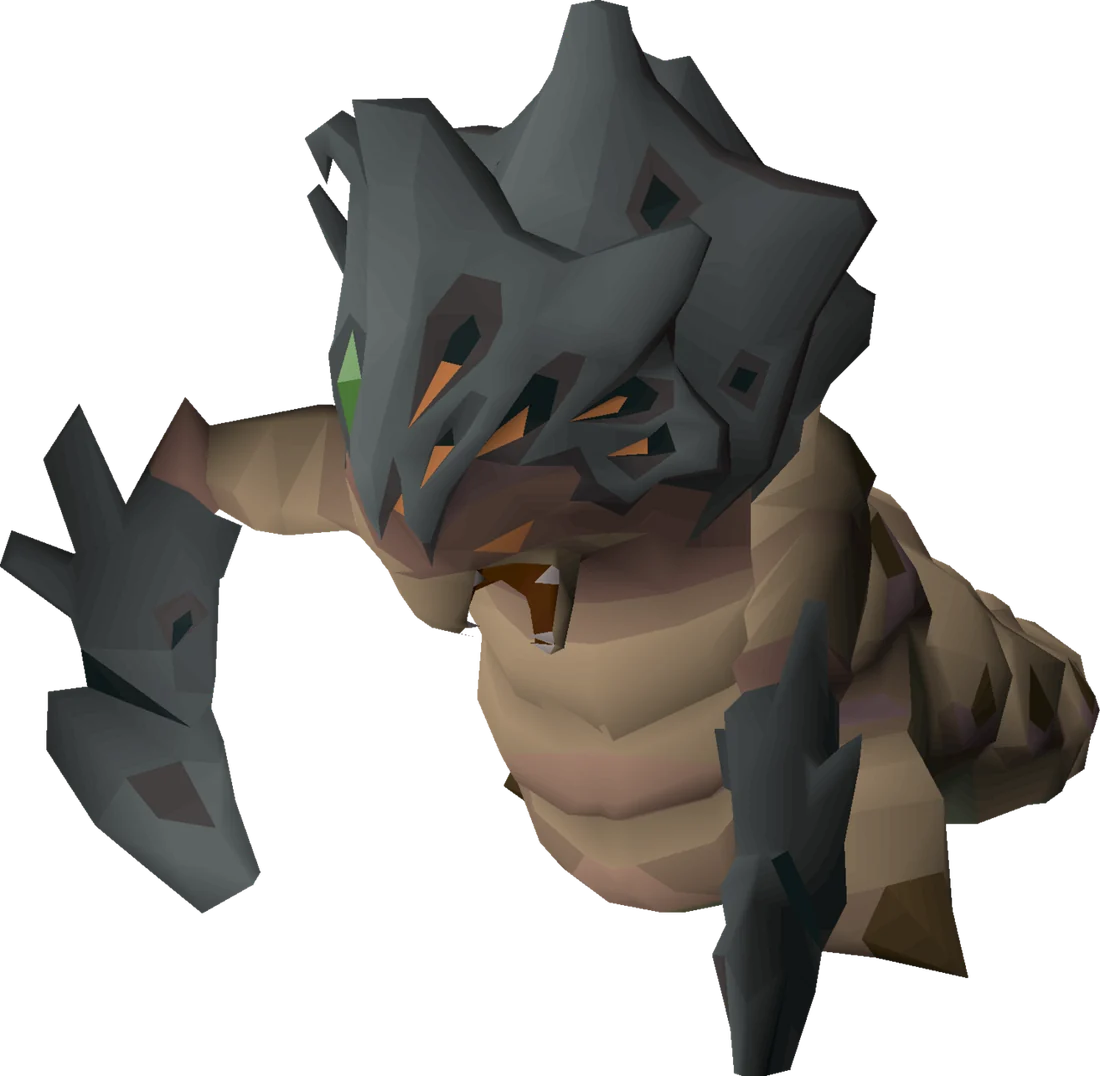
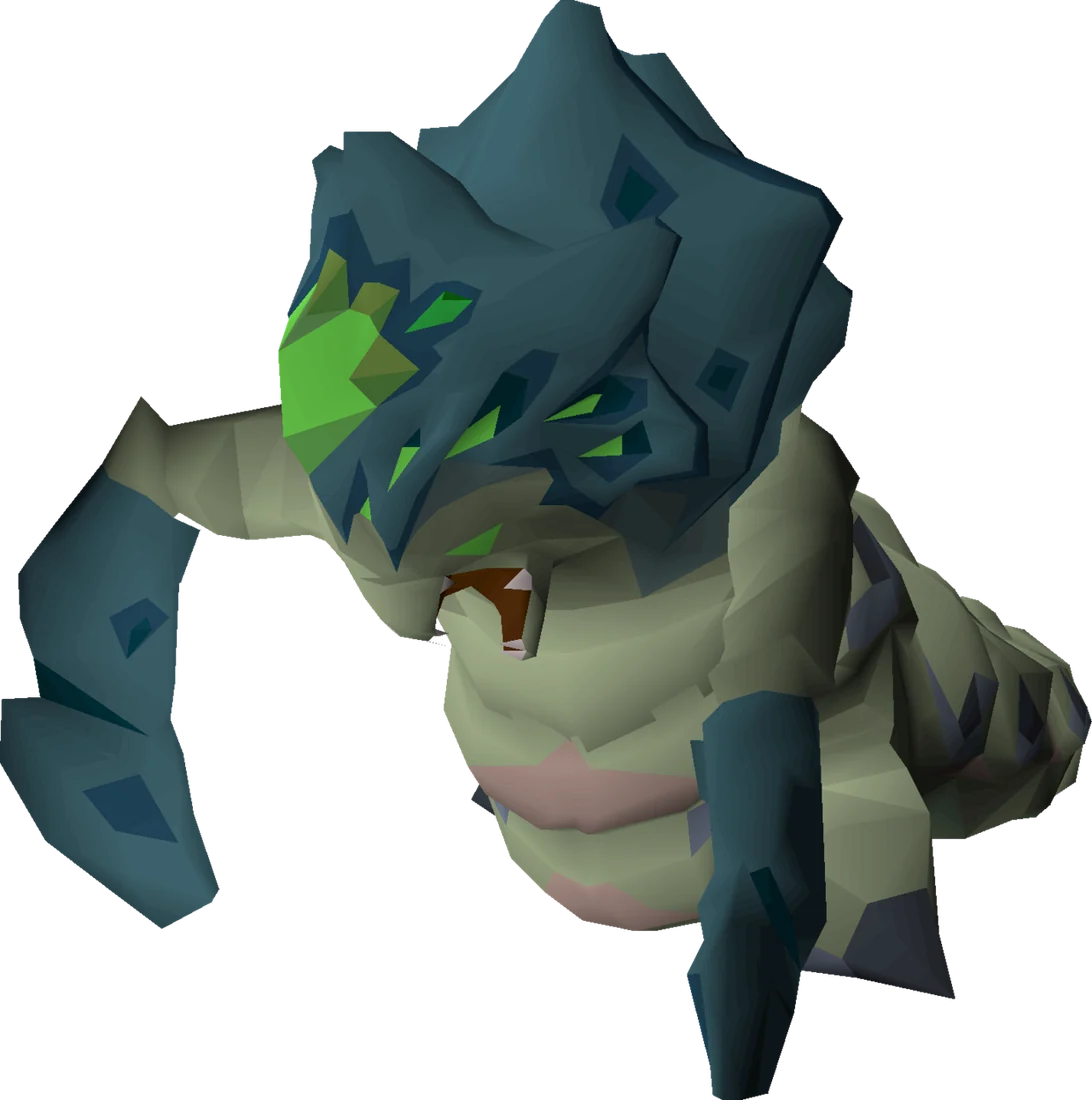
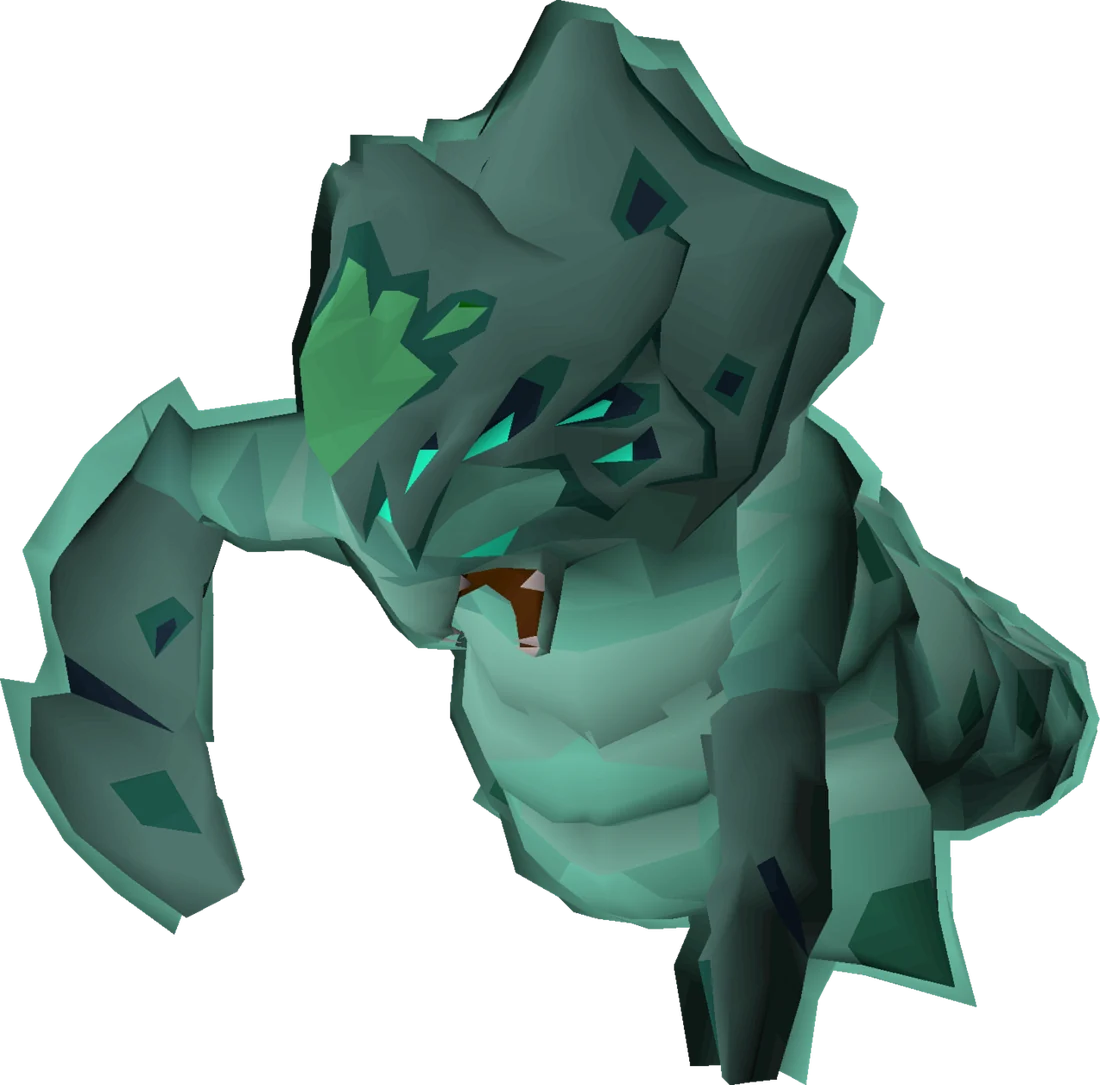
The creature has 550 Hitpoints, and attacks with both Melee and Ranged. The creature has four forms which it transitions through during the fight after taking a set amount of damage:
| Colour | Attacks | Pray against | Player attack | Tactic | Max hit |
|---|---|---|---|---|---|
| Brown
|
Melee only | Melee | Magic
or Ranged |
Keep a distance and attack with Magic or Ranged. Be prepared to Protect from Melee if you accidentally get too close to the creature, but be advised that this will only partially reduce damage. Ensure that you bring several stamina potions.
For those with access to good gear, Magic is advisable, as the creature has reduced Magic defence during this phase. If using Magic and Ranged, a switch of gear may be beneficial here to improve your chances of hitting the creature. Freezing it with ice spells is also viable during this phase, but note that freezes are 25% less effective than normal, meaning it will only stay frozen for 75% of the base freeze duration of ice spells. While the Creature has reduced magic defence during this phase, it still has a Magic level of 150, making splashes quite frequent. Players without max gear or a high Magic level may find it more viable to remain ranging this phase, using the special effect of ruby bolts (e) to rapidly lower its health and end the phase quickly. Note: During this phase, the creature has +160 Ranged Defence, so equipment with high Ranged attack bonuses is recommended if ranging. |
24 |
| Green
|
Magic
Ranged |
Ranged | Ranged | Attack with Ranged and have your prayer book open. Be prepared to Protect from Magic if necessary, and switch back to range after. No running is necessary for this phase; additionally, the correct protection prayers will negate most damage (you will still take a small bit of chip damage). | 33 |
| Teal (Prayer shield)
|
Magic
Ranged |
Ranged | Ranged | As soon as the Creature teleports to the centre of the room, run behind nearby spikes to avoid its shockwave. Attack the same as during the green phase, always praying against magic when necessary. When the shield appears, switch to Smite during attacks if possible; the shield will slowly disappear on its own, but Smite speeds up this process dramatically. It is also advised to use sapphire bolts (e) if using a crossbow for this phase, as it has a chance of draining a majority of the creature's prayer shield.
This form only appears once, when the creature is at 20% health. Damage received by the player during this phase will partially heal the creature after the shield is drained. |
38 |
| Green (post-shield) | Magic
Ranged |
Ranged | Ranged | Attack with Ranged, with your prayer book open, prepared to Protect from Magic if necessary.
Note: During this phase, change of attack styles becomes more frequent, spikes spawn in frequently across the whole map. |
38 |
| Animation | Attack | Pray against | Max hit |
|---|---|---|---|
| Raising arms and charging purple energy | Strong magic attack that, if not blocked, will inflict prayer-draining corruption. | Magic | 33 |
| Slamming spikes into the ground | Spikes that damage the player and heal the creature. It will also shove the player to an adjacent tile.
Spikes will always appear on the player's location when it changes forms. |
N/A, Run | 14 (?) |
| Creature disappearing and dimming of screen | A barrage of orbs will appear, damaging players if they touch them. | N/A, Run | 14 (?) |
| Creature howling and spikes moving towards player | Spikes will home in on the player, damaging them as listed above. This can happen during any phase. | N/A, Run | 14 (?) |
| Teleporting to center | Shockwave, which cannot be protected against. This attack only happens once. | See above | 40 |
A range only approach with a crossbow using enchanted bolts is the lowest budget way to defeat the boss, leaving plenty of inventory space for prayer potions and food.
Additionally, being on the arceuus spellbook can be helpful. Especially for lower level players, ward of Arceuus offers partial protection, including from the prayer drain effect of the bosses spikes. Lesser Corruption or Greater Corruption helps with punching through the prayer shield, and unlike Smite, doesn't add risk of taking damage off-prayer. Finally, summoning a thrall will aid in doing consistent damage while avoiding the bosses attacks.
If bringing a mage switch, players can use spells like Superior Demonbane and Skeletal Grasp, however, using ice Barrage on the ancient_Spellbook maybe a better option, especially for kiting the melee phase.
Note: If you die during the boss fight, your gravestone will appear inside the salt mine, outside the cave entrance to Ghorrock Dungeon. This acts as a normal deathpile for ultimate ironmen.
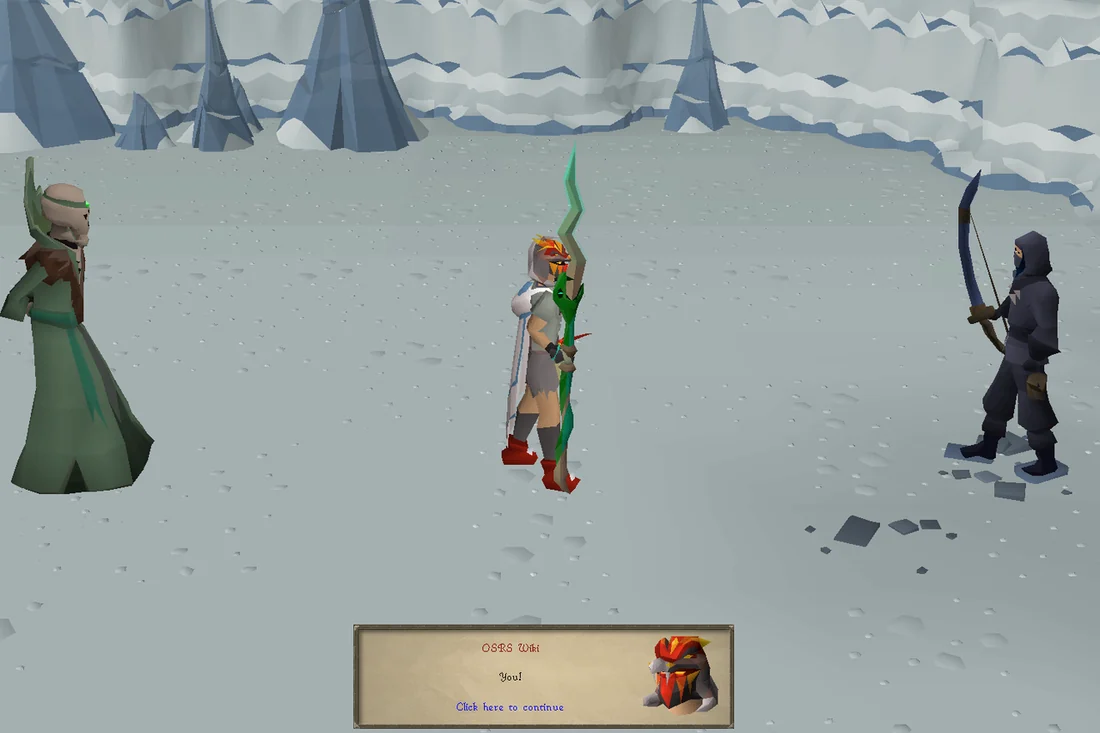
Once the creature is defeated, it will transform into Jhallan, another Mahjarrat. He then notices you and attempts to question you, but before anything can happen, the assassin appears and casts a spell on Jhallan, teleporting him away, and disappearing again.
You will report what happened to Hazeel and Khazard, just as the strange barrier dissipates, unsealing the prison. They will realise the assassin is capable of entering the Shadow Realm. Khazard will leave behind a regiment of troops to secure the area, and Hazeel will offer you a teleport back to East Ardougne. Accept the teleport, and report back to the guard to complete the quest.
Congratulations, quest complete!
Use this when you already know the route. The full walkthrough above includes explanations and diagrams.
Make your way to the Carnillean Mansion and speak to the guard.
Say: Yes.
Climb up the stairs and speak to the guard again.
Inspect Ceril's corpse and the broken window.
Knock on the false wall, then climb up the ladder and inspect the chest in the hidden room up the ladder.
Speak to the guard again.
Say: The window was broken from the outside. → Ceril was stabbed from behind. → A hidden room above us was broken into. → I think that's everything.
Head to the Fight Arena Bar, and speak to the Khazard Barman.
Say: Do you know anyone called Evelot?
Track down Evelot by inspecting the following during each track revealed:
Barrels just outside the bar entrance
North-west boulder
North bush
Tree stump
Another boulder
East bush
Approach Evelot to begin the fight. Every few attacks, she will use a special attack that disables protection prayers and drains your prayer.
Finish the conversation with Evelot after defeating her.
Head to the Hazeel Cult's hideout by way of the entrance to the Ardougne Sewers slightly east of the Clock Tower. Board the raft.
If the raft will not move, make sure all sewer valves outside the cave are in the correct position. See the Hazeel Cult guide for details.
Talk to Alomone (if you sided with Hazeel) or Clivet if you didn't .
Talk to Hazeel.
Return to Carnillean Mansion and talk to the guard.
Climb down the ladder inside the house and talk to Claus the Chef.
Search the south-western cooking shelves and press the button.
Say: Yes.
Inspect the wall next to the noticeboard and enter the passage.
Say: Yes.
Pick the lock on the chest by moving the pins along to specific positions. They will appear blue if the number is correct but in the wrong position, and green if that pin is at the correct position. The ordering does not change attempt to attempt.
Inspect the dusty scroll.
Bring the dusty scroll to Hazeel.
Head to the northern entrance of Weiss and speak to Big Fish.
Head to the main building and speak to Snowflake.
Say: Have you seen anything odd around here recently? (Chat option 2 if you don't have the Weiss fire notes)
Head to the northern entrance of Weiss and speak to Big Fish.
Say: Why would the killer come here? → What is this ritual you keep talking about? → Okay, I'm done asking questions. What now?
Head down the stairs in the main building, and go through the southern cave entrance.
Say: Yes.
After the cutscene, fight the assassin. He will attack with melee or ranged, whichever style the player is not praying protection against.
The assassin will continually throw 1x1 tile smoke bombs around the room, which you then need to lure him inside to be able to deal damage.
The assassin will also occasionally throw vials of poison, which can deal up to 30 poison damage and inflict poison starting at 6 damage.
Talk to Hazeel located just south-west at the cave's entrance.
Say: I'll get going.
Search the barrel south of the centre room to find a lever handle.
Enter the centre room, using the code BLOOD to unlock the gate.
Open the northern chest using code 7402 to obtain an icy chest.
Light the braziers in the following order: NW, SE, NE, SW (a tinderbox can be found by searching the crate in the room)
Open the western chest to find a jewel shard and a settlements note.
Head to the northern room, pressing the LEFT - UP - LEFT - DOWN arrows in that order to unlock the gate.
Use the handle on the lever mechanism, and pull it.
Inspect the south-western pillar in the room where you fought the assassin for the other jewel shard.
Use the jewel shards on one another, and use the ancient jewel on the icy chest.
Open the gate south of the centre room with the icy key.
Resupply with ranged and magic gear for a fairly difficult boss fight.
Enter the crevice to battle the Strange Creature. See here for details of the fight.
After the cutscene, accept Hazeel's teleport.
Say: Yes.
Return to the guard at the Carnillean Mansion.
Congratulations, quest complete!
QUEST COMPLETE
OSRS WIKI CONTRIBUTORS
Walkthrough text and preparation lists are adapted from Old School RuneScape Wiki contributors under CC BY-NC-SA 3.0. Game imagery © Jagex Ltd; individual image credits are available from their captions. This page is fan-made and not affiliated with Jagex.
KEEP QUESTING
Game icons © Jagex Ltd, via the OSRS Wiki. Interface icons by Lucide.