QUEST 72 · MEMBERS
One Small Favour
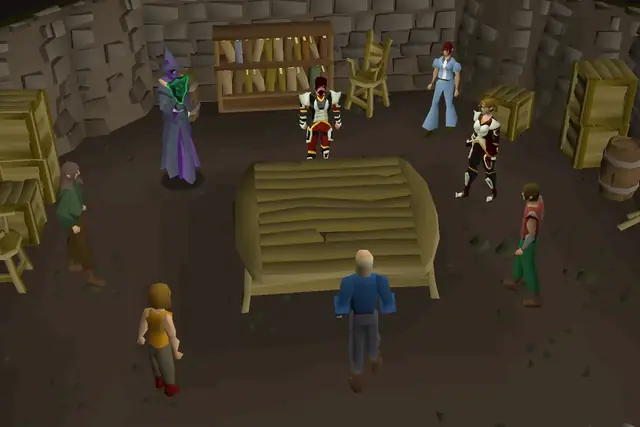
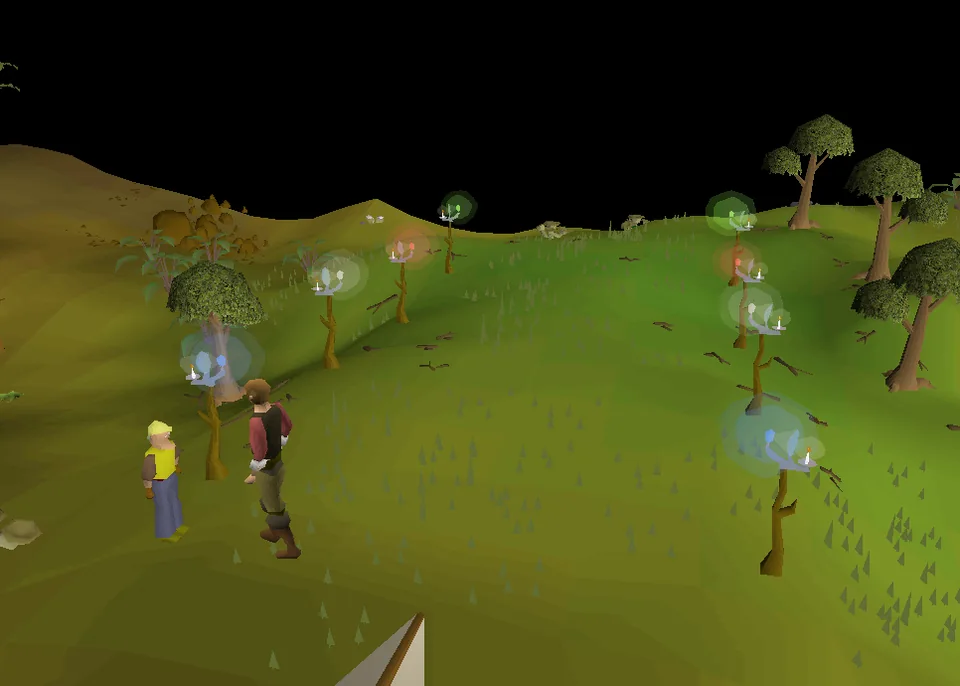
If you're new to Shilo Village after solving the mystery (or even if you did it some time ago), you may like to check out Yanni Salika's antiques shop. He's a busy chap, revamping antique items, checking out new stock from potential adventurers and maybe he'll have a small (1) favour to ask of you? Probably nothing particularly large, Yanni isn't a demanding (2) person, should hardly take you any time (3) at all really, something to do when you have a spare moment. That's assuming there aren't a
- Difficulty
- Experienced
- Length
- Long
- Quest points
- 2
- Released
- 28 February 2005
 2
2Jump to a chapter
Before you start
Where to start
Talk to Yanni Salika in Shilo Village.


Items required
- 4 steel bars
- Bronze bar
- Iron bar
- The ingredients required to make a Guthix rest:
- 2 Guam leaves
- Marrentill
- Harralander
- Cup of hot water (obtainable during the quest)
- Hammer (obtainable during the quest) or Imcando hammer
- 5 pigeon cages (obtainable during the quest)
- Note: The pigeons do not need to be let out of the cages.
- Pot (obtainable during the quest)
- Soft clay (obtained during the quest)
- Two of each of the following cut gems, or a chisel to cut the uncut gems received during the quest (high chance to crush them, up to 2 replacements available for 500 coins each during the quest)
Recommended
- 45 Combat level
- Weight-reducing clothing and stamina or energy potions.
- Fast travel to several locations
- Shilo Village (travel to Brimhaven and take the cart or use Fairy Rings to CKR)
- Port Sarim and Draynor Village (amulet of glory or Explorer's Ring 2)
- Varrock (Varrock teleport)
- Barbarian Village and Dwarven Mine (Skull Sceptre or combat bracelet to the Edgeville Monastery)
- Taverley (House teleports or Balloon transport system)
- White Wolf Mountain (gnome glider)
- Catherby and Seers' Village (Camelot teleport, or Catherby teleport and combat bracelet teleport to the Ranging Guild)
- Fishing Guild (skills necklace or Fishing guild teleport)
- East Ardougne (Ardougne teleport)
- Port Khazard (Ardougne cloak teleport to the Ardougne Monastery, Khazard teleport or Fishing Trawler Minigame Teleport)
- Feldip Hills (Feldip hills teleport or use Fairy Rings to AKS or the jungle Eagle transport system)
- A method of defeating Slagilith, which reduces damage by 67% when a pickaxe is not equipped:
- Any pickaxe - the highest level you can wield if not using Magic
- Runes to cast any combat spell - this will circumvent the damage reduction as long as any pickaxe is wielded
- A crush weapon if not using a pickaxe
- Armour and some food
- Lockpick to enter the H.A.M. Hideout if your Thieving level is low
Enemies to defeat
- Slagilith (level 92)
- Dwarf gang members (level 44/48/49) (Multicombat area)
Ironman concerns
- A method of acquiring Marrentill:
- 1/14.8 drop from chaos druids for the grimy herb.
- Picking the herbs in the Sorceress's Garden winter garden for marrentill (1/3.85). Requires completion of Prince Ali Rescue.
- A method of acquiring Harralander:
- 1/25.4 drop from chaos druids for the grimy herb. Requires 20 Herblore to clean.
- Picking the herbs in the Sorceress's Garden winter garden for harralander (1/4.09). Requires completion of Prince Ali Rescue.
- A method of acquiring Guam leaves:
- 1/11.1 drop from chaos druids for the grimy herb.
- Picking the herbs in the Sorceress's Garden winter garden for guam leaves (1/3.37). Requires completion of Prince Ali Rescue.
STEP BY STEP
Walkthrough
Follow the chapters below. Click any screenshot or diagram to view it at full size.
Before you begin
Players are advised to read through each section before starting, as there are many different teleportation options that will vary by player and will determine items required before banking again. Players are also encouraged to complete as many stages of this quest as possible without any combat gear equipped, in order to preserve energy for running (as there is a lot of ground to cover). The walkthrough will alert you if there are any impending encounters where any combat items may be necessary. Each section will list the items required, you should only withdraw the necessary items to reduce weight until the next bank stop.
Karamja
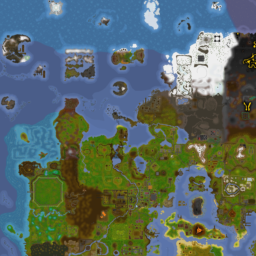
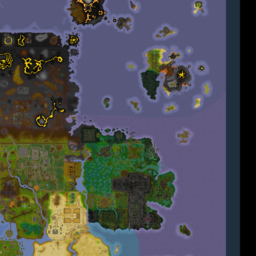
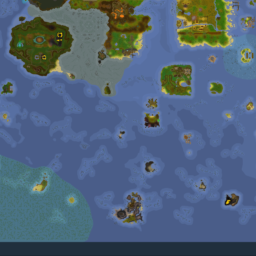
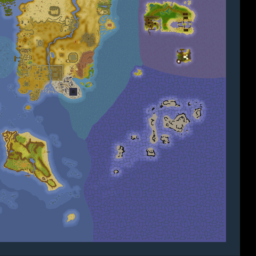 123456789101112131415161718192021
- 1 Yanni Salika
- 2 Jungle forester
- 3 Captain Shanks
- 4 Brian
- 5 Aggie
- 6 Johanhus Ulsbrecht
- 7 Fred the Farmer
- 8 Seth Groats
- 9 Horvik
- 10 Apothecary
- 11 Tassie Slipcast
- 12 Hammerspike Stoutbeard
- 13 Sanfew
- 14 Captain Bleemadge
- 15 Arhein
- 16 Phantuwti Fanstuwi Farsight
- 17 Goblin Cave
- 18 Wizard Cromperty
- 19 Tindel Marchant
- 20 Rantz
- 21 Gnormadium Avlafrim
Items needed before first bank visit: NONE
Items recommended: A good pickaxe to mine gems (with 40 mining), chisel, and transportation to Port Sarim (amulet of glory, a Rimmington tablet/house teleport, Explorer's ring 2 or higher, or the Ratcatchers minigame teleport).
Travel to Shilo Village and talk to Yanni Salika in the antiques shop north of the river. Fairy ring code CKR brings you close to the wall of Shilo Village. He will ask for a small favour: he wants you to bring him some red mahogany logs from a forester south of the village.
- Tip: If you still need the gems required for later in the quest, you may choose to mine for them now while in Shilo Village (two of each of the following: jade, opal, sapphire, and red topaz). Use a chisel to cut the gems as you mine since there is a high chance to crush the gems.
Leave the village through both south-eastern gates, climbing over the broken cart. Talk to a forester just south-west of the entrance, who will ask the player to take a blunt axe to Captain Shanks for sharpening. Captain Shanks would refer you to Port Sarim, so you may choose to skip talking to him.
Asgarnia and Misthalin
The first convenient bank visit to withdraw all these items is Draynor village.
Items needed: Blunt axe given by the Jungle Forester, 3 steel bars, 1 harralander, 2 guams, 1 marrentill, a bowl of hot water, an empty cup (you may take a cup of tea during this part and drink it to get an empty cup)
Items recommended: Teleportation to Draynor (amulet of glory), Varrock, Barbarian Village (skull sceptre), Dwarven Mine (skills necklace or Falador teleport), Taverley, and Camelot. A lockpick is recommended for those with a low Thieving level.
Skills needed: 18 [boostable] to make a guthix rest
Items recommended: Teleportation to Draynor (amulet of glory), Varrock, Barbarian Village (skull sceptre), Dwarven Mine (skills necklace or Falador teleport), Taverley, and Camelot. A lockpick is recommended for those with a low Thieving level.
Skills needed: 18 [boostable] to make a guthix rest
Speak to Brian in the axe shop in Port Sarim, who will ask you to speak to Aggie the witch, so she can act as a character witness in the trial of his friend. Agree to see Aggie and ensure he has taken the axe before continuing.
BANK VISIT 1, withdraw the needed items above.
Aggie is found in Draynor Village (teleport using Amulet of glory). Talk to her about becoming a witness: she will agree to help, but she wants you to first investigate the H.A.M. Hideout for any sign of her missing apprentice, Jimmy the Chisel.
The H.A.M. Hideout is found to the east of Draynor Village. Pick the lock on the trapdoor to enter, then speak to Johanhus Ulsbrecht in the south-eastern corner about Jimmy, who is being held hostage. Johanhus will agree to release him if the player agrees to supply a month's supply of chickens to their organisation, suggesting they talk to Fred the Farmer.
Fred can be found in his house to the north-east of the H.A.M Headquarters, indicated with a dairy churn icon. After speaking to him, he will suggest you talk to Seth Groats instead as he does not have enough chickens.
Talk to Seth on the eastern side of the river by the chicken coop, who will agree to help. He needs some cages to transport the chickens for the player, and suggests you visit Horvik in Varrock for help. He also wants you to deliver to Horvik three steel bars as another favour.
With the steel bars in your inventory, speak with Horvik in the armour shop north-east of Varrock Square, to discover he is feeling ill. He wants some medicine and pigeon cages to modify into chicken cages. You can bring him the medicine now and wait until later to retrieve the pigeon cages, as you will not yet need them.
Speak to the Apothecary in south-west Varrock about Horvik's illness and he will give you a herbal tincture while accidentally dropping the breathing salts. He now needs a new airtight pot to store them in.
- Note: You may drop the herbal tincture, as you can recover it later in the quest.
- Note: If you don't have the ingredients for the Guthix rest yet, now is the time to obtain them. A cup of hot water may be obtained by taking the cup of tea spawn by the tea seller just south of the eastern entrance to Varrock and drinking it to obtain an empty cup. Fill the cup with water at the water source to the south, then heat it on the cooking range to the west. The harralander, 2 guam, and marrentil can be obtained from the Grand Exchange or by killing chaos druids in the Edgeville dungeon.
Go to the Barbarian Village (teleport using the Skull sceptre), and talk to Tassie Slipcast the potter. She is too worried to show you how to make an airtight pot because she is being pressured by a dwarf called Hammerspike Stoutbeard in the Dwarven Mines.
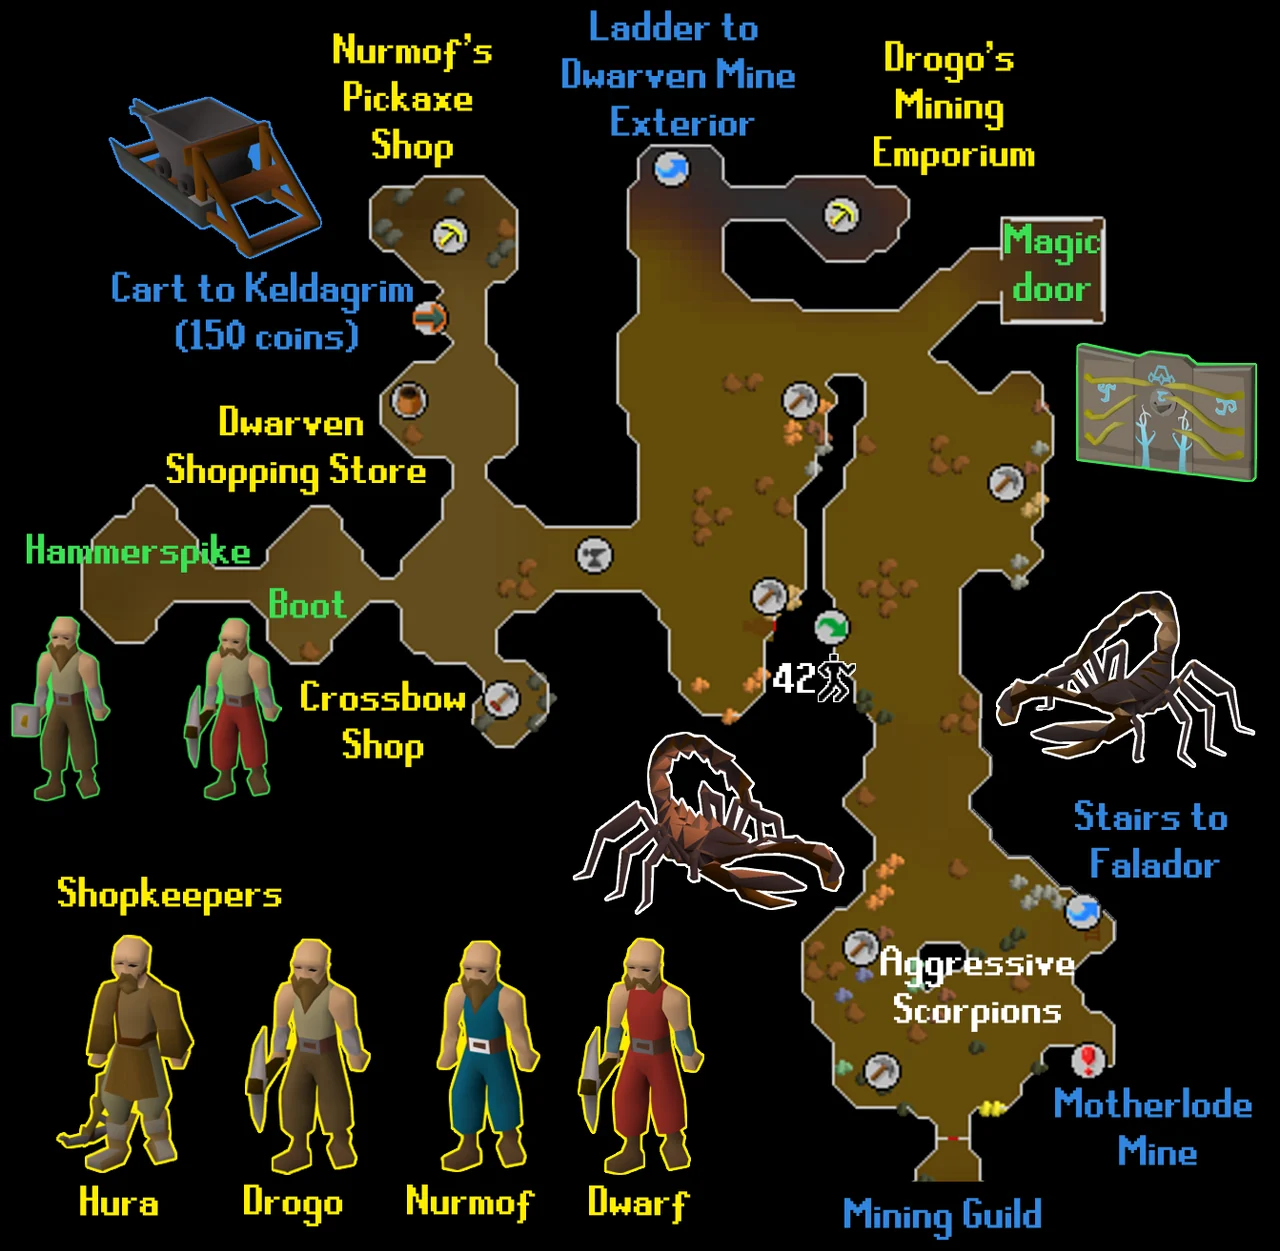
Go to the Dwarven Mines (teleport using the Skills necklace to Mining Guild, or take a minecart from Keldagrim). Head north-west to the westernmost cave past the anvils until you see Hammerspike Stoutbeard surrounded by dwarf gang members. Ask him, "Have you always been a gangster?", and he will tell you that he always wanted to be a druid. He wants you to convince the druid leader to let him join in return for leaving Tassie alone.
Go to Taverley, and talk with Sanfew, who is on the 1st floor (UK) of the central house with the herb icon. Ask him if he's taking any new initiates and accepts dwarves, and tell him that a dwarf you know wants to become one. He will allow Hammerspike to become a druid apprentice, but he wants you to give a Guthix rest tea to Captain Bleemadge on top of White Wolf Mountain and organise a trip for Sanfew down to the Feldip Hills. Use the harralander on the cup of hot water with two guam leaves and a marrentill in your inventory to create the guthix rest ( 18 ).
Once you have the tea, travel to the top of White Wolf Mountain (gnome glider is one way). Speak to Captain Bleemadge, and give him the tea. He will want some T.R.A.S.H. (Triple Redundant Aero Super Hawsers) for the trip down to the Feldip Hills.
- Note: If you have not completed The Grand Tree, you must right-click and select the "Talk to" option for Bleemadge. Otherwise, he will not discuss the quest or accept the Guthix Rest.
- Note: Low levels should be aware of white wolves while travelling on the mountain. An aggressive level 73 Big Wolf spawns near Captain Bleemadge which may attack you, preventing you from finishing the dialogue. Position Captain Bleemadge between yourself and the wolf to carry out the dialogue.
Kandarin
BANK VISIT 2, at catherby bank.
Items needed: A chisel (or 10 coins to buy one), spare cut jades, opals, and red topazes (or about 2,000 coins to buy any spares needed).
Items recommended: Transportation to Ardougne, Port Khazard, and the Feldip hills.
Items recommended: Transportation to Ardougne, Port Khazard, and the Feldip hills.
Travel to the general store south of Catherby bank, and speak to Arhein, who will ask for a weather report. Look on your map and go to the house with the water source north of the church in Seers' Village (teleport to Camelot and walk west). Speak with Phantuwti Fanstuwi Farsight, located in the building with the water symbol, who is looking for a missing person and cannot do the weather forecast until she is found.
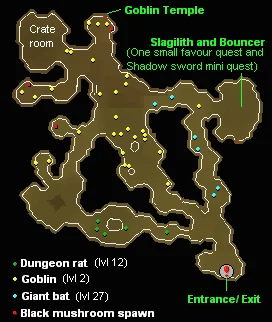
Enter the cave east of the Fishing Guild entrance (teleport using a Skills necklace). Head north along the east wall until you come to a cave where Petra is trapped in a rock. Right-click and search the sculpture to find a message saying to speak to Wizard Cromperty. After finding the message, go to the north-east corner of Ardougne marketplace, find the house with the blue checkerboard floor, and speak to Wizard Cromperty about a girl stuck in some rock. He needs some iron oxide from a man in Port Khazard. If you don't have a hammer or chisel yet, you may acquire them in this building.
- Note: If you have yet to get the five pigeon cages, go to the house directly south of the northern bank in East Ardougne. The cages are located outside the house along the east wall.
Go to Port Khazard (Ardougne cloak 1 or Fishing Trawler Minigame Teleport) and speak to Tindel Marchant, who will want his stodgy mattress stuffed with prime chompy bird feathers in return for the iron oxide.
- Note: Lower level players should be aware of the level 53-63 ogres in the following area.
With your gems in your inventory, head to the Feldip Hills (fairy ring AKS, Feldip hills teleport, or charter ship to Corsair Cove for 600 coins) and talk to Rantz, who is located at the quest icon in eastern Feldip Hills. He is unable to give the player feathers as a "small man" is disturbing the chompy birds. Tell him that you'll see what you can do.
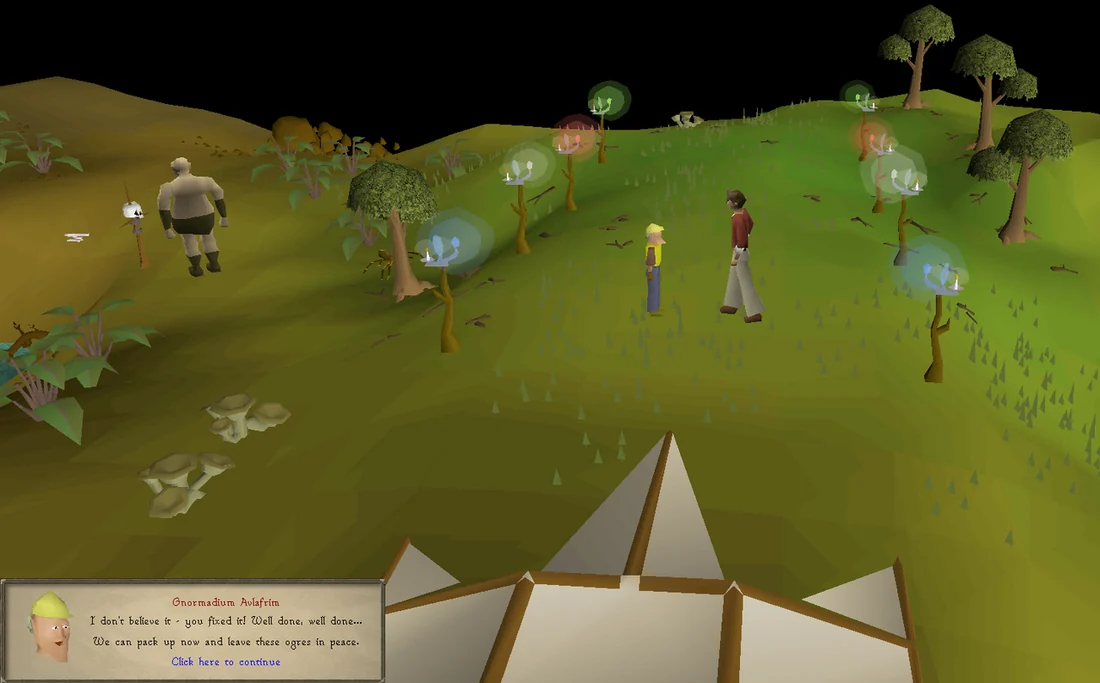
Go west until you see a landing strip and Gnome glider with a gnome named Gnormadium Avlafrim. Talk to him, and he will tell you he needs to repair the landing strip. Search each of the eight landing lights for a gem, cut it, and put it back in the landing lights. If you need a chisel, the gnome can sell you it. If you crush a gem, the gnome may also provide up to 2 spare gems of each type for 500 coins each, provided that you keep the crushed gems in your inventory.
- Tip: Due to the high cost of red topaz (1,782 coins), if you crush one you may wish to utilise the drop trick with the replacement to buy an additional topaz at a discount.
Completing the favours
BANK VISIT 3, at seer's village bank, mainly to deposit all unused gems and withdraw the bronze, iron, steel bars.
Items needed: A stodgy mattress, iron oxide, an animate rock scroll, the weather report, an airtight pot, breathing salts, the herbal tincture, chicken cages, a sharpened axe and red mahogany logs, a good pickaxe/weapon, armour and some food, a hammer, a bronze bar, an iron bar, a steel bar, 5 pigeon cages
Items recommended: Runes for teleports to Ardougne, Camelot, and Lumbridge, transportation to Taverley, skills necklace, skull sceptre, and coins for transportation or some means of teleportation to get back to Shilo Village. (Bring an extra piece of soft clay if you want to save some time during Swan Song later)
Items recommended: Runes for teleports to Ardougne, Camelot, and Lumbridge, transportation to Taverley, skills necklace, skull sceptre, and coins for transportation or some means of teleportation to get back to Shilo Village. (Bring an extra piece of soft clay if you want to save some time during Swan Song later)
Talk with Gnormadium to tell him the runway lights are fixed, then go back to Rantz to get the comfy mattress. Give the comfy mattress to Tindel in Port Khazard to get the iron oxide. Take the iron oxide to Wizard Cromperty in Ardougne, and he will give you an animate rock scroll.
Goblin Cave & Slagilith
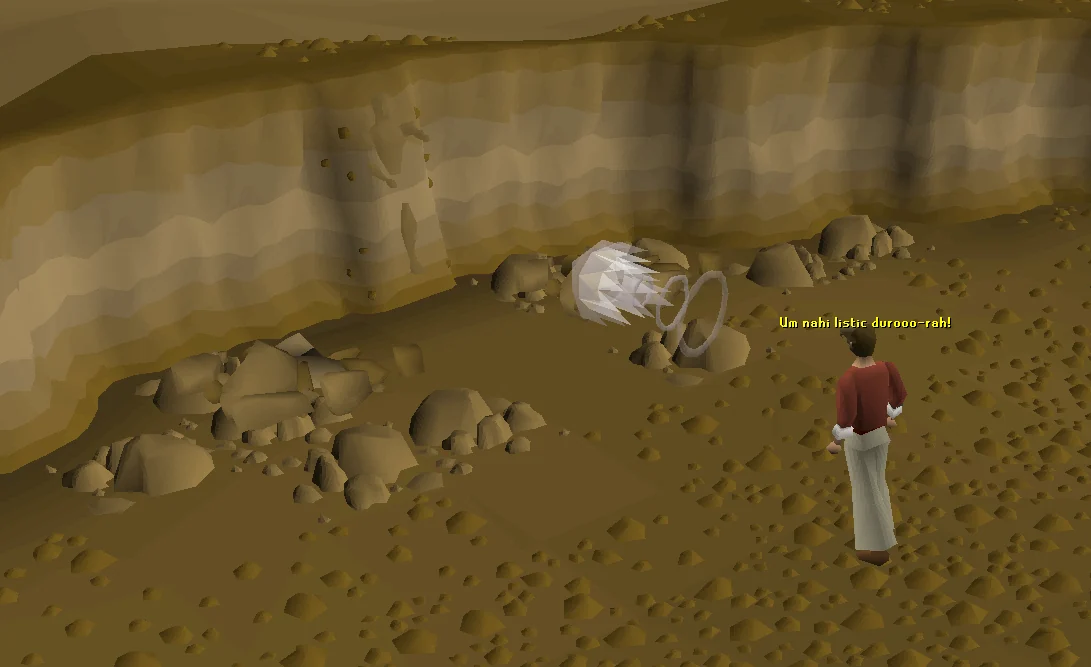
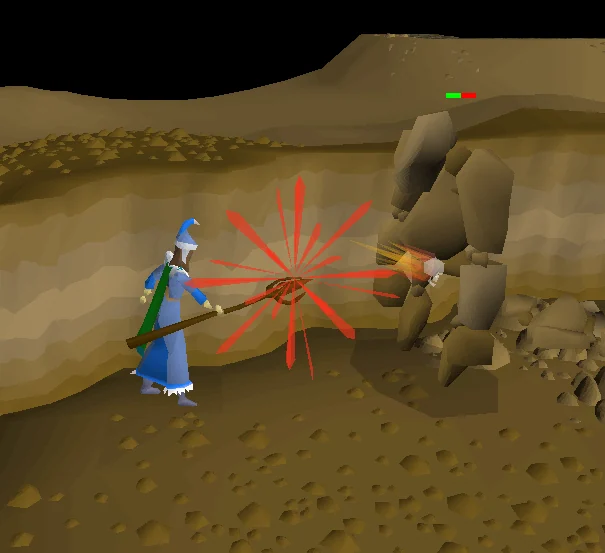
Prepare to fight a level 92 Slagilith in the following section. The Slagilith attacks within melee range and can hit up to 13 damage, though inaccurately. Protect From Melee will nullify all damage, and it may also be safespotted or flinched using the two rock piles nearby.
When fighting Slagilith, your damage will be reduced by 67% if a pickaxe is not equipped. [1]. Combat spells will deal full damage as to Slagilith as long as a pickaxe is equipped, and Slagilith additionally has lower Magic defence. If using a pickaxe as your method of damage, set it to crush as the Slagilith is resistant to the other melee combat styles.
The Slagilith will disappear within 5 minutes after it is summoned.
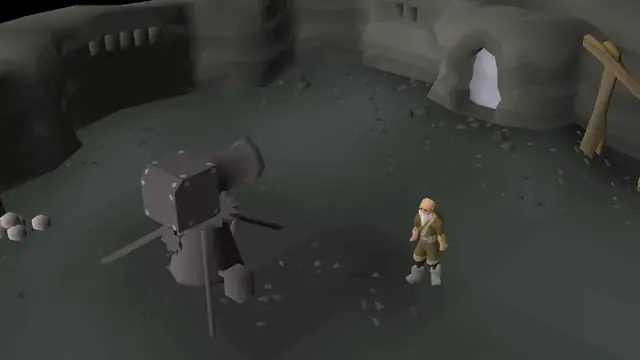
Once prepared for the fight, return to the Goblin Cave near the Fishing Guild, and hug the eastern wall until you come to the same room as before. Stand in front of the sculpture and read the animate rock scroll to summon it.
- Note: If you get a message saying, You don't feel that you should cast this with enemies around, you may need to first kill the bats around the entrance.
After defeating Slagilith, stand back in front of the sculpture and read the scroll once more to release Petra, then talk to her to send her back to Seers' Village.
- Note: You may now drop the animate rock scroll.
Seers' Village
Items needed: Hammer, bronze bar, iron bar, steel bar
Skills needed: 36 [boostable] to climb a ladder, 30 [boostable] to repair a weathervane
Skills needed: 36 [boostable] to climb a ladder, 30 [boostable] to repair a weathervane
Talk to Phantuwti in Seers' Village with 3 empty inventory spaces. He is unable to give you a weather report because his weather vane is broken. You'll have to go through all the chat options, and then ask him, "Why can't you get a clear picture?", and then ask, "Which special Seers tools do you need?" and "What do you mean, 'special combination of items'?" Finally, he'll tell you about his weather vane. Climb the ladder, head east, and climb another ladder to the roof of his house ( 36 ). Search the weather vane, use a hammer with the weather vane, and search it again to get three broken vane parts. Go to an anvil (closest is across the street) with a bronze, iron, and steel bar, and use the parts of the weather vane with the anvil ( 30 ). Go back to the roof of the house, and put the weathervane pillar, the directionals, and the ornament back on the Seers weathervane. Talk to Phantuwti again for a (comically useless) weather report.
- Note: If you lose the broken vane parts, you can recover them from Phantuwti for 1,000 coins.
Take the report to Arhein in Catherby, who will send somebody to send T.R.A.S.H. to Captain Bleemadge. Talk to Captain Bleemadge on top of White Wolf Mountain. (low and mid-levels should beware of the level 73 Big Wolf near Captain Bleemadge)
- Tip: Fly the glider to Feldip Hills to complete a medium Western Province Diary task.
Talk to Sanfew in Taverley, and he will agree to let the dwarf become an initiate.
Dwarven Mine & Gang Fight
Skills needed: 25 [boostable] to make a pot lid
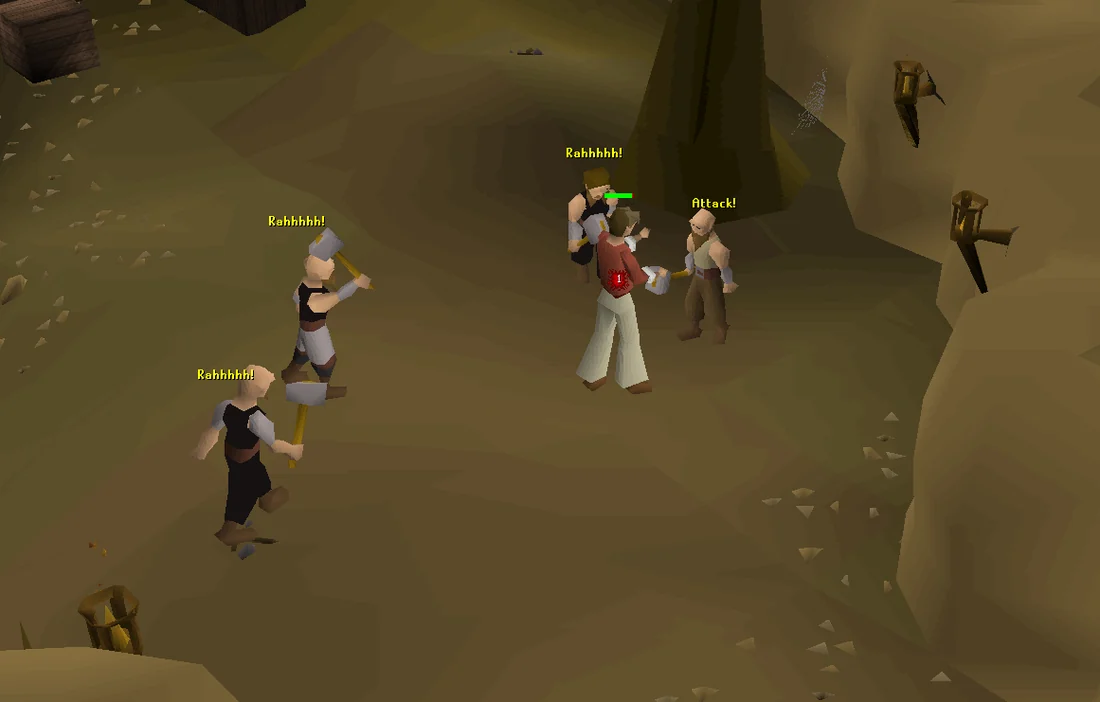
Talk to Hammerspike in the Dwarven Mine. Predictably, he has "changed his mind" about becoming a druid. Talk to him again and he'll have his gang members attack you; they must be fought to continue the quest. There are three gang members (levelled in the mid-to-high 40s) in the room who will attack you at once and altogether can deal a fair amount of damage if you have no armour equipped, so come prepared for this battle (bring a weapon to end the fight quickly). You can use Hammerspike as a safespot provided you have not walked through him. Once they're dealt with, speak to Hammerspike again, who will agree to stop harassing Tassie.
Go to Barbarian Village and talk to Tassie, who will give you some soft clay and teach you how to make pot lids. Use the soft clay on the wheel to make an unfired pot lid ( 25 ) and then use the unfired pot lid on the pottery oven. Pick up the pot in the Village helmet shop if you don't yet have one.
- Tip: Another pot lid is required for Swan Song, so you may consider making a second one.
Go to the Apothecary in Varrock, and give him the pot and pot lid in return for the salts.
Go back to Horvik the Varrock blacksmith, and give him the breathing salts and herbal tincture, then talk to him again to replace the pigeon cages with chicken cages.
Go back to Seth Groats (his farm is on the east side of the River Lum) and give him the chicken cages.
Go to the H.A.M. headquarters, and tell Johanhus in the south-eastern-most room that you've managed to swing that chicken deal; he will agree to release Jimmy.
Go to Draynor Village, and talk with Aggie the witch, who will agree to help Brian.
Go to Port Sarim, and Brian will give you the sharpened axe (after pulling your leg a bit).
Finally back on Karamja
Talk to any forester just south of the entrance to Shilo Village to receive some red mahogany logs in exchange for the sharpened axe.
Speak with Yanni in Shilo Village to complete the quest.
Congratulations, quest complete!
- Note: You must use both rewarded lamps before the quest will be officially completed, allowing the player to start King's Ransom and Swan Song, and marking the quest as green in the quests list. Dropping the lamps will require the player to recover them from Yanni and use them before the sequel quests can be started. Whether this is by design or a bug is unclear.
Quick checklist 72 instructions
Use this when you already know the route. The full walkthrough above includes explanations and diagrams.
Agreeing to the favours
Talk to Yanni Salika in Shilo Village (north of the bridge at the quest icon).
Say: Is there anything else interesting to do around here? → Ok, see you in a tick! → Il'l get going then!
If mining your own gems, do this now at the Shilo Village Mine.
Talk to a Jungle forester south of Shilo at the tree line (make sure to have 1 free inventory space to receive blunt axe).
Say: I need to talk to you about red mahogany. → Ok, I'll take your axe to get it sharpened.
Travel tip: Use the minigames teleport to Pest Control, then leave by talking to the Squire to the north and you'll be at Port Sarim. Or you Can use the Rat Pits teleport to Port Sarim, if you have completed Rat Catchers.
Talk to Brian in the Port Sarim axe shop.
Say: Do you sharpen axes? → Look, can you sharpen this cursed axe or what? → Ok, ok, I'll do it! I'll go and see Aggie.
Talk to Aggie in Draynor Village.
Say: Can I ask you about being a character witness? → Let me guess, you're going to ask me to do you a favour? → Oh, Ok, I'll see if I can find Jimmy.
Talk to Johanhus Ulsbrecht near the prison inside of the H.A.M. Hideout.
Say: I'm looking for Jimmy the Chisel. → And I suppose you need me to do you a favour? → Ok, Jimmy has to be worth more than a few scrawny chickens!
Talk to Fred the Farmer NE of the H.A.M. Hideout at the Sheep Shearer quest start point.
Say: I need to talk to you about Jimmy. (4 if you haven't done Sheep Shearer)
Prepare a bowl of hot water and take a pot in the Lumbridge Castle kitchen if needed. Gather 3 steel bars if not already carrying.
Talk to Seth Groats in the chicken farm east of River Lum.
Say: Oh, ok! I guess it's not that much further to Varrock!
Talk to Horvik at the armour shop in Varrock. Give him 3 steel bars.
Say: Hi, I need to talk to you about chicken cages! → Ok, I guess one good turn deserves another.
Talk to the Apothecary in Varrock south of the western bank.
Say: Talk about One Small Favour. → I guess I can go to Barbarian Village.
Travel tip: amulet of glory to Edgeville, run south or use a skull sceptre.
Talk to Tassie Slipcast in the Barbarian Village at the pottery icon on the minimap.
Say: Ok, I'll deal with Hammerspike!
Travel tip: teleport to the Mining Guild using a skills necklace.
Talk to Hammerspike Stoutbeard in the most western portion of the Dwarven Mines (SW of the Ice Mountain entrance).
Say: Oh, come on...do something nice for Tassie. → Have you always been a gangster? → Ok, another favour...I think I can manage that.
Gather one harralander, two guam leaves, and one marrentill.
Travel tip: If you have 10 Construction you can use Taverley teleport. If you're an ironman without redirect scrolls and have completed Enlightened Journey, ring of dueling to Castle Wars and take the Balloon Transport System to Taverley
Pick up the cup of tea from the house north of Sanfew, then drink the tea to obtain an empty cup, if you haven't got one already.
Talk to Sanfew on the top floor of the Taverley herblore shop about initiates.
Say: Are you taking any new initiates? → Do you accept dwarves? → A dwarf I know wants to become an initiate. → Yep, it's a deal. (2-2-3-1 if you have completed Eadgar's Ruse)
Add your bowl of hot water to a teacup. Add a harralander, 2 guam leaves, and a marrentill. The empty bowl can be dropped afterwards.
Travel tip: Ring of dueling to Al Kharid, then use the gnome glider to White Wolf Mountain.
Talk to Captain Bleemadge on top of White Wolf Mountain at the gnome glider icon on the minimap.
Say: I have a special tea here for you from Sanfew! → Ok, I'll go and get you some T.R.A.S.H.
Talk to Arhein on the Catherby docks south of the bank.
Say: I need to talk T.R.A.S.H to you. → Yes, Ok, I'll do it!
Talk to Phantuwti Fanstuwi Farsight in the building north of the Seers' chapel.
Say: Hi, can you give me a weather forecast? → What can I do to help? → Yes, Ok, I'll do it.
Travel tip: teleport to the Fishing Guild using a skills necklace.
Enter the Goblin Cave south-east of the Fishing Guild. Go to the most NE room. Right-click and search the sculpture.
Travel tip: Ardougne Teleport
Talk to Wizard Cromperty in NE Ardougne at the transportation icon.
Say: I need to talk to you about a girl stuck in some rock! → Oh! Ok, one more 'small favour' isn't going to kill me...I hope! ( → Chat. → I need to talk to you about a girl stuck in some rock! → Oh! Ok, one more 'small favour' isn't going to kill me...I hope! if you have completed the Ardougne Medium Diary)
You can take the hammer and chisel south of Cromperty if you didn't bring your own.
Travel tip: Fishing Trawler Minigame Teleport
Talk to Tindel Marchant on the Port Khazard south dock.
Say: Ask about iron oxide. → Ok, I'll do it!
Bring your cut gems, two of each: opal, jade, sapphire, and red topaz (can be mined with 40 Mining at Shilo Village) if you have them, otherwise, bring some gold in case you crush a gem in the upcoming step.
Travel tip: fairy ring teleport (AKS) or ring of dueling to Castle Wars and walk east
Talk to Rantz in the eastern Feldip Hills at the quest icon on the minimap.
Say: I need to talk to you about a mattress. → Can you fill this mattress with feathers? → Ok, I'll see what I can do.
Talk to Gnormadium Avlafrim west of Rantz.
Say: Rantz said I should help you finish this project. → Yes, I'll take a look at them. (at the gnome glider icon on the minimap)
Search each landing light, cut the gem, and put the cut gem back. If you crush a gem, the gnome will sell you up to 2 new ones for 500 coins.
Completing the favours
Talk to Gnormadium Avlafrim.
Say: I've fixed all the lights!
Talk to Rantz.
Say: Ok, I've helped that Gnome, he shouldn't bother you anymore.
Travel Tip: Watchtower teleport run north-east. Monastery Teleport via Ardougne cloak then south-east or use Port Khazard Teleport from Lunar Spellbook, or use the minigame teleport to Fishing Trawler or fairy ring DJP and run south
Talk to Tindel Marchant.
Say: I have the mattress.
Talk to Wizard Cromperty in Ardougne.
Say: I have that iron oxide you asked for! ( → Chat. → I have that iron oxide you asked for! if you have completed the Ardougne Medium Diary)
Take 5 pigeon cages (south of the north Ardougne bank) if needed, and get ready to fight Slagilith.
Return to the fishing guild cave, stand in front of the sculpture and read the animate rock scroll.
Kill the level 92 Slagilith.
67% damage reduction when pickaxe not equipped, weak to crush attacks and magic. Combat spells will deal full damage as long as a pickaxe is equipped. Can be safespotted.
Read the scroll again to free Petra. Make sure you finish the dialogue with her, or else you won't be able to make progress.
Talk to Phantuwti Fanstuwi Farsight in Seers' Village.
Say: I've released Petra, she should have returned. → I'll run through you if you don't give me that weather report. → Why can't you get a clear picture? → Which special Seers tools do you mean? → You're talking in riddles, just give me a straight answer! → What do you mean, 'special combination of items'?
Climb to the roof of his house search the weather vane, use a hammer on it and search it again for 3 parts.
Use each part on an anvil while holding a bronze, iron, and steel bar. There is an anvil north of his house.
Put each part back on the vane.
Talk to Phantuwti Fanstuwi Farsight.
Say: I've fixed the weather vane!
Talk to Arhein in Catherby.
Say: I have the weather report for you.
Talk to Captain Bleemadge on White Wolf Mountain.
Say: Hey there, did you get your T.R.A.S.H?
Talk to Sanfew in Taverley.
Say: Hi there, the Gnome Pilot has agreed to take you to see the ogres! ( → Hi there, the Gnome Pilot has agreed to take you to see the ogres!) if you have completed Eadgar's Ruse)
Travel Tip: Use a skills necklace to teleport to the Mining Guild or use the combat bracelet to teleport to the Edgeville Monastery
Gather combat gear and a weapon for killing Hammerspike's gangsters (Combat levels 44, 48, and 49)
Go and talk to Hammerspike Stoutbeard in the Dwarven Mine.
Kill his gang members, then talk to him again.
Talk to Tassie Slipcast in Barbarian Village. She will give you clay. Spin it into a pot lid, then fire the pot lid in the pottery oven.
Use the pot lid on an empty pot. This is found in the house to the north.
Talk to the Apothecary with the pot lid and a pot.
Say: Talk about One Small Favour. ( → Talk about One Small Favour) if you have completed A Tail of Two Cats)
Bring 5 pigeon cages for the next step.
Talk to Horvik in the Varrock Armour shop.
Say: I have the tincture and breathing salts.
Talk to Horvik again.
Say: I have the five pigeon cages you asked for!
Talk to Seth Groats at the Lumbridge chicken farm.
Talk to Johanhus in the H.A.M. camp.
Say: You're in luck, I managed to swing that chicken deal for you.
Talk to Aggie in Draynor.
Say: Good news! Jimmy has been released!
Talk to Brian in Port Sarim.
Say: I've returned with good news.
Talk to a Jungle forester south of Shilo Village.
Say: Good news, I have your sharpened axe!
Talk to Yanni in Shilo Village, wait for the dialogue to finish.
Say: Here's the red mahogany you asked for.
Congratulations, quest complete!
QUEST COMPLETE
Rewards
- Two experience lamps giving 10,000 experience to any skill of your choice. Skill must be at least level 30
- A steel key ring
- The ability to make and drink Guthix rest tea
- The ability to craft pot lids
- Access to the gnome glider route to the Feldip Hills
- Slagilith accessible in the Nightmare Zone
OSRS WIKI CONTRIBUTORS
Sources & credits
Walkthrough text and preparation lists are adapted from Old School RuneScape Wiki contributors under CC BY-NC-SA 3.0. Game imagery © Jagex Ltd; individual image credits are available from their captions. This page is fan-made and not affiliated with Jagex.
- One Small Favour →full guide · revision 15292287
- One Small Favour/Quick guide →quick guide · revision 15158371
KEEP QUESTING