Despite the high cost to Train Prayer effectively, it is a very important skill due to what it provides in combat utility.
Many quests recommend 43 Prayer, so that all 3 protection prayers are available for use. Important skill milestones include Level 50 for completing all quests, Level 77 for unlocking all prayers and Level 85 for completing all Achievement Diaries. A higher Prayer level also allows the player to restore more prayer points per dose of prayer potion/super restore/sanfew serum.
Starting off
Early levels can be skipped by completing quests that give Prayer experience.
Completing The Restless Ghost, Priest in Peril, Recruitment Drive, and Holy Grail will grant a total of 14,531 Prayer experience, which will get the player from level 1 to 30. Spirits of the Elid has more requirements, but gives another 8,000 Prayer experience.
Active training
Cremating urium remains
Cremating urium remains only rewards 35,000 Prayer experience per hour (or up to to 57,000 Prayer experience per hour with Hard Morytania Diary and max efficiency), but it is the fastest way to obtain the zealot's robes. The robes provide a 1.25% chance per piece to prevent various remains from being consumed whilst training Prayer – totalling 5% with the full set equipped. Given that most Prayer training methods are relatively expensive, the zealot's robes can be beneficial to obtain early.
At an average cost of 8 gp/xp, 1 million Prayer experience would normally cost 8,000,000 and the zealot's robes would reduce that amount by 400,000.
On average, 512 gold keys are needed to obtain the full zealot's set, which calls for cremating approximately 648 urium remains at level 95 Firemaking (or 3,273 fiyr remains at level 80 Firemaking). Cremating 648 urium remains would cost 8,757,720 coins upfront and take approximately 2-3 hours. The rewards from cremating the remains typically make this a profitable activity in addition to earning the full set of zealot's robes.
Offering bones at a gilded altar
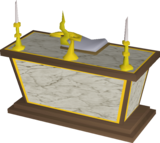
The fastest way to train Prayer is to offer bones at a gilded altar in a player-owned house. When both incense burners are lit, the altar gives 350% experience per bone when a bone is offered at it. For example, burying a dragon bone gives 72 Prayer experience, but using it on the gilded altar with two incense burners lit would give 252 experience. While this method is the fastest way to train Prayer, it is also very expensive. Players who seek to save money are advised to offer bones at the Chaos altar in the Wilderness instead, as this is only slightly slower but offers twice as much experience per bone when compared to the gilded altar.
Building a gilded altar requires level 75 Construction, which can be boosted. The tier of incense burner does not matter, as all three types (oak, mahogany, and marble) yield the same experience bonus and remain lit for the same amount of time. Lighting an incense burner requires level 30 Firemaking and a marrentill herb, and both incense burners must be lit for the highest experience bonus. It is also recommended to have level 45 Magic for Camelot Teleport and Teleport to House.
 | | | |
| | | |
| | | |
| | | |
| | |  |
|  | |  2000 2000 |
Use the bank chest near Camelot Castle in a PvP world when offering bones. It is the closest one to a teleport and within a safe area from player killers. Equip a dust battlestaff, and keep a tinderbox and law runes in the inventory. Withdraw 24 bones and two marrentills, teleport to the house, light the incense burners, and offer the bones at the gilded altar. Use each bone manually at the altar to speed up the process. Teleport back to Camelot and repeat.
Players who do not have the Construction level to build a gilded altar can use the altar of a house party host for free. Ironmen cannot use this method as they are unable to access friend POHs. The official worlds for hosted gilded altars are 330 (US East), 465 (Germany) and 512 (UK) at the Rimmington house portal. Take noted bones and unnote them at Phials located in the Rimmington General Store store for 5 coins each.
Experience rates vary depending on the type of bone used and performance. With good banking and accurate clicks, players can offer 2,550 bones per hour when manually using the bones on the altar. This equates to around 1,340,000 experience per hour when using superior dragon bones, or 643,000 experience per hour when using dragon bones. The rates can be increased up to 3,500 bones per hour if using alternative accounts to light the incense burners and bringing bones from the bank, or even higher if hiring runners. If the player is not manually using the bones on the altar, only up to 1,070 bones per hour can be offered.
More information about experience rates and costs can be seen below. Currently, offering superior dragon bones costs 37.25 coins per experience, and dragon bones 14.82 coins per experience.
Offering blessed bone shards to the libation bowl
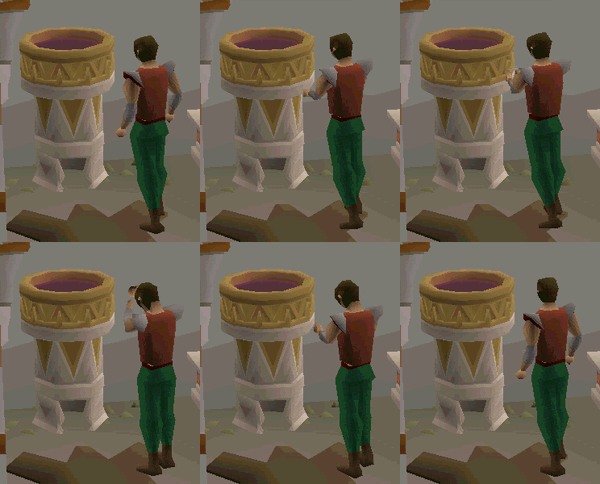
Requiring level 30 Prayer, offering blessed bone shards to the libation bowl within the Teomat is slightly slower, but offers more experience per bone compared to the gilded altar.
Fill the bowl with either jugs of blessed wine or jugs of blessed sunfire wine, then sacrifice blessed bone shards as an offering for either 5 or 6 Prayer experience per shard. One jug of blessed wine fills the libation bowl enough for 400 blessed bone shards to be sacrificed in total. Each offering drains two Prayer points; players can recharge their prayer at the Shrine of Ralos in the southern building.
Up to 100 blessed bone shards can be sacrificed per action, for a total of either 500 or 600 Prayer experience. Sacrificing happens automatically (4 ticks per action) so long as the player has remaining jugs of blessed wine, blessed bone shards, and Prayer points. Sacrificing can also be sped up (1 tick per action) by clicking manually.
With a full inventory of 27 jugs of blessed sunfire wine, a player could sacrifice up to 10,800 bone shards per inventory, awarding 64,800 Prayer experience in only 65 seconds of sacrificing. Of course, this would also drain 216 Prayer points, so a few trips would need to be made to restore Prayer points at the Shrine of Ralos nearby.
The zealot's robes do have a chance to save sacrificed blessed bone shards, and can trigger separately for each individual shard (rather than per sacrifice of 100). They will not save "charges" of the filled libation bowl, however.
Obtaining shards

The fastest way to obtain blessed bone shards is to bless bones at the exposed altar nearby, then break them down with a chisel; the amount of shards received is dependent on the type of bone blessed. Virilis at the bottom of the altar will un-note bones for 10 gp per item.
Bones are broken down automatically (4 ticks per action). This can be sped up (0 ticks per action) by using the chisel on blessed bones manually. With active effort, around 4,000 bones can be un-noted, blessed, and broken down per hour; otherwise 1,000 bones can be broken down automatically.
Aside from monster remains, there are alternative ways of obtaining blessed bone shards. For example, mining Calcified rocks in the Cam Torum mine is a relatively AFK method of receiving bone shards; around 2,200 shards can be banked per hour (including trips to break down calcified deposits), netting around 11,000 to 13,200 banked Prayer XP per hour. With optimal gear, levels and focus, upwards of 20,000 banked Prayer XP per hour can be obtained this way.
Obtaining blessed wine
The Culinaromancer's Chest sells both jugs and grapes and has a nearby sink for filling the jug, making it an ideal location for creating jugs of wine. They may also be purchased, with the closest shop to a bank being Sunlight's Sanctum in Aldarin which offers an unlimited supply.
Jugs of wine must be blessed at the exposed altar nearby into jugs of blessed wine. Alternatively, two sunfire splinters can be used on a jug of wine first to convert it into a jug of sunfire wine, which becomes a jug of blessed sunfire wine when brought to the exposed altar and grants 20% extra Prayer experience per shard.
With active effort, adding sunfire splinters to around 6,000 wines per hour can be expected. Automatic creation of sunfire wine takes 2.4 seconds each, so 1,500 wines per hour would be the theoretical limit.
As blessed wine cannot be banked, it is recommended that players only bring and bless wines at the exposed altar in proportion to the amount of shards they have.
General strategy
 |  |  | |
| File:Pendant of ates.png |  |  | |
| | | |
| | | |
| | | |
| | | |
| | | |
- Break down the desired amount of bones into blessed bone shards.
- Bring a chisel and noted bones to Virilis at the Teomat, who charges 10 coins for each bone un-noted.
- Bless the bones at the exposed altar.
- Break the bones down into blessed bone shards. You can substantially speed this by repeatedly using the chisel on the bones. If you do not want to spam click, you can still automatically process them at double speed by clicking Break-down on one bone (NOT the first bone in inventory), and then Useing a chisel on another within the same tick.
- Run back to Virilis and repeat.
- Offer the blessed bone shards to the libation bowl.
- Bring your blessed bone shards and a full inventory of (sunfire) wine to the Teomat. Optional: Make jugs of sunfire wine while running by using sunfire splinters on a pestle and mortar with the wines present in your inventory. This process can also be sped up by using the sunfire splinters on the pestle and mortar repeatedly.
- Bless the wines at the exposed altar.
- Sacrifice at the libation bowl. You can repeatedly click the libation bowl to perform sacrifices faster.
- Restore prayer as needed at the Shrine of Ralos. Optional: Use prayer potions or a Falador shield for higher efficiency.
- Bank and repeat. The quickest way is to teleport to a bank using an equipped item such as a ring of dueling, then returning to Ralos's Rise using a pendant of ates.
Restoring stamina
For extended Prayer training sessions, players may need to restore stamina occasionally. An easy way to bank without any additional items is to use the quetzal transport at the Teomat to Quetzacalli Gorge. Another method that does not take up an inventory slot involves equipping a ring of dueling to teleport to Fortis Colosseum where there is both a bank and a quetzal nearby for fast transport back to the Teomat; this requires Hero status in the Colosseum. Alternative methods of restoring run energy without taking up an inventory space include a Construction cape (provided players have a Revitalisation pool in their home), a Desert amulet 4 to teleport to the Elidinis Statuette in Nardah, or drinking a stamina potion at the bank.
The Teomat has a list of other methods of efficient transportation after banking.
Experience rates
As the whole process of gaining experience is quite complex, the experience rates below are only estimates.
For a comparison of experience rates and cost across different Prayer training methods, see further below.
By using existing shards
As prayer points are drained while sacrificing, recharging prayer periodically is required. The player's prayer level determines how many recharge trips are required to use up one inventory of wine. Recharging at the nearby altar and returning to the bowl takes ~25 seconds. Assuming that replenishing supplies (banking for wine, blessing it, and recharging prayer) takes around 65 seconds, it is not efficient to do another prayer recharge run if less than 40% of one prayer bar worth of wine is left - it is more efficient to bank.
| Approximate XP/h | ||||
|---|---|---|---|---|
| Prayer level
range |
Optimal prayer
recharge trips |
Seconds per inventory
(recharging at Shrine of Ralos) |
Jug of blessed wine | Jug of sunfire wine |
| 30-32 | 7 | ~277 | ~670,000 | ~809,000 |
| 34-38 | 6 | ~252 | ~740,000 | ~889,000 |
| 40-46 | 5 | ~227 | ~820,000 | ~980,000 |
| 48-60 | 4 | ~202 | ~923,000 | ~1,100,000 |
| 62-86 | 3 | ~172 | ~1,050,000 | ~1,124,000 |
| 88-99 | 2 | ~147 | ~1,110,000 - 1,118,000 | ~1,320,000 - 1,420,000 |
Prayer restoration is a major component of the entire cycle time; by using prayer potions there is no need to leave the bowl and even higher rates can be attained. Supposing Sunfire splinters are losslessly added to Jugs of wine during the run from the Quetzal to the Exposed altar, with an inventory consisting of a stack of Sunfire splinters, a stack of Blessed bone shards, a Pestle and mortar, 184 Prayer points worth of potions (Above level 64 Prayer, 2 Prayer potions will suffice, from level 56 Prayer until 64, 2 Super restores will also suffice) and the remaining 23 inventory slots filled with Jugs of wine, an optimal run takes approximately 200 ticks (2 minutes); At this rate up to 1,656,000 XP/h could be achieved. Pre-preparing the Jugs of blessed sunfire wine or taking advantage of other accounts using Moonlight moth mixes nearby the Libation pool to save two inventory spaces allows for 25 Jugs of wine per run, equating to 208 ticks (2 minutes and 4.8 seconds) per round trip and approximately 1,730,000 XP/h. Through the use of alt accounts to use Moonlight moth mixes and supply additional Jugs of wine, running back and forth between the Libation pool and the Exposed altar, a full round of 25 Jugs of blessed sunfire wine would take an optimal 174 ticks (1 minute and 44.4 seconds) and would equate to approximately 2,069,000 XP/h.
By preparing sunfire wines
Assuming active effort is used for 5500 wines per hour, creation of sunfire wines adds around 16 seconds to the total trip time. That means trip length is 5-10% longer, but considering it adds 20% XP per shard, it is worthwhile in terms of efficiency.
By making shards
If the player produces their own shards from bones, the experience rates drop depending on the bones used. Assuming 4000 bones are processed per hour and 25 wines per inventory (10,000 shards) are used, some example time penalties can be found in the table below. The table shows that with dragon bones, the shard preparation time is quite similar to the time taken to sacrifice shards with a full inventory of wines at levels 62-99 when including sunfire wine preparation - meaning that for the aforementioned setup, all-in-all XP rate is about half of what is shown in the table above.
For example, 4000 dragon bones provide 232,000 shards, taking 155 seconds per 10,000 shards. Since 10,000 shards take 147 seconds to sacrifice at level 88+ Prayer, making your own shards roughly doubles the amount of time spent sacrificing (155 seconds added to the original 147 seconds).
| Item | Shards per hour | Seconds to prepare
inventory worth of shards |
|---|---|---|
| Blessed babydragon bones | ~96,000 | ~375 |
| Blessed dragon bones | ~232,000 | ~155 |
| Blessed lava dragon bones | ~272,000 | ~132 |
| Blessed hydra bones | ~372,000 | ~97 |
| Blessed dagannoth bones | ~400,000 | ~90 |
| Blessed superior dragon bones | ~484,000 | ~74 |
For a full comparison of shards per bone and cost per experience, see blessed bone shards.
Offering bones at the Chaos Temple
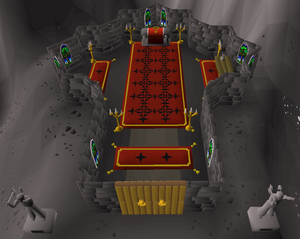
Offering bones at the altar within the Wilderness' Chaos Temple is a slightly slower but much cheaper alternative to the gilded altar in a POH. As the temple is located in a multi-combat area within level 38 Wilderness and is a popular spot for player killers, there is risk involved in this activity.
The altar grants the same 350% experience per bone as the gilded altar (with both burners lit), but has an additional 50% chance for each offering to not be consumed, resulting in double the effective experience per inventory compared to the gilded altar.
Players may take noted bones with them and un-note them at the Elder Chaos druid NPC just outside of the Southern wall of the temple for 50 coins per note. While convenient, this increases the amount the player is risking to lose to player killers. Players who wish to minimise risk should take only an inventory of unnoted bones at a time and suicide (see planning to die below) to bank for more bones.
The fastest way to get to the altar is to use Ghorrock Teleport (or the respective house portal or the teleport tablet) and run south.
- Alternatively, players who have an Ancient Obelisk in their player-owned house and have completed the hard Wilderness Diary can use the reward to teleport to the obelisk at level 44 Wilderness and then run south.
- Another option is to use Cemetery Teleport on the Arceuus spellbook (or the respective house portal) and run north. This is a slightly slower method, and it will put the player in Level-31 Wilderness in range of aggressive NPC's so logging out if a player-killer is waiting for you is usually not an option, and players' must run south to level-30 wilderness before they can attempt to teleport away if not tele-blocked. However, this method has lower requirements than the previous two.
- Using the burning amulet to the Lava Maze entrance and running south-west has no quest or skill requirements, but is only recommended for players using the suicide strategy (see planning to die below). The Lava Maze entrance is often crowded by player killers due to its proximity to Revenant Caves, King Black Dragon Lair, and Lava Dragons.
Experience rates vary depending on the type of bones used and the number of player killers. When bringing noted bones and manually using the bones on the altar, players can gain up to 1,800,000 experience per hour with superior dragon bones or 860,000 experience per hour with dragon bones. Higher rates can be achieved by using runners. If suiciding for every inventory of bones, players can offer up to around 2,000 bones per hour. This would equate to 1,050,000 experience per hour with superior dragon bones and 500,000 experience per hour with dragon bones.
Strategies
As the altar can also be used to recharge Prayer points, players can keep Protect from Magic and Augury prayers up while offering bones and pray at the altar when needed.
Planning to die
 |  | | |
| | | |
| | | |
| | | |
| | | |
| | | |
| | | |
Players who wish to minimise their risk can travel to the altar from the bank for every inventory of bones, and suicide to get to the bank faster. While this is much less risky than bringing noted bones to the altar, it is also slower.
For this method, it is strongly recommended to have the respawn point in Ferox Enclave or Edgeville. They are the closest respawn points to a bank, but also cost 5,000,000 coins each to unlock. Alternatively, players can use PvP worlds, which have a bank chest right next to the respawn points.
This method goes as follows:
- Take bones, a teleport to the Wilderness, and optionally (recommended if you have high HP) a locator orb, dwarven rock cake, or enchanted symbol from the bank.
- Teleport to the Wilderness, and run to the Chaos Temple. Offer the bones at the altar.
- Lower Hitpoints to 1 then suicide to the Wine of Zamorak on the table in the chaos altar. Alternatively, let the Chaos Fanatic kill you.
- Run from the respawn point to the nearest bank to repeat the process.
Players can optionally wear a piece of defensive equipment, such as the Dinh's bulwark. This way, players have a better chance of surviving player killers long enough so they can use up all their bones before dying.
Alternatively, players can wear Zealot's robes when using the suicide strategy. The bone-saving effect of the altar stacks with the Zealot's robes, and wearing them would give slightly more value out of the bones. The Zealot's robes are protected over the bones on death, but the Protect Item prayer must be used to protect all 4 pieces upon death.
Logging out
If a player wishes to avoid encounters with player killers, an option is to keep the logout menu open with the cursor placed over the logout button. Consider using the ::renderself chat interface setting to hide your character model on your own client, allowing you to see anyone who logs in beneath you. With careful attention, the player can quickly log out before being attacked. One disadvantage to this method is that it offers lower XP/hr than manually using the bones on the altar.
Bringing noted bones
Bringing noted bones is riskier, but a lot faster than using the suicide method. However, it is only viable for either high-level or very low-level players.
The Elder Chaos Druid located outside the Chaos Altar unnotes bones for 50 coins each.
Very low-level players (combat level 3–20) are often too low-levelled to be targeted by player killers. Such players can usually bring higher amounts of noted bones with lower risk. However, some low-level combat pure player killers can sometimes be found at the altar, so some caution should still be given.
High-level players should wear good defensive gear while 3- or 4-iteming more expensive armour pieces, and bring some Saradomin brews along with sanfew serums or super restores to have a higher chance of escaping player killers. Players will also have very limited space for supplies, as it is best to have as much inventory space as possible for the bones.
Gear setups can vary depending on how much money the player has available. It is generally best prioritise Magic defence while having decent defensive bonuses against Melee and Ranged attacks. When choosing protected items, the fortified Masori body or the Armadyl chestplate, a tank shield such as elysian/spectral spirit shield or dinh's bulwark, and staff of the dead (if using an off-hand shield) are considered the best options. The rest of the equipment should consist of fairly cheap or easily replaceable items.
If the player is confident using Protect Item, the serpentine helm or the fortified Masori chaps (or the Armadyl chainskirt) can be brought as the extra item. It is still possible to get smited, so it may be a good idea to keep the smite risk reasonable. In a certain death situation prioritise having enough Prayer points to keep Protect Item active.
Smite risks for certain items:
- Serpentine helm: 3,213,180
- Staff of the dead: Lua error: .
- Slayer helmet (i): 1,085,736
- Karil's leatherskirt: 383,226
Generally it is best to wear a phoenix necklace to reduce the chance of getting combo-ed out along with a ring of wealth, which offers a teleport out of the Wilderness while not taking up inventory space. With certain setups it may be better to bring a ring of suffering (i) and an amulet of glory for extra defence, although the player will miss out on the phoenix necklace's healing effect.
Using the staff of the dead with a powerful off-hand shield (such as the elysian or spectral spirit shield) offers the highest escaping potential. Having a very high Magic defence helps at not getting frozen inside the multi-combat area, thereby significantly increasing the chances of surviving. Players should keep the risk at a reasonable level, as it is still fairly likely to die to a larger team of player killers. Choose 3 pieces of equipment (4 if confident using Protect Item) that will be protected on death and some low-value equipment that you do not mind risking.
| Slot | Item (most effective → least effective) | |||
|---|---|---|---|---|
 |  Serpentine helm Serpentine helm |  Slayer helmet (i) Slayer helmet (i) | File:Helm of neitiznot.pngHelm of neitiznot |  Bearhead Bearhead |
 |  Phoenix necklace Phoenix necklace |  Amulet of glory Amulet of glory | N/A | N/A |
 |  Cape of Accomplishment Cape of Accomplishment |  God capes God capes | File:Cape of legends.pngCape of legends | N/A |
 |  Masori body (f) Masori body (f) |  Armadyl chestplate Armadyl chestplate |  Karil's leathertop Karil's leathertop |  Black d'hide body Black d'hide body |
 |  Masori chaps (f) Masori chaps (f) |  Armadyl chainskirt Armadyl chainskirt |  Karil's leatherskirt Karil's leatherskirt |  Black d'hide chaps Black d'hide chaps |
 | File:Staff of the dead.pngStaff of the dead / File:Staff of light.pngStaff of light |  Ancient staff / File:Trident of the seas.pngTrident of the seas Ancient staff / File:Trident of the seas.pngTrident of the seas |  Lunar staff Lunar staff |  Staff of water Staff of water |
 |  Elysian spirit shield Elysian spirit shield |  Spectral spirit shield Spectral spirit shield |  Dragonfire ward / Dragonfire ward /  Twisted buckler Twisted buckler |  Dragonfire shield Dragonfire shield |
 |  Rada's blessing 4 Rada's blessing 4 |  God blessing / God blessing /  Rada's blessing 3/2 Rada's blessing 3/2 | N/A | N/A |
 |  Confliction gauntlets Confliction gauntlets |  Black d'hide vambraces Black d'hide vambraces | N/A | N/A |
 |  Silly jester boots Silly jester boots |  Mystic boots Mystic boots |  Fremennik sea boots 4 Fremennik sea boots 4 | N/A |
 |  Ring of wealth [n 1] Ring of wealth [n 1] |  Ring of suffering (i) Ring of suffering (i) | N/A | N/A |
- ^ Ring of wealth is used to teleport out of the Wilderness, and it saves an inventory space when wearing a phoenix necklace.
 File:Staff of the dead.png |
The elysian spirit shield is the best option for overall tanking due to its damage reduction effect. However, the spectral spirit shield is much more affordable and arguably almost as good due to its considerably higher Magic defence bonus. Wearing the spectral spirit shield makes it a lot less likely to get frozen inside the multi-combat area, but should this happen, the elysian spirit shield offers much better survivability.
The staff of the dead has fairly high Magic defence and also offers a useful special attack, which halves the all Melee damage of your opponent(s) (all opponents that hit you in the time of the special attack) for one minute. A staff of light or staff of balance can also used instead as they have the exact same bonuses and special attack. Should the player not be able to use the staff of the dead, any other staff with high Magic defence bonus should be used instead.
Recommended skills
- 90+
 (75 required)
 - 90+
 (75 required)
  75
75  70
70  77 (Augury)
Inventory
| 500 | |  |  |
| | |  |
| | | |
| | | |
| | | |
| | | |
|  25000 25000 |  | |
- Noted bones
- Coins
- Teleport to house tablet or Burning amulet to get to the altar
- 1 stamina potion
- 4–6 Saradomin brews
- 2–3 blighted super restores
- If not wearing a serpentine helm, bring 2–3 sanfew serums instead for curing potential venom
- If sanfew serums are not available, bring a 2-dose anti-venom+ (optional)
- 1–2 blighted anglerfish or manta ray for combo healing (optional)
- Rest unnoted bones
This setup uses the Dinh's bulwark for Melee and Ranged defence and other equipment for Magic defence. It is usually more affordable than the previous setup and it offers higher Ranged and Melee defences, at the expense of some Magic defence. Players should keep the risk at a reasonable level, as it is still fairly likely to die to a larger team of player killers.
| Slot | Item (most effective → least effective) | |||
|---|---|---|---|---|
| Serpentine helm | Slayer helmet (i) | File:Helm of neitiznot.pngHelm of neitiznot | Bearhead |
| Phoenix necklace | Amulet of glory | N/A | N/A |
| Cape of Accomplishment | God capes | File:Cape of legends.pngCape of legends | N/A |
| Masori body (f) | Armadyl chestplate | Karil's leathertop | Black d'hide body |
| Masori chaps (f) | Armadyl chainskirt | Karil's leatherskirt | Black d'hide chaps |
|  Dinh's bulwark Dinh's bulwark | N/A | N/A | N/A |
| Rada's blessing 4 | God blessing / Rada's blessing 3/2 | N/A | N/A |
| Black d'hide vambraces | N/A | N/A | N/A |
| Silly jester boots | Mystic boots | Fremennik sea boots 4 | N/A |
| Ring of wealth [n 1] | Ring of suffering (i) | N/A | N/A |
- ^ Ring of wealth is used to teleport out of the Wilderness, and it saves an inventory space when wearing a phoenix necklace.
|
Recommended skills
- 90+ (75 required)
- 90+
- 75
- 70
- 77 (Augury)
Inventory
| 500 | | | |
| | | |
| | | |
| | | |
| | | |
| | | |
| 25000 | | |
- Noted bones
- Coins
- Teleport to house tablet or Burning amulet to get to the altar
- 1 stamina potion
- 4–6 Saradomin brews
- 2–3 blighted super restores
- If not wearing a serpentine helm, bring 2–3 sanfew serums instead for curing potential venom
- If sanfew serums are not available, bring a 2-dose anti-venom+ (optional)
- 1–2 blighted anglerfish or manta ray for combo healing (optional)
- Rest unnoted bones
Reanimating ensouled heads
Reanimating ensouled heads and killing the reanimated monsters near the Dark Altar is a relatively slow training method, but it requires less effort than manually offering bones at a gilded altar or the Chaos altar. This method is mainly recommended for players who wish to save money on Prayer training and do not wish to go to the Wilderness, as offering bones at the Chaos altar offers a lot faster experience and is usually comparable in terms of cost.
For this method, using fairy ring code CIS for faster access to the Dark Altar, and a fast access to fairy rings, such as the fairy ring in the POH, quest point cape, or using the Salve Graveyard Teleport. Having the rune pouch is strongly recommended to save inventory space. It is also recommended to buy the ensouled heads in advance, as most of them have a low trade volumes on the Grand Exchange.
Experience rates vary depending on the type of ensouled head used and combat stats. With high combat stats, players can reanimate up to 220 ensouled heads per hour. This equates to around 343,000 experience per hour when reanimating ensouled dragon heads. Higher rates can be achieved by using a cannon to kill the reanimated monsters faster, but this makes the method slightly more expensive. Players will also gain some passive combat and Magic experience from this method.
More information about experience rates and costs can be seen at the calculator page.
- Experience rates assume 220 reanimated monsters are killed per hour. Slightly higher rates can be achieved by using the dwarf multicannon to kill reanimated monsters faster.
- GP/XP includes the cost of the ensouled head and the runes required to cast the respective spell. It does not include the cost of supplies (such as super combat potions) or teleports.
| Level
|
Ensouled head | Required runes | Total cost | XP
|
XP/hr
|
GP/XP | |||
|---|---|---|---|---|---|---|---|---|---|
| Head | Price | Runes | Price | ||||||
| 16 |  |
Ensouled goblin head | 267 | 4 2 2
|
292 | 559 | 130 | 28,600 | −4.30 |
| 16 |  |
Ensouled monkey head | 569 | 4 2
|
292 | 861 | 182 | 40,040 | −4.73 |
| 16 |  |
Ensouled imp head | 1,198 | 4 2
|
292 | 1,490 | 286 | 62,920 | −5.21 |
| 16 |  |
Ensouled minotaur head | 646 | 4 2
|
292 | 938 | 364 | 80,080 | −2.58 |
| 16 |  |
Ensouled scorpion head | 585 | 4 2
|
292 | 877 | 454 | 99,880 | −1.93 |
| 16 |  |
Ensouled bear head | 619 | 4 2
|
292 | 911 | 480 | 105,600 | −1.90 |
| 16 |  |
Ensouled unicorn head | 803 | 4 2
|
292 | 1,095 | 494 | 108,680 | −2.22 |
| 41 |  |
Ensouled dog head | 1,664 | 4 3 1
|
819 | 2,483 | 520 | 114,400 | −4.51 |
| 41 |  |
Ensouled chaos druid head | 350 | 4 3 1
|
819 | 1,169 | 584 | 128,480 | −1.77 |
| 41 |  |
Ensouled giant head | 525 | 4 3 1
|
819 | 1,344 | 650 | 143,000 | −1.86 |
| 41 |  |
Ensouled ogre head | 832 | 4 3 1
|
819 | 1,651 | 716 | 157,520 | −2.12 |
| 41 |  |
Ensouled elf head | 1,141 | 4 3 1
|
819 | 1,960 | 754 | 165,880 | −2.42 |
| 41 |  |
Ensouled troll head | 1,103 | 4 3 1
|
819 | 1,922 | 780 | 171,600 | −2.29 |
| 41 |  |
Ensouled horror head | 1,309 | 4 3 1
|
819 | 2,128 | 832 | 183,040 | −2.39 |
| 72 |  |
Ensouled kalphite head | 880 | 1 3 2 3 2
|
1,524 | 2,404 | 884 | 194,480 | −2.72 |
| 72 |  |
Ensouled dagannoth head | 1,275 | 1 3 2
|
1,524 | 2,799 | 936 | 205,920 | −2.99 |
| 72 |  |
Ensouled bloodveld head | 2,282 | 1 3 2
|
1,524 | 3,806 | 1040 | 228,800 | −3.66 |
| 72 |  |
Ensouled tzhaar head | 2,409 | 1 3 2
|
1,524 | 3,933 | 1104 | 242,880 | −3.56 |
| 72 |  |
Ensouled demon head | 3,192 | 1 3 2
|
1,524 | 4,716 | 1170 | 257,400 | −4.03 |
| 72 |  |
Ensouled hellhound head | 3,979 | 1 3 2
|
1,524 | 5,503 | 1200 | 264,000 | −4.70 |
| 90 |  |
Ensouled aviansie head | 2,646 | 2 4 4
|
2,776 | 5,422 | 1234 | 271,480 | −4.39 |
| 90 |  |
Ensouled abyssal head | 3,118 | 2 4 4
|
2,776 | 5,894 | 1300 | 286,000 | −4.53 |
| 90 |  |
Ensouled dragon head | 6,216 | 2 4 4
|
2,776 | 8,992 | 1560 | 343,200 | −5.76 |
Offering spells
With the upgraded Arceuus spellbook from A Kingdom Divided, players can offer bones or demonic ashes from their inventory, offering simultaneous Magic experience.
Sinister Offering
Casting Sinister Offering requires level 92 Magic, one blood rune, and one wrath rune. Players must have level 70 Prayer in order to offer superior dragon bones via the spell.
| Bones | Bury XP | Spell XP | GP/XP | XP/Hr[n 1] | |
|---|---|---|---|---|---|
 |
Bones | 4.5 | 13.5 | −19.53 | 24,300 |
 |
Monkey bones | 5 | 15 | −34.58 | 27,000 |
 |
Bat bones | 5.3 | 15.9 | −43.38 | 28,620 |
 |
Big bones | 15 | 45 | −11.88 | 81,000 |
 |
Jogre bones | 15 | 45 | −26.37 | 81,000 |
 |
Zogre bones | 22.5 | 67.5 | −17.03 | 121,500 |
 |
Shaikahan bones | 25 | 75 | −106.58 | 135,000 |
 |
Babydragon bones | 30 | 90 | −13.45 | 162,000 |
 |
Wyrm bones | 50 | 150 | −16.92 | 270,000 |
 |
Strykewyrm bones | 60 | 180 | −18.38 | 324,000 |
|
Dragon bones | 72 | 216 | −18.32 | 388,800 |
 |
Wyvern bones | 72 | 216 | −17.93 | 388,800 |
 |
Drake bones | 80 | 240 | −19.07 | 432,000 |
 |
Fayrg bones | 84 | 252 | −20.24 | 453,600 |
 |
Lava dragon bones | 85 | 255 | −23.07 | 459,000 |
 |
Raurg bones | 96 | 288 | −26.15 | 518,400 |
 |
Frost dragon bones | 100 | 300 | −21.40 | 540,000 |
 |
Hydra bones | 110 | 330 | −24.01 | 594,000 |
 |
Dagannoth bones | 125 | 375 | −32.21 | 675,000 |
 |
Ourg bones | 140 | 420 | −109.89 | 756,000 |
|
Superior dragon bones | 150 | 450 | −43.95 | 810,000 |
- ^ Assuming 600 casts per hour on three bones, gaining 108,000 per hour.
Demonic Offering
Casting Demonic Offering requires level 84 Magic, one soul rune, and one wrath rune.
Since the three highest level Slayer masters assign at least 120 abyssal demons as a minimum, one can expect at least of 30,600 Prayer experience per task if casting the demonic offering spell on abyssal ashes, making that particular task a great passive training method for players who melee the monsters. Also, one may collect abyssal ashes from the floor in worlds where there is another player barraging, for a low intensity and cheap method.
| Ashes | XP | Spell XP | GP/XP | XP/hr[n 1]
| |
|---|---|---|---|---|---|
 |
Fiendish ashes | 10 | 30 | −9.82 | 54,000 |
 |
Vile ashes | 25 | 75 | −5.02 | 135,000 |
 |
Malicious ashes | 65 | 195 | −7.97 | 351,000 |
 |
Abyssal ashes | 85 | 255 | −8.98 | 459,000 |
 |
Infernal ashes | 110 | 330 | −11.83 | 594,000 |
- ^ Assumes 600 casts per hour on three ashes, awarding 105,000 per hour.
Offering bones at the Ectofuntus
Worshiping the Ectofuntus gives 400% the normal experience. Although this is the second-highest guaranteed per-bone prayer bonus in the game, this is much less than the 700% theoretical average experience at the Chaos Altar. This is due to the 50% chance of the Chaos Altar not consuming bones. The libation bowl will either match the 400% increase in xp per bone, or exceed it, depending on the bone sacrificed and whether or not sunfire wine is used.
The Ectofuntus is a less common method of training prayer due to it being much slower and not much cheaper than gilded altars, but it can be sped up considerably with the daily rewards provided by the Morytania Diaries.
Passive training
Passive training can be the cheapest Prayer training method, and take no additional time, especially when combined with Slayer training or in the Nightmare Zone or similar areas where players plan to stay for a long time without banking their drops.
Bonecrusher
With the bonecrusher or bonecrusher necklace, when charged with ecto-tokens, if the player kills a monster that drops bones, the bonecrusher will automatically crush them, granting the player half the Prayer experience they would have received from burying the bones themselves, or full amount of experience if the elite Morytania Diary is completed, and consuming one charge.
Ash sanctifier
With the ash sanctifier, when charged with death runes, if the player kills a monster that drops ashes, the sanctifier will automatically scatter them, granting the player half the Prayer experience they would have received from scattering the ashes themselves, or full amount of experience if the elite Kourend & Kebos Diary is completed, and consuming one charge.
Reanimating ensouled heads
Ensouled heads can be reanimated to passively train Prayer during Slayer tasks from monsters that drops them, such as Bloodvelds or Abyssal Demons. Reanimation spells can be directly cast on ensouled heads dropped on the ground from monsters as long as the player do not bank them. In addition, reanimated monsters counts toward Slayer tasks, with the exception of Reanimated dragons.
Ectoplasmator
With the ectoplasmator, if the player kills a spectral creature such as an aberrant spectre, the player receives Prayer experience equal to 20% of the monster's max health, rounded down. The ectoplasmator requires 40 Prayer, and it is a reward from the Soul Wars minigame for 250 Zeal Tokens. In addition, the ectoplasmator stacks with the bonecrusher when killing a spectral monster that also drops bones, like ankou.
Bird's eggs
Occasionally, while woodcutting or emptying Bird houses, a bird's nest containing red, green, or blue bird's eggs can be obtained. These can be offered to the shrine at the woodcutting guild for 100 prayer xp each, allowing some passive experience while training other skills. Offering to the shrine also gives a chance of obtaining pieces of the evil chicken outfit, making this method of interest to players who wish to fill the collection log.
Experience rates and cost
For a dynamic calculator with user inputs, see Calculator:Prayer.
Comparison between bone offering methods
The table below compares the three primary methods of Prayer training for each type of bone at a gilded altar with two burners lit, the Chaos altar, and shards at the libation bowl. It does not include burying bones or using the Ectofuntus; for those methods, see Calculator:Prayer/Bones.
- This table assumes you manually 'use' bones on altars/chisels for faster experience. This results in 2,550 bones/hour offered at a gilded altar, 2,000 bones/hour offered at the Chaos altar (costing only 1,000 bones/hour), and 1,700 bones/hour blessed + chiseled + offered at the libation bowl.
- Experience rates do not assume using alternative accounts for running bones and/or lighting burners. If using one, you can expect to achieve rates 20–25% higher at a gilded altar, 40–45% higher at the Chaos altar, and perhaps 30-35% higher at the libation bowl.
- GP/XP for the Chaos altar assumes effectively getting twice the experience per bone. It also includes the 50 coins unnoting fee per bone (which effectively only applies to half the bones), but does not include the cost of teleports, supplies and potential loss to player killers.
- XP/hour for the libation bowl assumes having level 62+ Prayer for 3 prayer recharges per inventory of wine. It is also based on the number of inventories of wine required by dragon bones; lower-tier bones will require fewer trips to the libation bowl due to producing fewer shards/hour, slightly increasing the XP/hour shown here; higher-tier bones will require more trips to the libation bowl, slightly reducing XP/hour shown here. See Calculator:Prayer/Blessed_Bone_Shards for a more precise breakdown with user inputs.
- GP/hour for the libation bowl assumes using sunfire splinters and paying Virilis to un-note bones.
| Item | XP/h (Gilded) | XP/h (Chaos) | XP/h (Shards) | GP/XP (Gilded) | GP/XP (Chaos) | GP/XP (Shards) | GP/h (Gilded) | GP/h (Chaos) | GP/h (Shards) | |
|---|---|---|---|---|---|---|---|---|---|---|
|
Bones | 40,162 | 31,500 | 40,800 | −2.55 | −2.86 | −2.40 | −102,000 | −90,000 | −97,784 |
 |
Wolf bones | 40,162 | 31,500 | N/A | −25.48 | −14.29 | N/A | −1,020,000 | −450,000 | N/A |
 |
Burnt bones | 40,162 | 31,500 | N/A | −25.67 | −14.38 | N/A | −1,027,650 | −453,000 | N/A |
|
Monkey bones | 44,625 | 35,000 | N/A | −16.86 | −9.86 | N/A | −752,250 | −345,000 | N/A |
|
Bat bones | 47,302 | 37,100 | 51,000 | −25.19 | −13.91 | −16.18 | −1,188,300 | −516,000 | −825,180 |
|
Big bones | 133,875 | 105,000 | 122,400 | −5.92 | −3.44 | −4.77 | −793,050 | −361,000 | −584,052 |
|
Jogre bones | 133,875 | 105,000 | N/A | −18.34 | −9.65 | N/A | −2,455,650 | −1,013,000 | N/A |
 |
Wyrmling bones | 187,425 | 147,000 | 214,200 | −7.78 | −4.23 | −4.93 | −1,458,600 | −622,000 | −1,056,516 |
|
Zogre bones | 200,812 | 157,500 | 183,600 | −11.77 | −6.20 | −8.98 | −2,361,300 | −976,000 | −1,648,728 |
|
Shaikahan bones | 223,125 | 175,000 | N/A | −88.80 | −44.69 | N/A | −19,813,500 | −7,820,000 | N/A |
|
Babydragon bones | 267,750 | 210,000 | 244,800 | −9.40 | −4.94 | −7.24 | −2,516,850 | −1,037,000 | −1,771,604 |
|
Wyrm bones | 446,250 | 350,000 | 428,400 | −13.22 | −6.75 | −9.54 | −5,900,700 | −2,364,000 | −4,085,032 |
|
Wyvern bones | 642,600 | 504,000 | 591,600 | −14.48 | −7.34 | −10.83 | −9,307,500 | −3,700,000 | −6,407,368 |
|
Dragon bones | 642,600 | 504,000 | 591,600 | −14.82 | −7.51 | −11.07 | −9,521,700 | −3,784,000 | −6,550,168 |
|
Drake bones | 714,000 | 560,000 | 683,400 | −15.55 | −7.86 | −11.17 | −11,100,150 | −4,403,000 | −7,631,232 |
|
Fayrg bones | 749,700 | 588,000 | 683,400 | −16.59 | −8.38 | −12.47 | −12,433,800 | −4,926,000 | −8,520,332 |
|
Lava dragon bones | 758,625 | 595,000 | 693,600 | −19.02 | −9.59 | −14.21 | −14,427,900 | −5,708,000 | −9,852,928 |
|
Raurg bones | 856,800 | 672,000 | 785,400 | −21.75 | −10.95 | −16.15 | −18,632,850 | −7,357,000 | −12,684,992 |
|
Frost dragon bones | 892,500 | 700,000 | 818,125 | −22.80 | −10.25 | −15.14 | −17,439,450 | −6,889,000 | −11,889,392 |
|
Hydra bones | 981,750 | 770,000 | 948,600 | −19.99 | −10.06 | −14.13 | −19,629,900 | −7,748,000 | −13,400,828 |
|
Dagannoth bones | 1,115,625 | 875,000 | 1,020,000 | −27.09 | −13.60 | −20.09 | −30,227,700 | −11,904,000 | −20,488,400 |
|
Ourg bones | 1,249,500 | 980,000 | 1,173,000 | −93.73 | −46.92 | −66.89 | −117,121,500 | −45,980,000 | −78,465,540 |
|
Superior dragon bones[n 1] | 1,338,750 | 1,050,000 | 1,234,200 | −37.25 | −18.67 | −27.26 | −49,862,700 | −19,604,000 | −33,645,516 |
- ^ Requires 70 Prayer to use.
Efficiency
Because most Prayer training methods are available to players regardless of Prayer level, a main differentiator between training methods and bone choice is cost (coins per experience) and speed (experience per hour).
Imagine a choice between two made-up bones:
- Small Bones cost 1,000 coins each and grant 100 XP when buried (10 coins per XP)
- Large Bones cost 4,000 coins each and grant 200 XP when buried (20 coins per XP)
If you can feasibly bury 2,500 bones per hour, that means:
- Small Bones provide 250,000 XP per hour.
- Large Bones provide 500,000 XP per hour.
At first glance, paying twice as much per XP in order to gain XP twice as fast may seem like a reasonable tradeoff. However, the final factor is actual time saved, also called efficiency. Imagine you'd like to train Prayer from level 60 to level 70, requiring a total of roughly 500,000 XP. To gain that much XP:
- Small Bones would take 2 hours and cost 5,000,000 coins.
- Large Bones would take 1 hour and cost 10,000,000 coins.
That means it costs 5,000,000 coins more to save 1 hour of time if you choose Large Bones instead of Small Bones in this made-up scenario. This would only ever be worthwhile if you can feasibly earn more than 5,000,000 coins per hour with your time, or simply prefer doing other activities enough to accept the cost associated with saving that time.
In other words, if you can earn 1,000,000 coins per hour doing some activity as your primary money-making method, then in order to afford training to level 70 Prayer:
- You would need to spend 5 hours making money if using Small Bones (5 + 2 = 7 hours total to 70 Prayer).
- You would need to spend 10 hours making money if using Large Bones (10 + 1 = 11 hours total to 70 Prayer).
Quests for Prayer experience
| Quest | Experience reward |
Prayer requirement |
Other requirements |
|---|---|---|---|
| Rag and Bone Man I | 500 | - | - |
| Making History | 1,000 | - | - |
| Recruitment Drive | 1,000 | - |  12 12
|
| The Restless Ghost | 1,125 | - | - |
| Priest in Peril | 1,406 | - | - |
| Mountain Daughter | 2,000 | - |  20 20
|
| Ghosts Ahoy | 2,400 | - | 25 ,  20 20
|
| Another Slice of H.A.M. | 3,000 | 25 |
15
|
| Rag and Bone Man II | 5,000 | - |  40 , 20 40 , 20
|
| The Great Brain Robbery | 6,000 | 50 |
 16 , 16 ,  30 30
|
| Rum Deal | 7,000 | 47 |
42 ,  50 , 50 ,  40 , 42 40 , 42
|
| Spirits of the Elid | 8,000 | - |  37 , 33 , 37 , 37 , 33 , 37 ,  37 37
|
| Swan Song | 10,000 | - | 100 , 66 , 62 , 62 ,  45 , 45 ,  42 , 40 42 , 40
|
| Holy Grail | 11,000 | - | 20
|
| His Faithful Servants (miniquest) |
20,000 | - | - |
| Hopespear's Will (miniquest) |
38,750 | 50 |
- |
| Total | 118,181 | ||