 |
This quest has a quick guide. It briefly summarises the steps needed to complete the quest.
|
| Ghosts Ahoy (#71) | ||||
|---|---|---|---|---|
| ||||
| Released | 15 February 2005 (Update) | |||
| Members | Yes | |||
| Quest series | None | |||
| Lead developer(s) | Martin B | |||
Ghosts Ahoy is a quest in which you help the villagers of Port Phasmatys pass on to the afterlife.
Details
| Start point | Talk to Velorina in Port Phasmatys. Show on map |
|---|---|
| Official difficulty | Intermediate |
| Official length | Medium |
| Description | East of Canifis is a ghost port. Not meaning that it's deserted. It's full of ghosts! For some reason, they're unable to pass on to the afterlife, but some aren't happy with that. Can you help? |
| Requirements |
|
| Items required |
|
| Recommended |
|
| Enemies to defeat |
|
| Ironman concerns |


Walkthrough
- Important advice: The bank can be accessed in Port Phasmatys, with or without your Ghostspeak amulet. However, it would be ideal to bring the items needed to create ecto-tokens (as mentioned in the Obtaining ecto-tokens section of this guide below). Make sure you keep your ecto-tokens at all times to travel in and out of the town. The closest bank outside of the town is located in Canifis.
- If you have access to fairy rings you may instead use the fairy ring to the west and enter the code CKS to reach Canifis, or ALQ west of Port Phasmatys.
- To safely cross the swamp avoiding attacks from Vampyres etc, walk north from Canifis past the Slayer Master and go east along the shoreline. You will come into Port Phasmatys from the north but for low level players this is a safe route.
Pre-quest: Obtaining Ecto-tokens at the Ectofuntus
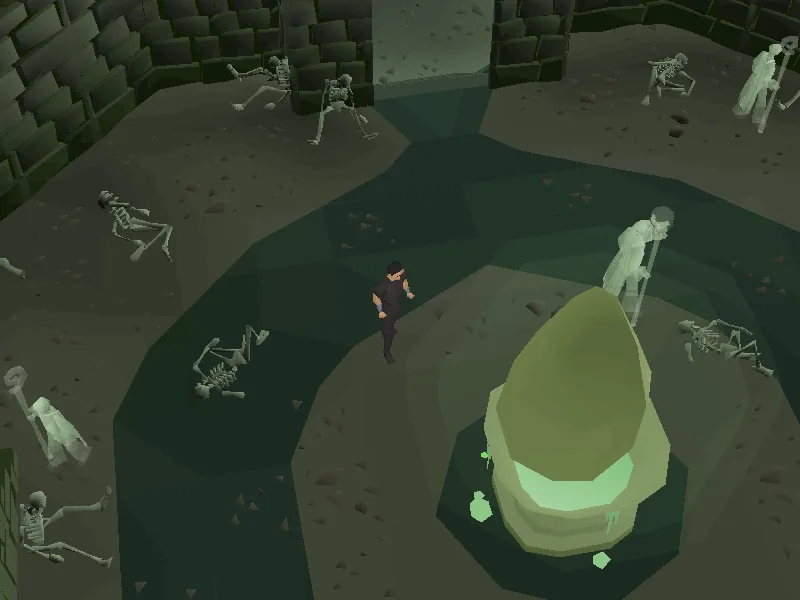
Ectofuntus tokens are required to complete the quest and can be gathered before starting it. This is done by worshipping the Ectofuntus just north of Port Phasmatys. It is recommended to obtain 35 Ecto-tokens to finish the quest, (20 when using the Ring of Charos(a)). You can obtain these tokens in one trip by wearing your Ghostspeak amulet and bringing 7 empty buckets, 7 empty pots and 7 bones of any type to the Ectofuntus. Level 1 undead chickens can be killed near the farm west of the Ectofuntus to obtain the needed bones. Buckets and pots may be purchased in Port Phasmatys, but note that you cannot enter the town before gathering Ecto-tokens unless you enter via a charter ship from Port Sarim which costs 1,300 gp.
You will then need to follow the steps below to obtain untradeable buckets of slime and bonemeal in order to then worship the Ectofuntus and earn tokens:
- Enter the trapdoor to the west of the fountain inside the temple. If you have 58 Agility use the weathered wall shortcut in front of you, otherwise walk around to the opposite side of the cavern and climb down the stairs, then repeat this process for the next two sets of stairs. Use a bucket on the Pool of Slime: this will automatically fill all the buckets in your inventory over the next few seconds. Walk back up the stairs and up the ladder.
- Go up the stairs east of the Ectofuntus. Use a bone on the loader located on the right side of the bone grinder, making sure to use the bones and not bury them. This will begin an automated process where the player will load one of the bones, turn the wheel, empty the bin to retrieve the completed bonemeal, and then automatically repeat this for each subsequent bone. However, interacting with each part of the grinder will speed up this process.
- Return to the Ectofuntus and click on it to consume each set of bonemeal and slime. While wearing your ghostspeak amulet, talk to a ghost disciple to receive your Ecto-tokens.
Beginning the quest
Pay 2 ecto-tokens (right click the Energy Barrier entrance located north of Port Phasmatys) and go to the house directly east to speak to Velorina. She will explain the sad history of the ghosts of Port Phasmatys. She will ask you to speak to Necrovarus located at the Ectofuntus temple to allow any ghost who wishes to pass over into the next world.
Head west of Velorina's house and pass the Energy Barrier again to be outside of the town's walls. Speak to Necrovarus located in the Ectofuntus temple. Necrovarus becomes furious over you mentioning Velorina and demands you be silent, refusing to listen to any reasoning.
Pass the Energy Barrier back into the city and speak to Velorina again. She mentions another approach: speaking to an old friend who may be used as aid without Necrovarus's involvement. When asked where she may be located, Velorina explains a vision of a small wooden shack in Morytania, where a sea is very close and castles loom to the west and east.
The old crone and nettle tea
Skills needed:
 20 [boostable] to create nettle tea
Go out of Port Phasmatys from the Energy Barrier and head west towards Canifis. If you need to make the nettle tea, follow the directions below while heading to Canifis:
- Fill the empty bowl with water by using the bowl on the waterpump located west of the farm allotment patches. (Empty bowls can be purchased from the charter ships on the Phasmatys docks, buy 3 to be safe)
- Continue west towards Canifis until you reach the Slayer master Mazchna. Just east will be a patch of nettles. Wear your gloves and pick some; it is recommended to pick some spare nettles, since the Nettle-water can boil over when making tea. Note: gloves that cannot be used to pick up nettles include Slayer gloves, Ranger gloves, Infinity gloves, Moonclan gloves, and Lunar gloves. A pair of coloured gloves can be purchased for 650 coins from Barker's Haberdashery in Canifis.
- Use the nettles on the bowl of water. ( 20 )
- Light a fire using your tinderbox and logs and use the bowl on fire. ( 20 ) Avoid accidentally drinking the bowl. The bowl can also be boiled on a range, however there are no ranges in Canifis.
Head north-west of the Slayer master Mazchna to the Old crone's house, shown on the map as a red pin (between the Slayer Tower and the Mausoleum).
Speak to the Old crone. When asked if she was a disciple of Necrovarus in the Temple of Phasmatys, she will have a hard time remembering due to her old age. She will mention that nettle tea will help refresh her memory as well as where you can find nettles.
If you have the nettle tea already made, she will exclaim that she only drinks from her special cup. She will give you a porcelain cup to pour the nettle tea into. Avoid accidentally drinking the bowl.
Speak to the Old crone again where she will refuse the tea again due to no milk being added. Add the bucket of milk to the cup of tea. Avoid accidentally drinking the cup of tea.
Speak to the Old crone again, this time she will remember being a disciple of Necrovarus. When Velorina's name is mentioned, she will remember her as a very good friend and ask how she is doing. After being told she's now a ghost, she regrets running away rather than stopping what was happening. She knows a way to help those wanting to pass over into the next world using the Ghostspeak amulet. She explains that enchanting the amulet will give power of command over ghosts; one charge will allow you to command Necrovarus to let the ghosts pass on. She explains that Necrovarus must have a magical robe that can be used to perform the enchantment. She will also need his book of rituals called Haricanto written by an ancient sorcerer from the East and a book to translate these rituals.
Ask her if there is anything else you can do for her. She will speak about her son, who at the age of 12 years old, ran away with some pirates to be a cabin boy. She asks if you see him, give him the toy model boat that he made. She will give you the model ship.
Enchanting the amulet
The Book of Haricanto
Skills needed:
 25 [boostable] to cross the rocks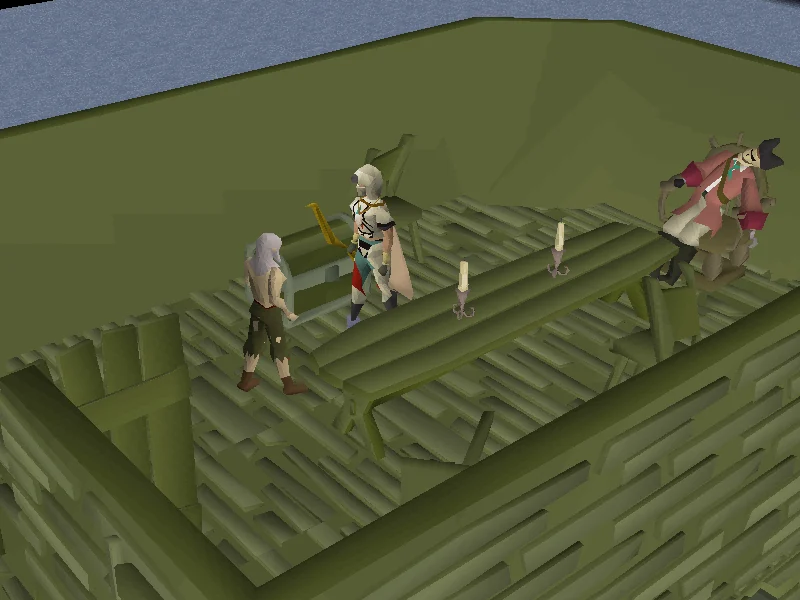
Head to the Canifis bank and retrieve the items required. You can buy the needle, thread, and knife from the nearby Canifis General Store. Make sure to still have your Ghostspeak amulet and ecto-tokens.
Repair the model ship by using silk, needle, thread, and a knife.
Go east towards Port Phasmatys. Before you pass the undead cows and undead chickens, go to the wrecked ship on the north coast of the farming patch (refer to map; the boat will appear as water on the mini map).
Climb up the ship's ladder to the ship deck. Head east and climb the ship's ladder just outside the small room (on the wall next to the cabin) with the Old man and the Pirate Captain to get to the ship quarterdeck.
The wind speeds will appear on the top right hand side; wait for the wind speed to change to low. Search the mast in the centre of the deck to find the colour of the tattered flag. Different parts of the flag and the skull emblem are different colours. Make sure you dye the right parts of your toy ship with the right colours. You will need to check the mast at least 3 times to get all 3 colours needed. Now mix the dyes you need and dye the model ship to match the colours seen from the mast. If you make a mistake when painting, simply paint over the piece again.
Head back down the ship's ladder to the ship deck and talk to the Old man. Ask him if the model ship is his and he'll recognise it. For giving his model ship back, he'll give you a chest key.
Use the key on the closed chest inside the captain's quarters to receive the first map scrap.
Go to the north-west side of the deck where there is a gangplank you can walk onto rocks. Jump along the path of rocks ( 25 ). Each jump costs 5% of your run energy. It is possible to fail the jumps by falling on your face but you won't fall in the water. When you get to the end, there will be another chest with the second map scrap. Once you have the second map scrap, head back to the ship.
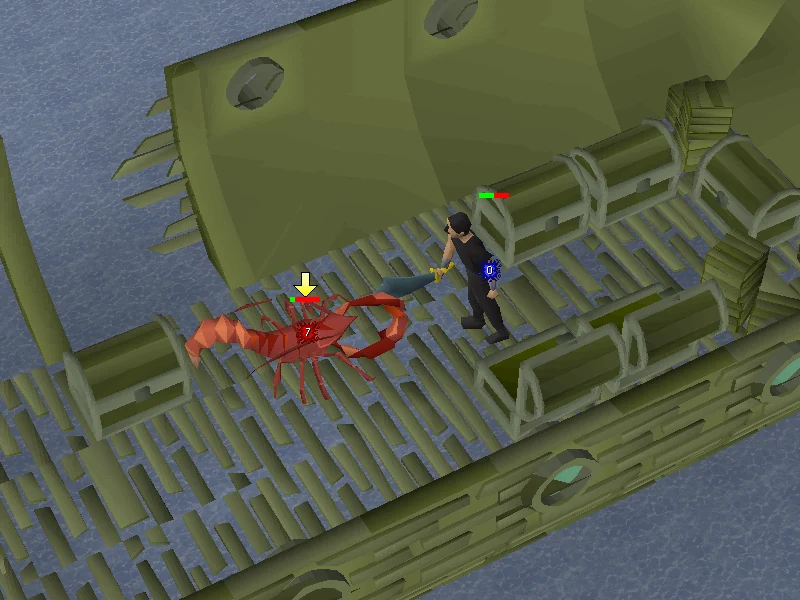
Climb down the ship's ladder. When you open the next chest you will be attacked - be ready to fight. Search the chests until you are attacked by a giant lobster (level 32) with a blinking yellow arrow over it. Once you kill it, search the chest again for the final map scrap.
You can safespot the lobster by standing west of the ladder (the one nearest to the chests) and using Magic or Ranged. However, if you do not kill the lobster fast enough (within two minutes), it will disappear and you will have to fight it again from full health.
After you've received all pieces, use one piece on another to get a completed treasure map. It marks where to find treasure on Dragontooth Island. Head east to Port Phasmatys. Pass the Energy Barrier to enter the town and go to the bank. If you haven't already, grab 27 ecto-tokens (or 10, if you have an Ring of Charos(a)), a spade, and the treasure map.
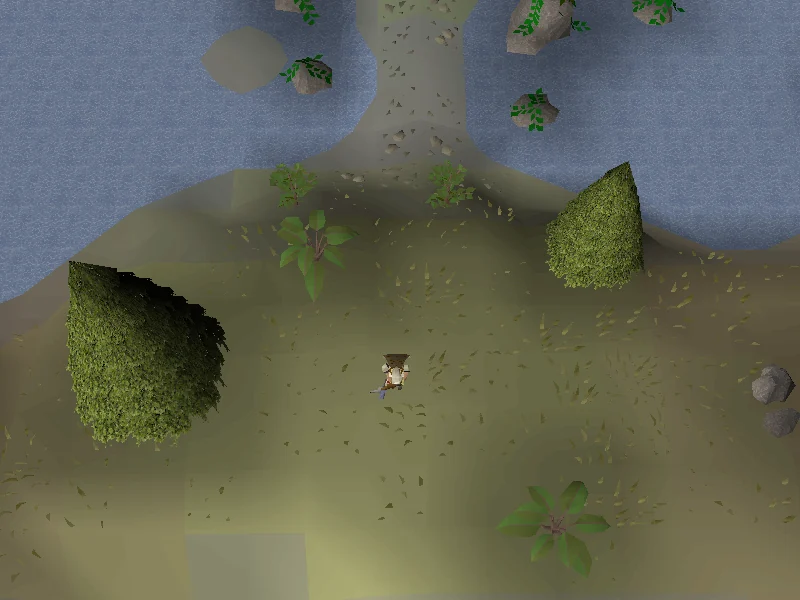
Head north-east from the bank onto the dock and find the Ghost captain next to the small rowing boat. Ask him to take you to Dragontooth Island, and he will oblige for a 25 ecto-token fee (10 with an Ring of Charos(a), or 500 for permanent access). Once there, use the map to find the treasure. You can proceed to the square pictured to the right. You will be standing in the only grass-less square in the clearing. If you follow the instructions from the map you will start by standing west of the Statue of Saradomin. From there, walk 6 steps south, 8 steps east, 2 steps north, 4 steps east, and 22 steps south. Dig with a spade and you will find the book of Haricanto.
The translation manual
After finding the Book of Haricanto, head north to the ghost captain and travel back to Port Phasmatys. Go to the bank just south-west of the boat, and take out the 400 coins and the oak longbow.
Head north of the bank. Go onto the docks just east of the pub/inn and talk to Ak-Haranu. He is a trader from the east. After being asked if he has a book that can be used to translate, he'll tell you he has the manual, but in trade for it, he wants Robin's signature on an oak longbow.
Go to the pub/inn just west of Ak-Haranu and talk to Robin. He'll challenge you to a game of Rune-Draw. Beat him at it a few times until he owes you 100 coins (the objective of the game is to get as many points as possible, awarded when you draw a rune, before drawing a death rune, which results in an automatic loss; if Robin draws a death rune before you, you win). He will give you his signature to repay the debt.
Take it back to Ak-Haranu and he'll give you the manual as promised.
The robes
Head back to the pub/inn (where Robin was) and speak to the Ghost innkeeper. Ask him if he has any jobs for you and he will give you a bedsheet that he wants you to take to Robin. Rather than doing that, keep the bedsheet; you will be using it to disguise yourself as a ghost.
Ghosts do not look like bedsheets, so to make it passable you need to colour it with Ectofuntus slime. A fast way to get some slime is by trading with one of the Trader crewmembers on the east docks and buying a bucket of slime to dip the bedsheet in. Alternatively, use the Ectofuntus by walking down to the slime pool with an empty bucket, and fill it with slime. After you get the bucket of slime, dip the sheet into it.
Go to the town square near the north entrance of Port Phasmatys and talk to Gravingas, the ghost activist protesting and carrying a sign. He will ask if you will partake in the protest, to which you will accept happily. He'll give you a Petition form to collect signatures from the townsfolk. Put your dyed bedsheet on and gather 10 signatures.
Speak to any ghost villager nearby for signatures. As long as you don't talk to the same person twice in a row, you can ask the same two or three ghosts for all 10 signatures. If they ask for ecto-tokens, move onto the next ghost that doesn't require payment. Alternatively, you could ask the same people by switching worlds. Repeat until they say "yes" enough times to have 10 signatures.
With all 10 signatures, talk to Gravingas. He will ask you to go back to Necrovarus and show him the petition.
Head north of Gravingas and pass the Energy Barrier. Speak to Necrovarus and show him the petition form. He will ask you to continue explaining the petition which outlines that the citizens of Port Phasmatys should have the right to choose whether they pass over to the next world or not. He will sarcastically say that he understands, then flies into a rage, causing him to drop a bone key. Pick it up and head upstairs. Use the key on the locked door to get into his room. Open and search the coffin to find his robes. Leave the room and head back downstairs.
Using the spell
From the Ectofuntus, head back to the Old Crone, just north of Canifis.
Give her the robes, book, manual, and Ghostspeak amulet in your possession. The Old crone will perform an enchantment ritual - dancing - on your amulet, empowering it.
Head back east to the Ectofuntus and speak with Necrovarus; make sure your ghostspeak amulet is equipped. Command Necrovarus to release all the ghosts he's holding. You can command him to tell you the joke first or do the chicken impersonation; both of which won't deplete the ghost amulet's charge. A beam of green light will radiate out from the amulet, enveloping Necrovarus in its power. He will appear to become much softer in the eyes and stare into nothingness. He will then allow the ghosts to pass at their will.
Once finished speaking to Necrovarus, pass through the Energy Barrier (this will not consume any ecto-tokens from now on) and speak to Velorina. She will tell you that she sensed the removal of Necrovarus's psychic barrier. She will then hand you a vial of ectoplasm as her thanks in return, and explain the use of this newly acquired item: an Ectophial.
Congratulations, quest complete!
Rewards
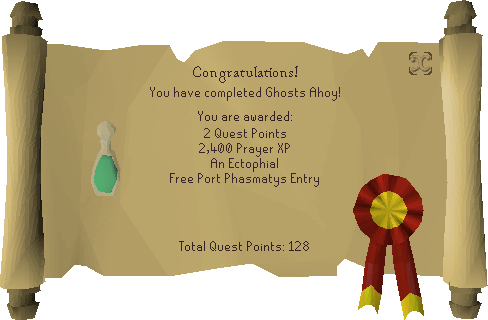
- 2
 Quest points
  2,400 Prayer experience
- Free passage into Port Phasmatys
- The Ectophial, which allows direct teleport to the Ectofuntus, is refilled from the Ectofuntus.
Required for completing
Completion of Ghosts Ahoy is required for the following:
- Dragon Slayer II
- Morytania Medium Diary
Transcript
| This article on a quest has an associated dialogue page. Click here for a transcript of possible conversations encountered throughout the quest. |
Changes
| Date | Changes |
|---|---|
| 23 July 2015 (Update) |
A ghost during the Ghosts Ahoy quest now only speaks ghost when you do not have a ghostspeak amulet equipped. |
Notes
- The Ectofuntus teleport is reasonably close to the fairy ring network by running west through Mort Myre Swamp. It's still much further than the slayer ring and quest cape teleports, however.
- You can get multiple ectophials by asking Velorina for another.
- Your character will refill the ectophial automatically upon teleporting.
Trivia
- If you speak to the old man after he gives you the chest key, he will tell you his mother is on her way to get him.
- Before a patch on the 28th of November 2019, if you were to click away before the ectophial is refilled, it would not be refilled, and you would have to do it manually.
- You can give Robin the bedsheets if you wish to do so. The innkeeper will give you another bedsheet to give Robin again.
- The drop trick method can be used to obtain multiple bedsheets, in case you want a brown bedsheet as well as the ghost green bedsheet.
- If you talk to Gravingas after the quest, your character will ask him why he's still protesting, to which he replies, "There's always a need for a healthy interest in politics."
- Attempting to charter any ship with the slimy bedsheet in your inventory will result in the Trader Crewmember patently refusing you passage until you get rid of it.