This article provides an overview of strategies used to train the Mining skill.
Equipment
The only item required to mine is a pickaxe. A certain Attack level is required to wield one, but players can still use the pickaxe to mine without the Attack level requirement. Use the best pickaxe available for the fastest mining speed.
Using an infernal pickaxe is recommended if using the fastest training methods. Mining rocks with it will give a 1/3 chance for the ore to automatically combust, which will consume the ore. This reduces the number of ores that need to be dropped, and also grants some passive Smithing experience. Making an infernal pickaxe requires level 85 Smithing, and it can be charged with dragon pickaxes or smouldering stones. The latter are usually cheaper, but using the infernal pickaxe can still be somewhat expensive for some players.
For other methods, the crystal pickaxe performs better, and it should be used if the player has enough crystal shards for it.
Pickaxes
Higher-tier pickaxes take less time between rolls while mining. Each tick is a period of 0.6 seconds. When the allotted time passes, the game will roll whether or not you mine something successfully. The chance itself is affected by the Mining level. The pickaxe tier does not affect the skilling success rate, only the time between rolls. For example, a bronze pickaxe has the same chance of mining successfully as a rune pickaxe, but rolls for a resource every 8 ticks instead of 3. However, the mining speed mechanic can be bypassed with tick manipulation. When using a knife on teak logs (or other suitable items), a bronze pickaxe can mine every 3 ticks instead of 8 when timed correctly.
| Item | 
|

|
Shop price | GE price | Weight | Ticks between rolls | |
|---|---|---|---|---|---|---|---|
 |
Bronze pickaxe | 1 | 1 | 1 at Nurmof and Bob | 98 | 2.267 kg | 8 |
 |
Iron pickaxe | 1 | 1 | 140 at Nurmof | 67 | 2.267 kg | 7 |
 |
Steel pickaxe | 6 | 5 | 500 at Nurmof | 151 | 2.267 kg | 6 |
 |
Black pickaxe | 11 | 10 | Not sold | 2,044 | 0.01 kg | 5 |
 |
Mithril pickaxe | 21 | 20 | 1,300 at Nurmof | 473 | 1.814 kg | 5 |
 |
Adamant pickaxe | 31 | 30 | 3,200 at Nurmof | 1,597 | 2.721 kg | 4 |
 |
Rune pickaxe[1] | 41 | 40 | 32,000 at Nurmof | 18,586 | 2.267 kg | 3 |
 |
Dragon pickaxe[2] | 61 | 60 | Not sold | 609,005 | 2.4 kg | 2.83[3] |
 |
Infernal pickaxe | 61[4] | 60 | Not sold | 4,312,862 | 2.4 kg | 2.83[3] |
 |
Crystal pickaxe | 71[5] | 70 | Not sold | 27,915,878.60[6] | 1.36 kg | 2.75[7] |
- ^ The gilded pickaxe is functionally equivalent.
- ^ The 3rd age pickaxe, dragon pickaxe (or), and dragon pickaxe (upgraded) are functionally equivalent.
- ^ 3.0 3.1 3 ticks by default, 1/6 chance to be 2 ticks.
- ^ Also requires 85 Smithing to use.
- ^ Also requires 50 Agility to use.
- ^ The price of the required crystal shards is based on exchanging enhanced crystal teleport seeds with Amrod.
- ^ 3 ticks by default, 1/4 chance to be 2 ticks.
Prospector kit
The Prospector kit obtained from Prospector Percy in the Motherlode Mine or from the Volcanic Mine Reward Shop provides a total of 2.5% bonus Mining experience when worn. The outfit is not worth getting timewise if the player is going for 99 Mining using the fastest methods. However, it is a requirement for a master clue step, and the helmet for a hard task in the Falador Diary, so the player might want to get it anyway.
The full set costs 180 nuggets or 120,000 Volcanic Mine reward points in total. Getting 180 nuggets takes around 10 hours on average.
| Item | XP Boost | Cost (in  ) )
|
Sells for (in )
|
Boost per nugget
(% per | |
|---|---|---|---|---|---|
 |
Helmet | +0.4% | 40 | 32 | 0.010 |
 |
Jacket | +0.8% | 60 | 48 | 0.013 |
 |
Legs | +0.6% | 50 | 40 | 0.012 |
 |
Boots | +0.2% | 30 | 24 | 0.007 |
| Set bonus | +0.5% | ||||
| Complete set | +2.5 % | 180 | 144 | 0.014 | |
Varrock armour
Completing task sets from the Varrock Diary grants the player Varrock armour, which gives the player 10% chance of mining 2 ores at once while worn. For the methods below, Varrock armour 1 provides this effect for mining iron, Varrock armour 2 for mining granite, and Varrock armour 4 for mining amethyst. However, the Varrock armour does not work at Motherlode Mine, Blast Mine, Volcanic Mine, or on gem rocks.
The Varrock armour 4 also works as a prospector jacket.
Other
Wearing a celestial ring, obtained through the Shooting Stars activity, provides an invisible +4 boost to the Mining skill. This will boost experience rates slightly. The uncharged ring is worth getting if the player is going for level 99 Mining using the methods below.
There are also mining gloves available in the Mining Guild. The expert mining gloves are worth getting if mining amethyst crystals.
Fastest experience
To gain Mining experience most efficiently, players should always drop the ores they mine (also known as "powermining" or "dropmining"). This can be done by holding the shift key and clicking on the ore once shift drop has been enabled in the options. Mobile users can toggle the tap-drop option.
Levels 1–37: Questing
Early levels can be skipped by completing quests that give Mining experience. Completing Doric's Quest, The Dig Site, Plague City, The Giant Dwarf, The Lost Tribe and Another Slice of H.A.M. grants a total of 27,525 Mining experience, which will get the player from level 1 to 37. All of these quests have low requirements, and completing them allows the player to use an adamant pickaxe right from the start.
Levels 1–15: Copper/Tin ore
From level 1 to 15, mine copper or tin. This can be done anywhere, though the Lumbridge Swamp mining site is debatably the easiest due to its relative lack of players and aggressive monsters, and its collection of copper and tin rocks.
Levels 15–45/70: Iron ore
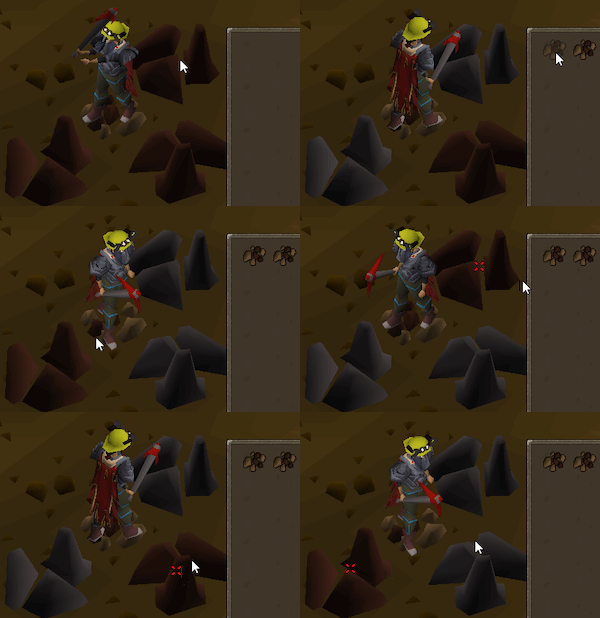
From level 15 to 45, mine iron. Players who are inexperienced with tick manipulation methods, or do not plan to use tick manipulation at all, are advised to mine iron up to level 70 and continuing with other methods such as the Volcanic Mine.
Wearing Varrock armour 1 or higher increases the overall experience rate for this method, as it gives the player 10% chance to mine 2 ores at once while worn.
From level 15 to 60, mine iron at a location that has three iron rocks in a triangle. This formation allows the player to mine all three rocks without moving. Drop the ores while waiting for the rocks to respawn. There are 16 such locations available at this level:
- Legends' Guild Mine
- Al Kharid Mine
- Piscatoris Mine
- Lovakengj Mine
- Verdant Valley
- Mount Karuulm Mine
- Resource Area (level 51 Wilderness)
- South Mor Ul Rek Mine
- Isle of Souls
- Sisterhood Sanctuary Mine
- Stranglewood Mine
- Cam Torum Mine
- Salvager Overlook Mine (east)
- Pandemonium Cave
- Deepfin Mine (Requires 67 Sailing)
- Ynysdail (Requires 73 Sailing)
If using tick manipulation, the best place to mine iron is in the Legends' Guild mine or the Isle of Souls mine. Both locations have 4 iron rocks close to each other. Start the 3-tick cycle with a herb and tar (or other suitable items) while moving between rocks, and drop the ores in between mines. Because this method is much harder and more advanced than using a triangle spot, it is only recommended for players who plan on 3-tick mining granite from level 45 onwards.
From level 60 onwards, the pay-to-play area of the Mining Guild becomes the best option, as the respawn time for rocks mined in this area is halved. This makes it so the players do not have to wait for the rocks to respawn or use tick manipulation. With correct timing and accurate clicks, players can drop the ore between mines and keep mining continuously.
Players can gain around 45,000–55,000 experience per hour below level 60 when not using tick manipulation. From level 60 and above, the maximum experience rate in the Mining Guild caps at around 70,000–80,000 experience per hour, depending on performance and the pickaxe used.
Banking the ores is not recommended as this slows down experience rates a lot and the iron ores are usually not worth very much. Ironmen who wish to bank their ores are advised to use the pay-to-play area in the Mining Guild, which has a triangle spot near to the bank chest. For those below level 60, an alternative location to bank iron ores is the Monastery Mine, using the Ardougne cloak to teleport to the mine and then a bank teleportation method such as the ring of dueling teleport to Castle Wars to bank your ore.
Levels 45–99: Granite
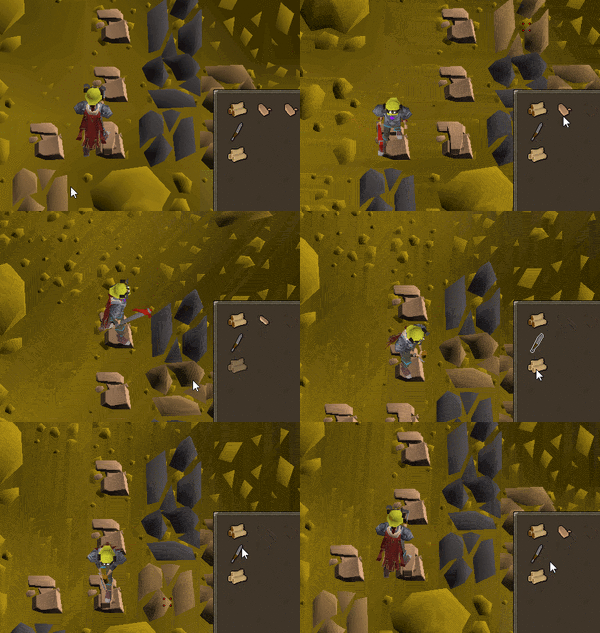
3-tick mining granite (commonly referred to as "3t4g", 3-tick 4 granite) at the quarry or Cape Conch mine offers the fastest Mining experience from level 45 onwards. 3-tick mining is done by using swamp tar on a clean herb (or other suitable items) to set up the 3-tick cycle and then moving to a granite rock to mine it. When timed correctly, the player will skip the delay from moving to the granite rock and has a chance to receive a rock every three ticks. The player will need to move between four granite rocks to continuously keep up the 3-tick cycle.
While 3-tick mining granite offers the fastest experience, it is very click-intensive and can be hard to learn. This method is not worth doing without tick manipulation, as the experience rates would be much lower. Players who are new to tick manipulation methods may find it worthwhile to train with iron before attempting to train with granite, as mining iron offers relatively high rates at lower levels.
Experience rates shown in the table below assume wearing the Varrock armour, the prospector kit, and an uncharged celestial ring. The rate at level 99 also assumes wearing the Mining cape. At maximum efficiency, it is possible to gain up to 134,000 experience per hour at level 99, though players are more likely to see rates closer to around 120,000–125,000 experience per hour when including some mistakes. Without tick manipulation players can only gain around 63,000 experience per hour at best.
| level
|
XP/h
|
 XP/h () XP/h ()
|
|---|---|---|
| 45 | 87,000 | N/A |
| 55 | 95,000 | N/A |
| 65 | 103,000 | 7,700 |
| 75 | 109,000 | 8,200 |
| 85 | 114,000 | 8,700 |
| 95 | 119,000 | 9,100 |
| 99 | 126,000 | 9,700 |
Setup and tips
    |
 |  | | |
 | | ||
 | |||
 1000 1000 |  | ||
 |  | ||
 | |||
 |
The best place to mine granite is at the Cape Conch mine, as the player will not need protection against desert heat like at the Bandit Camp Quarry. This requires partial completion of Troubled Tortugans. With 61 Agility, use fairy ring CJQ, climb down the rocks shortcut to the south, then go east and use the stepping stone shortcut. From there, continue running south-east to the mine. Without 61 Agility, sail to the docks or take a charter ship to the Great Conch, then take the Rowboat found on the docks to the eastern part of the island. From there, run south.
If using the quarry, teleport with the camulet to Enakhra's Temple, navigate outside, and run a short distance south-west. After completing the hard Desert Diary, players can teleport straight to the entrance instead. Players who have not completed Enakhra's Lament can use the Pharaoh's sceptre to teleport to the Ancient Pyramid and run west, take the ferry to the Ruins of Unkah and run north, or take the carpet to Bedabin Camp and run south. Alternatively, players who have started Beneath Cursed Sands can use the spot at the Necropolis mine near the fairy ring AKP.
Players must have some sort of desert heat protection to survive at the Bandit Camp Quarry, such as
- Wearing the Desert amulet 4.
- Wearing the Hitpoints cape with a regen bracelet, which will outheal the damage taken from desert heat.
- Bringing waterskins and filling them with the lunar spell Humidify.
- Wearing the circlet of water. This comes at the cost of 0.4% experience bonus from the Prospector helmet and 0.5% from the Prospector outfit set bonus.
Wearing Varrock armour 2 or higher gives the player 10% chance to mine 2 ores at once while worn, which will increase experience rates. Varrock armour 4 also acts as a prospector jacket for the prospector kit experience bonus.
Using the infernal pickaxe is strongly recommended if the player can afford it, as it reduces the amount of granite that need to be dropped and also provides passive Smithing experience. One fully charged infernal pickaxe lasts for around 960,000 Mining experience. It can be charged with smouldering stones or dragon pickaxes, with the smouldering stone currently costing 3,703,857 and the dragon pickaxe 609,005.
If not using the infernal pickaxe, the pickaxe tier does not matter as it does not affect mining success rates. Because tick manipulation bypasses the normal pickaxe rate for mining rolls, the crystal pickaxe does not bring any benefits for this method.
To minimise mouse movement, make the game client as small as possible and use the 'Modern' resizable client layout. Zoom in and turn the camera south so that there is as little distance from the inventory to the rocks as possible. Turning data orbs off is also helpful to prevent any misclicks when clicking on the southernmost rock.
Players should drop the mined pieces of granite on the ground between mines. This is done by starting the 3-tick action and clicking on the next rock, quickly dropping the granite and clicking the rock again. This requires accurate clicking and some practice to perform consistently, but it is much more efficient than dropping a full inventory.
Moreover, it is recommended to only drop 1 or 2 rocks at a time to avoid clicking the next rock too late. Because of how movement stalls work with tick manipulation, moving to the next rock will grant a second roll for a resource if the first one fails. This makes the player more likely to receive a rock. However, if the player clicks on the next rock too late, they will miss out on the additional roll and are less likely to receive a rock. Note that this mechanic is separate from mining enhancers, and the chance to get extra rocks from Varrock armour (or other mining enhancers) is applied after getting a successful roll.
It is possible to use a bird snare, box trap, or rabbit snare to tick manipulate. An advantage of using bird snares is the ability to stack large quantities of them for a low cost, allowing for mistakes to be made (when compared to logs).
Other methods
Levels 30–99: Motherlode Mine
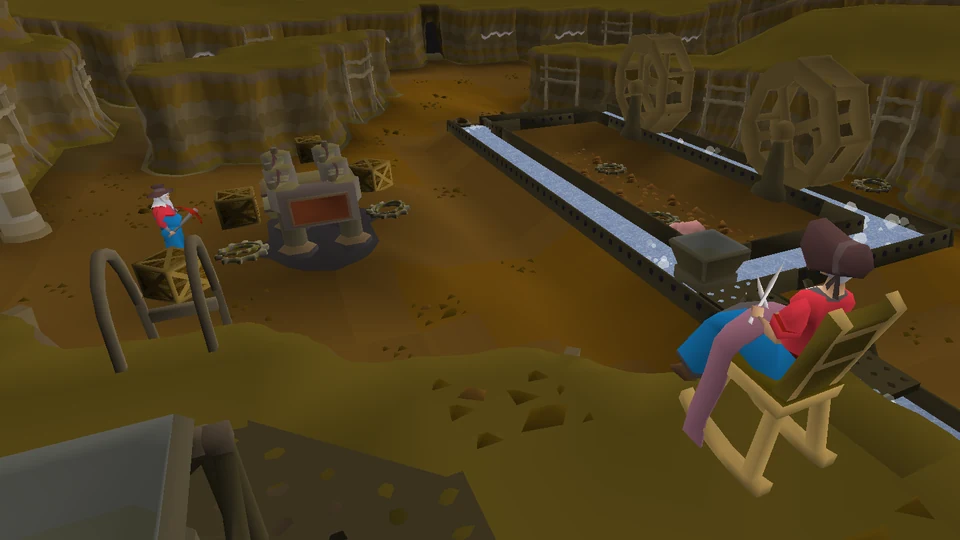
Mining in the Motherlode Mine is a profitable low-effort alternative to the faster methods. To do this, mine ore veins inside the mine, deposit the pay-dirt into the hopper to clean it, and repeat. Once the sack is full, empty it and bank the ores for profit. The veins deplete after 36–40 seconds in the upper level, or 23–27 seconds in the lower level. At higher levels, this method is only recommended for players who are looking for a straightforward training method, as the Volcanic Mine minigame offers faster experience.
To get there, use a skills necklace teleport to the Mining Guild and run a short distance to the entrance. Players will need a pickaxe to clear the obstructing rockfalls to enter deeper into the mine.
Completing the medium Falador Diary grants the player access to a shortcut (requires level 54 Agility) to an area which is near the bank chest and relatively close to the hopper. Completion of the elite diary will also increase the chance of receiving higher-level ores.[1]
Players can obtain golden nuggets through cleaning pay-dirt, which can be used to purchase perks and rewards from Prospector Percy. The most notable reward is the Prospector kit, which adds a bonus 2.5% experience while mining. Purchasing the prospector helmet is required for the hard Falador Diary. Unlock the upper levels of the mine as soon as it becomes available.
Experience rates vary depending on the Mining level and what upgrades have been unlocked. At level 90 with a dragon pickaxe and a celestial ring, prospector kit, with the upgraded sack, the upper level unlocked and the upper chute unlocked, players can gain around 62,000 experience per hour.
For more up to date calculations on profit per hour, see Motherlode Mine.
Levels 40–99: Gem rocks
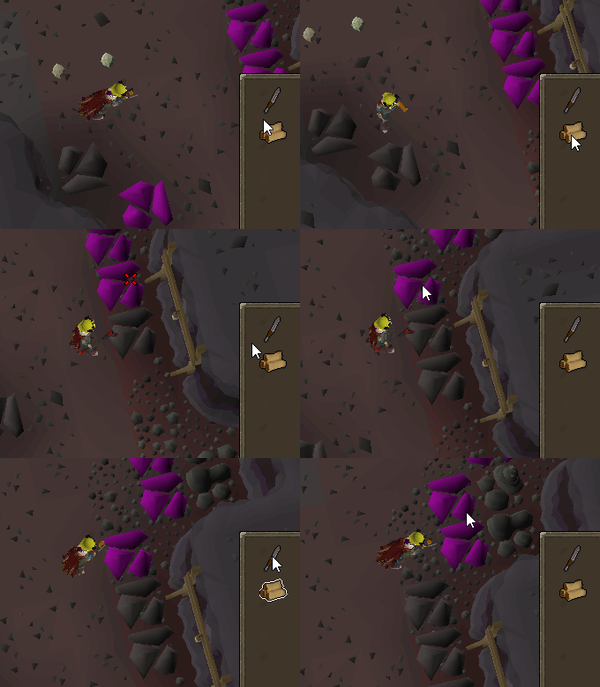
Mining gem rocks is a profitable alternative that offers comparable experience rates to granite when using tick manipulation. Gem rocks are also the fastest method on average to obtain the rock golem pet. Without tick manipulation, this method is considerably slower and only recommended for ironmen who need opals, jades, or red topazes.
For this method, players will need to have completed the medium Karamja Diary for access to the underground portion of the Shilo Village mine. The area has many gem rocks and a bank deposit box nearby. Without the diary completion this method is not worth doing, as the surface area has much fewer rocks. Wearing a charged amulet of glory is also required for the fastest rates. Having the gem bag (or better, the upgraded gem sack) is recommended to reduce dropping and banking.
The experience rates in the table below assume wearing a charged amulet of glory and the prospector kit. At maximum rates players can expect 541,448.49 profit per hour.
| level
|
XP/h (3-tick) | XP/h (w/o 3-tick) |
|---|---|---|
| 50 | 93,000 | 46,000 |
| 60 | 97,000 | 52,000 |
| 70 | 101,000 | 58,000 |
| 80 | 105,000 | 66,000 |
| 90 | 107,000 | 70,000 |
| 99 | 110,000 | 75,000 |
Levels 41–99: Calcified rocks
Mining calcified rocks in the Cam Torum Mine is a low-effort alternative to the faster methods. This method requires having started Perilous Moons. The rocks deplete after around 70 seconds. Occasionally, water starts oozing temporarily from some of the veins, and mining those veins will increase the success rate of mining rocks. Additionally, players can receive a calcified deposit from mining the rocks which when opened with a hammer on an anvil provide the player with 5-15 additional bone shards or a tradeable and stackable calcified moth. Crushing the moth will teleport the player directly to Cam Torum.
Players can gain up to 50,000 experience and roughly 3,000 blessed bone shards (15,000-18,000 Prayer XP) per hour at level 99. With tick manipulation, players can gain up to around 94,000 experience and 5,500 bone shards (27,500-33,000 Prayer XP) per hour at level 99.
| level
|
XP/h (3-tick + water)
estimated |
XP/h (w/o 3-tick) |
|---|---|---|
| 50 | 40,000 | 23,500 |
| 60 | 50,000 | 27,000 |
| 70 | 64,000 | 34,000 |
| 80 | 74,000 | 39,000 |
| 90 | 84,000 | 44,000 |
| 99 | 94,000 | 49,000 |
Levels 48–99: Rubium rocks
Mining rubium rocks in the Charred Dungeon offers a low-effort and profitable, but slower alternative for players wishing to avoid tick manipulation. Rocks are solely located in the dungeon on Charred Island, requiring level 60 Sailing and a one-time use of a rope (found on the island) to access. The island can be easily reached from Red Rock (requiring partial completion of the Red Reef quest), which can be teleported to via the Sailors' amulet and has a Shipwright to negate the trip back, or alternatively from the Void Knights' Outpost. As the mining spots are past aggressive red and black dragons, dragonfire protection (e.g. a potion or shield) or level 37 Prayer for Protect from Magic is highly recommended.
Players can expect ~39,000 XP/h at level 48, scaling up to ~64,000 XP at level 99. Mining enhancers, including the Varrock armour, the prospector kit and celestial rings/signets can all improve rates. While there is a buildable bank chest on the island (requiring level 70 Construction), using it is not necessary for optimal rates, as rubium splinters stack in the inventory.
Levels 60–99: Crashed stars
Mining crashed stars is a very low-effort alternative to the faster methods. As part of the Shooting Stars Distraction and Diversion, a shooting star will fall at a random spot selected from a predetermined list. Once the player has found a crashed star, they can mine it for 42–63 minutes depending on its tier before the star depletes. Each tier can be mined for seven minutes without interaction, only requiring the player to click again whenever the star degrades a tier.
There are a few issues this method faces if one chooses to efficiently train on crashed stars. Depending on the size of the star, players need to have a secondary activity planned after fully mining stars to depletion. Using an oak telescope or better in a study room of a player-owned house can display a timeframe for when the star will fall, as well as the region it will land in. Stars may also fall in the Wilderness and in other dangerous areas, which are not recommended to train on. Switching worlds or receiving information from other players/clans may also help to scout for new crashed stars.
This method is fully available at level 60 Mining since the lowest star falls at tier 6, but it can begin at level 10 if the star is mined down to a suitable tier. The stardust can be exchanged for a celestial ring, which gives an invisible +4 boost to Mining. Each piece of stardust is valued at 81.33 when buying a soft clay pack, or at 68.89 when buying a bag full of gems from Dusuri's Star Shop.
If stardust is used to charge the celestial ring and is taken to efficient Granite mining, each hour of mining stardust is worth ~10k xp/h more and can give 140k xp/h with good clicks.
Experience and stardust rates are shown in the table below. The rates include the time spent finding a new star as well as some idle time whenever the star degrades a tier. While it's possible to use tick manipulation for higher rates, doing so is not recommended for this method (except for obtaining stardust as quickly as possible) as there are much better options for high-effort training.
| level
|
|
|
| ||||||
|---|---|---|---|---|---|---|---|---|---|
| XP/h
|
With
|
 /h /h
|
XP/h
|
With
|
/h
|
XP/h
|
With
|
/h
| |
| 60 | 23,500 | 24,100 | 733 | 24,900 | 25,500 | 777 | N/A | N/A | N/A |
| 70 | 24,600 | 25,200 | 769 | 26,100 | 26,700 | 814 | 26,800 | 27,500 | 839 |
| 80 | 25,900 | 26,600 | 811 | 27,500 | 28,100 | 858 | 28,300 | 29,000 | 884 |
| 90 | 27,000 | 27,700 | 844 | 28,600 | 29,300 | 893 | 29,500 | 30,200 | 920 |
| 99 | 28,200 | 28,900 | 881 | 29,800 | 30,600 | 933 | 30,800 | 31,500 | 961 |
Levels 70–99: Volcanic Mine
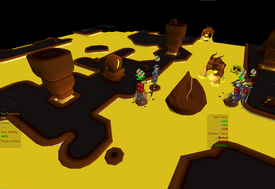
The Volcanic Mine minigame on Fossil Island is a fairly low-effort alternative that offers relatively fast experience. In the mine, the goal is to mine the boulder to obtain ore fragments for Petrified Pete while keeping the mine stable. This grants Mining experience and points for the reward shop. Doing the minigame efficiently requires coordinated teamwork and it does not provide any significant profit, however.
To access Fossil Island, players must have completed the Bone Voyage quest. Players must also pay Petrified Pete 30 numulites every time they wish to enter the mine. Alternatively, pay a one-time fee of 3000 numulites for permanent access. While the mine can be accessed at level 50 Mining, having at least level 70 is recommended for better experience rates. Good food is also required, as players take heavy damage in the mine.
The official world for this minigame is World 323, although it is recommended to search for a team — the Grouping interface includes a clan chat for Volcanic Mine, where players may be found making groups. Having 3 to 5 players in a team is optimal, although duo is viable as well. Soloing is also possible, but it requires much more effort and practice, and the experience rates are slightly lower than in a team.
Experience rates shown in the table below assume having a consistent 3–5-player team. The rates vary depending on the role performed and the team's performance. Players also can gain up to around 15,400–17,200 points per hour at the maximum listed rates. When using dedicated boosting accounts, it is possible to gain up to 105,000 experience per hour at level 99.
| level
|
XP/h | ||
|---|---|---|---|
|
|
|
| |
| 70 | 64,200 | 68,000 | N/A |
| 75 | 65,200 | 69,000 | 75,000 |
| 80 | 68,000 | 72,000 | 81,000 |
| 85 | 71,800 | 76,000 | 86,000 |
| 90 | 74,700 | 79,000 | 90,000 |
| 95 | 76,500 | 81,000 | 91,000 |
| 99 | 79,300 | 84,000 | 94,000 |
Levels 70–99: Zalcano
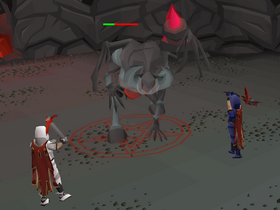
Zalcano is a demon imprisoned beneath Prifddinas that is fought using skilling rather than conventional combat. Being immune to traditional combat damage, players must use their Mining, Smithing and Runecraft skills to create imbued tephra capable of destroying her stone armour. Once her armour has been destroyed, they must damage her by mining her with a pickaxe.
Zalcano can be a viable training option for players past level 70 Mining who are seeking an engaged and challenging training method. Players should be advised that in order to fight Zalcano, they will need to unlock Prifddinas by completing the grandmaster quest Song of the Elves.
Speaking to Rhiannon allows players to toggle between resource rewards and increased experience. Toggling resources off still rolls for unique and pet rewards.
- If resource drops are enabled, players can expect to get roughly 13,500 Mining, 3,000 Smithing and 1,500 Runecraft experience per hour when killing Zalcano efficiently.[confirmation needed]
- If resource drops are disabled, players can expect to get roughly 50,000 Mining experience per hour, scaling up with Mining level. At level 80 Mining, players can expect at least 70,000 Mining experience per hour. In small teams of 3 to 5, players can obtain around 90,000 xp per hour.
Levels 75–99: Blast Mine
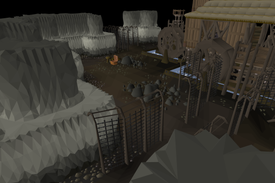
The Blast Mine minigame is a profitable alternative that offers fast experience. At level 75, players are able to obtain runite which makes the bulk of the profit gained. While it is possible to participate in the minigame below level 75, this is not recommended as the lack of runite ores will severely hamper experience and profit rates.
Having a higher Mining level increases the chances of obtaining better ores, increasing experience and profit as a result.
Blast mining requires numerous dynamite, a chisel, and a tinderbox. Wear weight-reducing clothing (such as the Graceful outfit) and a charged ring of endurance to reduce run energy drain, and use stamina potions to restore run energy if needed. Having a pickaxe is not necessary, but the dragon pickaxe's special attack can be used to temporarily increase the current Mining level to have a higher chance of receiving better ores. The Prospector kit can be worn for extra experience when collecting the ores from the operator.
Experience rates depend on Mining level and strategy. Players can gain between 65,000–76,000 experience per hour at level 75, increasing to 87,000–101,000 experience per hour at level 99.
Levels 78–99: Infernal shale
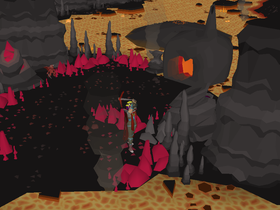
Infernal shale can be mined in the Chasm of Fire with level 78 Mining. It is crushed into crushed infernal shale with a hammer and a chisel, which is used to create oathplate armour. A Kingdom Divided is required to mine the rocks. Infernal shale is untradeable and must be crushed in order to trade, providing no experience.
The experience gained from each rock varies, with each rock giving between 13.2 and 100 experience. For more information, see the infernal shale page. The average amount of experience per rock mined is 43.67 or 44.75, depending on whether the player is using the prospector kit.
The mining method is usually not recommended as experience rates are very low unless using tick manipulation with Jim's wet cloth, and even then it's very high intensity for a maximum of 67,000 - 80,000 experience per hour (with a hypothetical maximum of 90,000, yet this is unrealistic).
The main draw for this method is that it can provide more than 683,200 per hour with significant mining experience if the user is willing to put in the work.
For more information on this activity, visit the money making guide and Jim's wet cloth page.
Levels 92–99: Amethyst
Amethyst crystals are an alternative choice for players looking to mine with low effort or click intensity, albeit for very slow experience rates. Depending on concentration and the tier of pickaxe used, players can expect to mine from 80 to 100 amethyst per hour, for approximately 20,000–25,000 experience per hour and around 260,370 profit per hour.
Post 99
After level 99, experience rates will remain constant. Assuming that the player is wearing full prospector, a celestial signet, Varrock armour 4, a charged amulet of glory, a Mining cape, expert mining gloves and is using either a dragon or crystal pickaxe, the table below provides some expected rates of experience per hour:
| Method | Xp/hour (low)[n 1][n 2] | Xp/hour (high)[n 1][n 3] | Intensity[n 4] | Yield[n 5] |
|---|---|---|---|---|
| Zalcano (drops) | 13,500 | 20,000 | High | Crystal shards, various unique drops, and various ores, bars, and runes |
| Amethyst crystals | 20,000 | 25,000 | Very low | Amethyst |
| Crashed stars | 30,600 | 31,500 | Extremely low | Stardust, gems |
| Calcified rocks | 49,000 | Low | Blessed bone shards, calcified deposits | |
| Motherlode Mine | 54,000 | 60,000 | Low | Various ores |
| Gem rocks | 75,000 | Very high | Various gems, including opals, jades and red topazes | |
| Zalcano (xp) | 50,000 | 92,000 | High | Crystal shards, crystal tool seed, and Zalcano shard |
| Volcanic Mine | 84,000 | 94,000 | Medium | Various ores and other rewards |
| Calcified rocks (3t) | 94,000 | Extremely high | Blessed bone shards, calcified deposits | |
| Blast Mine | 87,000 | 101,000 | High | Various ores |
| Gem rocks (3t) | 110,000 | Extremely high | Various gems, including opals, jades and red topazes | |
| Granite (3t) | 125,000 | Extremely high | Nothing |
- ^ 1.0 1.1 Experience rates are mostly copied from elsewhere in the article. Rates mentioned earlier in article are leading.
- ^ Low rates are based on playing more casually and/or making mistakes.
- ^ High rates are based on playing actively and making few to no mistakes.
- ^ 'Extremely low' means at most one click every few minutes, 'very low' means roughly a single click per minute, 'low' means a few clicks per minute, 'high' means many clicks per minute, 'very high' means a click every few ticks, and 'extremely high' means constant clicking.
- ^ A selection of the most relevant/common yield for each activity.
Ore table
| Name | Level | Experience | |
|---|---|---|---|
 |
Rune essence | 1 | 5 |
 |
Clay | 1 | 5 |
 |
Copper | 1 | 17.5 |
 |
Tin | 1 | 17.5 |
 |
Blurite ore | 10 | 17.5 |
 |
Limestone | 10 | 26.5 |
 |
Iron | 15 | 35 |
 |
Silver ore | 20 | 40 |
 |
Volcanic ash | 22 | 10 |
 |
Lead | 25 | 40.5 |
 |
Coal | 30 | 50 |
 |
Pure essence | 30 | 5 |
 |
Pay-dirt | 30 | 60 |
 |
Sandstone | 35 | 30,40,50,60 |
 |
Gold ore | 40 | 65 |
 |
Gem rocks | 40 | 65 |
 |
Granite | 45 | 50,60,75 |
 |
Mithril ore | 55 | 80 |
 |
Lovakite ore | 65 | 60 |
 |
Adamantite | 70 | 95 |
 |
Nickel | 74 | 80.5 |
 |
Runite | 85 | 125 |
 |
Amethyst | 92 | 240 |
Quests for Mining experience
| Quest | Experience reward |
Mining requirement |
Other requirements |
|---|---|---|---|
| The Forsaken Tower | 500 | - | - |
| Doric's Quest | 1,300 | - | - |
| Plague City | 2,425 | - | - |
| The Giant Dwarf | 2,500 | - |  14 , 14 ,  12 , 12 ,  16 , 16 ,  33 33
|
| Heroes' Quest | 2,575 | 50 |
 55 , 55 ,  53 , 53 ,  53 , 53 ,  25 25
|
| Another Slice of H.A.M. | 3,000 | - | 15 ,  25 25
|
| The Lost Tribe | 3,000 | 17 |
 13 , 13 13 , 13
|
| Between a Rock... | 5,000 | 40 |
 30 , 50 30 , 50
|
| Enakhra's Lament | 7,000 | 45 -optional |
50 , 45 , 43 , 39
|
| The Heart of Darkness | 8,000 | 55 |
48 ,  48 , 46 48 , 46
|
| The Dig Site | 15,300 | - | 10 , 10 , 25
|
| The Curse of Arrav | 40,000 | 64 |
37 ,  62 , 62 , 61 , 62 , 62 , 61 ,  58 58
|
| Song of the Elves | 40,000 | 70 |
70 ,  70 , 70 ,  70 , 70 , 70 , 70 ,  70 , 70 , 70 , 70 ,  70 70
|
| Making Friends with My Arm | 50,000 | 72 |
35 , 66 , 68
|
| Dragon Slayer II | 60,000 | 68 |
200 , 75 , 70 , 62 , 60 , 60 , 50 ,  50 50
|
| Total | 192,600 | ||

References
- ^ Jagex. Mod Ash's Twitter account. 8 November 2017. Archived from the original on 30 May 2020. Mod Ash: "[Was the diary reward for ore-choosing fixed?] 18th June 2015, yes."