QUEST 171 · MEMBERS
The Final Dawn
Bring an end to the plots of a deadly cult and unlock a new boss.
- Difficulty
- Master
- Length
- Long
- Quest points
- 3
- Released
- 23 July 2025
 3
3Jump to a chapter
Before you start
Where to start
Talk to Servius in the Sunrise Palace.


Items required
- Emissary robes
- Any kind of bones (except sun-kissed bones) or raw meat/cooked meat
- A knife (obtainable during the quest)
- A beer (obtainable during the quest)
Recommended
- 85 Combat level
- Combat gear (melee and ranged)
- Food
- Pendant of Ates
- Quetzal whistle
Enemies to defeat
- Emissary Enforcer (lvl-196)
- Chimalli (lvl-160) and Lucius (lvl-160)
- Multiple waves of Emissary cultists (lvl-70 to lvl-90)
- Ennius Tullus (lvl-306)
- Augur Metzli (lvl-396)
STEP BY STEP
Walkthrough
Follow the chapters below. Click any screenshot or diagram to view it at full size.
Infiltration II
Items needed: Two empty inventory spaces, emissary robes, combat gear for a fight with prayer disabled
Items recommended: Pendant of Ates, equip all spots not worn by the emissary robes
Items recommended: Pendant of Ates, equip all spots not worn by the emissary robes
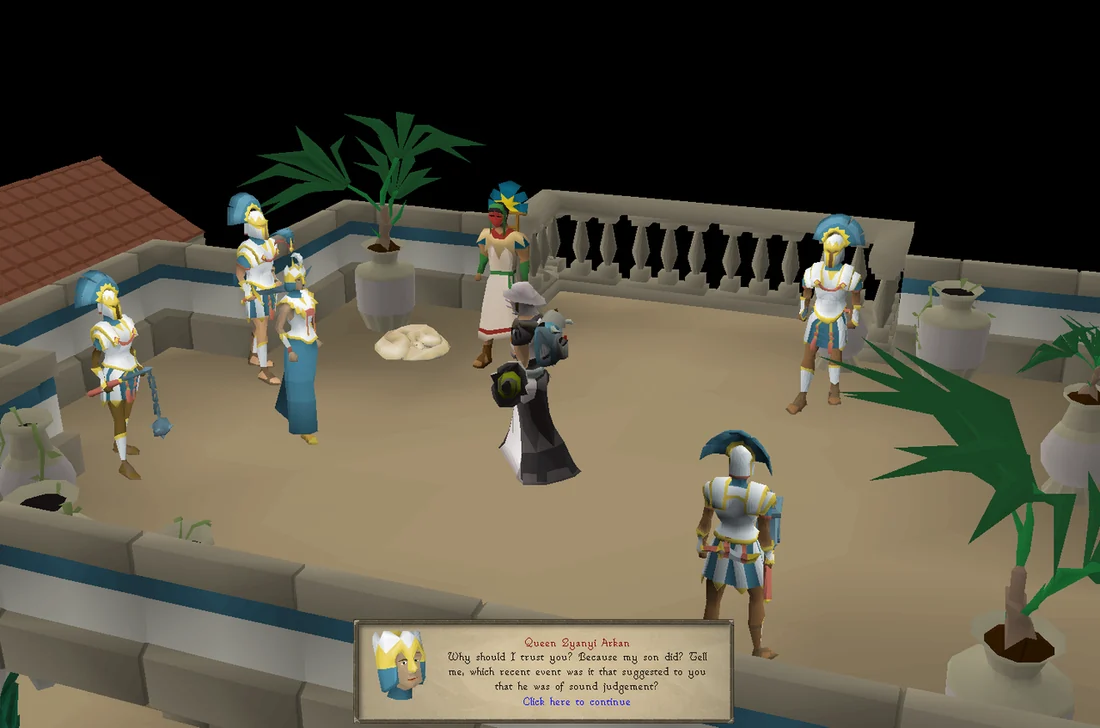
Speak to Servius, Teokan of Ralos at the ground floor (UK) of the Sunrise Palace. He will tell you that Queen Zyanyi Arkan seeks an audience with you; accept to start the quest.
A cutscene will begin in which you will be brought to the top of the palace, with the Queen asking you about your involvement with Prince Itzla Arkan, even though it meant disobeying direct orders from her. You admit that you helped him regardless of the consequences, but you offer to atone for your mistake. Servius convinces her to do so, and she decides to let the incident slide by proving yourself. She asks you to infiltrate the Twilight Emissaries and see what they're up to. Make sure to bring your emissary robes.
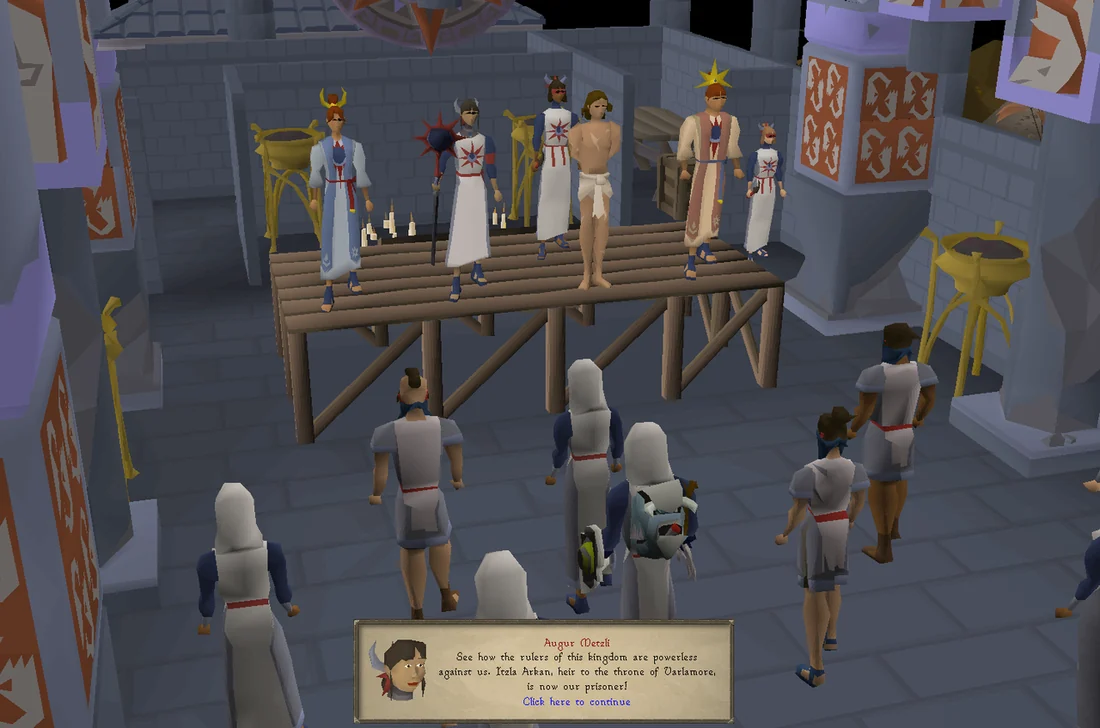
Head back to the Twilight Temple (quetzal to Salvager Overlook then running south to the temple will be fastest), and head inside whilst wearing your Twilight Emissary robes, and another cutscene will play as Metzli reveals to the cultists that they have Prince Itzla captive. Itzla is defiant in front of the crowd before he is taken away, seemingly underground. After the cutscene, attempt to go downstairs; you will be stopped by a Emissary Ascended asking you for the passcode, which is "Final Dawn".
- Note: While in the basement you will be unable to unequip your robes. Logging out may return you to the ground floor, and logging out or teleporting out can remove any quest items collected there.
Once in the basement, go north and then east into an offshoot. You will need to make your way past the Emissary Enforcer, who will throw you out if he sees you or you are too close behind him. Once you sneak past him, head into the next room, where you will try to get information on Itzla's whereabouts. When Metzli and Furia walk out of a room, the latter is concerned about the former's reckless actions before they leave.
Search the bed from the room they came out of for a key, and then search the drawer with the key to obtain a canvas piece. There are two drawers; one in the north and another in the south, and the location of the canvas is different for every player. Use the piece on the painting, then attempt to pick the lock on the chest inside.
To open the chest, simply move the tumblers by clicking on slots above them. The fastest way to brute force the lock is to simply click confirm, see if any show up as green on the right, and if not, move everything up by one. This will take no more than eight tries for the final combination. When picking the chest, if a number is blue, that means it is used in the combination but on a different tumbler. Once you picklock the chest, you will obtain an emissary scroll and attempt to leave, only for the enforcer to walk in and spot you. He will take the scroll from you before attempting to kill you for your betrayal.
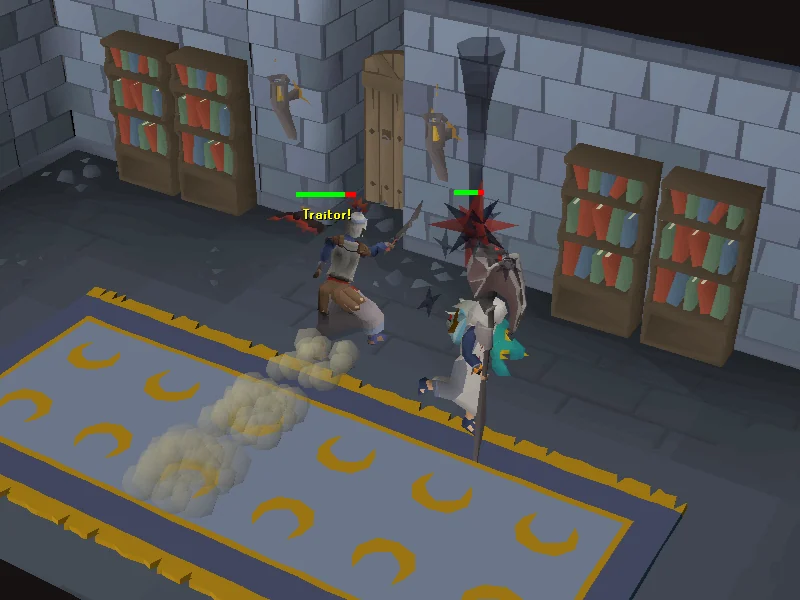
The enforcer has 180 hitpoints and uses a 3x3 AoE melee attack centred on himself. Periodically, he will yell a random quote (such as Thief! or Traitor!) and lunge forward, dealing moderate damage if caught in it and also having a chance to apply a bleed. In other words, all of his attacks are avoidable as long as players react to them in time by running away or side-stepping him. The player is unable to change their equipment during the fight, so it is highly recommended to have equipped the necessary gear beforehand. Additionally, players cannot use prayers or teleport out, though escape is possible via right-clicking "Quick-escape" on the exit door. Should players die during this fight, their gravestone will be placed at the entrance to the Twilight Temple.
After the enforcer dies, pick up the emissary scroll, read it, and then return to the Sunrise Palace.
Home Invasion
Items needed: One of the following: bones, raw meat, cooked meat
Make your way to the top floor of the Sunrise Palace, and inform Queen Zyanyi of the scroll's contents, which reveal that Forebearer Janus intends to move into a newly acquired property across from a bank as a safe house for the cult. Servius immediately recognises this bank as the south-western bank of Civitas illa Fortis, since there are no houses around the eastern bank. Zyanyi will have Captain Vibia help you capture Janus, asking you to meet up with her at the safe house, where she will ask you to set up the trap.
Head over to the safe house, Captain Vibia will be located on the road just south of the building. After talking to her, interact with the south-eastern window and force it open, then climb through the window. A dog inside will become agitated and attack; use either a pile of bones, or a raw/cooked meat of any sort to calm it down; raw beast meat will not work. Pet the dog to see its nametag, which is "GUS". This is the code needed to unlock the door to the rest of the house, and you will bring Vibia in after the coast is clear.
You will now need to make preparations to capture Janus whenever he arrives. First, grab the knife in the kitchen, then the sack of potatoes just outside the kitchen. Empty the sack, then head upstairs and grab the coin purse lying there. Open the purse, then head up to the top floor and use the knife on the potted fan plant with a lighter shade of green for a branch. Additionally, use the now-empty coin purse on the pot of sand for a sandy coin purse, then lastly use the branch on it to create a makeshift blackjack.
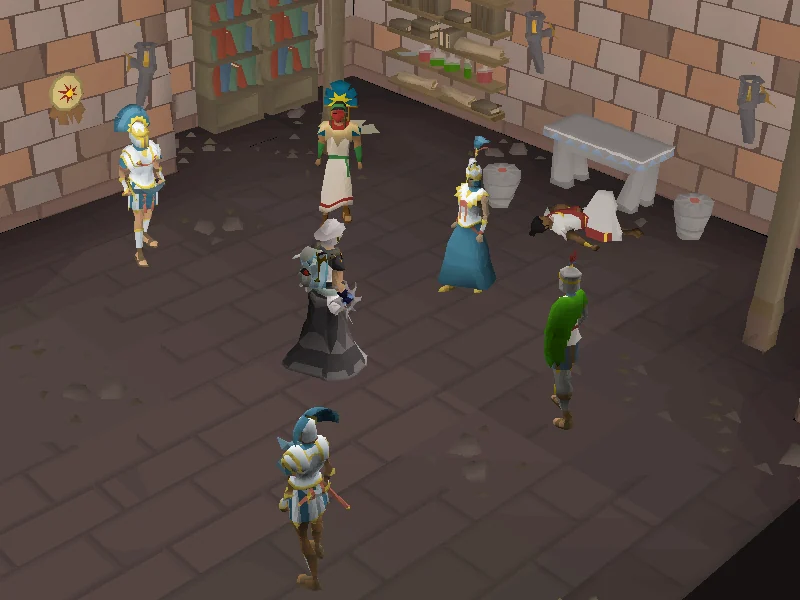
With the sack and blackjack, return to Captain Vibia, and a cutscene will ensue where Janus enters the house and discovers you and Vibia before you knock him out with the blackjack and Vibia restrains him with the sack. Search him for a key, then enter the basement for another cutscene. Zyanyi and her entourage will arrive to confront Janus, who is defiant towards her and states that he is not afraid of death. Zyanyi asks you and the others to leave while she makes him talk. The screen fades to black while various sounds of an unarmed man being assaulted can be heard.
Shortly after, the group returns, and Janus is found dead on the floor, with Zyanyi having tortured and interrogated him. Zyanyi reveals that the cult really intends to perform the Gathering, a ritual in which a dead Teokan is laid to rest and a successor chosen. While you question this, Zyanyi states that they intend to perform this ritual at the Crypt of Tonali in the Tlati Rainforest, where a set of doors must be opened with the blood of two Teokan, and beyond said doors is where the cult believes the path to Mokhaiotl lies.
However, without Servius, the cult hopes to use Prince Itzla's blood instead, and has sought help from the Dwarves of Cam Torum, as they were the ones who had built the doors. You will be offered to depart with them (acting as a "teleport" to the city). Accept this offer to initiate another cutscene.
Dwarven Traitor
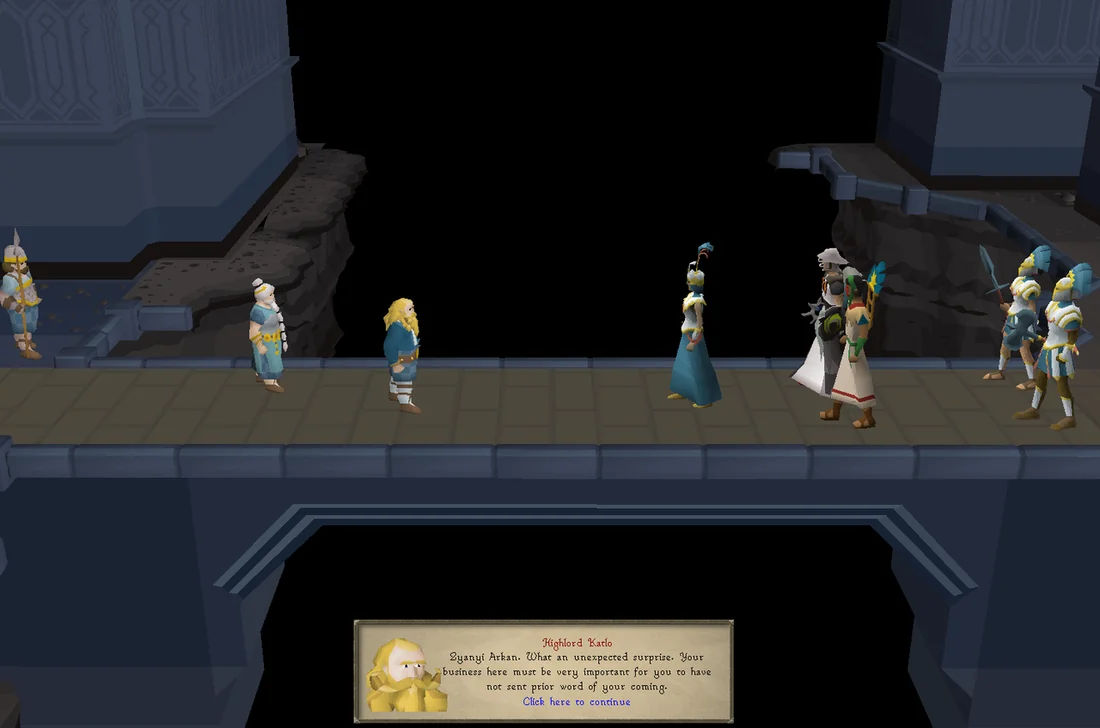
On the way to Cam Torum, Highlord Katlo and Attala will arrive to greet the group. Zyanyi will explain the reason for their visit and asks to lead an investigation, but Katlo refuses, believing a human investigation within his city would cause friction between the dwarven citizens and the human presence. However, Attala will vouch for you given your previous assistance during the events of Perilous Moons, and Highlord Katlo will grant the group permission to search for the cultists. Attala will ask you to meet her in the market, while Queen Zyanyi heads to Tal Teklan to prepare the defences at the Crypt of Tonali. Servius will accompany you, knowing that he is not safe anywhere and may have some knowledge to contribute towards the investigation.
Head further inside, and Attala will question Servius' presence, though you stop their arguing. Attala explains that only four individuals are authorised to grant human access to Cam Torum: Highlord Katlo, herself, Highseer Vandra, and her advisor Teumo. Attala believes that Teumo is the likeliest suspect, as she has enough trust in Katlo and Vandra, and asks you to meet her and Servius at Teumo's home.
Teumo's house is just east of the bank; enter it, where you will meet Galna. Attala will claim that Teumo allowed them to help with a project, while Galna allows the three of you to stay but avoid going downstairs, as she claims Teumo doesn't like anyone going down there. Go upstairs, grab the beer on the table, then speak to Galna again. Offer the beer to her, which she will chug and get drunk, allowing you to go wherever you want.
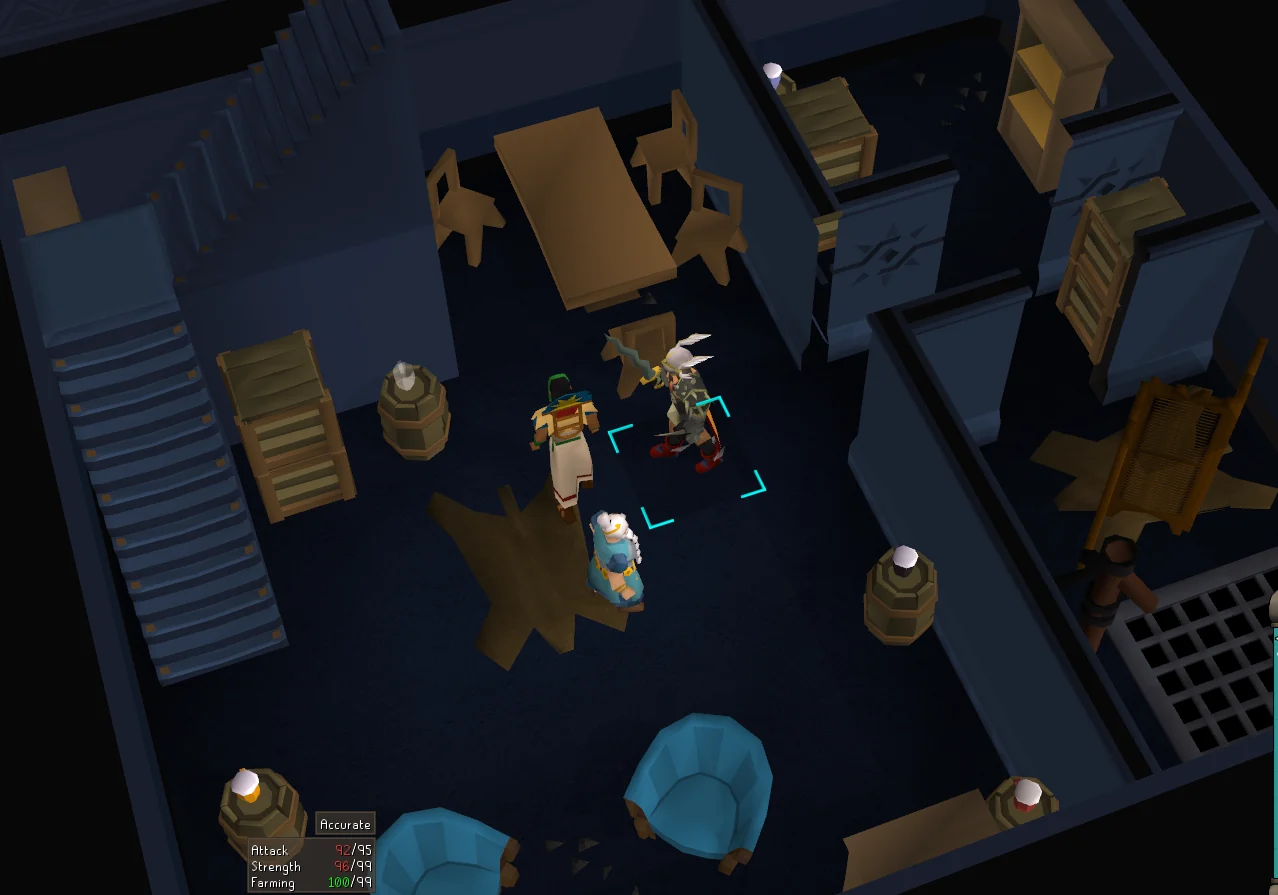
Go downstairs and search the cabinet to the south-west and grab one of each of the following beverages: steamforge brew, dwarven stout, beer, and wizard's mind bomb. You will need to place these on the barrels around the area.
- Place the steamforge brew on the barrel directly south of the cabinet (indicated with "steam")
- Place the stout directly east of this barrel (indicated with "black liquid")
- Place the beer on the northern barrel (indicated with "smells like a Gielinorian pub")
- Place the mind bomb on the south-eastern barrel (indicated with "bubbling")
- Drink any beer from the cabinet, then place the remaining beer glass on the original regular beer barrel ("This barrel seems to be empty").
Once the last correct drink is placed, you will hear a click and the fireplace will extinguish, revealing a lever. Pull the lever, then head to the south-east room and go through the hole. A cutscene will play where you eavesdrop the Tullus twins talking with Teumo, who agrees to help them open the doors in the Crypt of Tonali, provided that they retrieve an Old One keystone from Neypotzli, which he needs to succeed in getting the doors opened.
Report the news back to Servius and Attala, revealing that Teumo was bribed by the cult for his assistance, and you will tell Servius to head to Tal Teklan to see if the defences are ready, while Attala gets the guards to deal with Teumo. Attala will tell you to go to Neypotzli.
Interlopers in Neypotzli
Items needed: Combat equipment, one empty slot
Retrieve combat equipment and optionally supplies at the Cam Torum bank, then make your way north to Neypotzli. As you enter, Eyatlalli will appear before you, telling you of interlopers tampering with the icosahedron behind her. She will tell you that it is a form of keystone, and that an earlier form of it remains from when the prison was built. As she must keep the Moons of Peril in check, she cannot stop them from obtaining it, though you offer to do so in her stead. She will give you a keystone fragment to locate the other keystone. Before you leave, you will ask about Mokhaiotl. Eyatlalli states that while she was created near the end of the Old Ones' time, she did hear the word at least once, and believes that it was related to hope.
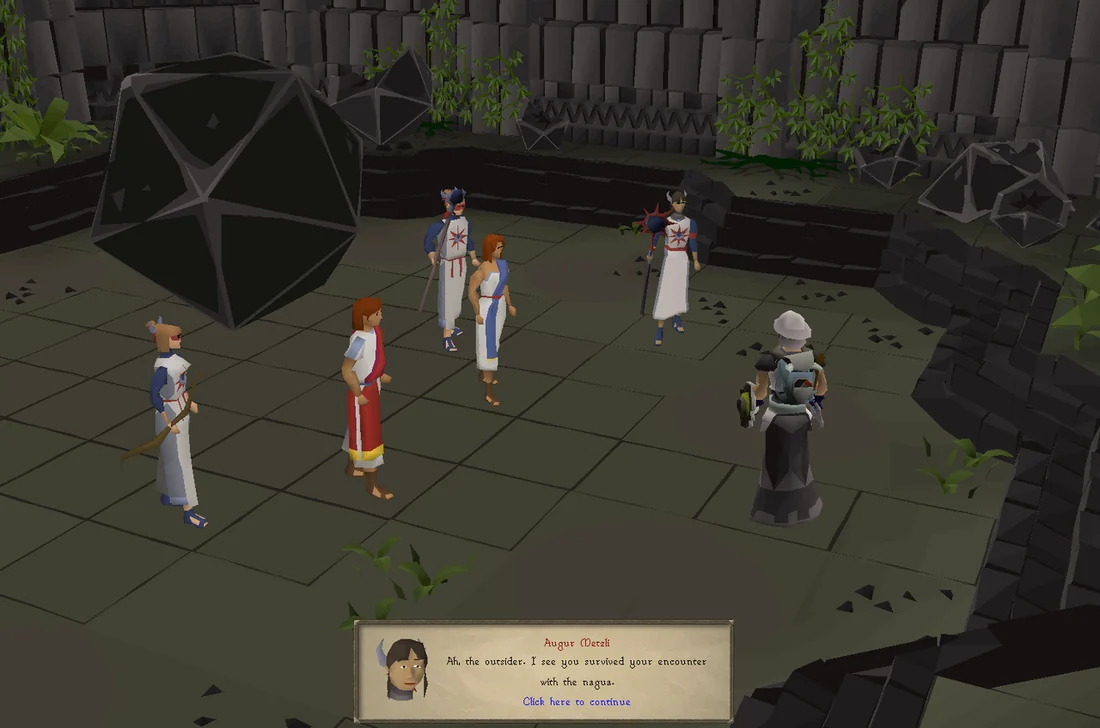
Head through each chamber, using the keystone to pinpoint the exact tile to resonate with the key. You will need to do this once in both the Streambound and Earthbound Caverns. If no supplies were brought, also make some potions and food in these caverns to prepare for the upcoming fight. Then head to the Ancient Prison and use the key in the room to the south-east in the section, revealing a glowing symbol. Go through it, and a cutscene ensues where you confront the Tullus twins, who have already retrieved the keystone. Ennius will call in Metzli, who teleports the twins out and orders Lucius and Chimalli to kill you.
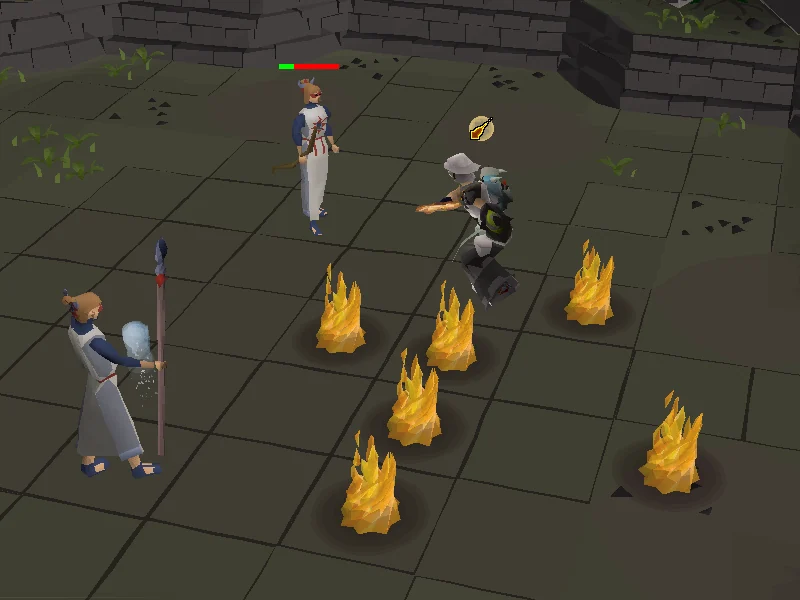
The two cultists have 180 health. Lucius uses magic, while Chimalli uses ranged. They will attack off-sync, allowing the player to flick against their attacks, and it is recommended to do so as they can hit fairly hard. Every three attacks, Lucius will unleash a triple projectile while a 2x2 mini-sun in the arena appears as a safespot. Failing to be in this zone before the projectile hits will deal heavy damage and disable protection prayers. Meanwhile, Chimalli will unleash a barrage of fire arrows that can be avoided by running away from where they would land, indicated with glowing shadows. When one of the pair dies, the other will enter an enraged state; their attacks will pierce through prayer (dealing chip damage), and they will use their special attack more often. It is recommended to kill Lucius first, since Chimalli's special attack is much easier to avoid, especially if you are using melee for the fight. The arena the fight takes place in is considered a part of Neypotzli, meaning that moonlight potions and cooked bream/cooked moss lizard can be made and used as free supplies for the fight.
When the last of the cultists dies, Attala and a few guards will arrive. You will tell her that the twins managed to escape with the keystone, and she will tell you in turn that they failed to find Teumo. You ask if Cam Torum will aid the Queen, but Attala states that this is a human matter and of no threat to Cam Torum, and as such, will not intervene; however, she does hope you survive before leaving to inform Highlord Katlo of the situation.
Crypt Assault
Items needed: Combat equipment of any style for fighting cultists, melee combat equipment for Ennius Tullus, food, potions
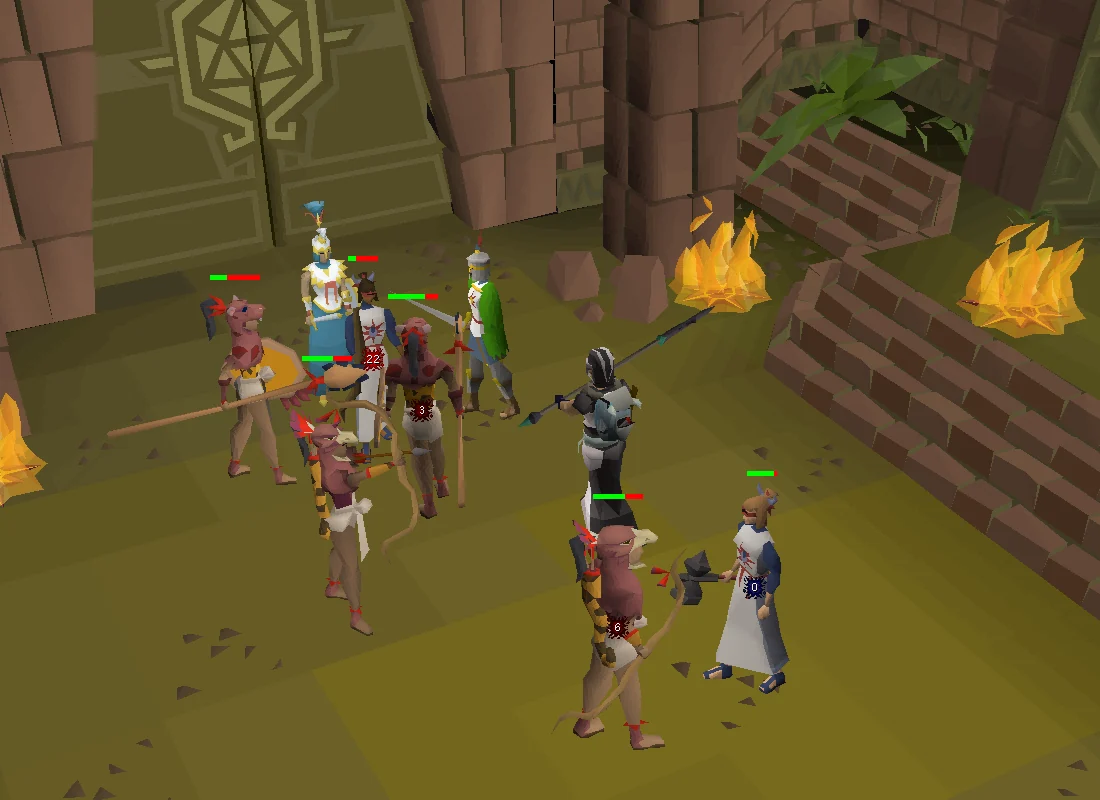
Head to Tal Teklan and find Servius, who is by the eastern gate. He will tell you that the cultists are attacking the Crypt of Tonali. Run south-east; you will find the cultists fighting the Tonali archers and warriors outside the crypt as Queen Zyanyi leads the defence to prevent them from charging through.
You will face six waves of cultists (Emissary brawlers, archers, and conjurers), alongside Queen Zyanyi (level 144), Captain Vibia (level 128), and two Tonali warriors and archers (level 85). While a few more Tonali and some of the Kualti are fighting them a bit further down, they are simply there as scenery.
- Wave 1: 2x Emissary Brawler (level 74), 2x Emissary Brawler (level 86)
- Wave 2: 2x Emissary Brawler (level 74), 1x Emissary Brawler (level 86)
- Wave 3: 1x Emissary Brawler (level 74), 1x Emissary Brawler (level 86), 1x Emissary Archer (level 71)
- Wave 4: 1x Emissary Brawler (level 74), 1x Emissary Brawler (level 86), 1x Emissary Archer (level 71), 1x Emissary Conjurer (level 71)
- Wave 5: 2x Emissary Brawler (level 74), 1x Emissary Brawler (level 86), 1x Emissary Archer (level 71), 1x Emissary Conjurer (level 71)
- Wave 6: 2x Emissary Brawler (level 86), 2x Emissary Conjurer (level 71)
The next wave starts when one enemy from the previous wave remains. While the cultists initially target the Tonali, the player can draw their aggression by attacking them, or may restore hitpoints to the Tonali using food. If too many Tonali fall, the battle is lost, and players must restart from the beginning.
The cultists can run, but they don't use routefinding, so the Emissary Brawlers can be trapped behind fires in the room allowing them to be safespotted. The archers and conjurers cannot be safespotted due to their higher attack range.
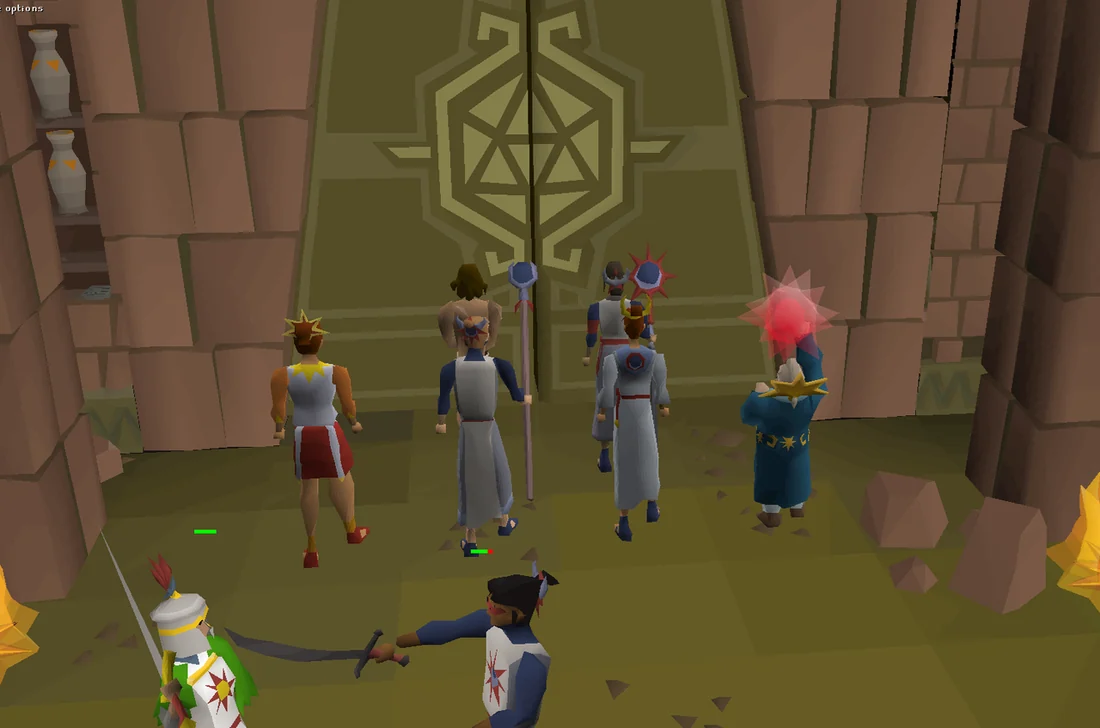
After the last wave of cultists is slain, another group will barge in. Additionally, Metzli, the Tullus twins (Furia and Ennius), Teumo, and Prince Itzla are all teleported into the crypt by a conjurer. Teumo activates the door and walks off, while the others, barring Itzla, rush inside. Zyanyi will get her son and order him away to recover, telling you to come with her to chase after the leaders.
Tullus Showdown
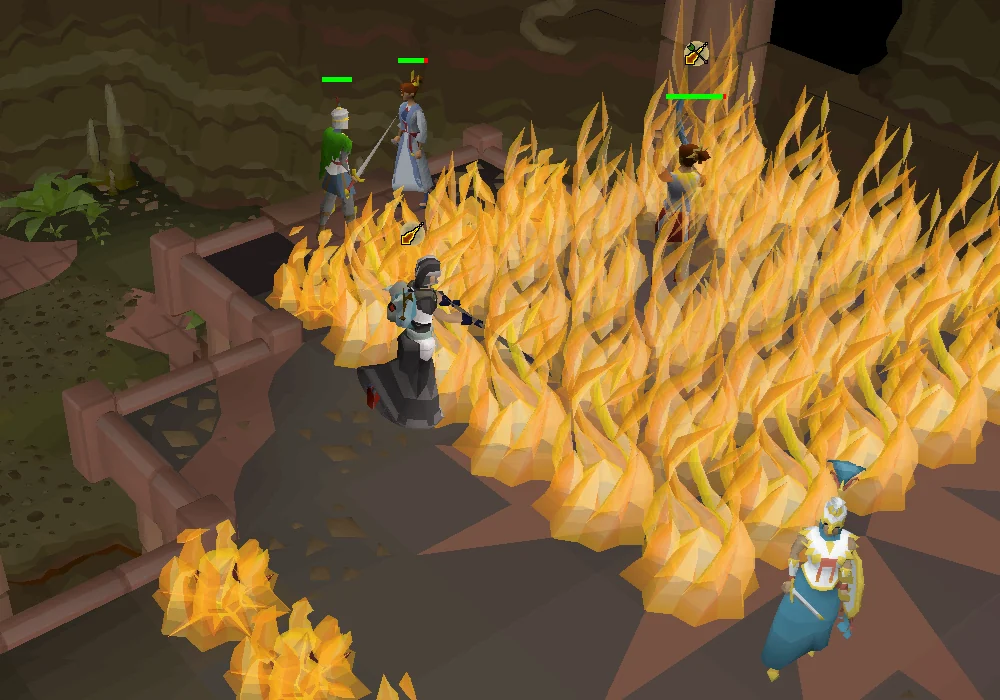
Pursuing the leaders to a small platform, you, Zyanyi, and Vibia confront the Tullus twins, with Furia realising that Metzli had deceived them, though Ennius fails to do so. Furia also reveals that she only accepted Metzli's offer as she promised to return the throne to the Tullus family, which had been seized from them after Emperor Imafore's death. Zyanyi offers them a chance to surrender, but Ennius will refuse and instead draws out his sword and casts several fire spells around the area, separating Vibia and Furia, leaving you and Zyanyi to fight Ennius.
Ennius will have both Protect from Magic and Protect from Missiles active simultaneously, so players must use melee to harm him. He has 380 hitpoints and attacks with melee, along with a few special attacks:
- Sunfire Blast: Circles will begin glowing around the area, indicating safespots for his upcoming attack. Getting caught in this attack will deal moderate damage and inflict a weak burn.
- Sunfire Strike: A row or column of sunfire through him. Getting caught in this attack will deal moderate damage and inflict a weak burn. If the player is diagonally across, he will likewise launch one across himself.
- Sunfire Smite: Ennius will disable the player's overhead prayers.
Queen Zyanyi will usually react to the special attacks. Upon reaching 0 health, Ennius will empower himself, yelling The sun burns within me!, entering the enrage phase. He will heal for 120 health, attacks significantly faster, pierces prayer slightly more, and the Sunfire Strike is enhanced to cover three rows/columns at a time. A halberd weapon can be useful in attacking diagonally across to minimise time loss.
Upon reaching 0 health a second time, Ennius will die for good, while Vibia informs the two of you that Furia was injured but managed to run away. Prince Itzla will then appear in his combat gear and insist that he accompany you in pursuing Furia and Metzli. Queen Zyanyi will initially refuse, but is persuaded to remain at the Crypt entrance to defend against the cultists.
The Tonali Cavern
Items needed: A knife blade (found in pile of Old Tools), 3 free inventory spaces for the knife blade, ancient roots, and root kindling
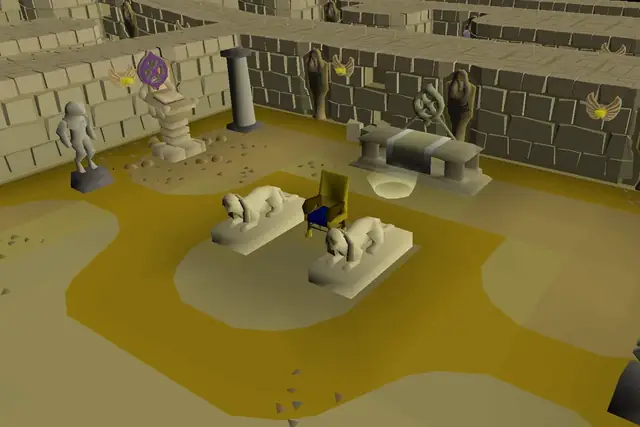
You will need to navigate through the underground cavern beneath the Crypt. A Earthen Nagua will appear, prompting Prince Itzla to stay behind and fight it while telling you to go further ahead. Make your way across the agility shortcuts or portals to reach the other end of the chamber, where Prince Itzla will have caught up to you. Make sure to activate the strange platform, as this unlocks a permanent shortcut.
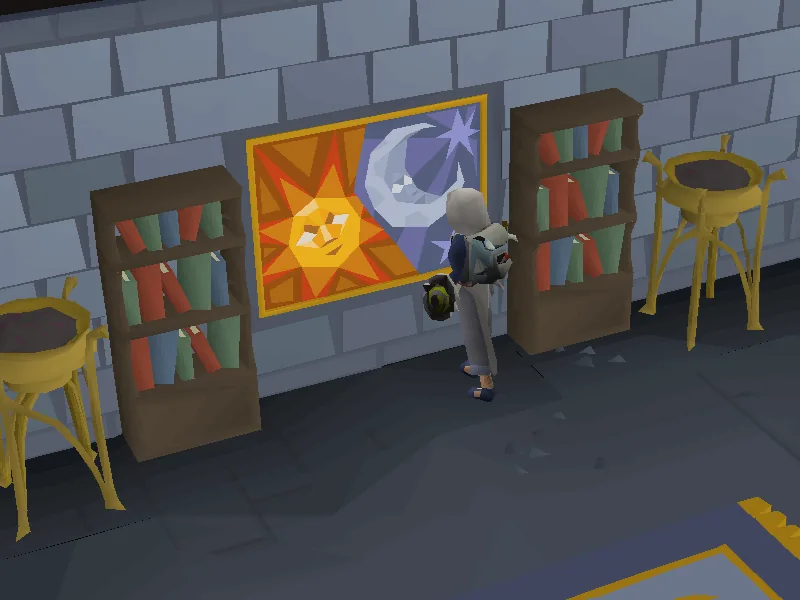
Upon entering the next room, you will find both a moon and sun puzzle to the sides, both of which need to be solved to proceed further in. Avoid logging out or hopping worlds during the puzzles, as this may reset your progress.
Sun Chamber
The right side of the room contains a sun-related puzzle. First, inspect the statue, which is written in the Old Ones' language. Prince Itzla will be able to translate the words for you by inputting them into the message box when prompted.
In order to activate the statue, both you and Prince Itzla must be at a specific altar and imbue it with Kuhu essence, found by searching the urns near the altars.
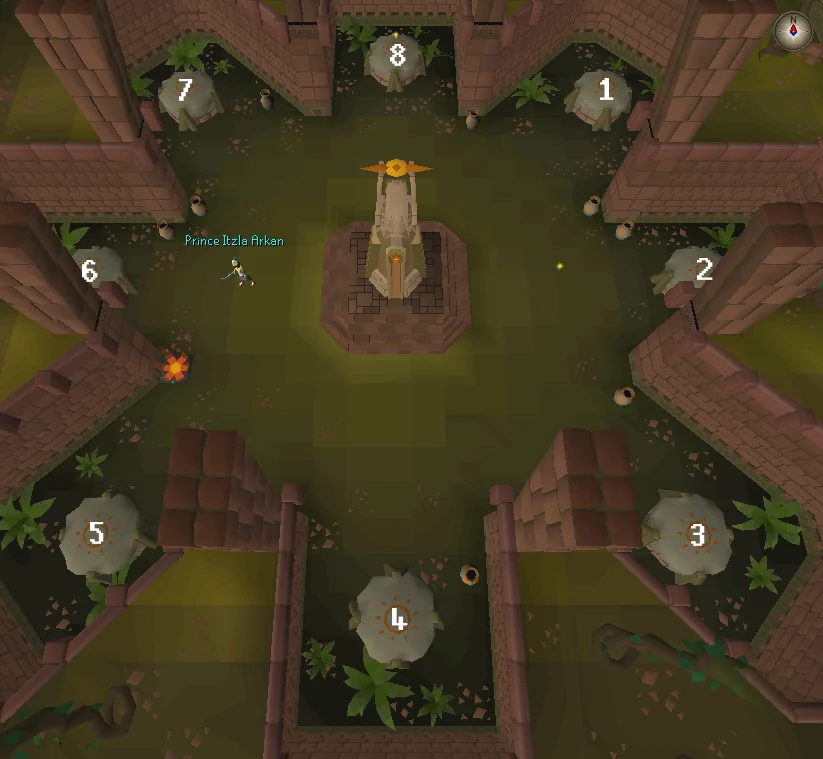
The altars are not labeled or numbered in any way in game, but their numbering starts with 1 being the north-east altar and travels clockwise, with 8 ending at the north altar.
The statue's wording will determine where you and Prince Itzla need to be positioned, and is random for every player. You will need to be on one altar corresponding to either the first or second numbered altar of the statue's given code, while Prince Itzla would be moved to the altar of the second altar number, respectively. The third number/word is not used (but is good for translation purposes).
- Oma = 2
- Naui = 4
- Kuli = 5
- Chaki = 6
- Koma = 7
- Ueai = 8
- Makti = 10
For example, if the statue states "Naui Koma-Makti", you or Itzla need to be placed by the fourth altar, while the other needs to go to the seventh altar. The altars are numbered 1 to 8, with the first being the north-east altar and the next number in sequence going clockwise.
When placed on the correct altar, attempt to imbue the Kuhu essence. If successful, the statue will generate a new phrase. If failed, you will take 5 damage. After three successful tries, the room is finished.
Moon Chamber
The left side of the room contains a moon-related puzzle. You will be teleported to the side of the room, while Prince Itzla is teleported into the centre. Flames block your path forward, and Itzla can disable them by standing on the corresponding pressure plate. He will need to move back and forth so that you can fully navigate the room.
Upon nearing the statue, search the old tools to get a knife blade. Then, use the blade on the tree roots across the room to get ancient roots, which must be fletched into root kindling. Then, this kindling must be used on the statue.
To find how much kindling to use you will need to have Prince Itzla step on both plates in turn, and sum the total number of braziers that are alight in each case. If the wrong amount of kindling is deposited, the player will take 4-5 damage. After three successful deposits, the room is finished.
The Truth of Mokhaiotl
Items needed: Combat equipment (preferably ranged), food, potions
Head into the next chamber to find Metzli, who reveals that she manipulated the cult to acquire the means to access Mokhaiotl, which she knows is an archive built by the Old Ones. She will then initiate combat, entering a ranged form. Immediately activate Protect from Missiles and fight her. Metzli has 600 hitpoints, and Prince Itzla will assist you in the fight. It is recommended to fight her using ranged since her magic defence is fairly high and many of her mechanics must be dodged.
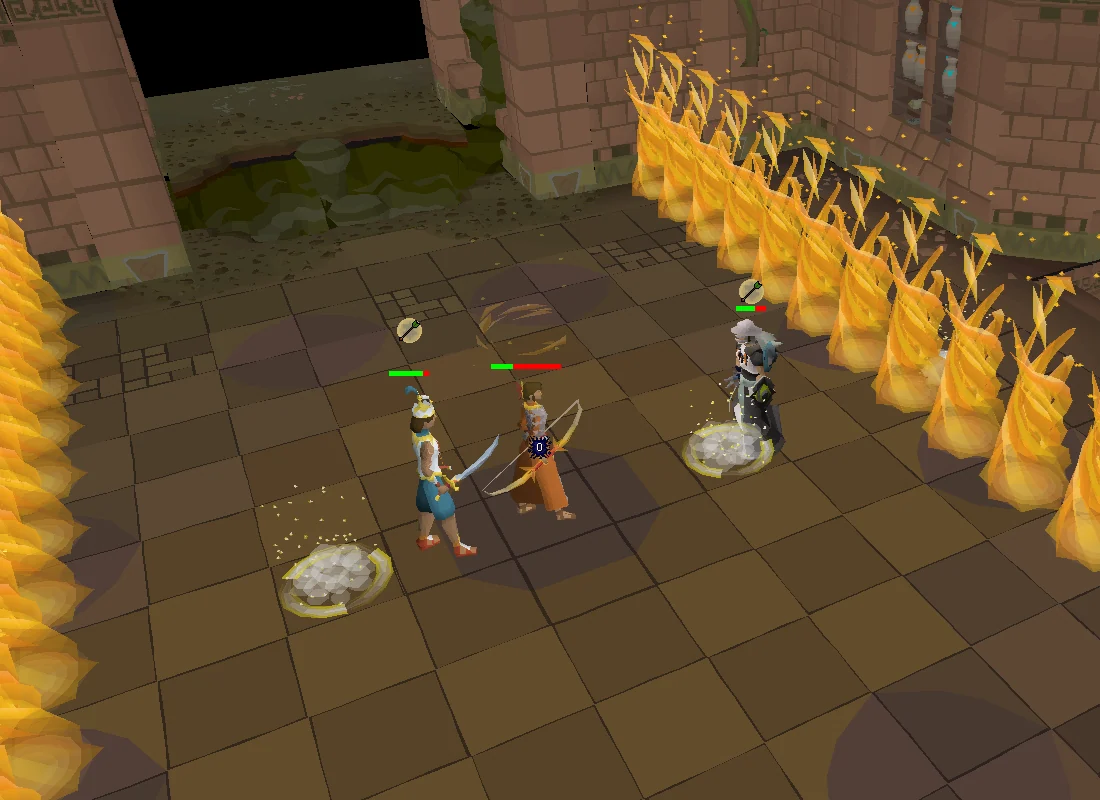
Every three attacks, Metzli will perform a special attack based on her current active style:
- Sunfire Blast: Same as the one used by Ennius, except used twice in a row.
- Sunfire Waves: Metzli will unleash two waves of sunfire that sweep across the room. To avoid damage from the attack, simply stand on the row/column that doesn't have sunfire on it.
- Sunfire Sweeper: Metzli will unleash two waves of sunfire simultaneously while also summoning two white portals to her sides. To avoid damage from this attack, wait for the sunfire wave to close in, then stand on the white portal to teleport behind it.
- Triple Projectile: Same as the one used by Lucius, except used twice in a row.
- Moonfire Waves: Same as Sunfire Waves.
- Moonfire Sweeper: Same as Sunfire Sweeper.
After every sweeper attack, Metzli will change combat styles, this time using magic. Upon using Moonfire Sweeper, she will revert to ranged. Pray accordingly to minimise damage.
Upon reaching 10% of her health, Metzli will enter an enrage phase, conjuring a wall of fire in all cardinal directions. She will not use any auto-attacks. Instead, she will target the quadrant that the player and Itzla are on. A white portal will additionally spawn to move to the next quadrant, avoiding damage from the attack. Itzla will react to the mechanic but will be unable to attack her.
Upon reaching 0 health, Metzli will run further into the cavern. Head down the stairs to the west then search the skeleton on the lower level for a stone tablet, revealing that human refugees assisted the Old Ones (seemingly referred to as the Kuhu) in constructing the archive's defences. Continue around this path to the north to the next entrance to reach the final chamber. Dying after defeating Metzli will not require the player to repeat the fight.
Note: With 75 Agility, you can cross the pillar shortcut on the north side of the chamber where you fought Metzli, to more quickly reach the final chamber. However, you will still need to return and take the stone tablet to complete the quest.
In the final chamber, Metzli will be shocked to discover that there were no archives at all. Prince Itzla tells her that the gift might never have existed or was never meant for them to access. As he finishes, Furia appears from behind, calls Metzli a traitor, and throws a rune knife at her, finishing her off. You and Prince Itzla will then take Furia back to Queen Zyanyi. As you exit the chamber, you will be prompted to explore the area fully before returning.
Inspect the statues at the entrance to the final chamber, and then search the skeleton for a second stone tablet, which reveals that the chamber was indeed named Mokhaiotl and was in fact an archive, but during its construction, something ancient awakened deep in the archive and destroyed it entirely. Lastly, attempt to return to the chamber, resulting in a message appearing that a horrifying screech can be heard within, and the player will automatically return to the crypt. Do not forget to inspect the statues in the area to complete the investigation sequence and automatically return to the crypt.
Queen Zyanyi orders to take Furia to prison in Fortis for her betrayal, presumably with death, but Prince Itzla stops her from doing so, believing that while the cult is mostly leaderless, there are still supporters from the shadows. As Metzli and Ennius had been martyred, Prince Itzla suggests sparing Furia for the time being, which she accepts, seeing it as a sign of his growth throughout the entire ordeal.
Queen Zyanyi and Captain Vibia will then return to Fortis with Furia in tow. You and Prince Itzla will exchange some banter, and he'll thank you for sticking by him, showing his gratitude by handing down the Arkan blade, which was passed down to him from his grandfather.
Congratulations, quest complete!
Quick checklist 106 instructions
Use this when you already know the route. The full walkthrough above includes explanations and diagrams.
Infiltration II
Talk to Servius at the of the Sunrise Palace to start the quest.
Say: Yes.
After the cutscene, make your way to the Twilight Temple. Search the chest at the Tower of Ascension for the emissary robes if needed.
Equip the emissary robes and enter the temple.
After the cutscene, attempt to go downstairs and choose the passcode "Final Dawn".
Enter the basement, and head east toward the backroom while avoiding the Emissary Enforcer.
Enter the backroom and watch the cutscene.
Search the large bed (south room) for a key.
Open the drawer in either the south or north room for the canvas piece.
Use the canvas piece on the painting at the eastern end.
Inspect the painting and enter a hidden passage.
Picklock the blue chest for an emissary scroll. To open the chest, simply move the tumblers by clicking on slots above them.
The fastest way to brute force the lock is to simply click confirm, see if any show up as green on the right, and if not, move everything up by one. This will take no more than eight tries for the final combination.
Fight the Emissary Enforcer (180 HP AoE melee):
You cannot teleport, pray, or change gear. If you die here, your gravestone will appear at the Twilight Temple entrance.
Step back during normal attacks, and step sideways when he shouts Traitor! or Thief!
Pick up and read the emissary scroll.
Return to Queen Zyanyi at the top floor of the Sunrise Palace.
Home Invasion
Go behind the safe house south of the western bank in Civitas illa Fortis.
Talk to Captain Vibia.
Inspect the southernmost window on the east side of the safe house.
Enter the window and use your chosen bones/meat on the dog.
Pet the dog for the door's passcode, "GUS".
Grab the sack of potatoes; empty the sack.
Take the knife nearby.
Head up to the middle floor and pick up the coin purse.
Empty the purse, then head up to the top floor.
Use the knife on the diseased off-green potted plant for a branch.
Use the empty coin purse on the pot of sand to fill it up.
Use the branch and sandy coin purse on each other to create the makeshift blackjack.
Show the sack and blackjack to Captain Vibia to initiate a cutscene.
Search Janus for a key which initiates another cutscene.
Agree to go with Queen Zyanyi to Cam Torum.
Say: Yes, let's go.
Dwarven Traitor
Speak to Attala in the Cam Torum market.
Enter Teumo's house east of the bank.
Head upstairs and pick up the beer.
Return downstairs and use the beer on Galna.
Enter Teumo's basement. Search the cabinet to the south-west and grab one of each of the following beverages: steamforge brew, dwarven stout, beer, and wizard's mind bomb.
Place the steamforge brew on the barrel directly south of the cabinet (indicated with "steam")
Place the stout directly east of this barrel (indicated with "black liquid")
Place the beer on the northern barrel (indicated with "smells like a standard Gielinorian pub")
Place the mind bomb on the south-eastern barrel (indicated with "bubbling")
Drink the beer on the barrel south of the staircase (indicated with "empty"), then place the beer glass on it.
Inspect the fireplace and pull a hidden lever.
Climb through the hole in the wall in the south-eastern room to initiate a cutscene.
Return to Servius and Attala in the basement and talk to them.
Interlopers in Neypotzli
Head to the bank and prepare for a fight against two level 160 cultists.
Head north to Neypotzli to have Eyatlalli give you a keystone fragment.
Head through the Streambound and Earthbound Caverns, using the keystone to pinpoint the exact tile to resonate with the key.
Head to the Ancient Prison and use it in the room to the south-east in the section.
Touch the glowing symbol to initiate a cutscene.
Kill Lucius and Chimalli.
Alternate Protect from Magic/Ranged. Step into golden circles to avoid Lucius' special, and avoid Chimalli's fire arrows by stepping away from where they will land.
Once one of them are defeated, the other will start to pierce prayer and perform special attacks more frequently.
It is recommended to kill Lucius first, since Chimalli's special attack is much easier to avoid, especially if using melee.
Talk to Attala.
Crypt Assault
Head to Tal Teklan. Servius is north-east of the Quetzal Transport System landing site, east of the altar.
The Crypt of Tonali is a fair distance to the south-east, just west of Kastori.
Enter the Crypt of Tonali to initiate a cutscene.
Kill six waves of cultists; allies can be healed by using food on them. If all Tonali warriors and archers helping you die, the waves reset.
Complete all six waves successfully to initiate a cutscene. The fight will not start until after all the dialogue.
Kill Ennius Tullus (380 HP). He uses melee attacks (pray Protect from Melee), and can only be attacked with melee, using three special attacks:
Sunfire Blast: Circles will begin glowing around the area, indicating safespots for his upcoming attack.
Sunfire Strike: A row or column of sunfire through him. If the player is diagonally across, he will likewise launch one across himself.
Sunfire Smite: Disables the player's overhead prayers.
Upon reaching 0 health, he will enter the enrage phase, healing 120 health, attacking faster, and Sunfire Strike is enhanced to cover three rows/columns at a time.
The Tonali Cavern
After the cutscene, descend into the Tonali Cavern.
Make your way across the agility shortcuts or portals to reach the northern end of the cavern.
Inspect the Strange Platform, as this unlocks an entrance from the surface directly east of Tal Teklan.
Proceed north slightly, and descend east into the sun puzzle room.
Search all the urns for Kuhu essence.
The altars are numbered 1 to 8, with the first being the north-east altar and the next number in sequence going clockwise.
Inspect the sun statue for your puzzle; the wording will determine where you and Prince Itzla need to be positioned (The third number/word is not used):
Oma 2
Naui 4
Kuli 5
Chaki 6
Koma 7
Ueai 8
Makti 10
For example, if the statue states "Naui Koma-Makti", Itzla needs to be placed by the fourth altar, while you need to go to the seventh altar.
Inspect the sun statue for the next engraving.
After successfully imbuing an altar three times, the puzzle is complete.
Descend west into the moon puzzle room.
Use pressure plates to move Prince Itzla and suppress a set of flames.
Search the old tools and obtain a knife blade.
Pull the tree roots around the room for some ancient roots.
Use the knife blade on the roots for some root kindling.
Count the total amount of lit braziers from stepping on both pressure plates
Count the lit braziers while Itzla is standing on one pressure plate, tell him to move, count the lit braziers. Add the two numbers up, and that's how many kindlings you need to add to the statue. The total number will not change until you add the correct amount of kindlings.
Deposit the equivalent amount of root kindling in the moon statue.
Doing so correctly three times will complete the puzzle.
Leave the puzzle through the portal.
Follow Prince Itzla to unlock the northern doors.
Return to the surface and resupply for the final fight if needed; ranged style is recommended.
The Truth of Mokhaiotl
Return to the entrance to Mokhaiotl via Lift Platform (Crypt of Tonali) then traveling north. Enter the door to initiate a cutscene.
Defeat Augur Metzli. She has 600 Hitpoints, and uses special attacks every three attacks, after which she sometimes switches from ranged to magic and vice versa.
Dodge flame walls via a gap or gold symbol to teleport to a safe area.
She also uses the same special attacks used by Lucius and Ennius earlier. She may do them multiple times in a row.
Upon reaching 10% of her health, she will enter the enrage phase. She will target the quadrant that the player and Itzla are on. A white portal will additionally spawn to move to the next quadrant, avoiding damage from the attack.
After defeating Metzli, make your way to the next entrance at the northern end by using the stairs or jumping across the pillar (requires 75 Agility).
Enter the final chamber to initiate a cutscene. Note that clicking elsewhere during the dialogue will reset the player back outside the room. Should this happen, you will have to watch the cutscene again.
After the cutscene, search the skeleton next to the entrance for a stone tablet. Read it.
Inspect the Sun Statue and Moon Statue.
Interact with the final chamber to return to the Crypt of Tonali.
Finish the final conversation with Prince Itzla.
Congratulations, quest complete!
QUEST COMPLETE
Rewards
- Arkan blade
- 55,000 Thieving experience
- 25,000 Runecraft experience
- 25,000 Fletching experience
- A lamp granting 55,000 experience to any combat skill of at least level 40, including Prayer
- Access to the Crypt of Tonali
- Access to the Doom of Mokhaiotl (also known as Osto-Ayak) 'delve' boss
OSRS WIKI CONTRIBUTORS
Sources & credits
Walkthrough text and preparation lists are adapted from Old School RuneScape Wiki contributors under CC BY-NC-SA 3.0. Game imagery © Jagex Ltd; individual image credits are available from their captions. This page is fan-made and not affiliated with Jagex.
- The Final Dawn →full guide · revision 15319352
- The Final Dawn/Quick guide →quick guide · revision 15319387
KEEP QUESTING