1
1Requirements
- 20 Magic [boostable]
- 30 Smithing [boostable]
- Completion of Elemental Workshop I
QUEST 112 · MEMBERS
Among the ancient scrolls and papers held at the Dig Site's Examination Centre, scholars have discovered more references to the mysterious elemental ore. Recently they have uncovered a beaten book detailing long-lost uses for this odd material. Can you decrypt the code that will lead you to the deeper depths of the Elemental Workshop? Can you get your head around fixing the mind-bending machinery, or will you fry your brain in the attempt?
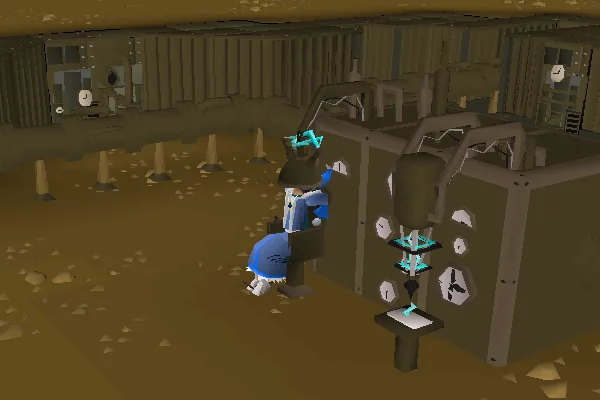
Search the bookcases in the Exam Centre's library.
STEP BY STEP
Follow the chapters below. Click any screenshot or diagram to view it at full size.
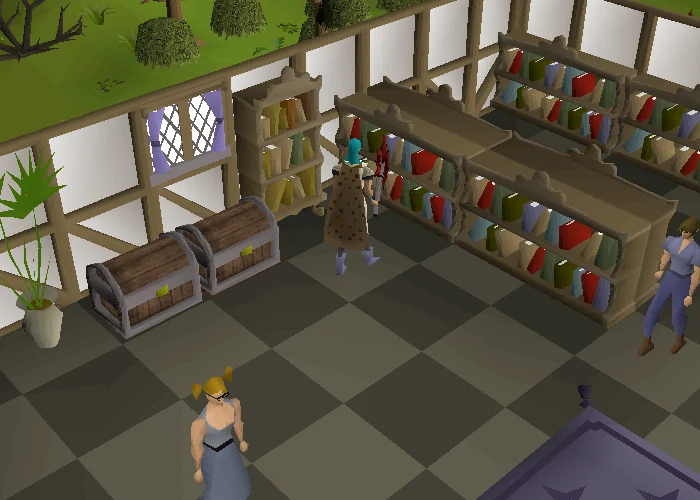
To begin, you need to go to the Exam Centre south of the Digsite. In the south eastern corner of the building, there are two chests. Search the bookcase two tiles down (the one attached both to the wall and another bookcase) to find a beaten book with a scroll in it as a bookmark.
Note: There is a bug where searching the bookcase may give the message "The label on this shelf reads 'Earth Sciences'; however, the helpful books have been taken. It looks like the other students got to them first." If this happens, search the other bookcases to start the quest.
Read the book and then the scroll, and then head to Seers' Village. Do not get rid of this book before the end of the quest; if you do, you will not be able to make the helmet out of the primed mind bar.
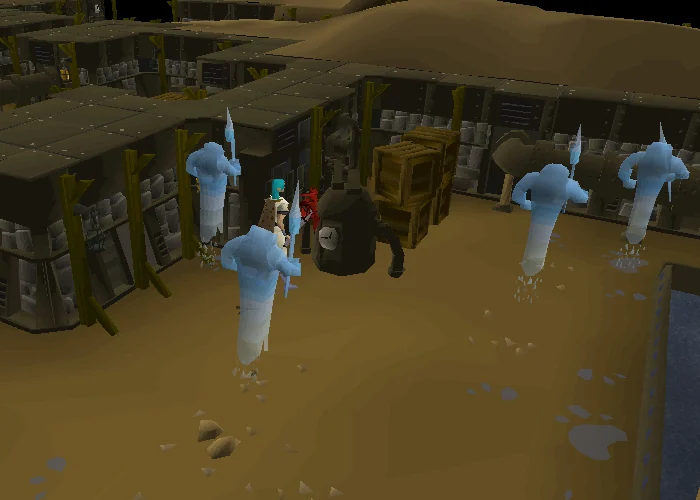
If you don't already have the battered key, head to the building south-west of Seers' Village Bank, and search the north-east bookcase to get a slashed book and a battered key. Enter the north building with the anvil icon, and let yourself in to the workshop the same way as in the Elemental Workshop I quest.
Next, go into the northern water elemental room and search the machinery to the south-west side of the room. You will receive the key used to unlock the hatch in the main room.
Go to the middle of the room and use the key on the locked hatch. Once you're downstairs, you need to fix the machinery. First, go to the "Schematic crate" (directly beside an old lever) to the south and take both the crane and the lever schematics. Then go back upstairs and use one of your bars on the workbench (make sure you only make one in the smithing menu, as the default will be make all!) and make the crane claw. Do not make a helmet yet!
Now, go back down and pull the south-western lever right next to the old crane, and then use the claw on the crane.
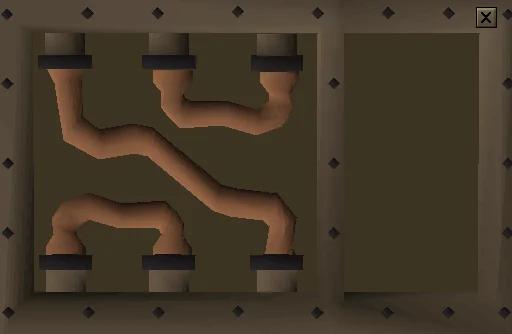
Next, head up the small stairs to your west (not up the hatch, but onto the metal construct) to get to the upper level. Open the junction box in the west to work on the pipes for the press (click on the ends you want to connect). You'll want to arrange them as seen on the left.
Hint: The player is led to assume that the machine operates by steam pressure. There is a huge entry pipe that leads from outside the workshop, suggesting that this is a power input source. Observe the lever schematic and the relative pipe entry points. The lever schematic indicates that it is in the middle position normally, blocking flow from the middle pipe, and requires pulling to either side to activate and allow flow from the middle pipe to the outer pipes.
Explanation of the solution: The correct solution is worked out from the clue given by the lever schematic as well as by seeing how the 6 pipes are connected to the back of the junction box. These correspond to the pipe ends in the interface. The lever schematic shows that the middle pipe coming from the lever, top-right in the interface, allows steam to flow towards the lever and must therefore be connected to the large supply pipe, top-middle in the interface. Next, the 2 remaining pipes coming from the lever, bottom-right and bottom-middle in the interface, must be connected to the 2 pipes coming from the press, top-left and bottom-left in the interface. The only combination that works is bottom-right to top-left and bottom-middle to bottom-left.
For the next two parts, you'll need to search some crates in the bottom and upstairs area. The small cog, medium cog, large cog and piece of pipe are located randomly in crates for each player. However, only certain crates contain items: on the bottom floor try searching the double-stacked crates next to the large exit staircase, the single crate north-west by the stairwell down, the double-stacked crate east of the west water valve, the double-stacked crates south-east, and the crate next to the schematics crate. Upstairs try searching the double-stacked crate south-east above the old crane and the double-stacked crate directly north-west of the junction box. If searching a crate does not yield an "It's empty." message or produce an item, it is not possible to find an item within. Once you have found all 3 cogs and the piece of pipe, you can stop searching the crates. If you lose one of the items before using it you can retrieve it in the same crate it was found previously.
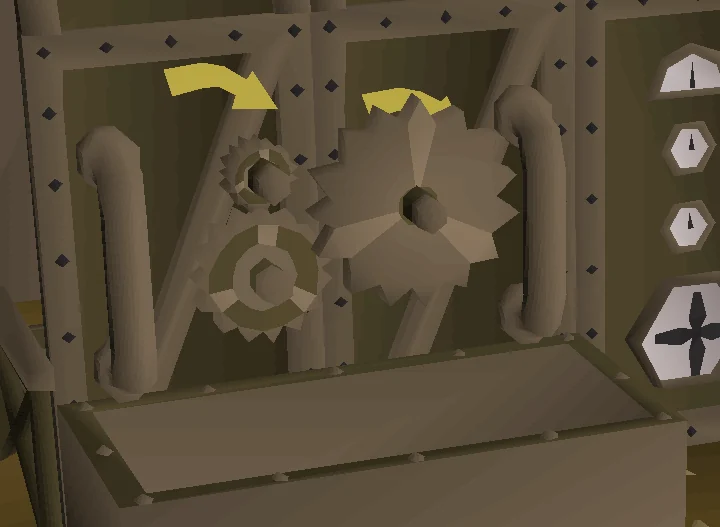
Use the pipe on the broken pipe upstairs on the northernmost point of the scaffolding. Then for the cogs, take them back down the steps to the wind tunnel on the east side of the track. On the side of the wind tunnel are three pins (under 2 yellow directional arrows). By using the cogs on the machine pins, you want to stick the small one on the upper-left pin, the medium one on the lower left, and the large one on the right.
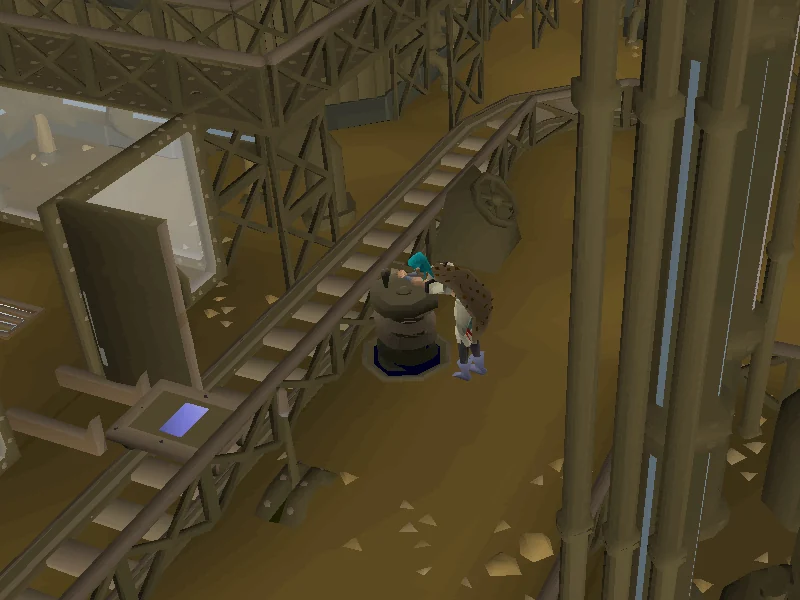
Pull old lever to turn off fan or cart will not move forward in the next step.
Do this twice if you want the shield.
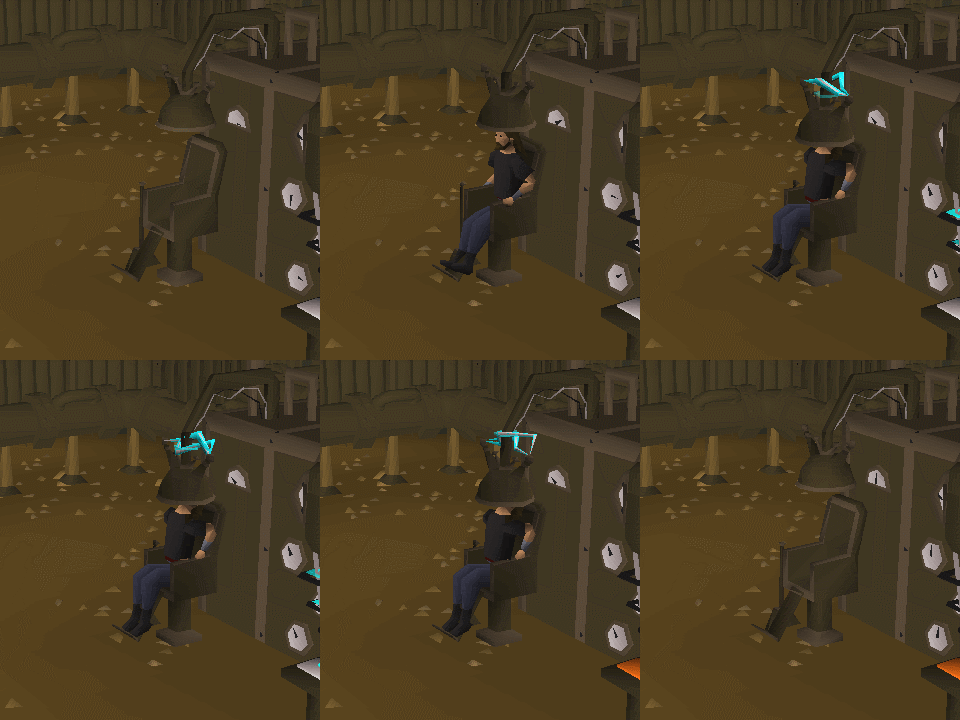
Go down one more level to where there are two doors, one with the mind symbol and the other with the body symbol. Go into the mind room (nearest), and place your bar on the extractor gun and operate the extractor hat next to it. A part of you will be drained into the bar turning it into a primed mind bar (that will be picked upstairs in the old crane).
This will temporarily lower your Magic level by 20.
NOTE: You can power multiple bars while here, but each additional bar will drain your Magic by another 20 levels. Power an additional bar if you wish to make a mind shield at the same time as your mind helmet (this is not required to complete the quest).
Once you have picked up the bar/s from the extractor gun, go back up to the workshop. The beaten book is required to be in your inventory to make the mind helmet, otherwise you will make a mind shield. Make a mind helmet out of the bar and the quest is complete.
Congratulations, quest complete!
After the quest is completed, if you have gathered an additional powered bar, make the mind shield with the slashed book in your inventory. Using a bar on the anvil with the slashed book in your inventory will make a mind shield, otherwise you will make a second mind helmet.
Both the mind shield and helmet can be sold on the grand exchange for 40,528 and 1,255 respectively.
Use this when you already know the route. The full walkthrough above includes explanations and diagrams.
Go to the Exam Centre south of the Digsite. (Varrock teleport then run east; or use a Digsite pendant/ teleport and walk south towards the exam centre; the Senntisten teleport from the Ancient Spellbook is quite close, and can be used from a Portal Nexus in a POH)
Search the most north-eastern of the south-eastern bookcases to find a beaten book.
Read the beaten book, then read the scroll.
Keep the book.
Head back to the Anvil building in Seers Village and enter the odd-looking wall and down the staircase to the workshop.
using the battered key (Elemental Workshop I) (to re-obtain search the north-eastern bookcase in the house opposite to get both the key and book)
Go north to the water elemental room and search the machinery to the west to get a key.
Note: You must read the scroll obtained from the Beaten Book to search Machinery or the option will not appear.
If you didn't bring 2 elemental ores with you, go west and get them by killing 2 Earth elementals (Mine the Elemental Rock for them to spawn).
Go south from the centre room and smelt your ores into bars, at the furnace.
Go down the hatch in the centre room with the key in your inventory.
Take-from the schematic crate to the south, take both schematics.
Go back upstairs and use one bar on the workbench to make a crane claw. Note: Don't accidentally let it create more than one.
Return downstairs to the two crane levers and pull the western one to lower the crane.
Use your claw on the old crane.
Climb the stairs to the south-west to get on the catwalk.
Open the junction box to the west.
Click the pipe ends, not the pipe, to connect them as shown.
Search all crates on the ground floor and the catwalk of the workshop until you find the following. IMPORTANT: Be sure to read the Crane schematic and Lever schematic, or you will be unable to find all the pieces.
Pipe
Small cog
Medium cog
Large cog
On the north side of the catwalk use the Pipe on the broken piping.
On the east side of the Ground floor use the cogs on the pins on the side of the machine that looks like a wind tunnel as shown.
Small cog on upper left pin
Medium cog on lower left pin
Large cog on right pin.
Pull the old lever to the right.
Note: The repairs are now complete. You will no longer need to head up to the catwalk again.
On the south side place an elemental bar on the jig cart. (under the elemental claw)
Note: Crane controls in case you get stuck:
Raise/Lower crane: western lever
Rotate crane: eastern lever
*
First, use the western lever (by the schematics crate) to raise the crane.
Use the eastern lever to rotate the crane.
Use the western lever twice to lower the crane into the lava and back up again.
At this point the elemental bar should be orange.
Use the eastern lever to rotate the crane over the cart.
Use the western lever twice to lower the bar onto the cart and release it.
Pull the lever just north of the claw controls to move the cart.
Note: The lever in front of the yellow sign moves the cart to the next station.
Pull the western-most lever - in front of the press station - to flatten the bar once the cart has stopped.
Note: At this point the elemental bar should be flattened.
Pull the yellow sign lever again to move the cart to the next station.
Pull the northern-most lever.
Turn the corkscrew lever twice.
Pull the northern-most lever again.
Turn the west water valve twice so that the valve opens and closes. The tank will fill.
Turn the east water valve twice so that the valve opens and closes. The tank will empty.
Pull the northern-most lever.
Note: At this point the elemental bar should be blue.
Turn the corkscrew lever twice.
Pull the northern-most lever to close the door.
Pull the yellow sign lever again.
Pull the east lever
At this point the elemental bar should be white.
Note: The machine may need to be turned off and back on again for the bar to turn white.
Pull the east lever again to stop the fan.
Pull the yellow sign lever again.
Take-from the jig to get a primed bar.
Head down the stairs to the north-west.
Go through the east door.
Use your primed bar with the extractor gun.
Operate the Extractor hat with the bar placed under the gun.
Note: Your magic level will be drained by 20.
Take-from the extractor gun to get a primed mind bar.
Go up both spiral stairs
Use your primed mind bar on the workbench to smith a mind helmet.
Congratulations, quest complete!
QUEST COMPLETE
OSRS WIKI CONTRIBUTORS
Walkthrough text and preparation lists are adapted from Old School RuneScape Wiki contributors under CC BY-NC-SA 3.0. Game imagery © Jagex Ltd; individual image credits are available from their captions. This page is fan-made and not affiliated with Jagex.
KEEP QUESTING
Game icons © Jagex Ltd, via the OSRS Wiki. Interface icons by Lucide.