 |
This quest has an in-depth guide. It contains a more detailed description of dialogue, cutscenes, and storyline.
|
Details
| Start point | Talk to the High Priest of Icthlarin in Sophanem. Show on map |
|---|---|
| Official difficulty | Experienced |
| Official length | Short |
| Description | The High Priest of Icthlarin has problems again - this time with the inhabitants of Menaphos. Sophanem is recovering from the plague, yet most of its citizens are still trapped on the other side of the river. Diplomacy has failed and subterfuge beckons. Clearly, this is the sort of job that a shifty adventurer could excel in. |
| Requirements |
|
| Items required |
|
| Recommended |
|
| Enemies to defeat |
|


Walkthrough
- Talk to the High Priest in Sophanem. ( 1•4)…
1 Sounds like a quest for me; I can't turn that down! 4 Is there any way into Menaphos from below? - Go to the most north-eastern building in Sophanem and talk to Jex. ( 2)…
2 Better get down there. - Climb-down the ladder in the building, then the trapdoor.
- Follow the red line on the map to the ladder and/or use the provided tile markers for guidance. Protection from magic is recommended. It is also recommended to turn off auto-retaliate in the combat tab.
- You will encounter one scarab trap via this path. BE HIGHLY CAUTIOUS as triggering it would drop you to a multi combat lower level.
The provided tile markers give a short route that is as safe as possible to the ladder required for the quest.
- Green markers indicate the correct direction to travel when the path forks.
- Yellow markers indicate the correct tiles to stand on carefully, when dealing with traps or other threats.
- Red markers contain other warnings.
The markers additionally indicate when specific other actions should be performed (e.g. swapping protection prayers or right clicking on particular tiles).
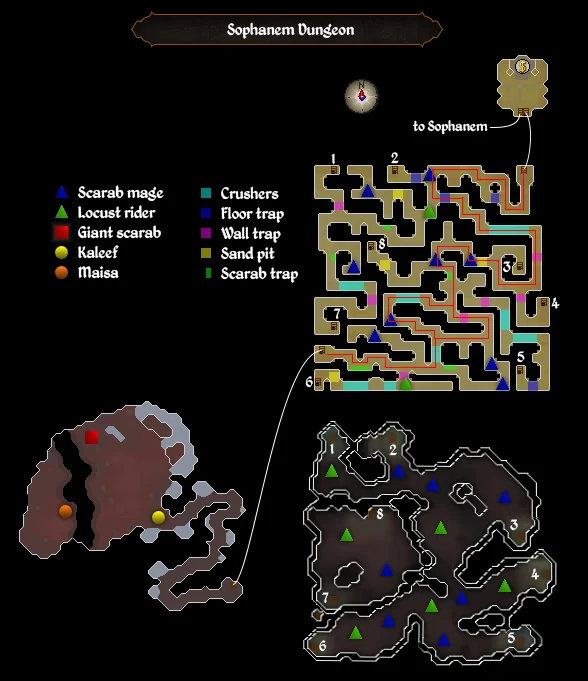
| Tile markers |
|---|
[{"regionX":22,"z":2,"regionId":8516,"regionY":52,"color":"#FFFFFF00"},{"regionX":47,"z":2,"regionId":8516,"regionY":43,"color":"#FFFFFF00"},{"regionX":48,"z":2,"regionId":8516,"regionY":43,"color":"#FFFFFF00"},{"regionX":49,"z":2,"regionId":8516,"regionY":44,"color":"#FFFFFF00"},{"regionX":50,"z":2,"regionId":8516,"regionY":44,"color":"#FFFFFF00"},{"regionX":51,"z":2,"regionId":8516,"regionY":43,"color":"#FFFFFF00"},{"regionX":52,"z":2,"regionId":8516,"regionY":43,"color":"#FFFFFF00"},{"regionX":53,"z":2,"regionId":8516,"regionY":44,"color":"#FFFFFF00"},{"regionX":54,"z":2,"regionId":8516,"regionY":44,"color":"#FFFFFF00"},{"regionX":28,"z":2,"regionId":8516,"regionY":27,"color":"#FFFFFF00"},{"regionX":27,"z":2,"regionId":8516,"regionY":27,"color":"#FFFFFF00"},{"regionX":26,"z":2,"regionId":8516,"regionY":26,"color":"#FFFFFF00"},{"regionX":25,"z":2,"regionId":8516,"regionY":26,"color":"#FFFFFF00"},{"regionX":33,"z":2,"regionId":8516,"regionY":13,"color":"#FFFFFF00"},{"regionX":32,"z":2,"regionId":8516,"regionY":12,"color":"#FFFFFF00"},{"regionX":47,"z":2,"regionId":8516,"regionY":52,"color":"#FFFF0000"},{"regionX":47,"z":2,"regionId":8516,"regionY":51,"color":"#FFFF0000"},{"regionX":46,"z":2,"regionId":8516,"regionY":51,"color":"#FFFF0000"},{"regionX":46,"z":2,"regionId":8516,"regionY":52,"color":"#FFFF0000"},{"regionX":27,"z":2,"regionId":8516,"regionY":56,"color":"#FFFF0000"},{"regionX":27,"z":2,"regionId":8516,"regionY":57,"color":"#FFFF0000"},{"regionX":26,"z":2,"regionId":8516,"regionY":57,"color":"#FFFF0000"},{"regionX":26,"z":2,"regionId":8516,"regionY":56,"color":"#FFFF0000"},{"regionX":33,"z":2,"regionId":8516,"regionY":52,"color":"#FF00FF00"},{"regionX":33,"z":2,"regionId":8516,"label":"Go east","regionY":51,"color":"#FF00FF00"},{"regionX":37,"z":2,"regionId":8516,"regionY":51,"color":"#FFFF0000"},{"regionX":36,"z":2,"regionId":8516,"regionY":51,"color":"#FFFF0000"},{"regionX":36,"z":2,"regionId":8516,"regionY":52,"color":"#FFFF0000"},{"regionX":37,"z":2,"regionId":8516,"regionY":52,"color":"#FFFF0000"},{"regionX":35,"z":2,"regionId":8516,"label":"Right click Evade","regionY":51,"color":"#FFFFFF00"},{"regionX":58,"z":2,"regionId":8516,"regionY":38,"color":"#FFFFFF00"},{"regionX":57,"z":2,"regionId":8516,"label":"Right click Disable","regionY":38,"color":"#FFFFFF00"},{"regionX":52,"z":2,"regionId":8516,"regionY":30,"color":"#FF00FF00"},{"regionX":52,"z":2,"regionId":8516,"label":"Go west","regionY":29,"color":"#FF00FF00"},{"regionX":46,"z":2,"regionId":8516,"label":"Walk","regionY":44,"color":"#FFFFFF00"},{"regionX":43,"z":2,"regionId":8516,"label":"NO STEP","regionY":35,"color":"#FFFF0000"},{"regionX":40,"z":2,"regionId":8516,"label":"Pray magic","regionY":38,"color":"#FFFFFF00"},{"regionX":43,"z":2,"regionId":8516,"label":"Pray magic","regionY":57,"color":"#FFFFFF00"},{"regionX":34,"z":2,"regionId":8516,"regionY":35,"color":"#FF00FF00"},{"regionX":37,"z":2,"regionId":8516,"regionY":27,"color":"#FF00FF00"},{"regionX":34,"z":2,"regionId":8516,"regionY":24,"color":"#FF00FF00"},{"regionX":34,"z":2,"regionId":8516,"label":"Go east","regionY":34,"color":"#FF00FF00"},{"regionX":36,"z":2,"regionId":8516,"label":"Go south","regionY":27,"color":"#FF00FF00"},{"regionX":34,"z":2,"regionId":8516,"label":"Go west","regionY":25,"color":"#FF00FF00"},{"regionX":29,"z":2,"regionId":8516,"label":"Walk","regionY":26,"color":"#FFFFFF00"},{"regionX":24,"z":2,"regionId":8516,"label":"Pray magic","regionY":20,"color":"#FFFFFF00"},{"regionX":31,"z":2,"regionId":8516,"regionY":9,"color":"#FF00FF00"},{"regionX":31,"z":2,"regionId":8516,"label":"Go west","regionY":8,"color":"#FF00FF00"},{"regionX":22,"z":2,"regionId":8516,"regionY":10,"color":"#FFFFFF00"},{"regionX":22,"z":2,"regionId":8516,"label":"Go west","regionY":9,"color":"#FFFFFF00"},{"regionX":12,"z":2,"regionId":8516,"regionY":9,"color":"#FFFF0000"},{"regionX":13,"z":2,"regionId":8516,"label":"NO STEP","regionY":9,"color":"#FFFF0000"}] |
| Tile markers guide • Data |
| Image | Description |
|---|---|
|
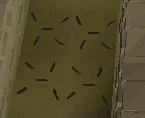
Floor trap: Search floor to pass. Walking over them will deal 10% of current hitpoints, rounded down, plus 10 damage |
|
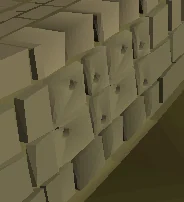
Wall trap: Search the wall to pass. Walking past them will deal 10% of current hitpoints, rounded down, plus 10 damage |
|
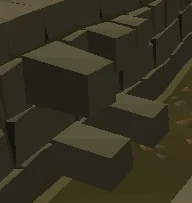
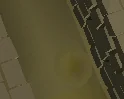
Crusher Blocks: Move diagonally between them or use the minimap to automatically navigate (Note: This may sometimes fail). Failure will hit 8 damage. |
|
Sand pits: Avoid by walking around the pit. If you step on these, the ground will crack open and a Scarab swarm will come out. |
|
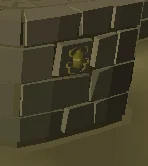
Scarab trap: Avoid standing directly under these. Otherwise a pit will appear, dropping you to the lower level. |
- Search Kaleef's body.
- Read the parchment.
- Talk to Maisa to the west. ( 2•3)…
2 Draynor Village 3 Leela - Speak to Osman in front of the Al Kharid palace. ( 2•3)…
2 I want to talk to you about Sophanem 3 It would drive a wedge between the Menaphite cities. - Travel to Sophanem and speak to Osman again outside the gates. ( 3)…
3 I know of a secret entrance to the north.
|
This fight takes place in an instance. |
- Navigate the tunnels to the ladder again.
- Kill the level 191 Giant scarab.
- If you decide to mage the Giant Scarab, it can be safespotted by standing near Kaleef's body, use Protect from Missiles. Note: The Giant Scarab can still spawn mages and riders that can attack you which you should be highly careful of. The Giant Scarab CAN extinguish bullseye lanterns; bring a tinderbox.
- Talk to Osman.
- Pick up Keris if you wish (needed for Desert hard diary).
- (Tip: Do not teleport out if you wish to complete a task for Desert hard diary, instead return to the maze and kill a Locust rider with the Keris.)
- Return to Sophanem and talk to the High Priest.
- Congratulations, quest complete!
Rewards
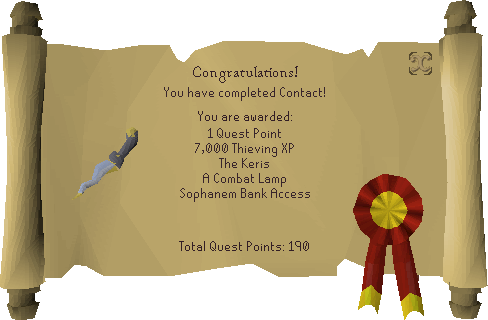
- 1
 Quest point
  7,000 Thieving experience
- Bankable Combat lamp granting 2 x 7,000 experience in
 Attack,
  Strength,
  Defence,
  Hitpoints,
  Ranged, or
  Magic
Magic - The Keris dagger
- Access to Sophanem's shops including: bank, Blades by Urbi., Nathifa's Bake Stall., The Spice Is Right.
- The music track Back to Life and The Spymaster
Unlocks:
- Giant scarab accessible in the Nightmare Zone.
Required for completing
Completion of Contact! is required for the following:
- Beneath Cursed Sands
- Hard tier of the Desert Diary