
Slayer XP is normally based on the assigned monster's Hitpoints and is awarded when an eligible task monster dies.
COMBAT • MEMBERS
Slayer
Build points before chasing perfect tasks, then block around your goals and preferred combat styles.
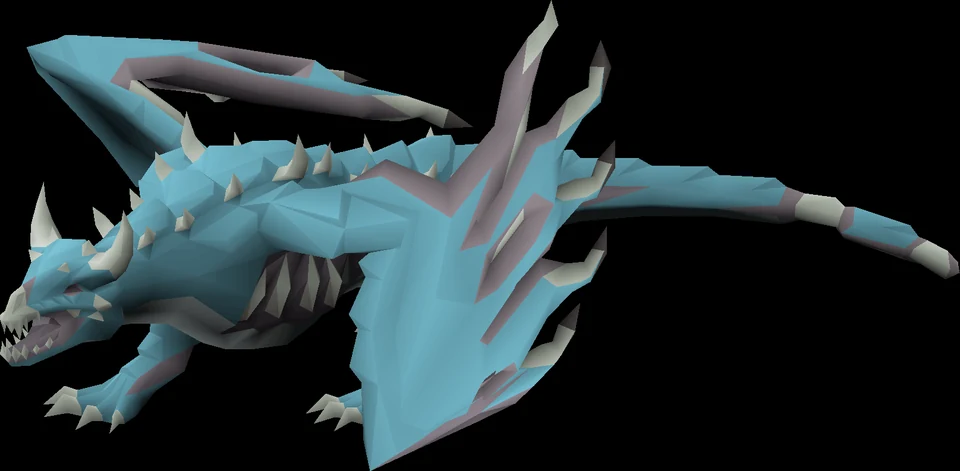
Do not spend early points impulsively—task storage, blocks, extensions, and the Slayer helm compete for them.
Image credits →START HERE
Pick the route that matches your level.
Use the short version below to orient yourself, then set your exact level in the method finder. You do not need to read the whole guide before starting.
01 · LEVEL 1–50Use a master that fits your combatComplete tasks quickly, learn weaknesses, and preserve points.Set your level →02 · LEVEL 50–70Unlock the Slayer helmetCombine useful headgear and start shaping a basic block list.Set your level →03 · LEVEL 70–85Extend tasks you enjoyBurstable and cannon-friendly assignments can speed both Slayer and combat.Set your level →04 · LEVEL 85–99Boss, barrage, or profitHigh-level creatures offer distinct routes; optimise for the style you will sustain.Set your level →
UNDERSTANDING SLAYER
Learn the system before you optimise the loop.
Slayer is a combat skill with several viable routes. The best method is not automatically the one with the largest experience-rate number: startup time, travel, real input prices, useful outputs, and the amount of attention you can sustain all belong in the decision.
This guide treats levels as unlocks rather than a single uninterrupted race to 99. Use the route below as a strong default, then switch when a quest, diary, equipment upgrade, or account goal makes another method more valuable to you.
Task weighting determines how often a master assigns each creature. A block list is most effective when it targets common, unwanted assignments rather than personal annoyances alone.
Slayer points arrive after task streak requirements and pay for blocks, skips, extensions, storage, unlocks, and equipment improvements.
The Slayer helmet combines protective headgear and provides task combat bonuses after components and imbues are handled appropriately.
LEVEL-BY-LEVEL METHOD FINDER
Set your level. Get the methods that apply now.
This is the working core of the guide: source-backed training sections filtered by current level and account type, with full rates, quantities, requirements, setup notes, and method tables kept beside their revision.
ACCOUNT
5 Slayer sections shown for Members at level 1.
Open a section for its full setup, evidence, and tables.Members • MembersAccess to Slayer masters
10 data rows
Access to Slayer masters
In general, obtain tasks from the highest-level Slayer master that your Combat and Slayer levels allow. The monsters they assign generally give more experience than lower-level Slayer masters. Duradel is the best Slayer master to use for the fastest experience, but some players may find that Nieve's (or Steve's) task weighting better suit their preferences. Note that just because the player can access better Slayer masters, this does not directly translate to more experience per hour. That is, maximising experience per hour is not simply a matter of always taking tasks from the highest-level Slayer master that is currently available to the player.
Some players train Slayer using only one master. However, players typically train Slayer by switching between two masters. They do this by using one specific Slayer master that is appropriate for (or lower than) their level, and then switch to using a different higher-levelled Slayer master in order to take advantage of completion milestones. There are Slayer completion milestones for every 10th, 50th, 100th, 250th and 1000th task completion that award additional Slayer points. Higher-levelled masters will assign more difficult tasks than the typical Slayer master would, either in monster assigned or quantity given, but the reward is a greater bonus of Slayer points.
Each Slayer master usually assigns various monsters based on a weight rating, which determines how likely the player is to get that task. Some Slayer masters have unique tasks to themselves, such as Konar quo Maten, who is the only one who assigns hydras. The latter three Slayer masters usually have a shared pool of assignable monsters, albeit with modifications to either the quantity or weighting.
| Slayer Master | Location | Requirement to use | Points/task | 10th | 50th | 100th | 250th | 1000th |
|---|---|---|---|---|---|---|---|---|
| Turael/Aya | Burthorpe | Any level | 0 | 0 | 0 | 0 | 0 | 0 |
| Spria | Draynor Village | A Porcine of Interest | 0 | 0 | 0 | 0 | 0 | 0 |
| Mazchna/Achtryn | Canifis | Priest in Peril, 20 combat or 99 Slayer | 6 | 30 | 90 | 50 | 70 | 100 |
| Vannaka | Edgeville Dungeon | 40 combat or 99 Slayer | 8 | 40 | 120 | 100 | 140 | 200 |
| Chaeldar | Zanaris | Lost City, 70 combat or 99 Slayer | 10 | 50 | 150 | 250 | 350 | 500 |
| Konar quo Maten | Mount Karuulm | 75 combat or 99 Slayer | 18 | 90 | 270 | 450 | 630 | 900 |
| Nieve/Steve | Tree Gnome Stronghold | 85 combat or 99 Slayer | 12 | 60 | 180 | 300 | 420 | 600 |
| Duradel/Kuradal | Shilo Village | Shilo Village, 100 combat+50 Slayer or 99 Slayer | 15 | 75 | 225 | 375 | 525 | 750 |
| Krystilia | Edgeville | Any level (Done at least 1 task) | 25 | 125 | 375 | 625 | 875 | 1250 |
| Mortimer | Wyrmscraig Cavern | Fallen From Grace, Combat level of 100 and a Slayer level of 70 | X | X | X | X | X | X |
Local reference: Slayer training, revision 15285156. Community reference material is attributed to the OSRS Wiki; this fan guide adds its own planning tools and route framing.
Members • MembersAccess to Slayer tasks
2 detailed notes
Access to Slayer tasks
Some Slayer task monsters can be found during a quest or in other locations but require quests to be completed before they can be assigned as Slayer assignments.
- Some Slayer task monsters can be found during a quest or in other locations but require quests to be completed before they can be assigned as Slayer assignments.
Local reference: Slayer training, revision 15285156. Community reference material is attributed to the OSRS Wiki; this fan guide adds its own planning tools and route framing.
Members • MembersRecommended stats
3 detailed notes
Recommended stats
It is strongly recommended to have fairly high combat stats and to have completed a lot of quests for block slots before starting Slayer training. High combat stats increase damage output considerably and allow the player to use the best equipment available. Low-level Slayer masters also have poor task lists and give fewer Slayer reward points than the higher-level ones.
A mid-level account with a combat level of 70 can start at Slayer master Chaeldar or with Konar quo Maten at level 75, and work their way towards higher-level Slayer masters such as Nieve and Duradel. An account with a combat level of 3 can start at Turael, but it is much more efficient to start at a higher level Slayer master after gaining combat levels and better equipment.
- A mid-level account with a combat level of 70 can start at Slayer master Chaeldar or with Konar quo Maten at level 75, and work their way towards higher-level Slayer masters such as Nieve and Duradel. An account with a combat level of 3 can start at Turael, but it is much more efficient to start at a higher level Slayer master after gaining combat levels and better equipment.
Local reference: Slayer training, revision 15285156. Community reference material is attributed to the OSRS Wiki; this fan guide adds its own planning tools and route framing.
Members • MembersRecommended quests
1 detailed notes
Recommended quests
Completing the following quests can improve the overall Slayer experience:
Local reference: Slayer training, revision 15285156. Community reference material is attributed to the OSRS Wiki; this fan guide adds its own planning tools and route framing.
Members • MembersRecommended equipment
35 data rows
Recommended equipment
The same general idea of maximizing strength and accuracy bonuses or prayer bonus to reduce Prayer point drain holds true from single target melee tasks
Hallowfell offers a strong melee option for tasks that would traditionally be done with bursting/barraging such as jellies or dust devils
Dinh's bulwark is useful to draw aggression, however this can also be achieved with the use of a goading potion, darts, or knives, freeing up special attack energy to be used for a weapon like the crystal halberd which can hit multiple targets. Alternatively, players can use Saradomin godsword or Ancient mace to restore Prayer points during a task.
| Slot | Item (most effective → least effective) |
|---|---|
| Slayer helmet (i) | Black mask (i) |
| Amulet of rancour | Amulet of torture |
| Infernal cape | Fire cape |
| Torva platebody / Oathplate chest | Bandos chestplate |
| Torva platelegs / Oathplate legs | Bandos tassets |
| Soulreaper axe + Scythe of vitur | Ghrazi rapier / Noxious halberd |
| Avernic defender | Dragon defender |
| Rada's blessing 4 | God blessing / Rada's blessing 3/2 |
| Expeditious bracelet / Bracelet of slaughter | Ferocious gloves |
| Avernic treads (max) | Primordial boots |
| Ultor ring | Berserker ring (i) |
| Dragon claws / Burning claws + Dinh's bulwark | Dragon dagger + Crystal halberd |
| Slot | Item (most effective → least effective) |
|---|---|
| Slayer helmet (i) | Black mask (i) |
| Amulet of rancour | Amulet of torture |
| Infernal cape | Fire cape |
| Torva platebody / Oathplate chest | Bandos chestplate |
| Torva platelegs / Oathplate legs | Bandos tassets |
| Hallowfell | N/A |
| Rada's blessing 4 | God blessing / Rada's blessing 3/2 |
| Expeditious bracelet / Bracelet of slaughter | Ferocious gloves |
| Avernic treads (max) | Primordial boots |
| Lightbearer | Ultor ring |
| Crystal halberd | Dinh's bulwark |
| Slot | Item (most effective → least effective) |
|---|---|
| Slayer helmet (i) | Black mask (i) |
| Occult necklace | Bonecrusher necklace |
| Imbued god cape | God capes |
| Virtus robe top | Ancestral robe top |
| Virtus robe bottom | Ancestral robe bottom |
| Kodai wand / Nightmare staff | Ancient sceptre / Dragon hunter wand / Master wand |
| Elidinis' ward (f) | Elidinis' ward / Arcane spirit shield |
| Rada's blessing 4 | God blessing / Rada's blessing 3/2 |
| Bracelet of slaughter / Expeditious bracelet | Confliction gauntlets |
| Avernic treads (max) | Eternal boots / Devout boots |
| Magus ring | Ring of the gods (i) |
| Dinh's bulwark + Crystal halberd | N/A |
Local reference: Slayer training, revision 15285156. Community reference material is attributed to the OSRS Wiki; this fan guide adds its own planning tools and route framing.
FOUR EDITORIAL STARTING POINTS
Shortlisted routes with executable instructions.
Use the finder above for the complete method library. These four routes are the fan-guide shortlist: each includes its setup, repeatable sequence, realistic rate band, and most important failure point.
011–85 • MEDIUM ATTENTION
Conventional task progression
10k–35k Slayer XP/hr
1–85 • MEDIUM ATTENTION
Conventional task progression
BEST FOR
First account and balanced progression
ECONOMY
Improves with level
LOCATION
Best unlocked Slayer master and assigned area
REQUIREMENTS
Combat level for the master; task-specific protection
INVENTORY / LOADOUT
Combat supplies, required Slayer item, transport, alch runes
EXECUTION
- Use the highest suitable master, but inspect its task weights before committing.
- Prepare weakness, protection, transport, and safe-spot details before every task.
- Record time and XP for several tasks before changing the block list.
0255–99 • HIGH ATTENTION
Cannon and barrage tasks
35k–80k Slayer XP/hr
55–99 • HIGH ATTENTION
Cannon and barrage tasks
BEST FOR
Fast Slayer levels
ECONOMY
High supply cost
LOCATION
Multi-combat task locations such as catacombs or cannon-friendly dungeons
REQUIREMENTS
Dwarf multicannon or Ancient Magicks; eligible task
INVENTORY / LOADOUT
Cannon and cannonballs or barrage runes, prayer, task gear, bonecrusher/ash sanctifier
EXECUTION
- Extend high-XP multi-combat tasks and block heavily weighted slow tasks.
- Stack monsters correctly before barraging, or place the cannon where it double-hits.
- Use bracelets of slaughter only on tasks worth extending.
03Any • MEDIUM ATTENTION
Point boosting
Task-count strategy
Any • MEDIUM ATTENTION
Point boosting
BEST FOR
Unlocks, skips, and block-list setup
ECONOMY
Low cost
LOCATION
Nine fast tasks at a low-level master, milestone task at the highest master
REQUIREMENTS
Access to two masters and enough combat to finish fast tasks
INVENTORY / LOADOUT
Broad transport kit and inexpensive combat setup
EXECUTION
- Complete nine quick tasks with a low-level master.
- Take each tenth, fiftieth, or other bonus task from the highest rewarding master available.
- Stop once the planned unlocks, blocks, and emergency skip reserve are funded.
0475–99 • HIGH ATTENTION
Boss Slayer
15k–45k Slayer XP/hr
75–99 • HIGH ATTENTION
Boss Slayer
BEST FOR
PvM learning and account upgrades
ECONOMY
Potentially high profit
LOCATION
Assigned boss lair
REQUIREMENTS
Like a Boss unlock or boss substitution, strong combat stats and gear
INVENTORY / LOADOUT
Boss-specific loadout, kill-count supplies, emergency teleport
EXECUTION
- Choose a kill count that fits current consistency rather than the maximum offered.
- Use the Slayer helmet bonus and task-only shortcuts when applicable.
- Measure profit after deaths, banking, and skipped assignments.
SLAYER CALCULATOR
Turn a level goal into hours and materials.
Select a method for its realistic experience-rate band. Add XP and GP per action when you want an exact resource estimate for your chosen item.
The level formula is exact. Time and budget are planning estimates: your equipment, banking, failures, attention, and live Grand Exchange prices determine the real result.
SETUP PROGRESSION
Upgrade the part that actually controls the rate.
| Stage | Setup | Priority |
|---|---|---|
| Foundation | Enchanted gem, protection items, broad teleport kit | Never arrive without the item that prevents task damage. |
| Helmet | Black mask then Slayer helmet and imbue | The on-task accuracy/damage bonus is the core upgrade. |
| Task speed | Cannon, rune pouch, bonecrusher/ash sanctifier | Buy only for tasks that exploit them. |
| Late game | Three combat-style loadouts and specialised weapons | Presets reduce preparation friction between tasks. |
THE ROUTE
From level 1 to cape
1
1–50
Use a master that fits your combat
Complete tasks quickly, learn weaknesses, and preserve points.Planning note
The opening objective is access, not perfect efficiency. Use quests and inexpensive equipment to compress levels where possible, and avoid over-investing in a method you will outgrow quickly.2
50–70
Unlock the Slayer helmet
Combine useful headgear and start shaping a basic block list.Planning note
This is where the skill settles into a repeatable loop. Upgrade the parts of the setup that affect every action, measure a representative session, and keep travel or banking from becoming the hidden bottleneck.3
70–85
Extend tasks you enjoy
Burstable and cannon-friendly assignments can speed both Slayer and combat.Planning note
At the mid-game checkpoint, compare the fastest route with account progress, useful outputs, and attention. A slightly slower method can be more efficient overall when it also supplies quests, diaries, or another skill.4
85–99
Boss, barrage, or profit
High-level creatures offer distinct routes; optimise for the style you will sustain.Planning note
Late-game training is a sustainability problem. Recheck prices and unlocks, alternate high-focus sessions with calmer ones, and choose a route you can repeat without turning the cape into a chore.LOWER-INTENSITY ALTERNATIVE
Point boosting alternates fast masters with milestone tasks from a high-tier master.
LEVEL REFERENCE
Milestones worth planning around
These are decision points, not instructions to stop. Boostable requirements and quest gates can change when an unlock becomes usable.
| Level | Unlock | Why it matters |
|---|---|---|
| 55 | Broad ammunition | Important affordable ranged supply, especially for irons. |
| 58 | Cave horrors | Black mask and Slayer helmet progression. |
| 65 | Dust devils | Popular multi-target Magic assignments. |
| 75 | Gargoyles | A consistent mid-game profit task. |
| 85 | Abyssal demons | The iconic whip-dropping milestone. |
| 95 | Hydras | High-level task and boss route. |
QUEST ROUTING
Let account progress do part of the grind.
Quest experience is most valuable when it skips slow early methods or opens a training system you will keep using.
Priest in Peril
Opens Morytania and many Slayer creatures.
Cabin Fever
Opens cave horrors and important pirate content.
Dragon Slayer II
Adds powerful high-level assignments and boss options.
CHOOSE YOUR ACCOUNT
The route changes with the rules you play by.
Spend for the time you value
Select a master your combat level and gear can handle efficiently. Bank points before aggressive skipping, build a weighting-aware block list, and choose whether the account values XP, boss tasks, or profit.
Optimise the whole supply chain
Slayer supplies equipment progression, herbs, runes, seeds, and boss unlocks. Broader loot value usually outweighs a main-account rush to the fastest barrage-only task list.
Know the edge of the map
Slayer is members-only. Free-to-play combat does not award Slayer XP or use task masters.
REVISION-PINNED REFERENCE
The detailed tables behind the recommendations.
Pulled in one batch from the Old School RuneScape Wiki on August 2, 2026. Every table keeps its source page and revision so you can verify requirements or spot a later game update.
Quests12 reference rows
| Quest | Monster | Assigned by |
|---|---|---|
| Barbarian Training | — | — |
| Waterfiend | — | — |
| Bone Voyage | Fossil Island Wyverns | — |
| Elemental Workshop I | — | — |
| Cabin Fever | Cave horror | — |
| Jungle horror | — | — |
| Contact! | Scabarite | — |
| Death to the Dorgeshuun | Molanisk | — |
| Death Plateau | Aviansie (can be toggled on/off) | — |
| Spiritual creatures | — | — |
| Desert Treasure I | Dust devil | — |
| Dragon Slayer I (started) | Black dragon | — |
Task summary12 reference rows
| Assignment | Slayer level | Weight | Pros | Cons | Recommendation | Approx. XP/h |
|---|---|---|---|---|---|---|
| Aberrant spectres | 60 | 7 | Relatively low-effort task. Valuable herbs and seeds cover most of the costs of using the cannon. | Cannot be lured into double-hit cannon spots properly, which results in mediocre experience rates. | Skip unless hunting for herbs/seeds | 35,000 |
| Abyssal demons | 85 | 12 | Decent profit from abyssal whip drops. Decent experience when barraging. Decent experience and low-effort when using Venator bow. | Long task and very commonly assigned. | Do for money; block for XP | 80,000 (Magic) 53,000 (Venator Bow) 40,000 (Melee) |
| Ankou | 1 | 5 | Decent experience and relatively fast task when barraging in the Catacombs of Kourend. While risky, barraging Ankou in the Wilderness Slayer Cave provides up to 90,000 Slayer experience per hour and drops will cover the cost of using Blight | Barraging will result in a loss due to lack of valuable drops. | Do | 55,000 (Magic) |
| Araxytes | 92 | 10 | Good experience, decent profit, and boss version available. Unextended tasks can be done for quick points. | Venom resistance required. | Do | 100,000 (Cannon and Venator bow) |
| Aviansie | 1 | 8 | Kree'arra can be killed on task for good profit. | Poor experience rates. Killing Kree'arra effectively requires very expensive equipment, and the profit is very inconsistent due to the value mostly being in the rare unique drops. | Should not be unlocked | 10,000 |
| Basilisks | 40 | 7 | Basilisk Knights can be killed on task for good profit. | Poor experience rates. | Don't unlock for XP; can unlock for profit or hunting the basilisk jaw on an ironman | 15,000 |
| Bloodveld | 50 | 8 | Good experience rates when cannoning mutated bloodvelds in the Meiyerditch Laboratories or Buccaneers' Laboratory. Drops cover some of the cost of using the cannon if in Meiyerditch Laboratories. | Travelling to the Meiyerditch Laboratories can take a while. Using a cannon will result in a loss in the Stronghold Slayer Cave. | Do | 100,000 (Cannon and Venator Bow) 80,000 (Cannon and Melee) |
| Black demons | 1 | 8 | Decent experience rates, low-effort task. Demonic gorillas can be killed for good profit at the expense of experience rates. | Long task, especially if killing demonic gorillas. Using the cannon will result in a loss. | Block/skip unless killing demonic gorillas for profit/uniques | 45,000 |
| Black dragons | 1 | 9 | If killing baby black dragons, a very fast task when unextended. Brutal black dragons can be killed for profit at higher levels. | Mediocre experience rates. | Do | 30,000 |
| Blue dragons | 1 | 4 | Vorkath can be killed on task for good and consistent profit. | Poor experience rates. | Skip if not killing Vorkath for profit. (Compare vs. Salve amulet beforehand) | 25,000 |
| Bosses | Varies (1 for all except a few) | 12 | Can be a relatively quick task depending on what boss you get, in addition to 5,000 Slayer experience upon completion of the task. Can potentially receive very valuable rare drops. | Some bosses can be rather annoying to kill, and requires 200 Slayer points to unlock boss tasks. | Only unlock if you want the slayer helm bonus vs. bosses; XP can be very poor. | Generally poor, but varies |
| Cave horrors | 58 | 4 | Relatively fast task. Drops cover the cost of using the cannon. | Poor experience rates. Not worth doing for XP unless Slayer points are an issue. | Skip unless you are an ironman hunting for a black mask | 25,000 |
Quest experience12 reference rows
| Quest | Experience reward | Slayer requirement | Other requirements |
|---|---|---|---|
| Natural history quiz (miniquest) | 1,000 | — | — |
| Recipe for Disaster (Dwarf subquest) | 1,000 | — | — |
| Animal Magnetism | 1,000 | 18 | 19 , 30 , 35 |
| A Porcine of Interest | 1,000 | — | — |
| The General's Shadow (miniquest) | 2,000 | — | — |
| Royal Trouble | 5,000 | 40 | 40 |
| Wanted! | 5,000 | 32 | — |
| Lair of Tarn Razorlor (miniquest) | 5,000 | 40 | — |
| The Heart of Darkness | 8,000 | 48 | 46 , 48 , 55 |
| Troubled Tortugans | 8,000 | 51 | 40 , 34 , 45 , 45 , 48 |
| Shadows of Custodia | 10,000 | 54 | 45 , 41 , 36 |
| The Path of Glouphrie | 20,000 | 56 | 60 , 56 , 47 , 45 |
Temple Trekking8 reference rows
| Skill | XP per hour (avg) |
|---|---|
| Slayer | 5800 - 7800 |
| Agility | 5800 - 7800 |
| Firemaking | 5800 - 7800 |
| Fishing | 5800 - 7800 |
| Mining | 5800 - 7800 |
| Thieving | 5800 - 7800 |
| Woodcutting | 5800 - 7800 |
| Total | 41,250 - 55,000 |
SOURCE PAGES
- Slayer training →revision 15285156
- Ironman Guide/Slayer →revision 15280048
- Slayer →revision 15285807
- Slayer/Level up table →revision 15285660
Reference tables are adapted with attribution from the community-maintained OSRS Wiki. Editorial recommendations, method walkthroughs, warnings, and calculators are original fan-guide material.
COMMON QUESTIONS
Slayer FAQ
What should I block?
High-weight tasks you consistently dislike and cannot make efficient. The answer changes by master, quests, gear, and whether you chase XP, bosses, or profit.
When should I skip a task?
Skip when the time and frustration saved are worth the points and your point reserve still protects important unlocks. Avoid spending down to zero casually.
KEEP RESEARCHING
Read the local training reference →Game updates can change rates, requirements, and best methods. Check the community reference before a large purchase.
COMBAT

Attack training
Unlock accurate weapons first, then let Slayer and quests carry the long grind.
Open guide →COMBAT
Strength training
Prioritise max hits: Strength usually gives the biggest early boost to melee damage.
Open guide →COMBAT
Defence training
Train enough for the armour you need, then finish levels alongside Slayer or bossing.
Open guide →COMBAT
Hitpoints training
A passive skill in the best sense: train damage skills well and Hitpoints follows.
Open guide →Ready to price the route?